Creating your own asset type in Unreal Engine 4 and customizing the properties panel

Hello, my name is Dmitry. I create computer games on the Unreal Engine as a hobby. Today I would like to tell you how to create your type of asset in the Unreal Engine and how to add an additional element to the properties panel of the asset. So, let's begin.
Start by creating an asset. First you need to create a class for your asset.
UCLASS() class UICUSTOM_API UMyObject : public UObject { GENERATED_BODY() public: UPROPERTY(EditAnywhere, Category = "My Object Properties") FString Name; }; After this, it is necessary that our asset be displayed in the content browser to create a descendant for the UFactory class:
')
UCLASS() class UICUSTOM_API UMyObjectFactory : public UFactory { GENERATED_UCLASS_BODY() // UFactory interface virtual UObject* FactoryCreateNew(UClass* Class, UObject* InParent, FName Name, EObjectFlags Flags, UObject* Context, FFeedbackContext* Warn) override; // End of UFactory interface virtual bool CanCreateNew() const override; }; Here, the most important method for us is FactoryCreateNew, which creates an instance of our class.
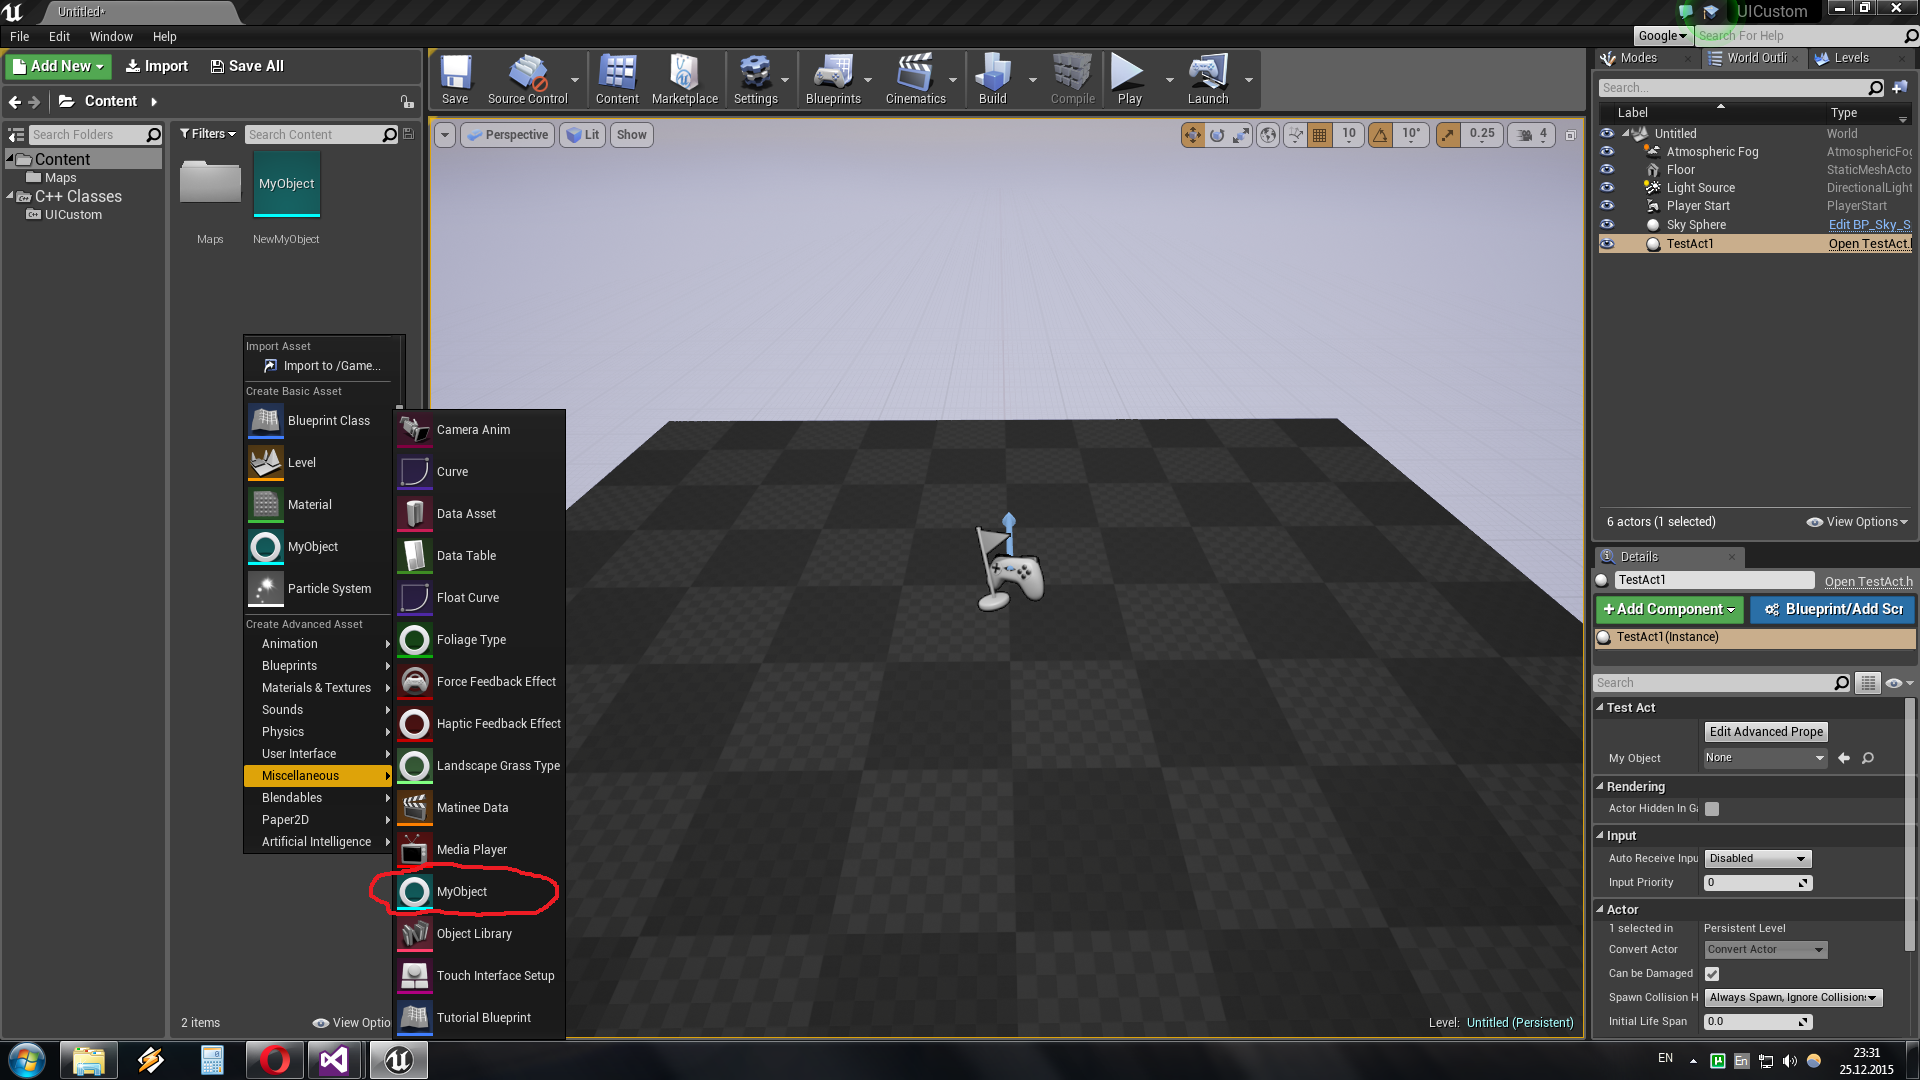
UObject* UMyObjectFactory::FactoryCreateNew(UClass* Class, UObject* InParent, FName Name, EObjectFlags Flags, UObject* Context, FFeedbackContext* Warn) { UMyObject* NewObjectAsset = NewObject<UMyObject>(InParent,Class, Name, Flags | RF_Transactional); return NewObjectAsset; } So our asset can already be created in the content browser, but you can’t choose not a name, not an icon color, not a category in the end. For all this, you need to create another class, a descendant of FAssetTypeActions_Base.
class UICUSTOM_API FMyObjectAssetAction : public FAssetTypeActions_Base { public: virtual FText GetName() const override; virtual FColor GetTypeColor() const override; virtual UClass* GetSupportedClass() const override; virtual bool HasActions(const TArray<UObject*>& InObjects) const override { return false; } virtual uint32 GetCategories() override; static void RegistrateCustomPartAssetType(); }; In principle, everything is clear by the name of the methods except for the RegistrateCustomPartAssetType () method. This method is needed to register this class. So where did you call it? This method should be called once when the editor is loaded, so the most suitable place to call it is the GameMode constructor. Here it is:
AUICustomGameMode::AUICustomGameMode() { #if WITH_EDITORONLY_DATA FMyClassDetails::RegestrateCostumization(); FMyObjectAssetAction::RegistrateCustomPartAssetType(); #endif //WITH_EDITORONLY_DATA } After that you can compile the project and enjoy the result:
You probably ask. And what's the point, I can just as well create a blueprint that will inherit MyObject, it will turn out the same but without hemorrhoids. Here it is necessary to clarify that blueprint is a class inherited from MyObject and not by itself.
For example, if you place a link to MyObject in some other asset, then you can select the asset created in this way, and the blueprint for which this asset is basic.
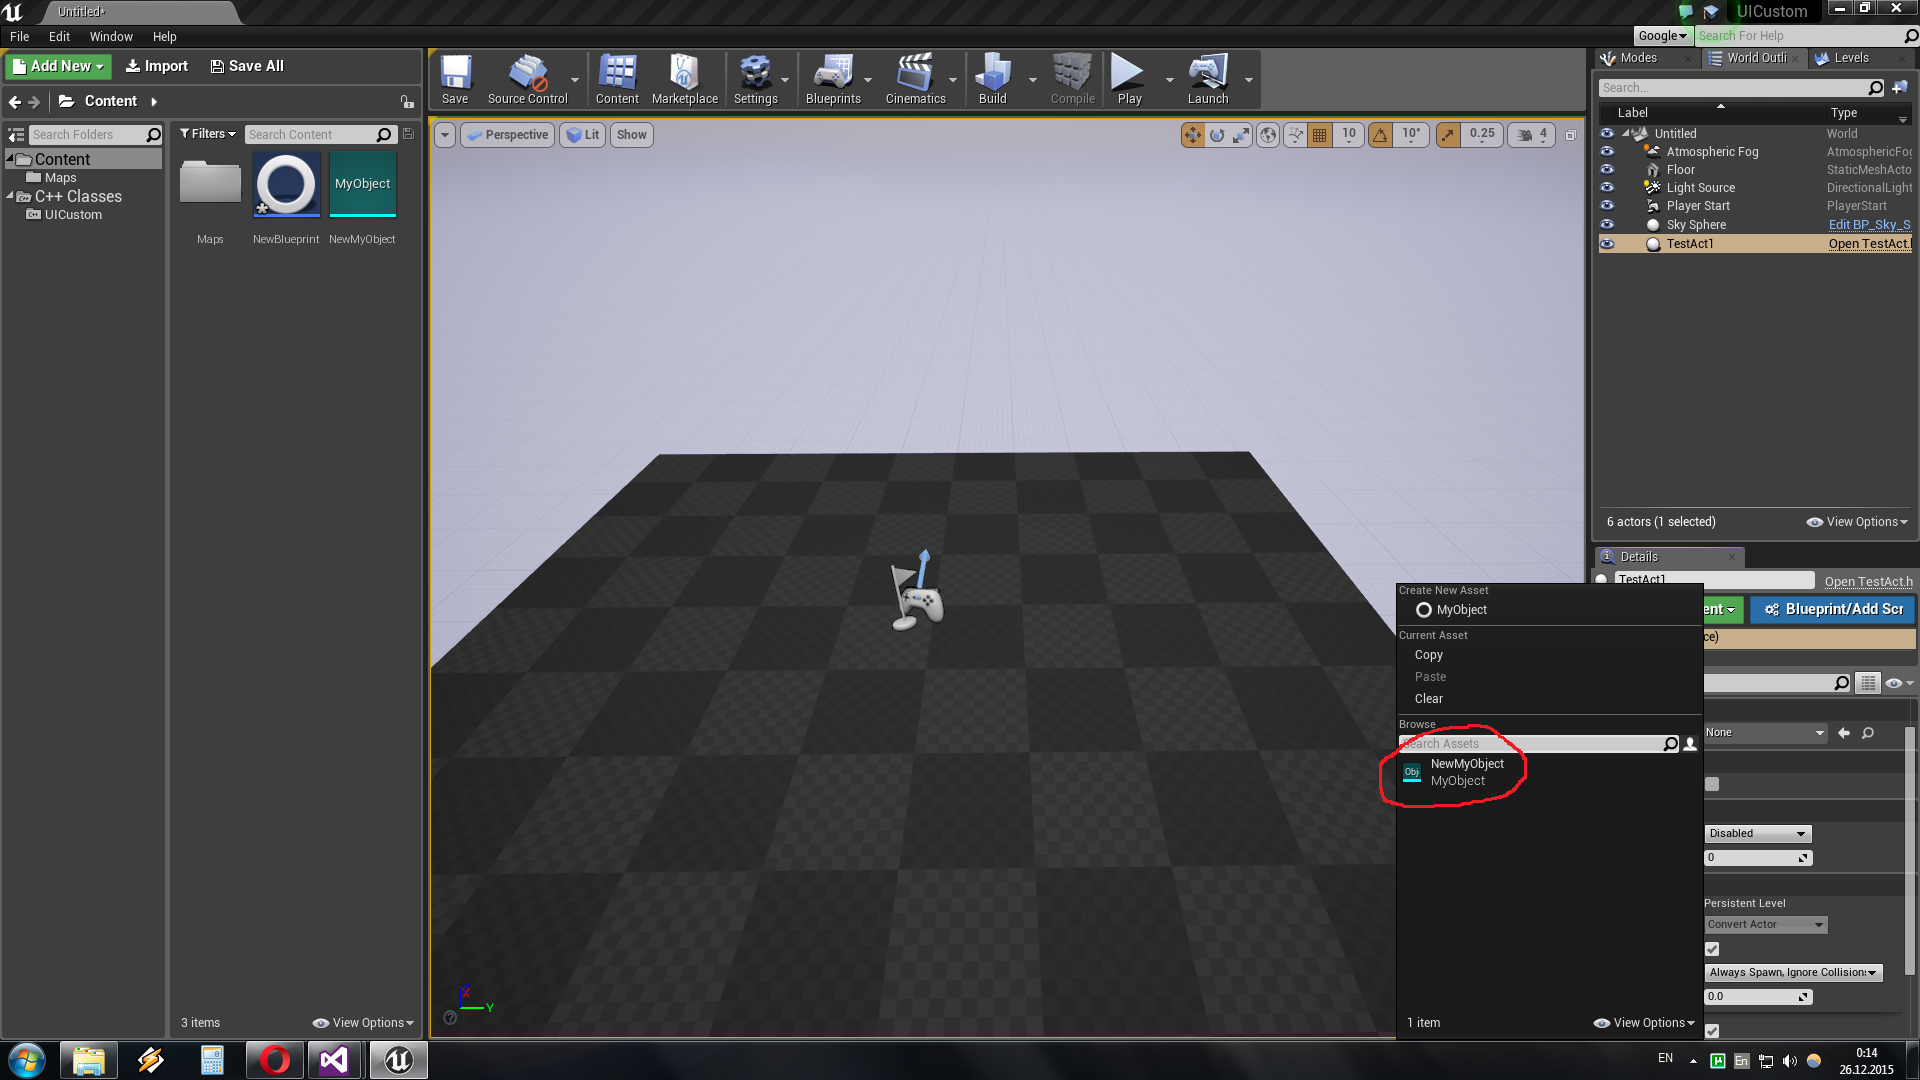
As you see, there is an asset, but there is no blueprint.
Now let's move on to adding elements to the properties panel of the asset. To do this, create an experimental class:
UCLASS() class UICUSTOM_API ATestAct : public AActor { GENERATED_BODY() public: // Sets default values for this actor's properties ATestAct(); // Called when the game starts or when spawned virtual void BeginPlay() override; // Called every frame virtual void Tick( float DeltaSeconds ) override; UPROPERTY(EditAnywhere, BlueprintReadWrite) UMyObject* MyObject; }; To customize its property panel, you need to create a class derived from IDetailCustomization:
class FMyClassDetails : public IDetailCustomization { public: static FReply MClick(IDetailLayoutBuilder* DetailBuilder); /** Makes a new instance of this detail layout class for a specific detail view requesting it */ static TSharedRef<IDetailCustomization> MakeInstance(); static void RegestrateCostumization(); /** IDetailCustomization interface */ virtual void CustomizeDetails(IDetailLayoutBuilder& DetailBuilder) override; static void ShowNotification(FText Text, SNotificationItem::ECompletionState State = SNotificationItem::CS_None); static ATestAct* GetObject(IDetailLayoutBuilder* DetailBuilder); }; So I explain: MClick method that will work when we click on the added button (as an example, I chose the button, but it can be any interface element).
CustomizeDetails method in which a new item is added to the details panel:
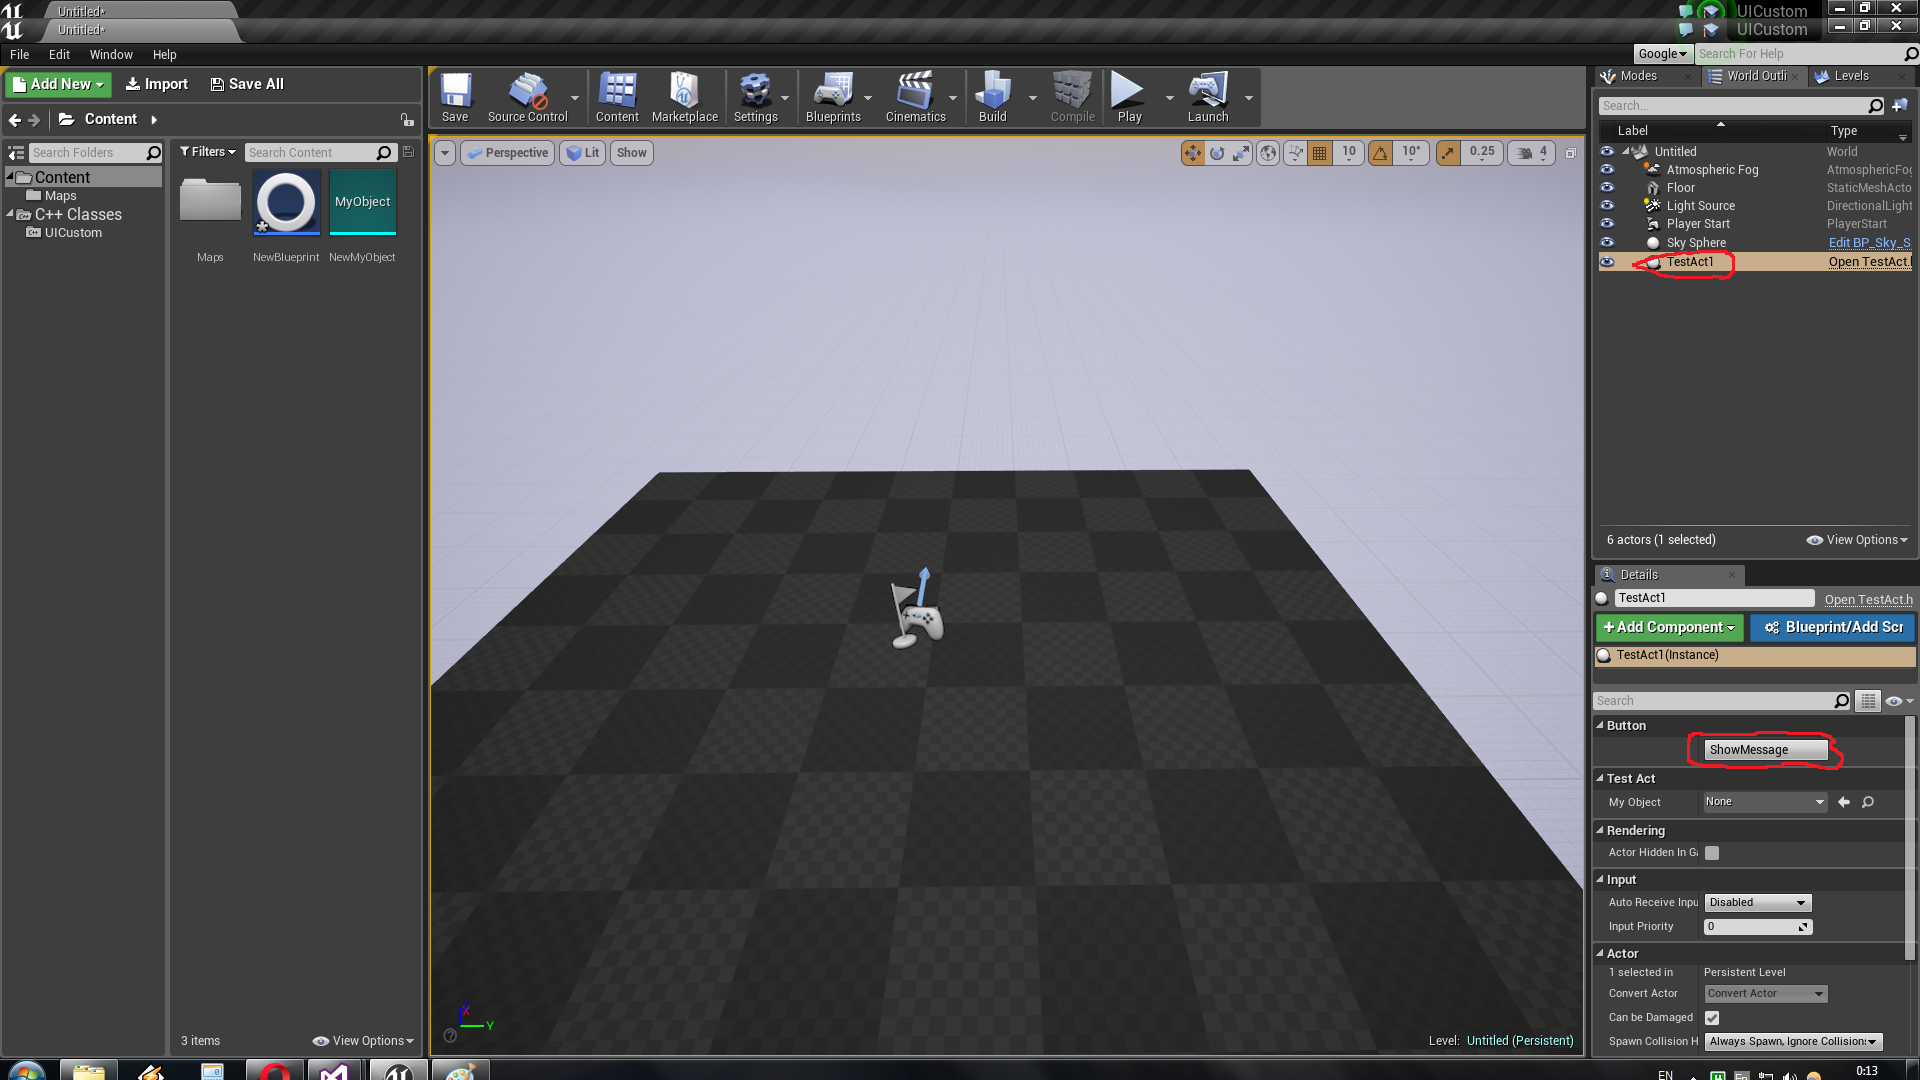
void FMyClassDetails::CustomizeDetails(IDetailLayoutBuilder& DetailBuilder) { // Create a category so this is displayed early in the properties ATestAct* TestAct = GetObject(&DetailBuilder); IDetailCategoryBuilder& MyCategory = DetailBuilder.EditCategory("Button", FText::GetEmpty(), ECategoryPriority::Important); //You can get properties using the detailbuilder //MyProperty= DetailBuilder.GetProperty(GET_MEMBER_NAME_CHECKED(MyClass, MyClassPropertyName)); FText TestHUDText = FText::FromString("Your Text"); MyCategory.AddCustomRow(TestHUDText) .ValueContent() //NameContent() [ SNew(SButton) .Text(FText::FromString("ShowMessage")) .OnClicked(FOnClicked::CreateStatic(&FMyClassDetails::MClick, &DetailBuilder)) ]; } RegestrateCostumization The method necessary for registering this customization. (You probably noticed his call from the GameMode constructor) I would like to note that TestAct must be entered without the prefix A:
void FMyClassDetails::RegestrateCostumization() { FPropertyEditorModule& PropertyModule = FModuleManager::LoadModuleChecked<FPropertyEditorModule>("PropertyEditor"); //Custom detail views PropertyModule.RegisterCustomClassLayout("TestAct", FOnGetDetailCustomizationInstance::CreateStatic(&FMyClassDetails::MakeInstance)); } ShowNotification Just displays a message on the screen. GetObject Allows you to get a link to a custom object (ATestAct in this case).
So, this is what we have as a result:
Thank you for your attention, I hope this lesson will allow you to create even better and more interesting games.
Source project here .
PS Small clarification. If you want to insert several buttons in one line, you need to write like this:
SNew(SHorizontalBox) + SHorizontalBox::Slot() [ SNew(SButton) .Text(FText::FromString("OK")) ] + SHorizontalBox::Slot() [ SNew(SButton) .Text(FText::FromString("OK")) ] And if you do not know in advance how many buttons you need, you can write this:
TSharedPtr<SHorizontalBox> Container = SNew(SHorizontalBox); for (int32 idx = 0; idx < 2; idx++) { Container->AddSlot() [ SNew(SButton) .Text(FText::FromString("OK")) ]; } MyCategory.AddCustomRow(TestHUDText) .ValueContent() [ Container.ToSharedRef() ]; Source: https://habr.com/ru/post/274159/
All Articles