Making cards like Tinder on Swift
Tinder - we all know that this is a dating application, where you can simply reject or accept someone with a swipe right or left. This card reader idea is now used in tons of applications. This way of displaying data is for you if you are tired of using table and collection views. There are many textbooks on this issue, but this project took me a long time.
You can see the full project on my Github .
First of all, I would like to pay tribute to the Phill Farrugia post on this issue, and then the YouTube series in Big Mountain Studios on a similar topic. So how do we make this interface? I got help with Phil's publishing on this topic. Essentially, the idea is to create UIViews and insert them as subviews into the container view. Then, using the index, we will give each UIView some horizontal and vertical insertion and slightly change its width. Further, when we swipe one map, all frames of the views will be swapped according to the new index value.
')
We'll start by creating a container view in a simple ViewController.
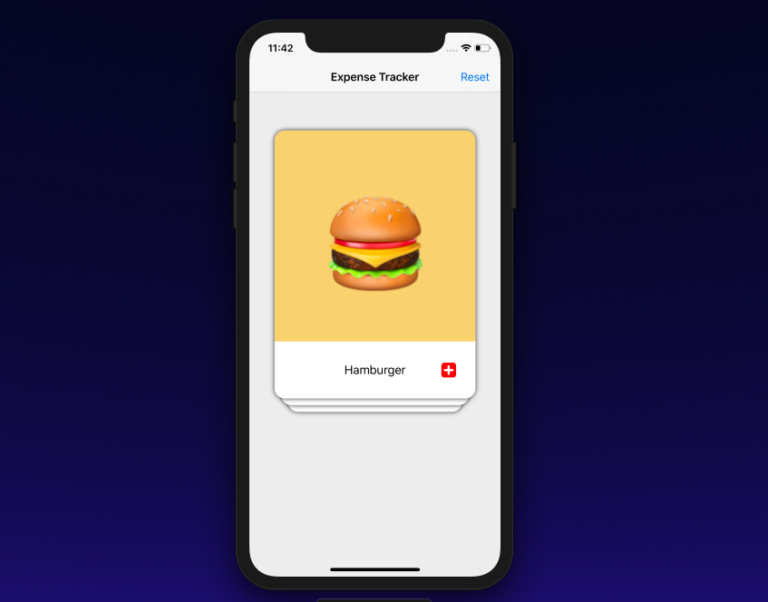
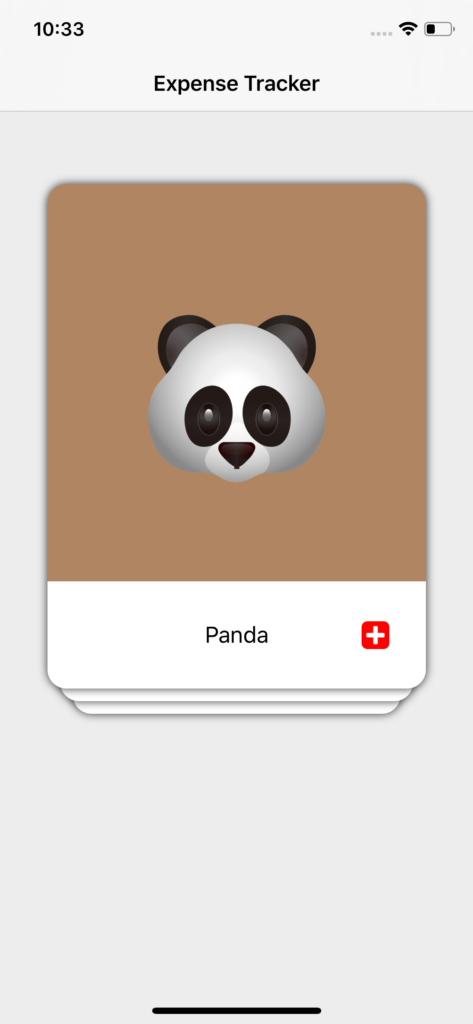
class ViewController: UIViewController { //MARK: - Properties var viewModelData = [CardsDataModel(bgColor: UIColor(red:0.96, green:0.81, blue:0.46, alpha:1.0), text: "Hamburger", image: "hamburger"), CardsDataModel(bgColor: UIColor(red:0.29, green:0.64, blue:0.96, alpha:1.0), text: "Puppy", image: "puppy"), CardsDataModel(bgColor: UIColor(red:0.29, green:0.63, blue:0.49, alpha:1.0), text: "Poop", image: "poop"), CardsDataModel(bgColor: UIColor(red:0.69, green:0.52, blue:0.38, alpha:1.0), text: "Panda", image: "panda"), CardsDataModel(bgColor: UIColor(red:0.90, green:0.99, blue:0.97, alpha:1.0), text: "Subway", image: "subway"), CardsDataModel(bgColor: UIColor(red:0.83, green:0.82, blue:0.69, alpha:1.0), text: "Robot", image: "robot")] var stackContainer : StackContainerView! //MARK: - Init override func loadView() { view = UIView() view.backgroundColor = UIColor(red:0.93, green:0.93, blue:0.93, alpha:1.0) stackContainer = StackContainerView() view.addSubview(stackContainer) configureStackContainer() stackContainer.translatesAutoresizingMaskIntoConstraints = false configureNavigationBarButtonItem() } override func viewDidLoad() { super.viewDidLoad() title = "Expense Tracker" stackContainer.dataSource = self } //MARK: - Configurations func configureStackContainer() { stackContainer.centerXAnchor.constraint(equalTo: view.centerXAnchor).isActive = true stackContainer.centerYAnchor.constraint(equalTo: view.centerYAnchor, constant: -60).isActive = true stackContainer.widthAnchor.constraint(equalToConstant: 300).isActive = true stackContainer.heightAnchor.constraint(equalToConstant: 400).isActive = true } As you can see, I created my own class called SwipeContainerView and simply configured stackViewContainer using automatic constraints. Nothing wrong. The SwipeContainerView will be 300x400 in size and will be centered on the X axis and only 60 pixels above the middle of the Y axis.
Now that we have configured the stackContainer, we will go to the StackContainerView subclass and load all kinds of maps into it. Before this, we will create a protocol that will have three methods:
protocol SwipeCardsDataSource { func numberOfCardsToShow() -> Int func card(at index: Int) -> SwipeCardView func emptyView() -> UIView? } Think of this protocol as a TableViewDataSource. Compliance of our ViewController class with this protocol will allow transferring information about our data to the SwipeCardContainer class. It has three methods:
numberOfCardsToShow () -> Int: Returns the number of cards we need to show. This is just a dataset counter.card(at index: Int) -> SwipeCardView: returns SwipeCardView (we will create this class in one moment)EmptyView-> We will not do anything with it, but once all the cards have been removed, calling this delegate method will return an empty view with some message (I will not implement it in this particular lesson, try it yourself)
Check the view controller with this protocol:
extension ViewController : SwipeCardsDataSource { func numberOfCardsToShow() -> Int { return viewModelData.count } func card(at index: Int) -> SwipeCardView { let card = SwipeCardView() card.dataSource = viewModelData[index] return card } func emptyView() -> UIView? { return nil } } In the first method, the number of elements in the data array will be returned. In the second method, create a new SwipeCardView () instance and send the array data for this index, and then return the SwipeCardView instance.
SwipeCardView is a subclass of UIView, in which there is a UIImage, UILabel and a gesture recognizer. More on this later. We will use this protocol to communicate with the container view.
stackContainer.dataSource = self When the above code works, the reloadData function is called, which then calls these data source functions.
Class StackViewContainer: UIView { . . var dataSource: SwipeCardsDataSource? { didSet { reloadData() } } .... ReloadData function:
func reloadData() { guard let datasource = dataSource else { return } setNeedsLayout() layoutIfNeeded() numberOfCardsToShow = datasource.numberOfCardsToShow() remainingcards = numberOfCardsToShow for i in 0..<min(numberOfCardsToShow,cardsToBeVisible) { addCardView(cardView: datasource.card(at: i), atIndex: i ) } } In the reloadData function, we first get the number of cards and store it in the variable numberOfCardsToShow. Then assign it to another variable named remainingCards. In the for loop, we create a map that is an instance of SwipeCardView using the index value.
for i in 0..<min(numberOfCardsToShow,cardsToBeVisible) { addCardView(cardView: datasource.card(at: i), atIndex: i ) } In fact, we want at least 3 cards to appear at a time. Therefore, we use the min function. CardsToBeVisible is a constant equal to 3. If numberOfToShow is greater than 3, then only three cards will be displayed. We create these maps from the protocol:
func card(at index: Int) -> SwipeCardView The addCardView () function is simply used to insert maps as subviews.
private func addCardView(cardView: SwipeCardView, atIndex index: Int) { cardView.delegate = self addCardFrame(index: index, cardView: cardView) cardViews.append(cardView) insertSubview(cardView, at: 0) remainingcards -= 1 } In this function, we add cardView to the view hierarchy, and by adding cards as a subview, we reduce the remaining cards by 1. Once we add cardView as a subview, we set the frame of these cards. For this we use another function addCardFrame ():
func addCardFrame(index: Int, cardView: SwipeCardView) { var cardViewFrame = bounds let horizontalInset = (CGFloat(index) * self.horizontalInset) let verticalInset = CGFloat(index) * self.verticalInset cardViewFrame.size.width -= 2 * horizontalInset cardViewFrame.origin.x += horizontalInset cardViewFrame.origin.y += verticalInset cardView.frame = cardViewFrame } This addCardFrame () logic is taken directly from Phil's post. Here we set the map frame according to its index. The first card with index 0 will have a frame, just like a container. Then we change the origin of the frame and the width of the map in accordance with the insert. Thus, we add the card a little to the right of the card above, reduce its width, and also necessarily pull the cards down to create the feeling that the cards are stacked on top of each other.
Once this is done, you will see that the cards are stacked on top of each other. Pretty good!
However, now we need to add a swipe gesture to the map view. Let's now turn our attention to the SwipeCardView class.
SwipeCardView
The swipeCardView class is a regular subclass of UIView. However, for reasons known only to Apple engineers, it is incredibly difficult to add shadows to a UIView with a rounded corner. To add shadows to map views, I create two UIViews. One of them is shadowView, and then swipeView to it. Essentially, shadowView has a shadow and that's it. SwipeView has rounded corners. On swipeView, I added a UIImageView, UILabel to show data and images.
var swipeView : UIView! var shadowView : UIView! Configure shadowView and swipeView:
func configureShadowView() { shadowView = UIView() shadowView.backgroundColor = .clear shadowView.layer.shadowColor = UIColor.black.cgColor shadowView.layer.shadowOffset = CGSize(width: 0, height: 0) shadowView.layer.shadowOpacity = 0.8 shadowView.layer.shadowRadius = 4.0 addSubview(shadowView) shadowView.translatesAutoresizingMaskIntoConstraints = false shadowView.leftAnchor.constraint(equalTo: leftAnchor).isActive = true shadowView.rightAnchor.constraint(equalTo: rightAnchor).isActive = true shadowView.bottomAnchor.constraint(equalTo: bottomAnchor).isActive = true shadowView.topAnchor.constraint(equalTo: topAnchor).isActive = true } func configureSwipeView() { swipeView = UIView() swipeView.layer.cornerRadius = 15 swipeView.clipsToBounds = true shadowView.addSubview(swipeView) swipeView.translatesAutoresizingMaskIntoConstraints = false swipeView.leftAnchor.constraint(equalTo: shadowView.leftAnchor).isActive = true swipeView.rightAnchor.constraint(equalTo: shadowView.rightAnchor).isActive = true swipeView.bottomAnchor.constraint(equalTo: shadowView.bottomAnchor).isActive = true swipeView.topAnchor.constraint(equalTo: shadowView.topAnchor).isActive = true } Then I added a gesture recognizer to this kind of map and the recognition function calls the selector function. This selector function has a lot of scrolling, tilting logic, etc. Let's get a look:
@objc func handlePanGesture(sender: UIPanGestureRecognizer){ let card = sender.view as! SwipeCardView let point = sender.translation(in: self) let centerOfParentContainer = CGPoint(x: self.frame.width / 2, y: self.frame.height / 2) card.center = CGPoint(x: centerOfParentContainer.x + point.x, y: centerOfParentContainer.y + point.y) switch sender.state { case .ended: if (card.center.x) > 400 { delegate?.swipeDidEnd(on: card) UIView.animate(withDuration: 0.2) { card.center = CGPoint(x: centerOfParentContainer.x + point.x + 200, y: centerOfParentContainer.y + point.y + 75) card.alpha = 0 self.layoutIfNeeded() } return }else if card.center.x < -65 { delegate?.swipeDidEnd(on: card) UIView.animate(withDuration: 0.2) { card.center = CGPoint(x: centerOfParentContainer.x + point.x - 200, y: centerOfParentContainer.y + point.y + 75) card.alpha = 0 self.layoutIfNeeded() } return } UIView.animate(withDuration: 0.2) { card.transform = .identity card.center = CGPoint(x: self.frame.width / 2, y: self.frame.height / 2) self.layoutIfNeeded() } case .changed: let rotation = tan(point.x / (self.frame.width * 2.0)) card.transform = CGAffineTransform(rotationAngle: rotation) default: break } } The first four lines in the above code are:
let card = sender.view as! SwipeCardView let point = sender.translation(in: self) let centerOfParentContainer = CGPoint(x: self.frame.width / 2, y: self.frame.height / 2) card.center = CGPoint(x: centerOfParentContainer.x + point.x, y: centerOfParentContainer.y + point.y) First we get an idea of the gesture. Next, we use the translation method to find out how many times a user has hit a card. The third row essentially gets the midpoint of the parent container. The last line where we set card.center. When the user swipes the card, the center of the card increases by the translated value x and the translated value y. To get this anchoring behavior, we essentially change the center point of the map from fixed coordinates. When the translation of the gestures ends, we return it back to the card.center.
In the case of state.ended:
if (card.center.x) > 400 { delegate?.swipeDidEnd(on: card) UIView.animate(withDuration: 0.2) { card.center = CGPoint(x: centerOfParentContainer.x + point.x + 200, y: centerOfParentContainer.y + point.y + 75) card.alpha = 0 self.layoutIfNeeded() } return }else if card.center.x < -65 { delegate?.swipeDidEnd(on: card) UIView.animate(withDuration: 0.2) { card.center = CGPoint(x: centerOfParentContainer.x + point.x - 200, y: centerOfParentContainer.y + point.y + 75) card.alpha = 0 self.layoutIfNeeded() } return } We check if card.center.x is greater than 400 or if card.center.x is less than -65. If so, then we discard these cards by changing the center.
If swipe right:
card.center = CGPoint(x: centerOfParentContainer.x + point.x + 200, y: centerOfParentContainer.y + point.y + 75) If svayp left:
card.center = CGPoint(x: centerOfParentContainer.x + point.x - 200, y: centerOfParentContainer.y + point.y + 75) If the user ends the gesture in the middle between 400 and -65, then we will reset the center of the map. We also call the delegate method when the swipe ends. More on this later.
To get this tilt when you swipe on the map; I will be brutally honest. I used a bit of geometry and used different perpendicular and base values, and then I used the tan function to get the angle of rotation. Again, this was just a trial and error method. Using point.x and container width as two perimeters seemed to work well. Feel free to experiment with these values.
case .changed: let rotation = tan(point.x / (self.frame.width * 2.0)) card.transform = CGAffineTransform(rotationAngle: rotation) Now let's talk about the delegate function. We will use the delegate function to communicate between SwipeCardView and ContainerView.
protocol SwipeCardsDelegate { func swipeDidEnd(on view: SwipeCardView) } This function will take into account the form in which the swipe occurred, and we will take several steps to remove it from the subviews, and then redo all the frames for the cards under it. Here's how:
func swipeDidEnd(on view: SwipeCardView) { guard let datasource = dataSource else { return } view.removeFromSuperview() if remainingcards > 0 { let newIndex = datasource.numberOfCardsToShow() - remainingcards addCardView(cardView: datasource.card(at: newIndex), atIndex: 2) for (cardIndex, cardView) in visibleCards.reversed().enumerated() { UIView.animate(withDuration: 0.2, animations: { cardView.center = self.center self.addCardFrame(index: cardIndex, cardView: cardView) self.layoutIfNeeded() }) } }else { for (cardIndex, cardView) in visibleCards.reversed().enumerated() { UIView.animate(withDuration: 0.2, animations: { cardView.center = self.center self.addCardFrame(index: cardIndex, cardView: cardView) self.layoutIfNeeded() }) } } } First remove this view from the super view. Once this is done, check if there is any card left. If so, we will create a new index for the map to be created. We will create newIndex by subtracting the total number of cards to show with the rest of the cards. Then we add the map as a subview. However, this new map will be the lowest, so that the 2 sent by us will essentially guarantee that the frame being added is at the index 2 or at the very bottom.
To animate frames of other cards, we will use an index of subviews. To do this, we will create an array of visibleCards, which will contain all the subviews of the container as an array.
var visibleCards: [SwipeCardView] { return subviews as? [SwipeCardView] ?? [] } The problem, however, is that the visibleCards array will have an inverted index of subviews. Thus, the first card will be third, the second will remain in second place, and the third will be in the first position. To prevent this from happening, we will run the array of visibleCards in reverse order to get the actual index of the subview, not how they are located in the array of visibleCards.
for (cardIndex, cardView) in visibleCards.reversed().enumerated() { UIView.animate(withDuration: 0.2, animations: { cardView.center = self.center self.addCardFrame(index: cardIndex, cardView: cardView) self.layoutIfNeeded() }) } So now we will update the frames of the rest of the cardViews.
That's all. This is an ideal way to present a small amount of data.
Source: https://habr.com/ru/post/448664/
All Articles