IR Transcoder on Arduino
Devices with infrared remote control are closely included in our lives. Sometimes the remote from the TV or the ancient audio system is lost, and it is no longer possible to buy a new one for many years. Ordering a new remote control is not always possible, making a clone too, but with the donor or information about it, you can make a converter. Such a transcoder will receive commands from one remote and translate them into another.
For Arduino, there is an excellent IRemote library which makes building a variety of IR control systems very simple. But when solving even such a simple task as a transcoder, there are always problems that are interesting to solve.
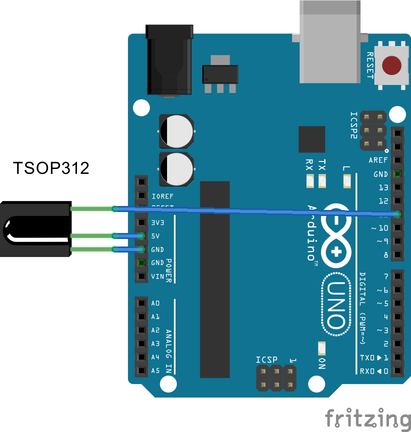
So first we need an integrated IR receiver type TSOP312 or the corresponding shield for Arduino. You should not forget that there are a lot of IR receivers and their voco changes randomly. For example, I used a certain nameless element on the socle coinciding with TSOP382 but in a reduced case and without a dividing key.
We need the assembled circuit to get the command codes from both remotes, unfortunately it is somewhat more difficult to remove commands from the device for which the remote has been lost. You can still find the donor remote, use the universal remote by picking up the code (and then why would you need a transcoder, since the remote came up?) Or by trying to use data from the Internet databases on IR codes. It turned out to be the easiest for me to use an application for an android that emulates the console I need.
To read the data, we use the example IRrecvDumpV2 from the delivery of IRremote, if your console belongs to a recognized library, then you will not need the raw scan result, although for example, the LG remote control was falsely recognized as Samsung and did not work when trying to send commands via sendLG.
In case the capture shows the message “IR code too long. Edit IRremoteInt.h and increase RAWLEN ”the library will have to be slightly corrected by increasing the size of the buffer for teams. For the console that you plan to control, it is enough to know the 32-bit command code, it is worth noting that on some consoles the code of the clamped key is different from the same button in the mode pressed and released. Such buttons will require two values. We reduce the received codes in the table convenient for you. In the same table we save the codes for the donor's console in raw form.
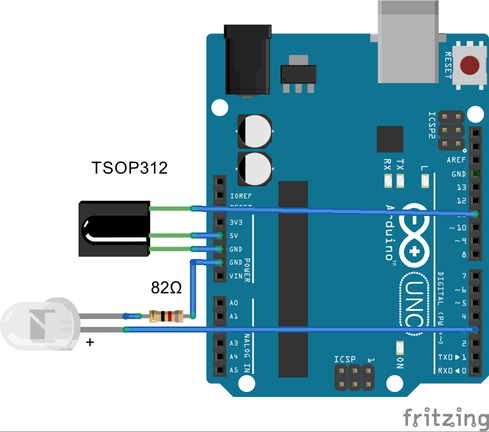
We connect an infrared LED to the Arduino and write a simple program that receives an infrared signal with a given code and sends another code through the LED. Resistor 82 is selected for the reasons that lay on hand. For an embedded device, it can be safely increased to 200 ohms, and if the transmitter must be long-range, you will need to supplement it with a simple transistor cascade, otherwise the current from the Arduino will not be enough.
In the presence of command codes from both consoles, the transcoder code takes the following form
Run the sketch, fill in the Arduino. Oddly enough, after starting one command passes, after which all subsequent devices are ignored. In order not to get involved in debugging, we add a flasher to the loop on pin 13 and see that after the first attempt to send a command, the board hangs. Well, this means that not everything is so smooth in the simultaneous use of the transmission and reception of the IR signal in one project. Having a little rummaged in the used timers, it turns out that since sending and receiving uses a common timer, after the start of sending the code must wait until the sending is completed. You can empirically add a delay of half a second (delay (500)) and everything will work, but knowing that the raw data is time counts in milliseconds, you can simply add the send function with a delay. In the Irsend module there is even a suitable function custom_delay_usec, which I initially used incorrectly, forgetting to multiply the delay value by USECPERTICK factor from the library (50 ms).
This code works fine, now it’s enough to switch to enter the necessary number of cases for buttons and everything will work. But it was not there. The rawData codes are written as an array of int and we have a platform on the microcontroller. The memory for variables will be eaten by five teams of 100 elements each. But on the remote there are 25 buttons.
There is no problem if you do not use the raw data representation, for this the library has the opportunity to send commands by well-known protocols, for example, for remote controllers compatible with Sony, sendSony. The library has already implemented the consoles of well-known manufacturers, but I didn’t manage to figure out my console right off the bat. Therefore, we move on to more primitive ways of saving memory that will help those who have remotes very very non-standard.
The first thing that comes to mind is to set rawData not as an int, but go to a byte. All values in this array are the result of reading the IR signal by a timer with a period of 50 milliseconds, and since this data is a multiple of 50, then dividing them by 50 we will not lose anything. The upper limit will be limited to 50 * 255 = 12,750, and this is 12 seconds, which will be enough even for decoding a slow Morse code - if the need arises.
A method of receiving input bytes was added to the library, which reduced memory consumption by half
')
Only here the memory for variables in the Arduino is only two kilobytes and this is the maximum of 40 commands of 50 bytes each. We need more memory. And we extract this memory from the command segment. It is enough to reserve one array of sufficient size and fill it before sending a string of assignments. Total from the code segment for one command will be spent about 100 bytes, but then the space for the code is at least ten kilobytes. So the middle console with a hundred buttons is enough for us.
In order not to fill the hands with assignments, an example IRrecvDumpRawByte was added to the library. It displays raw data not only in the form of bytes but also in the form of a block of assignments
An example of a sketch already written that allows you to control the Samsung DVD HR-755 using the Daewoo R40A01 remote control is in the examples under the name DaewooR40A01toDVDHR755Transcoder. Pull request to add examples to the general branch has not been accepted yet, so you can download the modified library from the fork .
Under the cut, there are photos of the Arduino Nano integration inside this DVD recorder, the Arduino Mini certainly takes up significantly less space, but only the Nano was at hand. I took the power from the control panel. The signal from the built-in receiver was connected to the Arduino and parallel to it was another IR receiver soldered on the opposite side of the first one. The same mounted mounting on it was soldered IR LED. In principle, this repetition could have been avoided - but the signal from the IR receiver is inverted - therefore, the direct connection of the TTL signal to the device will not work - and I did not bother to inverter the logic or the transistor.
Despite the fact that in my case, the raw data worked fine, experiments with the rest of the home equipment showed that not all captured signals worked correctly when trying to control a specific device. The command to turn on the air conditioner did not work, although if it was already turned on, the regime change worked correctly. The LG column also refused to accept raw commands, but it responded well to sending codes via sendSamsung. At the same time, the five collected by familiar TV perfectly responded to the raw data. I tried the variant with a different frequency of the signal - it did not help at all. Perhaps the problem lies in the signal sampling rate of 50 ms. Judging by the performance of Samsung commands on the LG technique, the protocol should be formalized as a separate module by analogy with ir_LG.cpp ir_JVC.cpp ir_Dish.cpp, selecting the header and coding parameters for zeroes and ones for a particular device. Probably the analysis of writing such a protocol would be a good topic for an article.
Well, in addition, the second large IR library for Arduino is IRLib . It has similar functionality, it even has a ready-made module for parsing the IR protocols for the desktop. A quick comparative test of raw data reading was carried out which revealed no difference in readings compared to IRemote. Of the benefits, in IRLib there is already an example of determining at what frequency the IR transmitter works. Example Samsung36 actually implements protocol parsing from the Internet. In addition, the documentation perfectly describes the connection of IR receivers with cascading and much more. Although in my opinion, IRemote is much easier to understand and use.
For Arduino, there is an excellent IRemote library which makes building a variety of IR control systems very simple. But when solving even such a simple task as a transcoder, there are always problems that are interesting to solve.
So first we need an integrated IR receiver type TSOP312 or the corresponding shield for Arduino. You should not forget that there are a lot of IR receivers and their voco changes randomly. For example, I used a certain nameless element on the socle coinciding with TSOP382 but in a reduced case and without a dividing key.
We need the assembled circuit to get the command codes from both remotes, unfortunately it is somewhat more difficult to remove commands from the device for which the remote has been lost. You can still find the donor remote, use the universal remote by picking up the code (and then why would you need a transcoder, since the remote came up?) Or by trying to use data from the Internet databases on IR codes. It turned out to be the easiest for me to use an application for an android that emulates the console I need.
To read the data, we use the example IRrecvDumpV2 from the delivery of IRremote, if your console belongs to a recognized library, then you will not need the raw scan result, although for example, the LG remote control was falsely recognized as Samsung and did not work when trying to send commands via sendLG.
An example of the data obtained under the spoiler:
Encoding: SAMSUNG
Code: 34346897 (32 bits)
Timing [67]:
+4450, -4350 + 600, - 500 + 600, - 500 + 600, -1600
+ 600, -1600 + 600, - 500 + 600, -1600 + 600, - 500
+ 600, - 500 + 600, - 500 + 600, - 500 + 600, -1600
+ 600, -1600 + 600, - 500 + 600, -1600 + 600, - 500
+ 600, - 500 + 600, - 500 + 600, -1600 + 600, -1600
+ 600, - 500 + 600, -1600 + 600, - 500 + 600, - 500
+ 600, - 500 + 550, -1650 + 550, - 550 + 550, - 550
+ 550, -1650 + 550, - 550 + 550, -1650 + 550, -1600
+ 600, -1600 + 600
unsigned int rawData [67] = {4450,4350, 600,500, 600,500, 600,1600, 600,1600, 600,500, 600,1600, 600,500, 600,500, 600,500, 600,500, 600,1600, 600,1600, 600,500, 600, 1600, 600,500, 600,500, 600,500, 600,1600, 600,1600, 600,500, 600,1600, 600,500, 600,500, 600,500, 550,1650, 550,550, 550,550, 550,1650, 550,550, 550,1650, 550,1600, 600.1600, 600}; // SAMSUNG 34346897
unsigned int data = 0x34346897;
In case the capture shows the message “IR code too long. Edit IRremoteInt.h and increase RAWLEN ”the library will have to be slightly corrected by increasing the size of the buffer for teams. For the console that you plan to control, it is enough to know the 32-bit command code, it is worth noting that on some consoles the code of the clamped key is different from the same button in the mode pressed and released. Such buttons will require two values. We reduce the received codes in the table convenient for you. In the same table we save the codes for the donor's console in raw form.
We connect an infrared LED to the Arduino and write a simple program that receives an infrared signal with a given code and sends another code through the LED. Resistor 82 is selected for the reasons that lay on hand. For an embedded device, it can be safely increased to 200 ohms, and if the transmitter must be long-range, you will need to supplement it with a simple transistor cascade, otherwise the current from the Arduino will not be enough.
In the presence of command codes from both consoles, the transcoder code takes the following form
void loop() { if (irrecv.decode(&results)) { switch(results.value){ case(0x845E5420):{ irsend.sendRaw(irSignal, sizeof(irSignal) / sizeof(irSignal[0]), khz); }break; } } irrecv.resume(); irrecv.enableIRIn(); } Run the sketch, fill in the Arduino. Oddly enough, after starting one command passes, after which all subsequent devices are ignored. In order not to get involved in debugging, we add a flasher to the loop on pin 13 and see that after the first attempt to send a command, the board hangs. Well, this means that not everything is so smooth in the simultaneous use of the transmission and reception of the IR signal in one project. Having a little rummaged in the used timers, it turns out that since sending and receiving uses a common timer, after the start of sending the code must wait until the sending is completed. You can empirically add a delay of half a second (delay (500)) and everything will work, but knowing that the raw data is time counts in milliseconds, you can simply add the send function with a delay. In the Irsend module there is even a suitable function custom_delay_usec, which I initially used incorrectly, forgetting to multiply the delay value by USECPERTICK factor from the library (50 ms).
void sendDelayed(unsigned int array[]){ irsend.sendRaw(array, sizeof(array) / sizeof(array[0]), khz); int array_size = sizeof(array) / sizeof(array[0]); for(int i=0;i<array_size;i++){ // Using usec, so multiply raw to usec irsend.custom_delay_usec(array[i]*USECPERTICK); } } This code works fine, now it’s enough to switch to enter the necessary number of cases for buttons and everything will work. But it was not there. The rawData codes are written as an array of int and we have a platform on the microcontroller. The memory for variables will be eaten by five teams of 100 elements each. But on the remote there are 25 buttons.
There is no problem if you do not use the raw data representation, for this the library has the opportunity to send commands by well-known protocols, for example, for remote controllers compatible with Sony, sendSony. The library has already implemented the consoles of well-known manufacturers, but I didn’t manage to figure out my console right off the bat. Therefore, we move on to more primitive ways of saving memory that will help those who have remotes very very non-standard.
The first thing that comes to mind is to set rawData not as an int, but go to a byte. All values in this array are the result of reading the IR signal by a timer with a period of 50 milliseconds, and since this data is a multiple of 50, then dividing them by 50 we will not lose anything. The upper limit will be limited to 50 * 255 = 12,750, and this is 12 seconds, which will be enough even for decoding a slow Morse code - if the need arises.
A method of receiving input bytes was added to the library, which reduced memory consumption by half
')
IRsend::sendRaw (byte buf[], unsigned int len, unsigned int hz) Only here the memory for variables in the Arduino is only two kilobytes and this is the maximum of 40 commands of 50 bytes each. We need more memory. And we extract this memory from the command segment. It is enough to reserve one array of sufficient size and fill it before sending a string of assignments. Total from the code segment for one command will be spent about 100 bytes, but then the space for the code is at least ten kilobytes. So the middle console with a hundred buttons is enough for us.
In order not to fill the hands with assignments, an example IRrecvDumpRawByte was added to the library. It displays raw data not only in the form of bytes but also in the form of a block of assignments
Example under the spoiler
rawData [0] = 87; rawData [1] = 87; rawData [2] = 10; rawData [3] = 9; rawData [4] = 10; rawData [5] = 9; rawData [6] = 10; rawData [7] = 10; rawData [8] = 10; rawData [9] = 9; rawData [10] = 10; rawData [11] = 9; rawData [12] = 10; rawData [13] = 29; rawData [ 14] = 10; rawData [15] = 9; rawData [16] = 10; rawData [17] = 9; rawData [18] = 10; rawData [19] = 10; rawData [20] = 10; rawData [21 ] = 9; rawData [22] = 10; rawData [23] = 9; rawData [24] = 10; rawData [25] = 10; rawData [26] = 10; rawData [27] = 9; rawData [28] = 10; rawData [29] = 9; rawData [30] = 10; rawData [31] = 10; rawData [32] = 10; rawData [33] = 9; rawData [34] = 10; rawData [35] = 86; rawData [36] = 10; rawData [37] = 9; rawData [38] = 11; rawData [39] = 9; rawData [40] = 10; rawData [41] = 9; rawData [42] = 10 ; rawData [43] = 9; rawData [44] = 10; rawData [45] = 28; rawData [46] = 10; rawData [47] = 29; rawData [48] = 10; rawData [49] = 28; rawData [50] = 10; rawData [51] = 9; rawData [52] = 10; rawData [53] = 28; rawData [54] = 10; rawData [55] = 10; rawData [56] = 10; rawData [57] = 9; rawData [58] = 10; rawData [59] = 28; rawData [60] = 10; rawData [61] = 10; rawData [62] = 10; rawData [63] = 9; rawData [ 64] = 10; rawData [65] = 9; rawData [66] = 10; rawData [67] = 28; rawData [6 8] = 10; rawData [69] = 9; rawData [70] = 11; rawData [71] = 27; rawData [72] = 10; rawData [73] = 29; rawData [74] = 10; rawData [75 ] = 9; rawData [76] = 10;
An example of a sketch already written that allows you to control the Samsung DVD HR-755 using the Daewoo R40A01 remote control is in the examples under the name DaewooR40A01toDVDHR755Transcoder. Pull request to add examples to the general branch has not been accepted yet, so you can download the modified library from the fork .
Many photos with a converted recorder
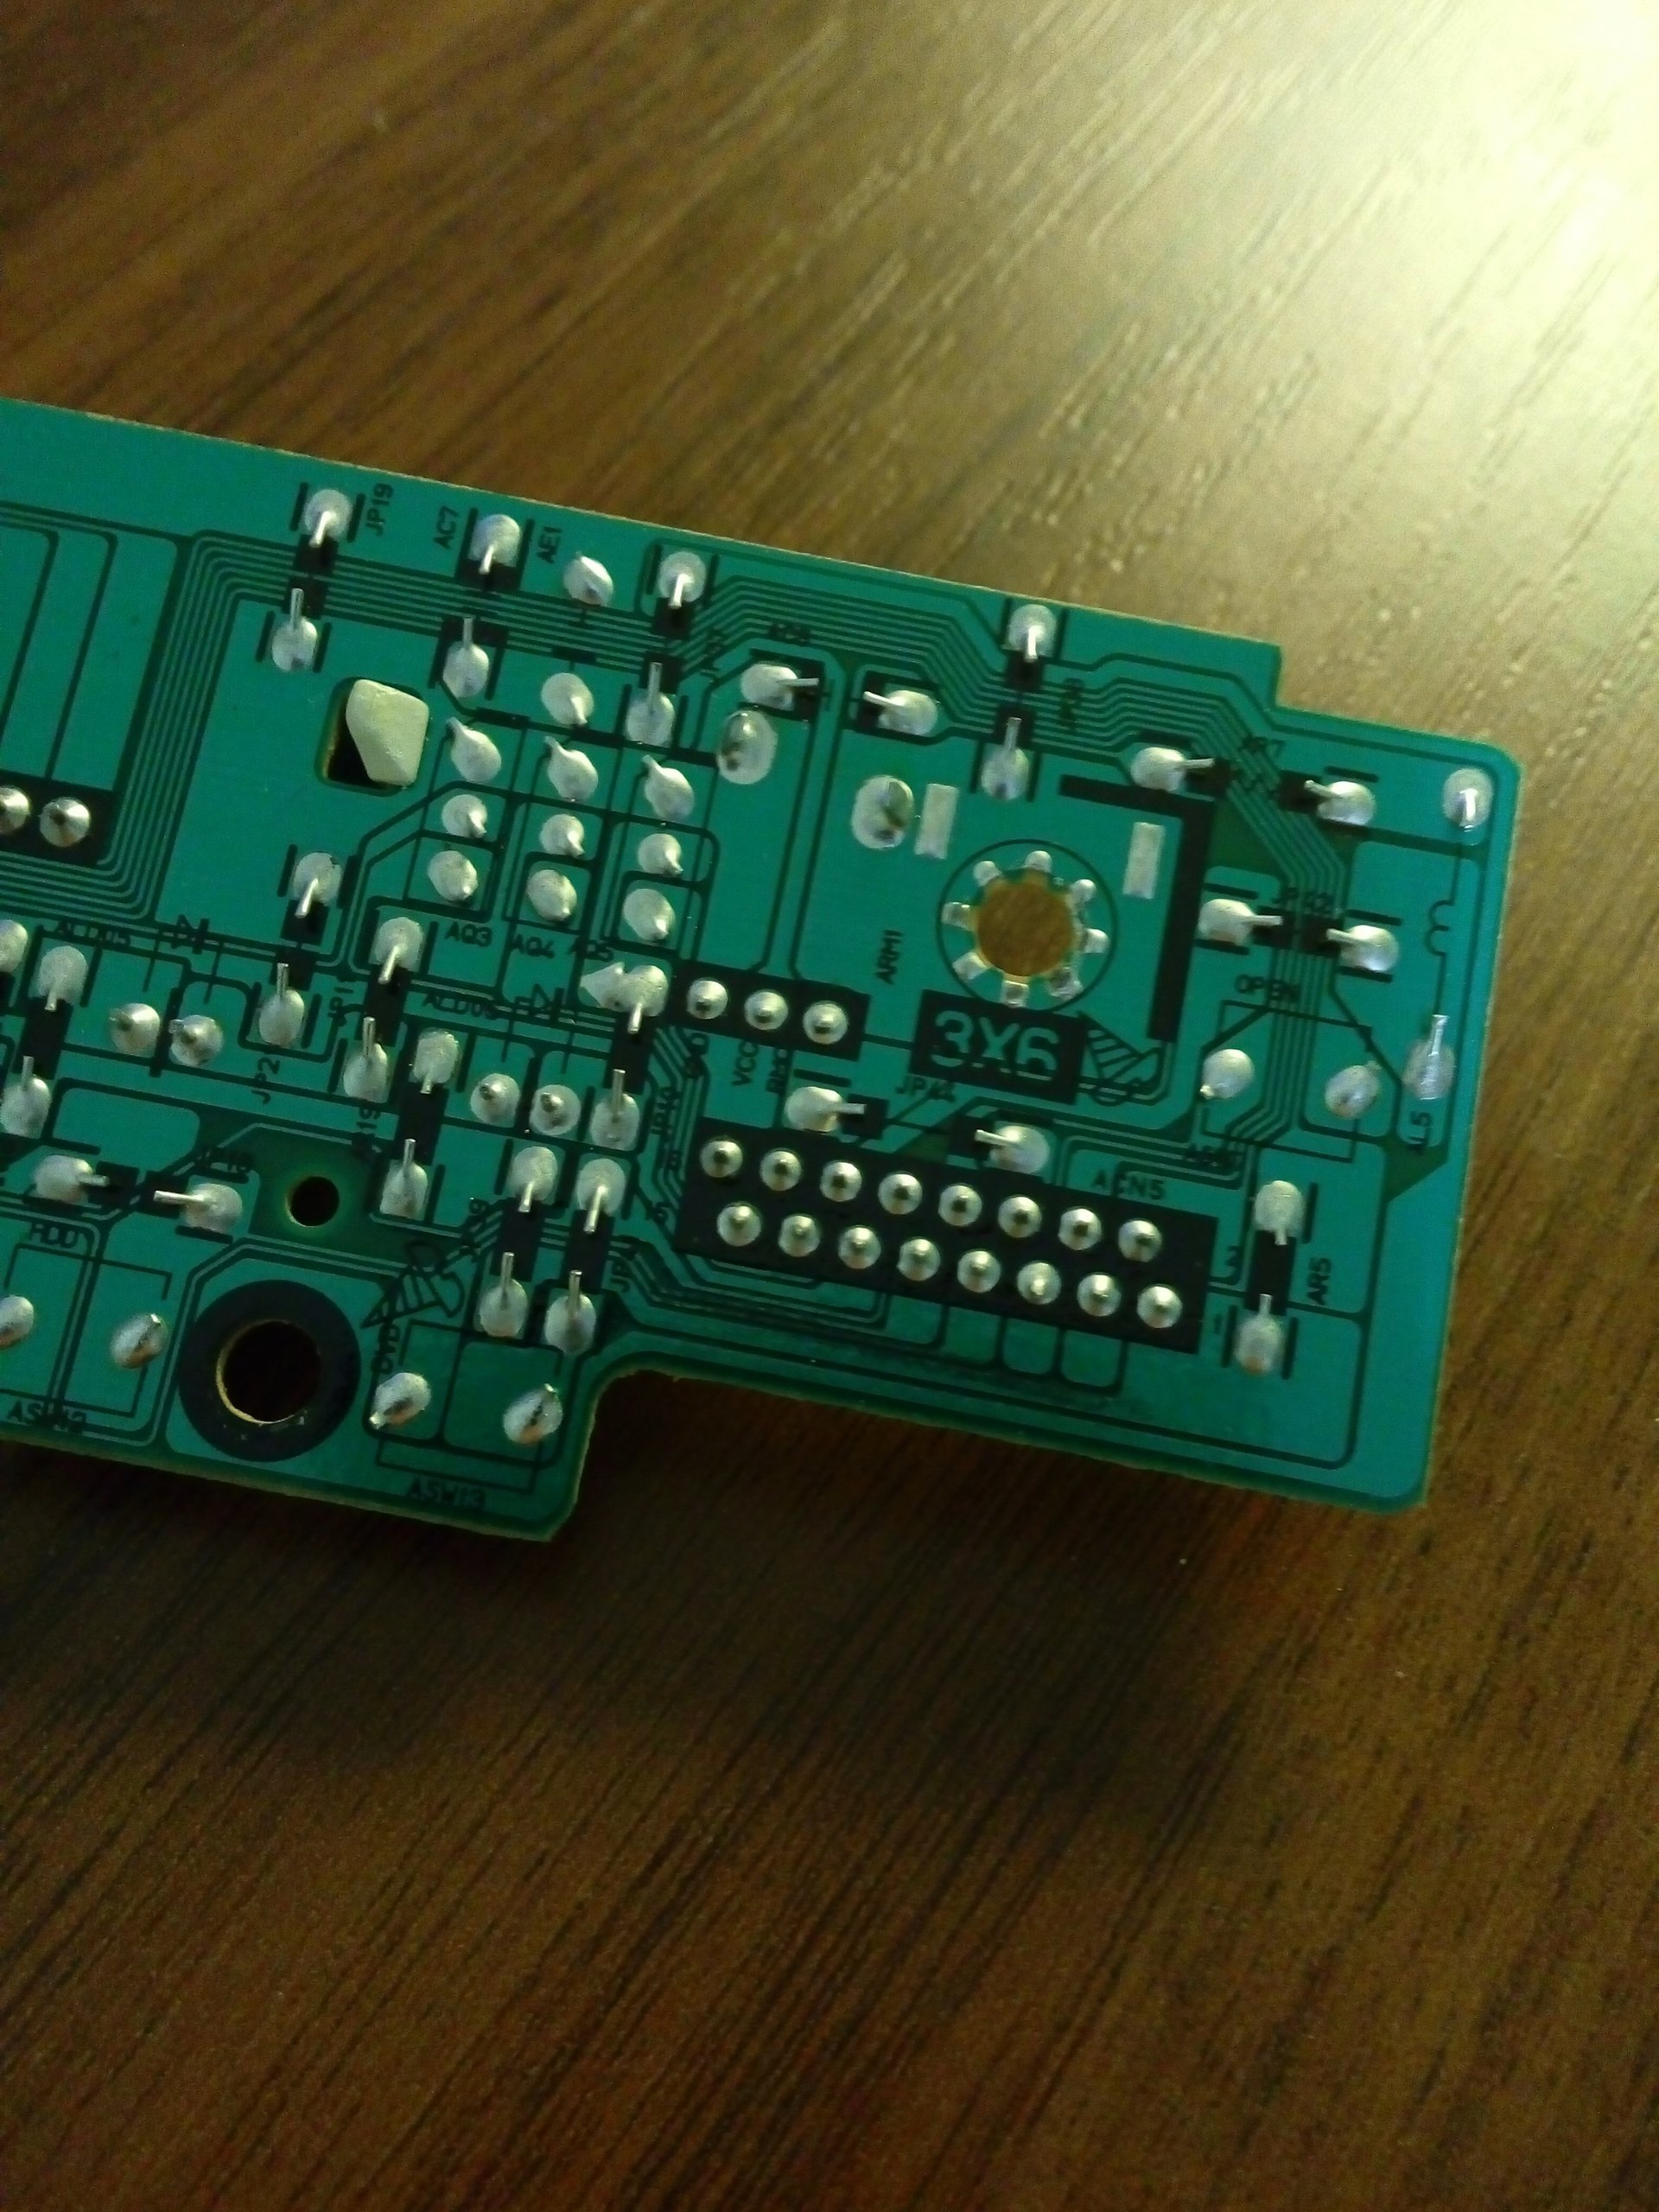

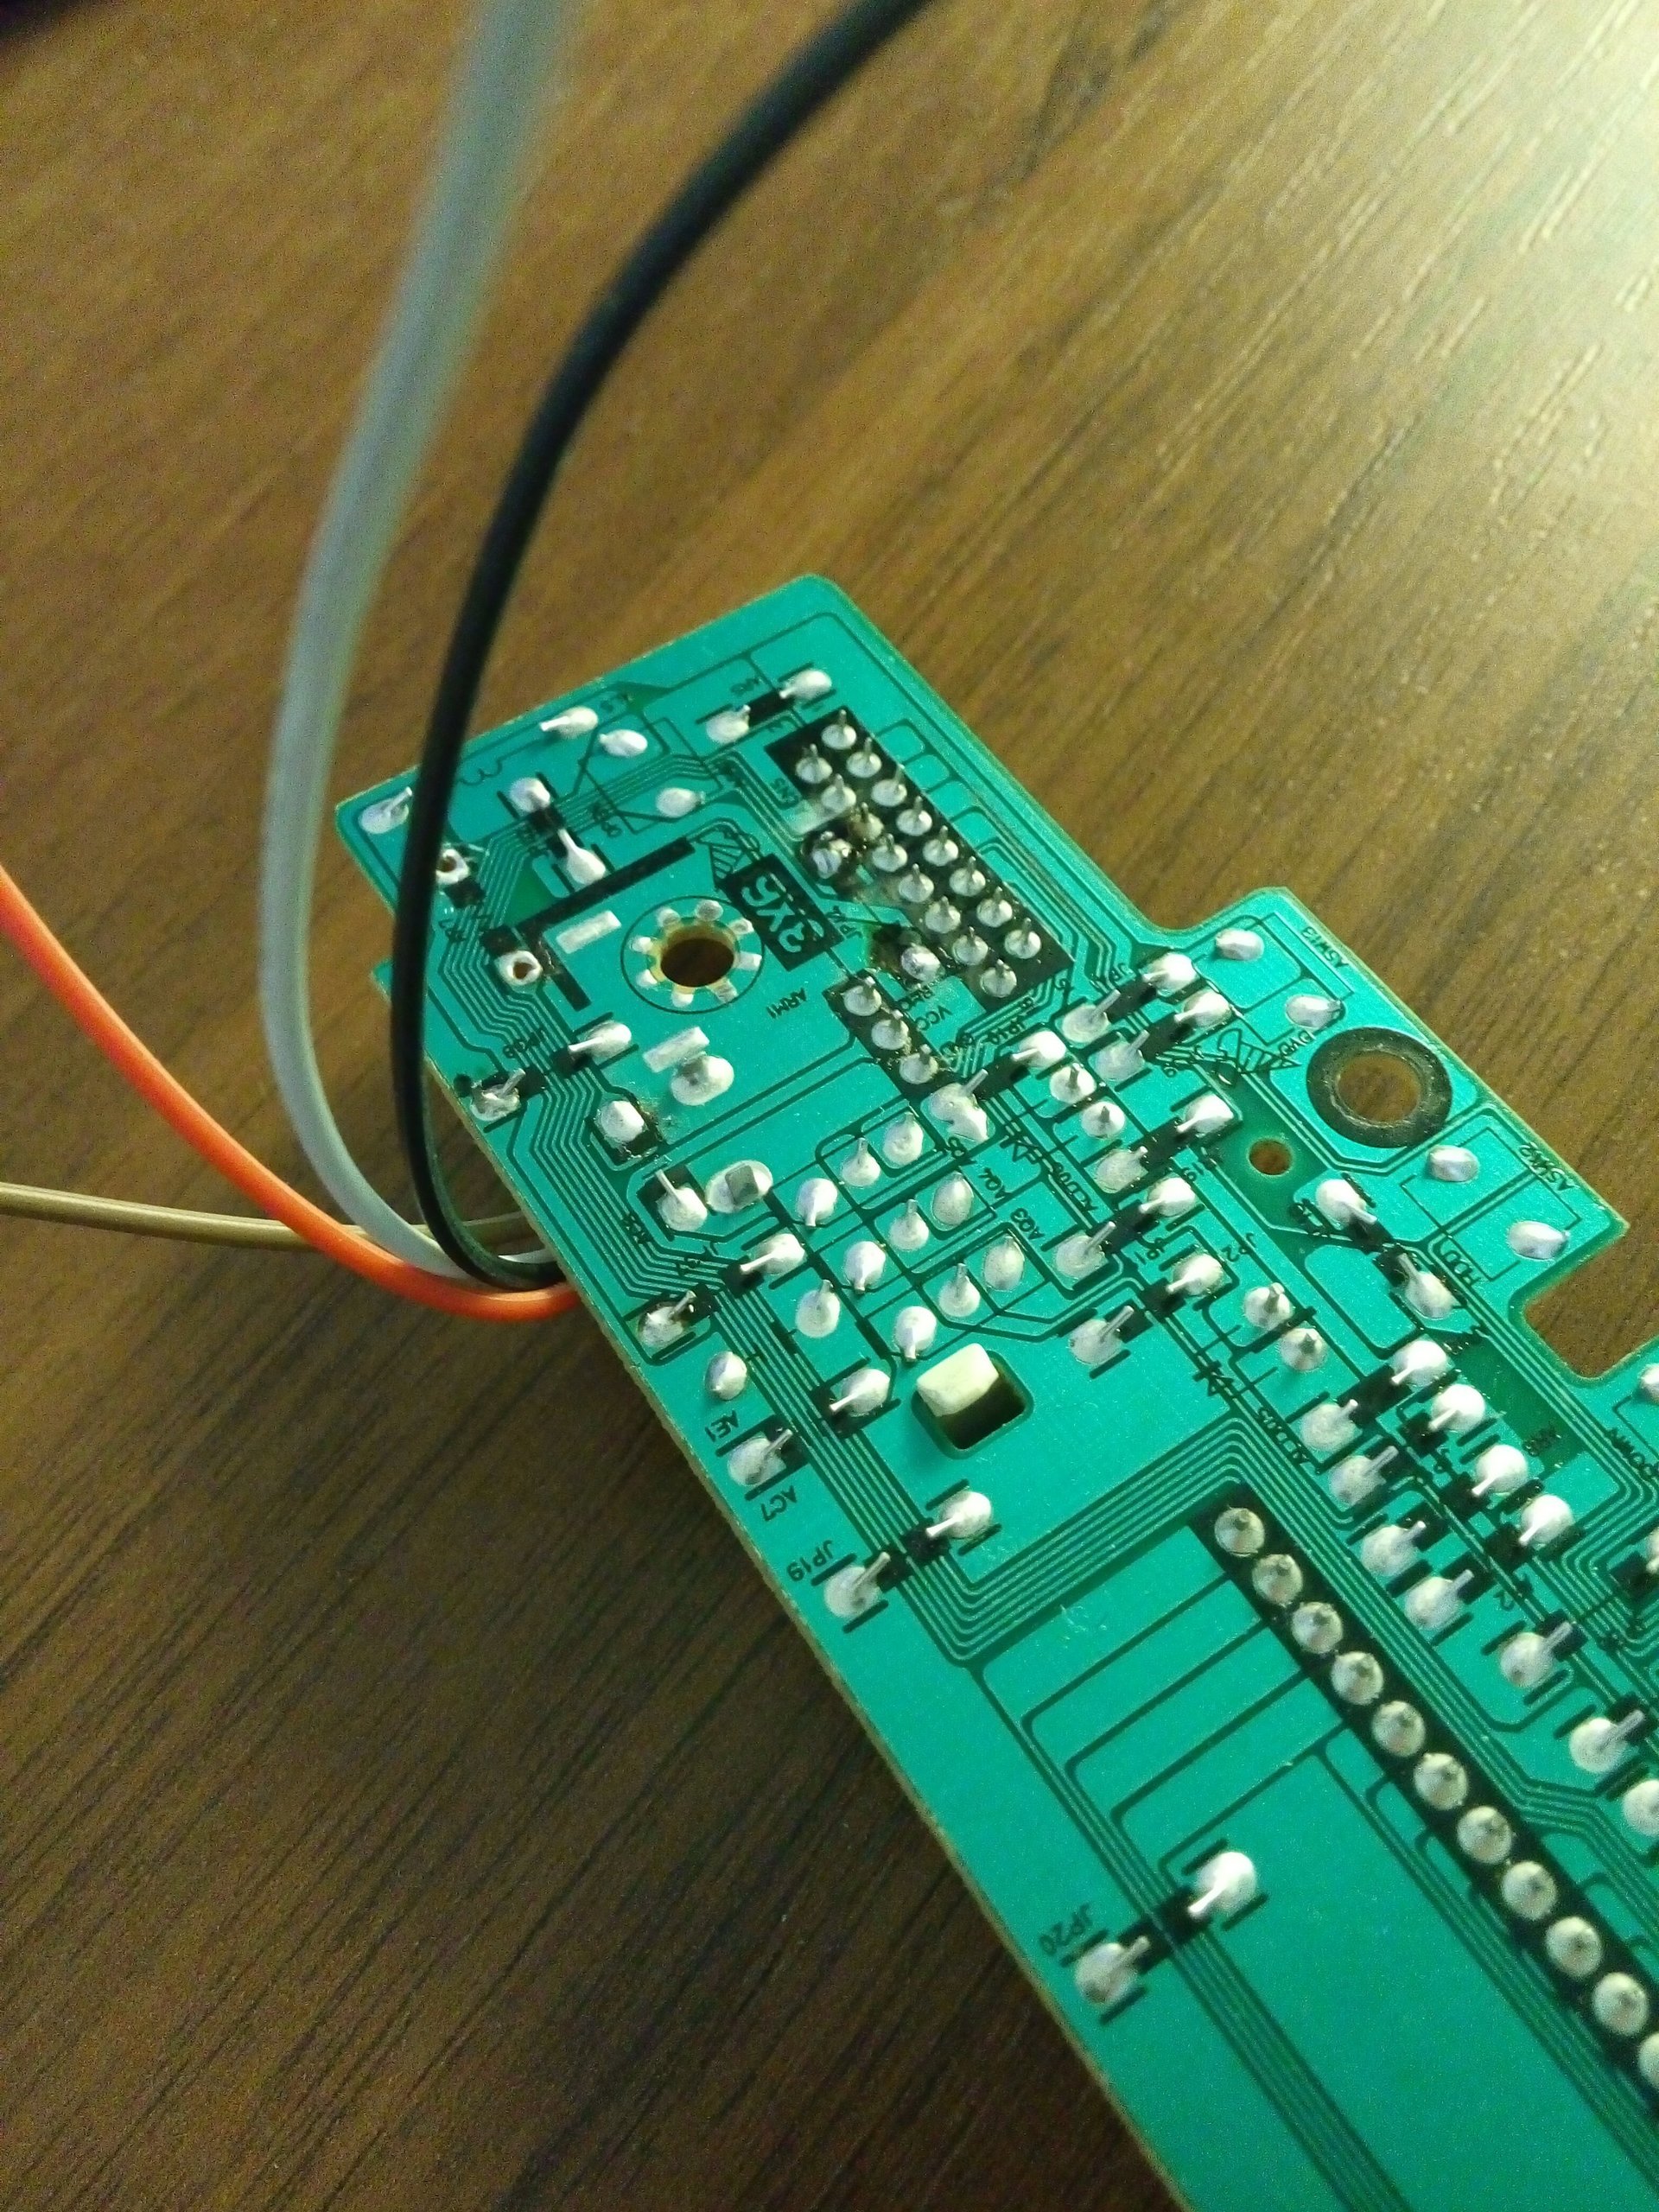


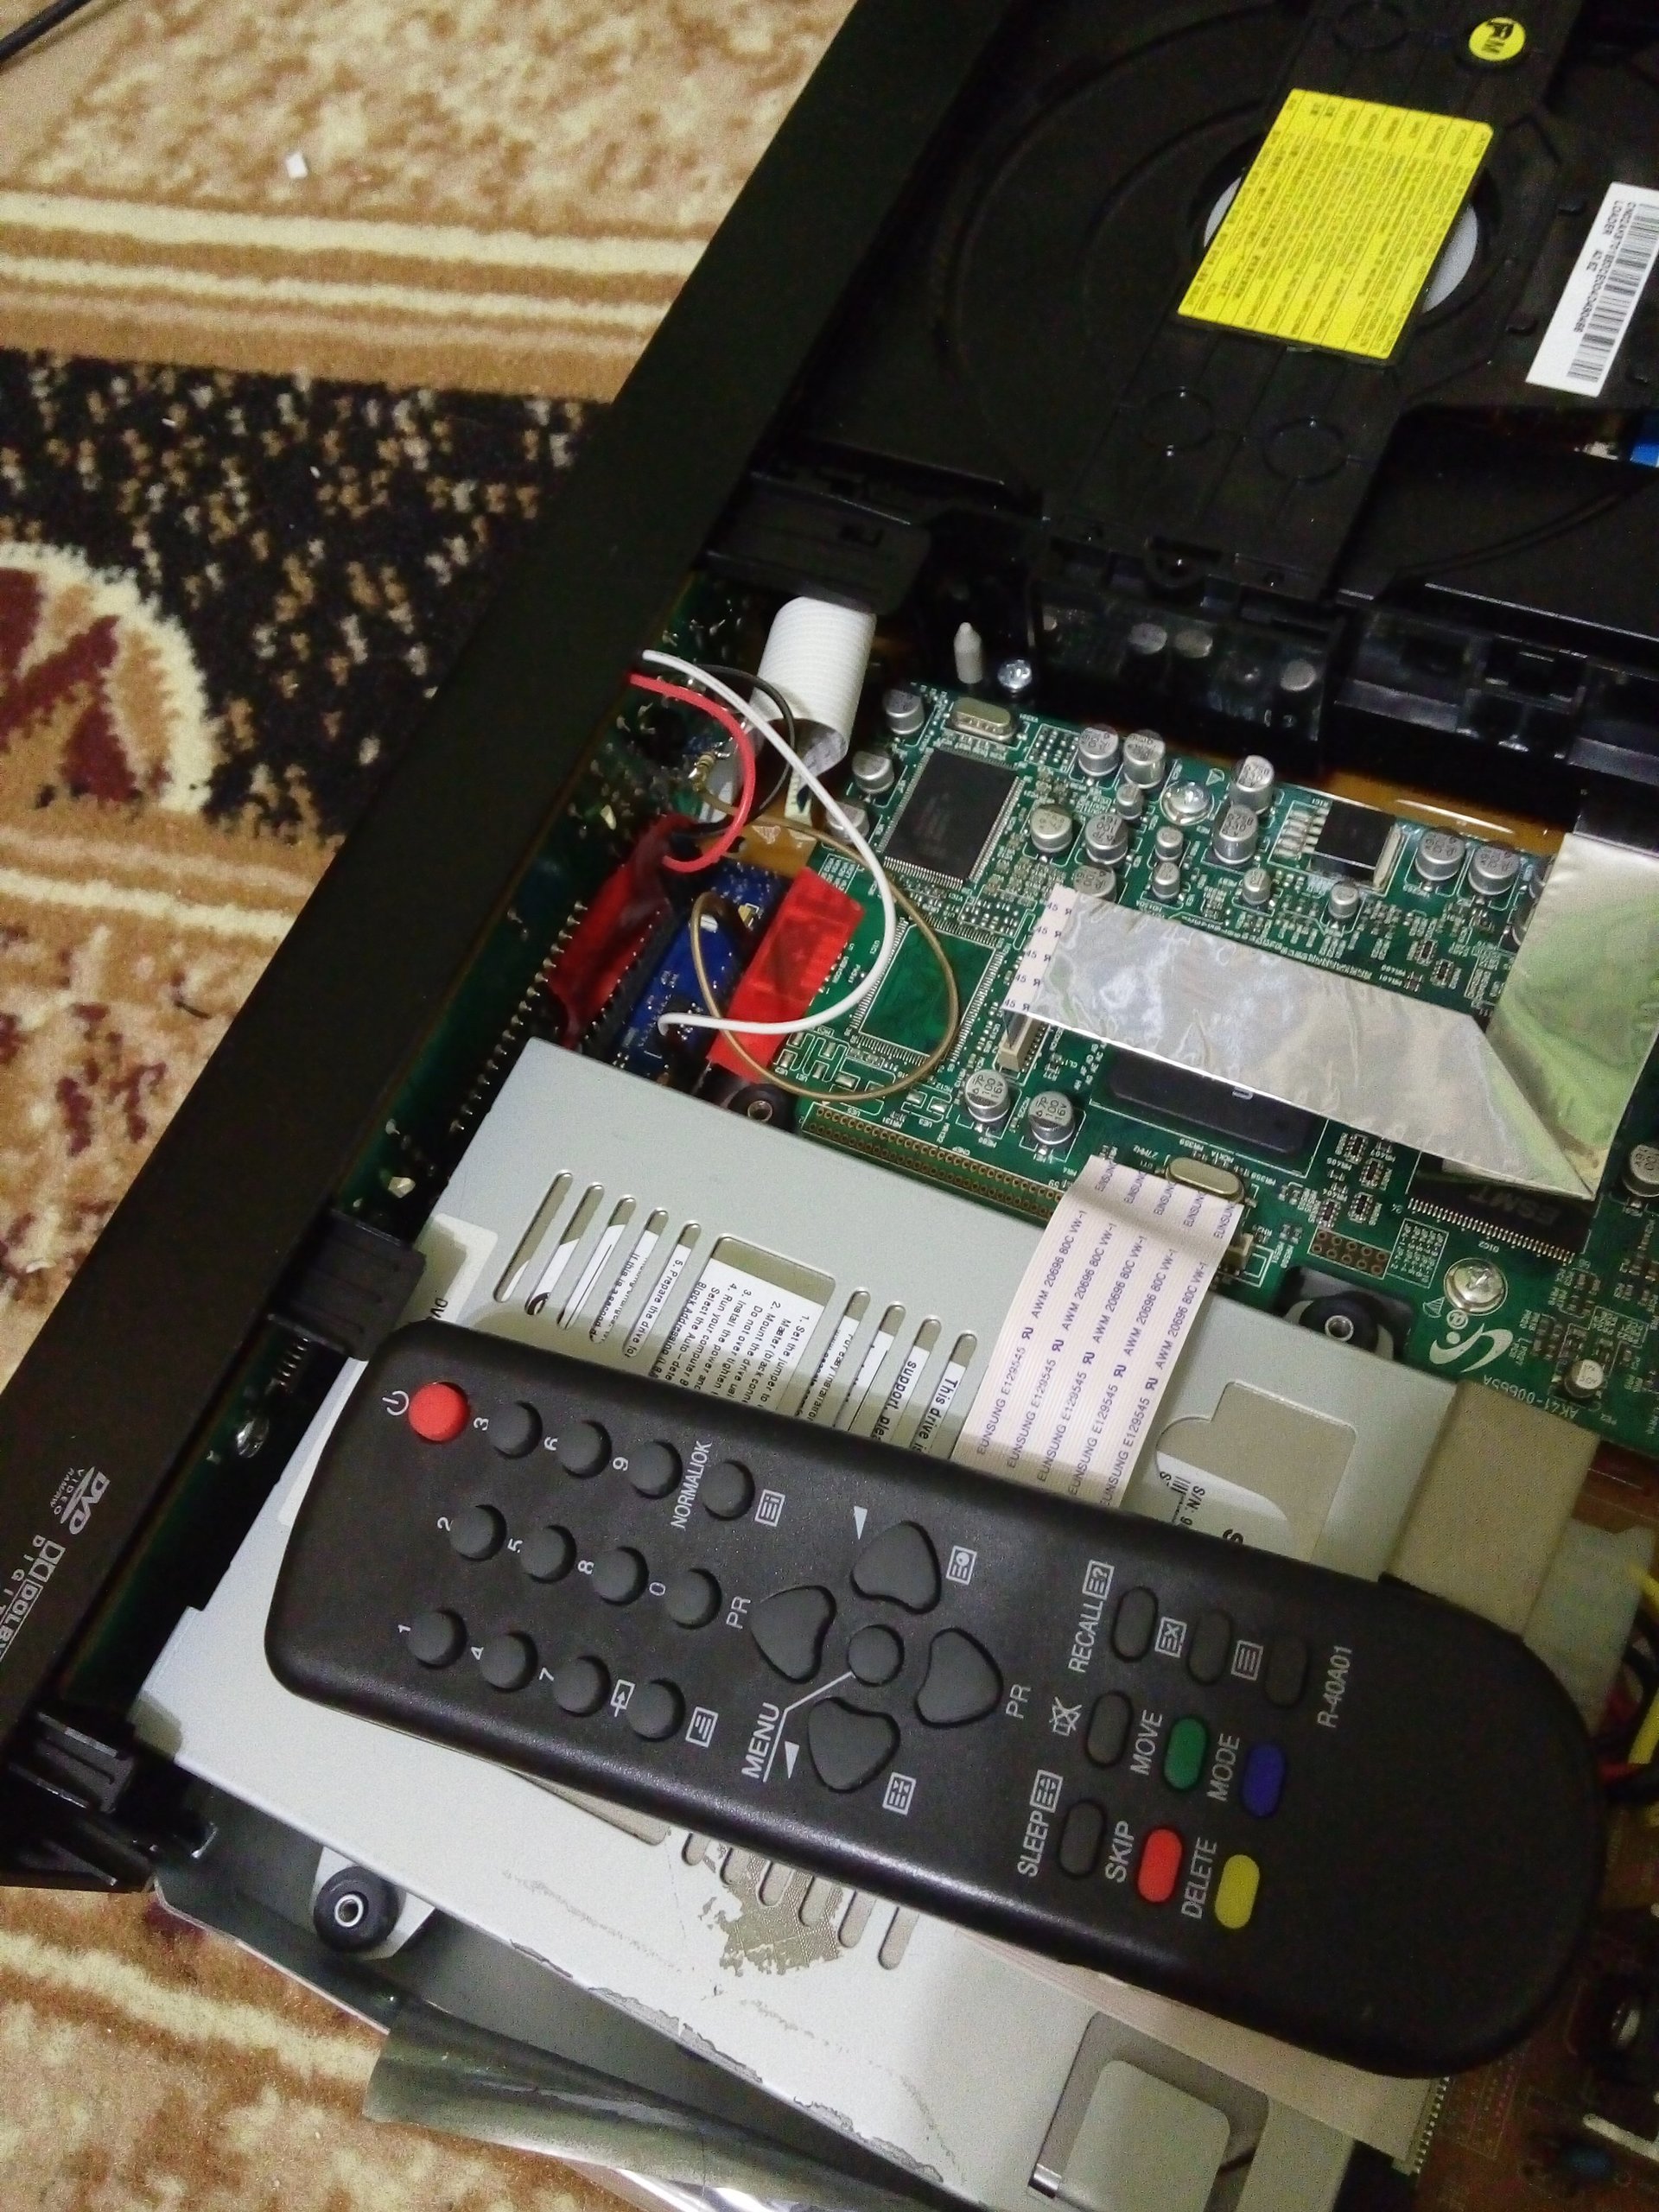
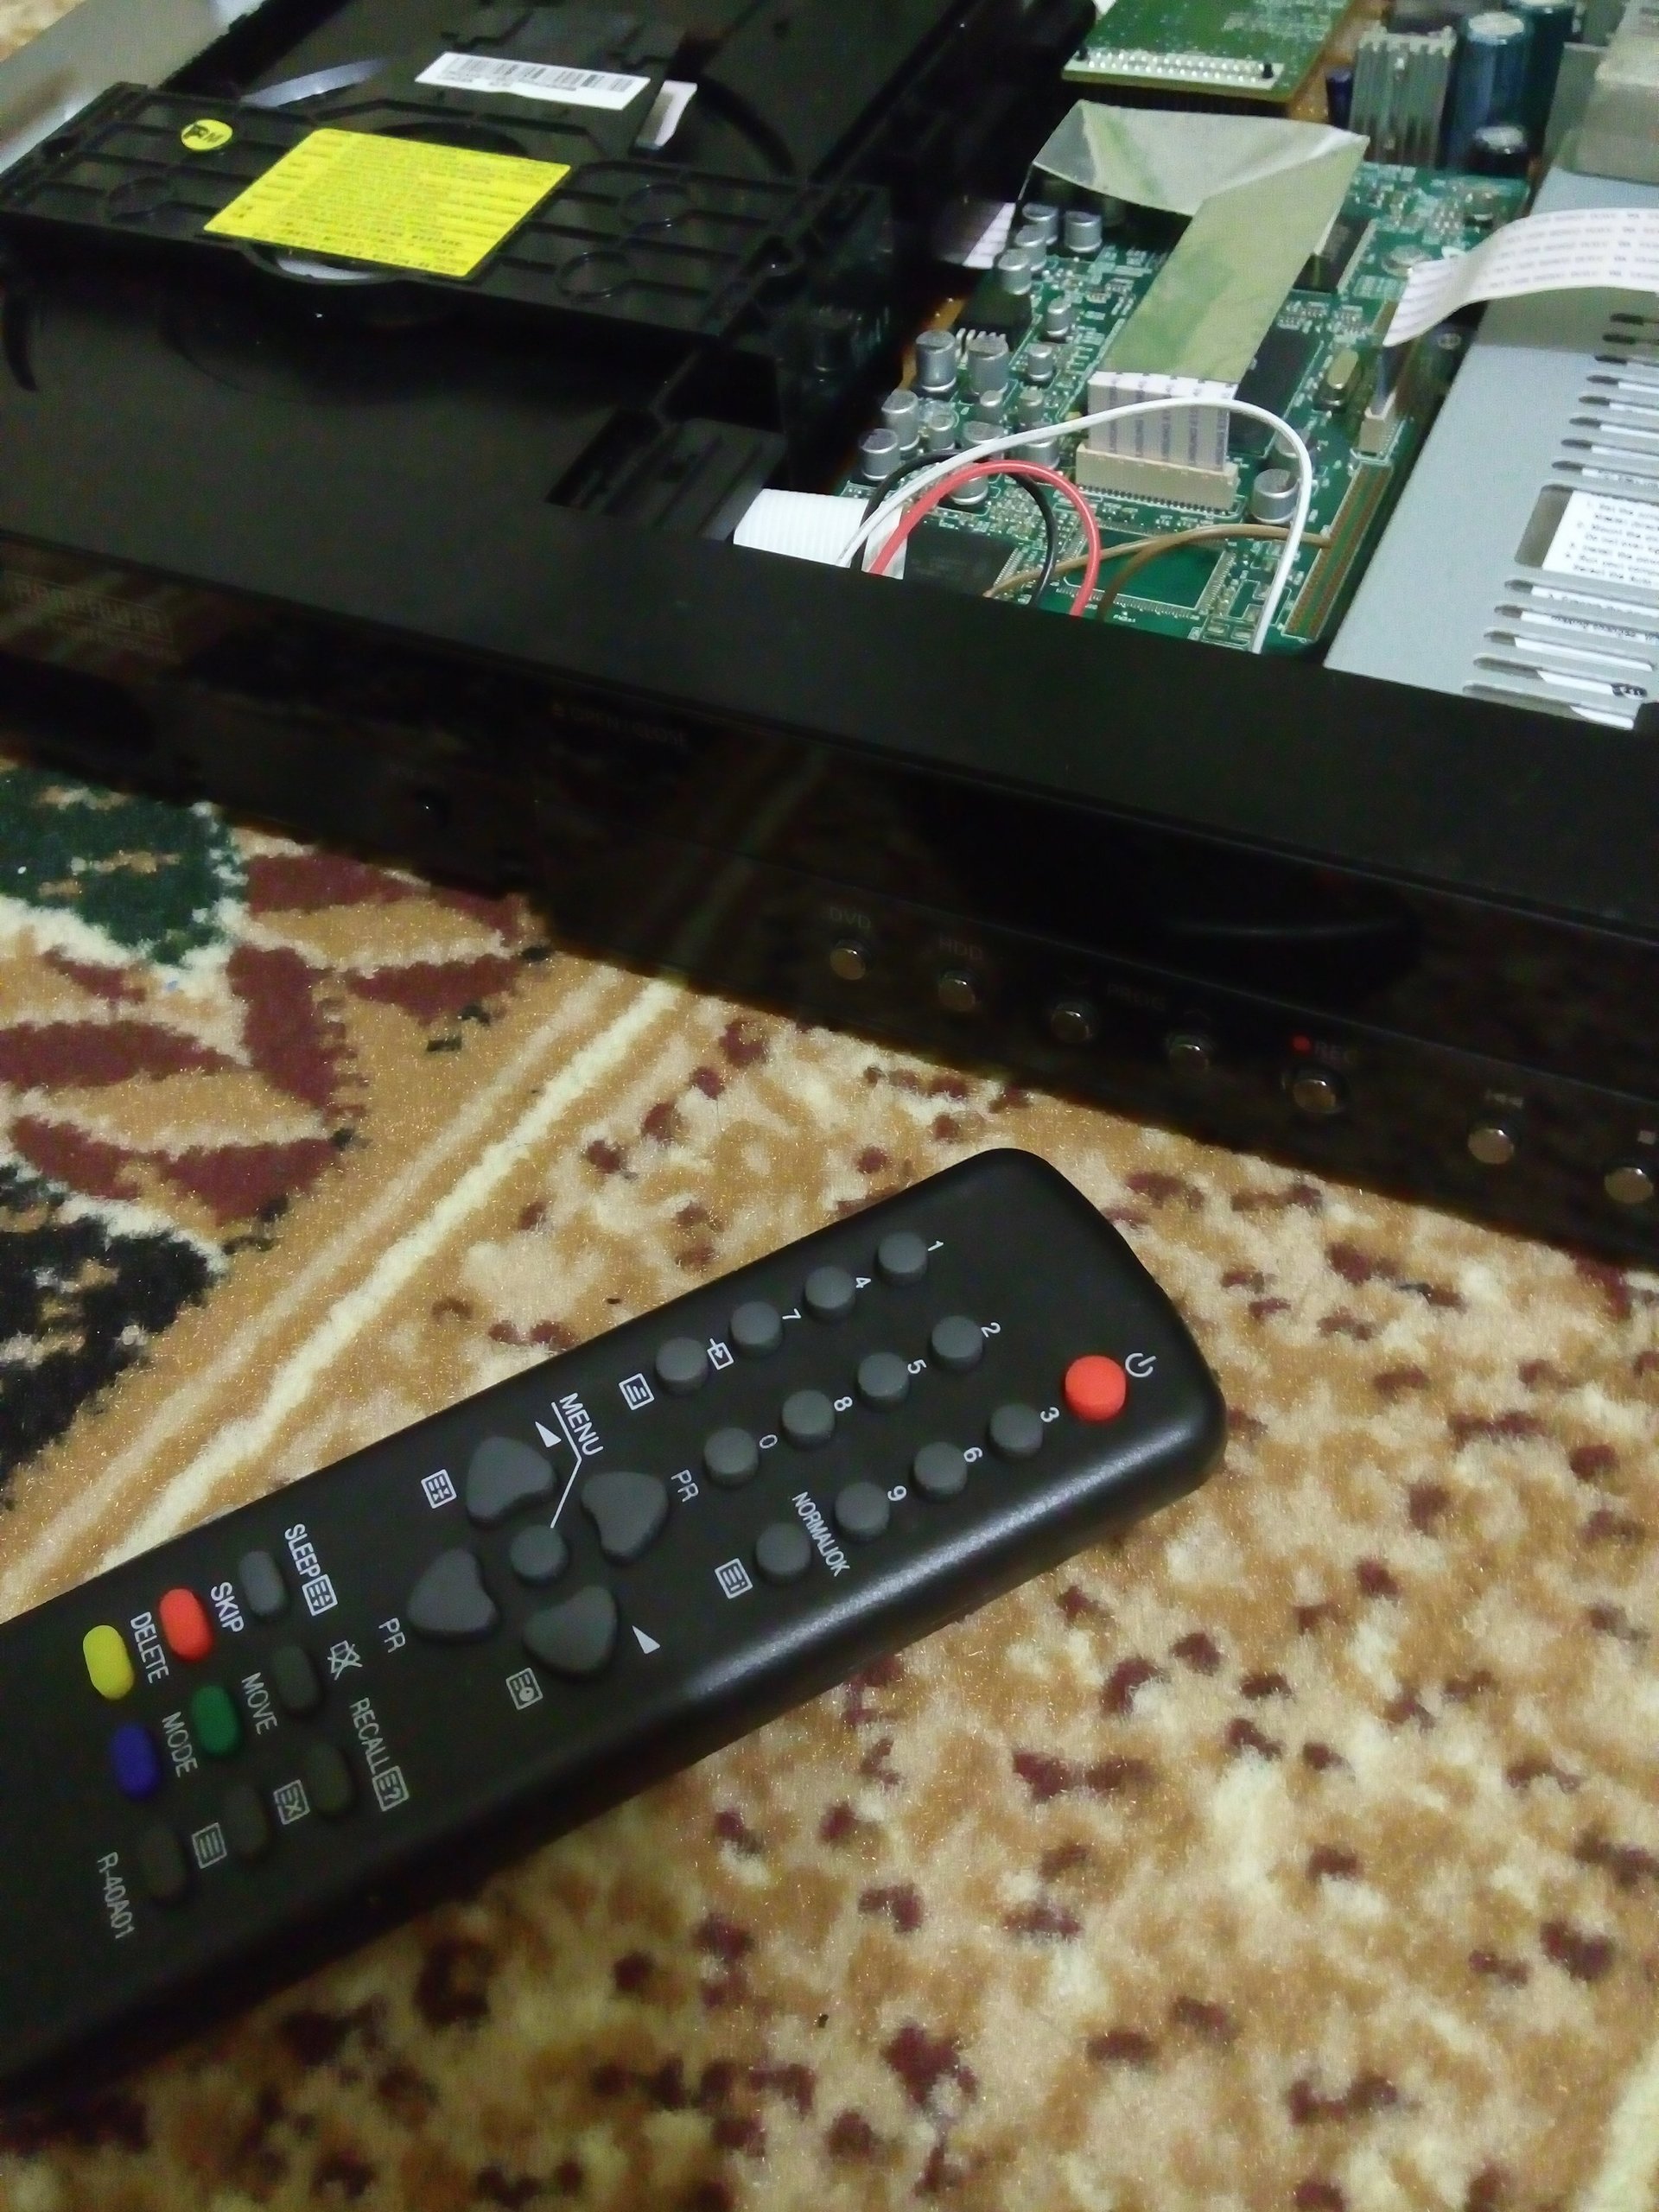
Under the cut, there are photos of the Arduino Nano integration inside this DVD recorder, the Arduino Mini certainly takes up significantly less space, but only the Nano was at hand. I took the power from the control panel. The signal from the built-in receiver was connected to the Arduino and parallel to it was another IR receiver soldered on the opposite side of the first one. The same mounted mounting on it was soldered IR LED. In principle, this repetition could have been avoided - but the signal from the IR receiver is inverted - therefore, the direct connection of the TTL signal to the device will not work - and I did not bother to inverter the logic or the transistor.
Despite the fact that in my case, the raw data worked fine, experiments with the rest of the home equipment showed that not all captured signals worked correctly when trying to control a specific device. The command to turn on the air conditioner did not work, although if it was already turned on, the regime change worked correctly. The LG column also refused to accept raw commands, but it responded well to sending codes via sendSamsung. At the same time, the five collected by familiar TV perfectly responded to the raw data. I tried the variant with a different frequency of the signal - it did not help at all. Perhaps the problem lies in the signal sampling rate of 50 ms. Judging by the performance of Samsung commands on the LG technique, the protocol should be formalized as a separate module by analogy with ir_LG.cpp ir_JVC.cpp ir_Dish.cpp, selecting the header and coding parameters for zeroes and ones for a particular device. Probably the analysis of writing such a protocol would be a good topic for an article.
Well, in addition, the second large IR library for Arduino is IRLib . It has similar functionality, it even has a ready-made module for parsing the IR protocols for the desktop. A quick comparative test of raw data reading was carried out which revealed no difference in readings compared to IRemote. Of the benefits, in IRLib there is already an example of determining at what frequency the IR transmitter works. Example Samsung36 actually implements protocol parsing from the Internet. In addition, the documentation perfectly describes the connection of IR receivers with cascading and much more. Although in my opinion, IRemote is much easier to understand and use.
Source: https://habr.com/ru/post/391001/
All Articles