Instructions: Setting up the Gateway PD (AltLinux SPT 6.0 + VipNet Coordinator)
Introduction
The information presented in this manual is intended for setting the “Gateway PDN” PAK. All information is formed from personal experience
Before setting up, read the manuals on the official Alt Linux and InfoTeCS websites. Understanding in the configuration process will be more. Configuring forwarding rules, enabling coordinator and firewall modes, parsing sections and configuration parameters, and many other useful information are contained in these manuals. Well, if you read and fail, please read this manual. I can not guarantee that it will help you 100% in your situation, but it’s still worth reading.
Start setting / installation
Before you start setting up / installing software on the PACK “SLOOZ-PDN”, you need to find out if it worked before or not. In my case, the gateway was certified about 1.5 years ago and at the moment the certificate for it is over. Information about network interfaces is also weighing, in this example there is one network interface. It is planned to use this gateway at the university to work with the state information systems FIS EGE and FIS FRDO . The “curved” Alt Linux shell and the outdated version of the VipNet coordinator were installed on the gateway, it was decided to remove everything and install the full Alt Linux SPT 6.0 and the new version of the VipNet Coordinator 3.7.
Create backup
First of all, you need to make a backup copy of the hard disk of our gateway. This can be done using the software: Acronis True Image, previously writing it as a boot disk, for example, on an external USB drive. It is necessary to make a backup copy on an alternate medium, using the same hard drive of the gateway for the backup copy does not make sense.
After creating a backup, make sure that the backup disk file of the gateway is visible on the media and occupies a certain size. Then you can remove all the used / usb drives and go to the Alt Linux installation.
')
Installing Alt Linux SPT 6.0
Installing the Alt Linux distribution is not difficult, all settings are made by default, and you don’t even have to suffer from partitioning disks. For the VipNet Coordinator to work, we will need to install a 32-bit system.
The example shows screenshots of Alt Linux Centaurus , do not pay attention at the moment, the procedure for installing SPT is the same.
System loading
In order to start a normal installation (if you have an installation CD with the distribution kit and a DVD reader), you need to boot from the CD or DVD-disk on which the distribution kit is recorded. In this case, you may need to enable the BIOS boot option from the CD / DVD drive.
PS In most cases, an indication of how to enter the BIOS is displayed on your monitor immediately after turning on the computer. The way to enter the BIOS menu and information about the location of the settings is determined by the manufacturer of the equipment used. For information, you can refer to the documentation for your equipment.
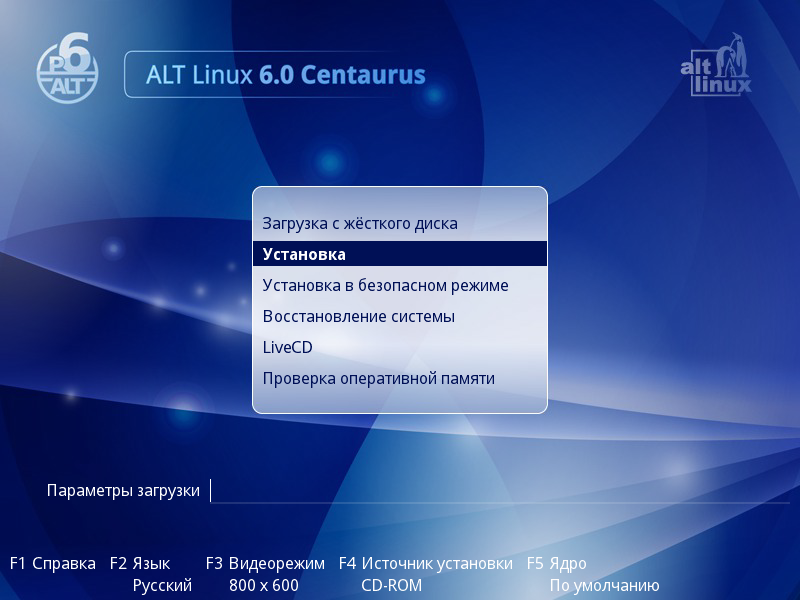
After booting the computer from the installation disc, a menu is displayed in which you can choose the possible system boot options, as well as launch the OS already installed on the hard disk, perform a memory check, boot into recovery mode and start in the LiveCD mode.
PS Mouse at this stage of installation is not supported. To select installation options and various options, you must use the keyboard.
To start the installation process, use the up and down cursor keys to select the Setup menu item, and then press "Enter" . The initial stage of installation does not require intervention: the equipment is automatically detected and the components of the installation program are launched.
- Messages about what is happening at this stage can be viewed by pressing the ESC key.
- For help, type F1 .
- The language of the loader interface and the installer depends on the choice of language in the loader. Select the language by pressing F2 .
- F3 opens the menu of available video modes (screen resolutions). This permission will be used during installation and boot of the installed system, etc.
PS In the initial bootloader, a short waiting time for user actions is set: if you have not taken any steps to select the menu item you need, the system that is already installed on the hard disk will be loaded. If you missed the right moment, then restart your computer and select “Installation” on time .
Installation sequence
The installation process is divided into steps. Each step is dedicated to setting up or setting a specific property of the system. Steps need to be completed in succession, the transition to the next step occurs by clicking the "Next" button. Using the “Back” button, if necessary, you can return to the step that has already been passed and change the settings. However, the ability to go to the previous step is limited to those steps in which there is no dependence on previously entered data.
If for some reason you need to stop the installation, click the reset button on the computer system unit. It is important to remember that it is completely safe to stop the installation only until the “Disk preparation” step, since up to this point no changes are made on the hard disk. If you interrupt the installation between the steps "Preparing the disk" and "Installing the bootloader", then probably none of the installed systems will be able to boot from the hard disk.
Each step is accompanied by a brief help that can be accessed by clicking the Help button or by pressing F1 .
During installation, the following steps are taken:
- Tongue
- License agreement
- date and time
- Disc preparation
- System installation
- Saving settings
- Install the bootloader
- Network configuration
- System administrator
- System user
- Installation completion
Tongue
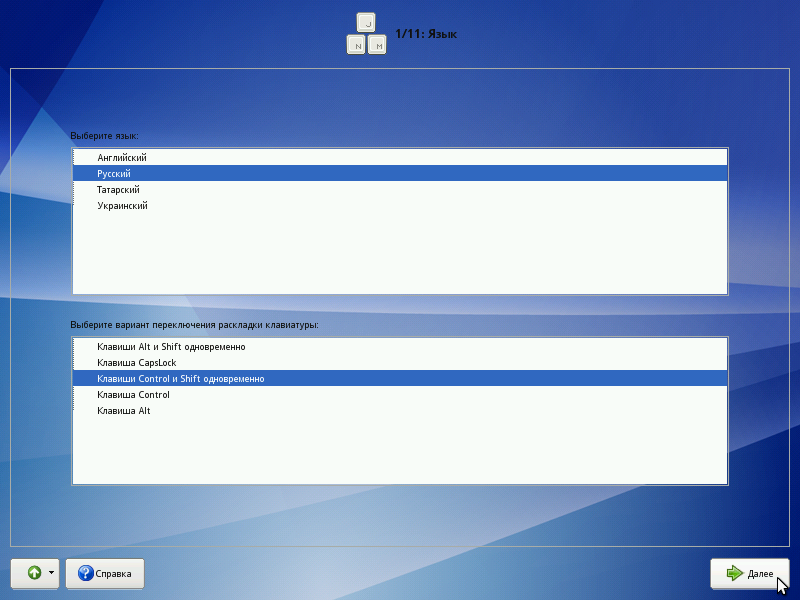
Installation begins with the choice of the main language - the language of the installer interface and the installed system. In addition to the language selected at the initial stage of loading, English is indicated in the list of available languages of the region.
At the same stage, the option of switching the keyboard layout is selected. The keyboard layout is the binding of letters, numbers and special characters to the keys on the keyboard. In addition to entering characters in the main language, it is necessary to be able to enter Latin characters (names of commands, files, etc.) on any Linux system. For this, the standard English keyboard layout is usually used. Switching between layouts is carried out with the help of specially reserved keys. For the Russian language, the following options for switching layouts are available:
- Alt and Shift keys simultaneously;
- Capslock key ;;
- Control and Shift keys simultaneously ;;
- Control key ;;
- Alt key;
If the selected primary language has only one layout (for example, when selecting English as the main language), this single layout will be automatically accepted.
License agreement
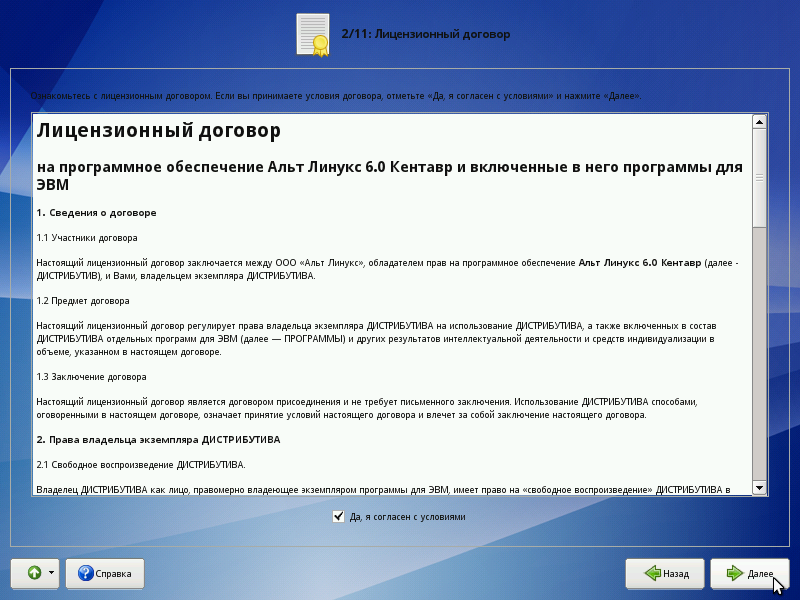
Before proceeding with the installation, you should carefully read the license terms. The license says about your rights. In particular, you are entitled to:
- operation of programs on any number of computers and for any purpose;
- distribution of programs (accompanying them with a copy of the copyright agreement);
- getting the source code of programs.
If you purchased a distribution kit, then this license agreement is attached in print to your copy of the distribution kit. The license applies to the entire ALT Linux distribution. If you agree to the terms of the license, check the box “Yes, I agree to the terms and conditions and click Next.”
date and time
To set the date and time correctly, it is enough to specify the time zone correctly and set the desired values for the date and time.

At this step, you should select the time zone for which you want to set the clock. To do this, select the country and the region in the corresponding lists. Search the list can be accelerated by typing on the keyboard the first letters of the search word.
Note the “Store time in BIOS GMT” mark. If Linux is the only operating system installed, check this box. If Linux is installed as a second system, then this mark must be removed. If this is not done, the time and date in the already installed operating system may not be displayed correctly.
Check whether the date and time are displayed correctly in the “Current time” column, and, if necessary, set the correct values (the “Change ...” button).
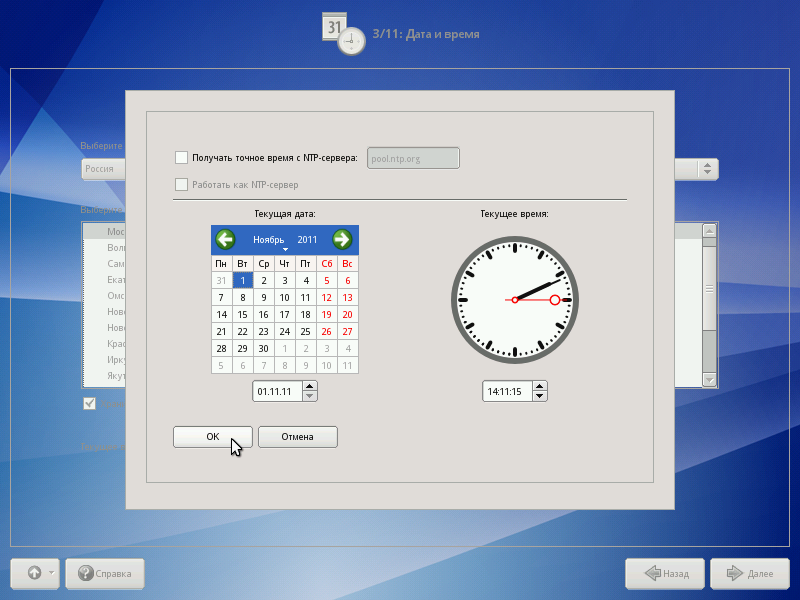
If your computer is connected to a local network or to the Internet, you can enable the system clock synchronization feature with a remote server (NTP). To do this, it is enough to mark the item “Receive exact time from the NTP server” and specify the preferred NTP server. In most cases, you will be satisfied with the pool.ntp.org server.
If the option “Receive exact time from NTP server” is selected, then your computer may itself be an exact time server. For example, be used as a time server by machines on your local network. To activate this feature, check “Work as NTP server” .
Disc preparation
The transition to this step may take some time. The waiting time depends on the performance of the computer, the size of the hard disk, the number of partitions on it, etc. At this stage, a platform is prepared for the installation of ALT Linux, first of all - free disk space is allocated.
Selecting a partitioning profile
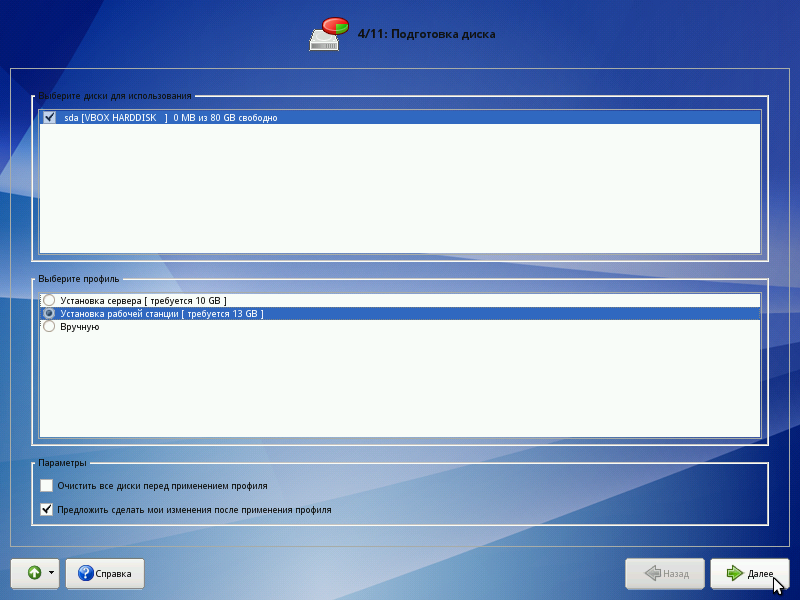
The list of partitions lists the partitions that already exist on the hard drives (including removable flash drives connected to the computer at the time of installation). The following are the available partitioning profiles. A profile is a template for allocating disk space for a Linux installation. You can select one of the profiles:
- Server installation;
- Installation workstation.
In our case, since the Coordinator is a server, during the installation, we select the hard disk partitioning for the server installation option.
Automatic partitioning profiles
Profiles assume automatic partitioning. The selection of an automatic disk partitioning profile also affects the default software set.
Server installation - the server software set will be installed by default. This allows you to use the installed system to perform various service tasks. When installing the “Server installation ” type, the graphical user interface will not start when the system is booted, unless you have installed the corresponding software packages yourself.
Workstation installation - by default, a set of software will be installed, including a graphical environment and development tools for solving everyday tasks.
If you select the “Server installation” option , if there are two hard disks on the computer, a RAID1 array will be created, and if there are three or more disks, RAID5 will be created. The use of RAID technology ensures data integrity even if one hard drive fails. Please note that when installing the distribution kit in a virtual machine, RAID-arrays are not automatically created.
System installation
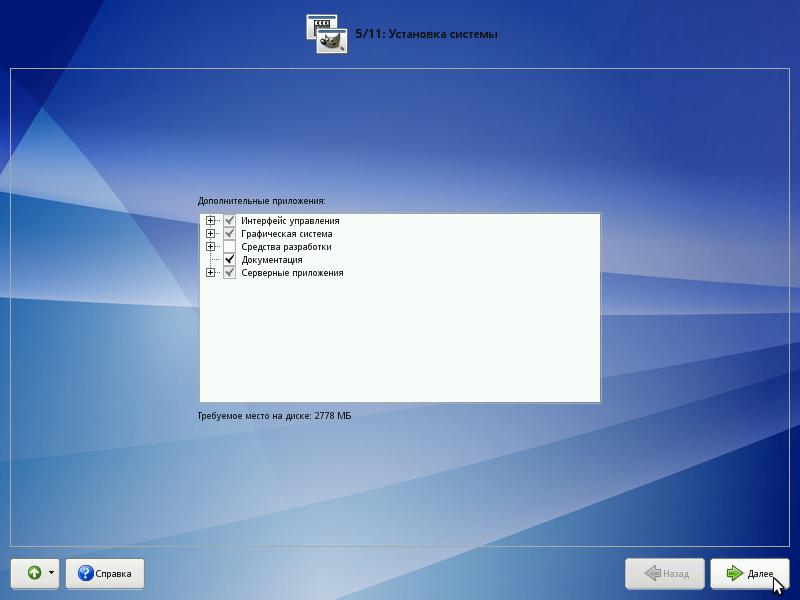
In any ALT Linux distribution, a significant number of programs are available (up to several thousand), some of which constitute the operating system itself, and the rest are application programs and utilities.
In the Linux operating system, all installation and removal operations are performed on packages — individual components of the system. A package and a program correspond ambiguously: sometimes one program consists of several packages, sometimes one package includes several programs.
During the installation of the system, a detailed selection of components at the package level is usually not required - this requires too much time and knowledge from the installer. Moreover, the distribution kit is selected in such a way that it is possible to create a complete working environment for the corresponding audience of users from the available programs. Therefore, in the process of installing the system, the user is asked to select from a small list of groups of packages that combine the packages necessary to solve the most common tasks. Under the list of groups on the screen displays information about the amount of disk space that will be occupied after the installation of packages included in the selected groups.
After selecting the necessary groups, click “Next” , after which the installation of packages will begin.
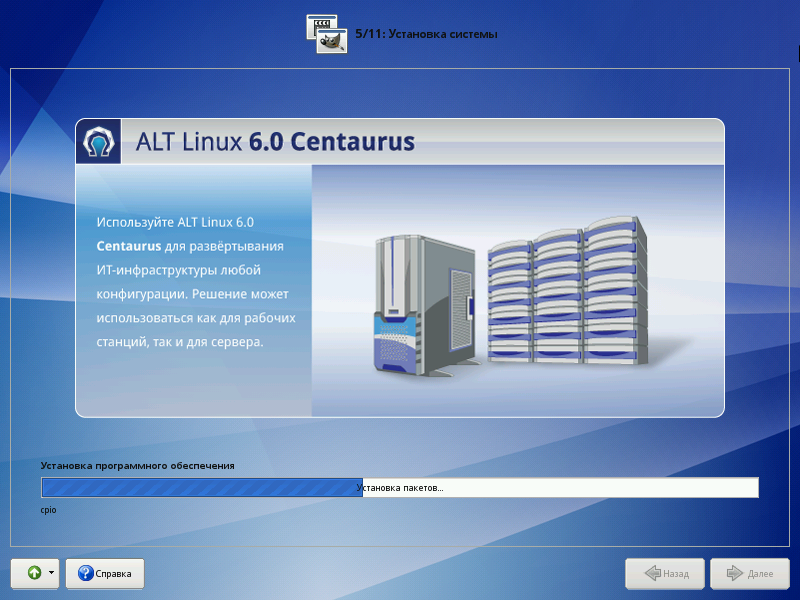
At this stage, the installation of a set of programs necessary for the operation of the system.
Installation takes place automatically in two steps:
- receiving packages;
- package installation.
Packages are received from the source selected during the initial boot phase. With a network installation (via FTP or HTTP), the execution time of this step will depend on the connection speed and may be much longer compared to the installation from the laser disk.
The waiting time for the end of the installation process can be devoted to reading the manual.
Saving settings
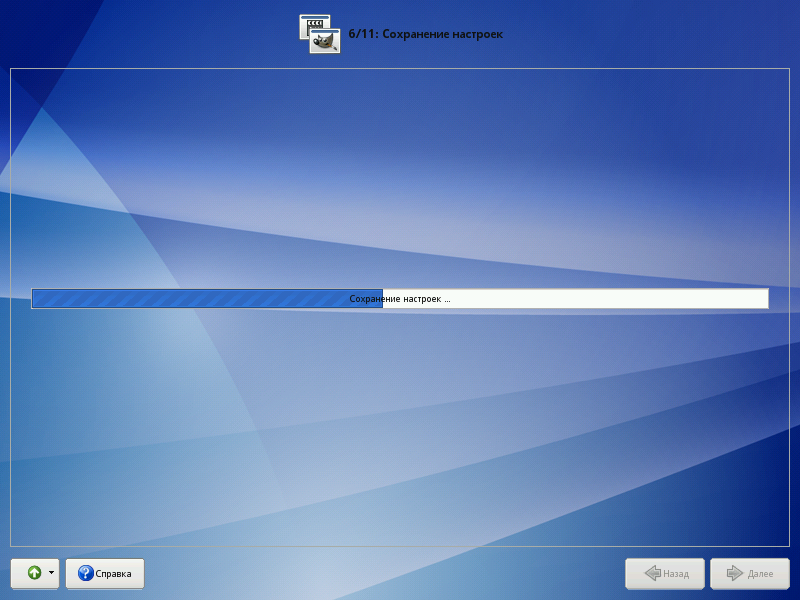
After the installation of the base system is complete, the save settings step begins. It passes automatically and does not require user intervention. A progress bar is displayed on the screen.
At this step, the settings made during the first installation steps are transferred. Information on the correspondence of partitions of the hard disk to the file systems mounted on them is recorded in the newly installed base system. The repository on the laser installation disk is added to the list of available software package sources.
After saving the settings, the system proceeds automatically to the next step.
Install the bootloader
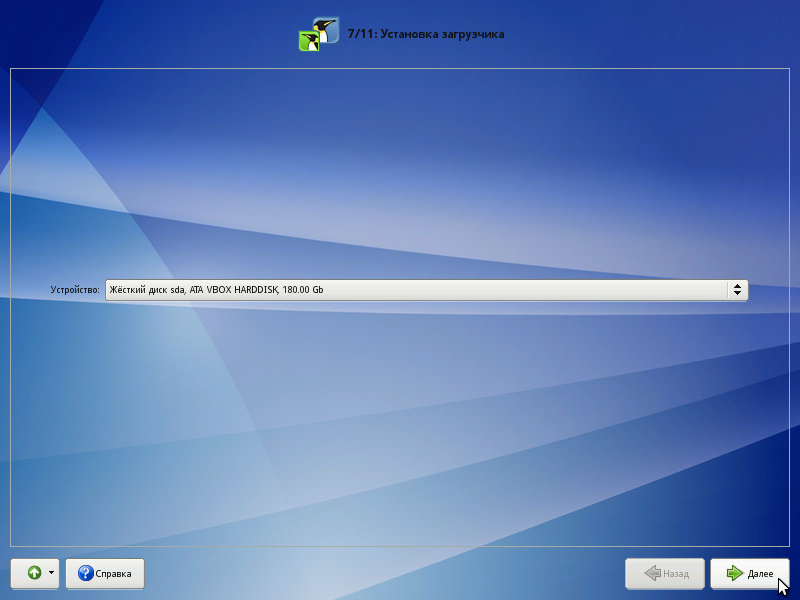
The Linux loader is a program that allows you to boot Linux and other operating systems. If only Linux is installed on your computer, then there is no need to change anything, just click “Next” .
If you plan to use other operating systems already installed on this computer, then it matters what hard drive or partition in which the boot loader will be located. In most cases, the installer itself correctly selects the location of the bootloader. You can specify the location yourself, or not install the proposed bootloader at all if, for example, you already use some third-party bootloader.
Network configuration
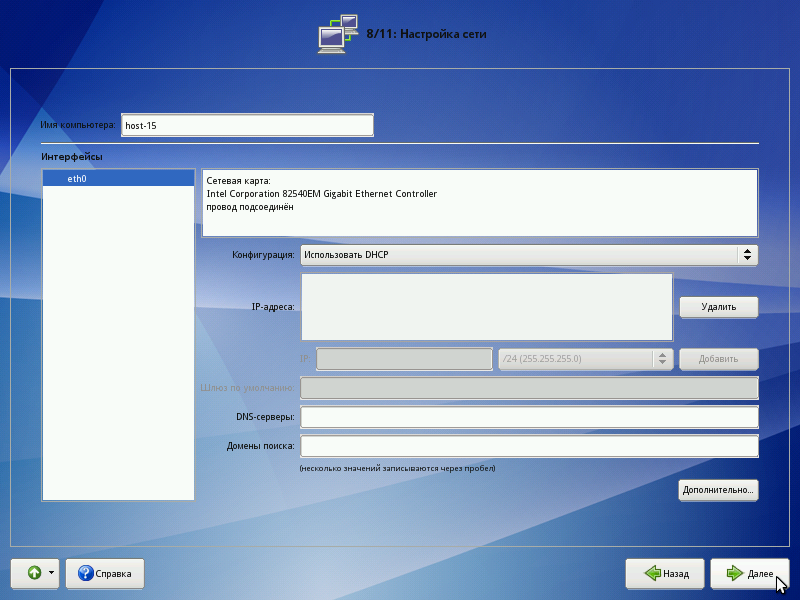
At this stage, you must specify the network configuration parameters: IP addresses of network interfaces, DNS server, gateway, etc. The specific values will depend on your network environment. Manual configuration can be avoided if there is a configured DHCP server on your network. In this case, all necessary network settings will be obtained automatically.
System administrator
Linux is a multi-user system. In practice, this means that you need to register to work in the system, i.e. make it clear to the system who exactly is behind the monitor and keyboard. The most common way to register today is to use system names (login name) and passwords (password). This is a reliable means of confirming that the one who needs is working with the system. Users are encouraged to create fairly complex, not too short passwords and keep them secret.
When typing the password instead of the characters on the screen are highlighted asterisks. To avoid typos when entering a password, it is suggested to enter it twice. You can use the automatic password creation by selecting "Create automatically" . You will be offered a randomly generated and fairly reliable password option. You can accept the automatically generated password (do not forget to remember the password!) Or request another version of the password using the “Generate” button.
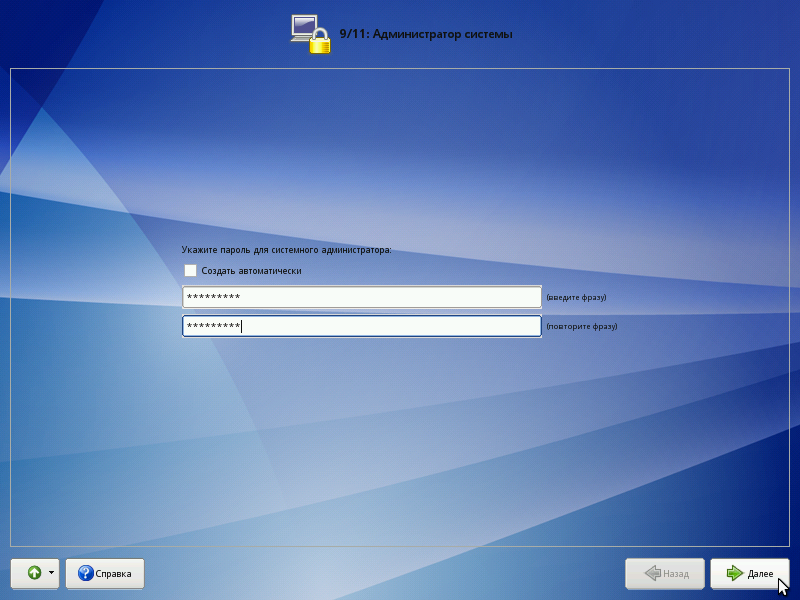
On any Linux system there is always one special user - the system administrator, who is also the superuser. A standard system name, root, is reserved for it.
The system administrator is different from all other users in that he is allowed to make any, including the most destructive changes in the system. Therefore, the choice of the system administrator password is a very important moment for security. Anyone who can enter it correctly (find out or pick up) will get unlimited access to the system. Even your own careless actions on behalf of root can be disastrous for the entire system.
Ps . It is worth remembering the root password - you will need to enter it to get the right to change system settings using standard ALT Linux configuration tools.
System user
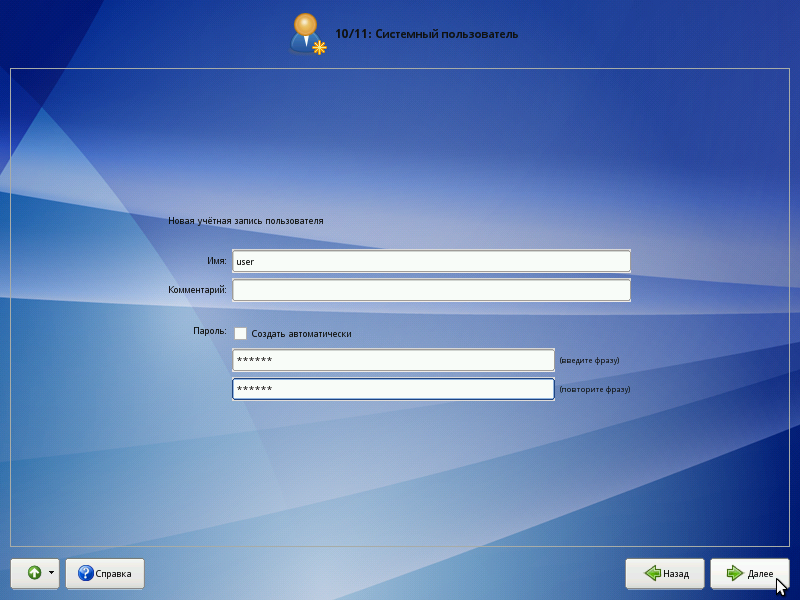
In addition to the administrator (root), you must add at least one regular system user to the system. Working on behalf of a system administrator is considered dangerous, so daily work in Linux should be performed on behalf of a system user who is limited in authority.
When adding a system user, you are prompted to enter the name of the user account. The account name is always one word, consisting only of lowercase Latin letters (uppercase letters are prohibited), numbers and the underscore character “_” (and the number and symbol “_” cannot stand at the beginning of a word).
In order to eliminate typos, the user password is entered twice. The user password can be created automatically, similar to the automatic creation of the superuser password.
During the installation process, it is proposed to create only one system user account — on its behalf, you can perform tasks that do not require superuser privileges.
Accounts for all other users of the system can be created at any time after installing the operating system.
Installation completion
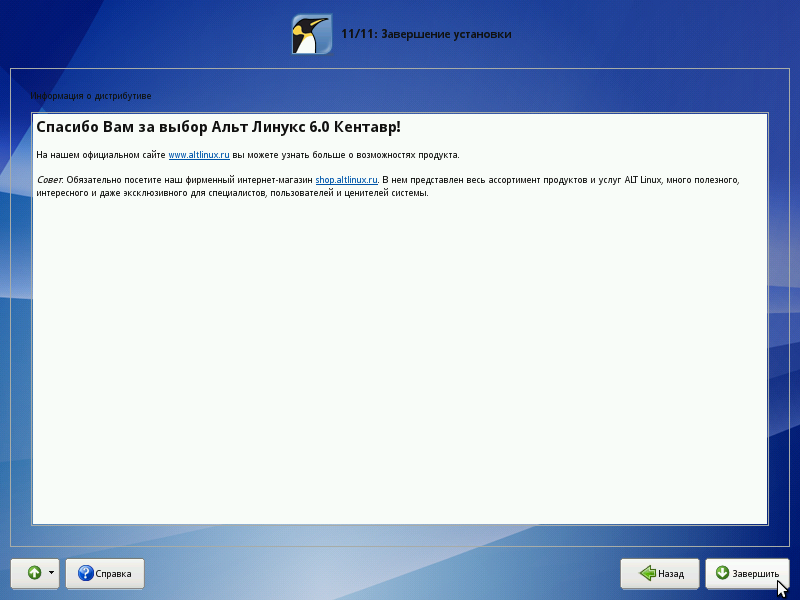
The screen for the last installation step displays information about the completion of the installation. This information may contain important notes on the use of the distribution. After clicking the "Finish" button, the computer restarts. Do not forget to extract the installation DVD (if this does not happen automatically). Then you can boot the installed system in normal mode.
First aid
In case of any troubles, do not panic, but calmly make out the situation. Linux is not so easy to bring to the complete inoperability and loss of valuable data. Hasty actions of a desperate user can lead to disastrous results. Remember that there is a solution and it will definitely be there!
Problems installing the system
If the system did not configure any component after the package installation stage, do not despair, finish the installation, boot into the system and try to repeat the setting in a calm atmosphere.
In case of problems with the installation, you can manually set the necessary parameters in the boot parameters row of the bootloader menu:
- xdriver - a graphical installer attempts to automatically select a video card driver, but sometimes it fails. This parameter can turn off the "artificial intelligence" and explicitly specify the desired driver version;
- instdebug - if this parameter is present, the shell will be launched before launch and after the completion of the graphical installer. This is a very useful tool for identifying the reasons for not running the graphical part of the installer. The sequence of internal scripts is as follows: install2 → xinit → alterator-install2 → alterator-wizard. If necessary, you can manually download Xorg (xinit command) and in the terminal window that opens, run alterator-install2 (or alterator-wizard) manually.
If you could not install the system at all (the package installation stage did not occur or did not complete), then first try to try again in Installation mode in safe mode . You may have some new or non-standard equipment, but it may turn out that it is perfectly tuned with the old drivers. In any case, you can always report your problems to us:
- to mailing lists (http://lists.altlinux.org/);
- Technical support (http://www.altlinux.ru/support);
- to the forum (http://forum.altlinux.org/).
If you want to get an exact answer, please provide a detailed list of your equipment and a detailed description of the problem.
Configuring Alt Linux SPT 6.0
After Alt Linux is installed, work with it is not completed yet. Before installing the VipNet Coordinator, you need to update the kernel, modules and several applications. Therefore, launch Alt Linux, connect the Internet and start setting / updating.
To update the modules provided package manager Synaptic .
Synaptic Package Manager
To start the Synaptic package manager, start the terminal on behalf of the superuser, for this, on the top panel of the operating system, click the menu item “Applications” -> “Standard” -> “Root Terminal” .
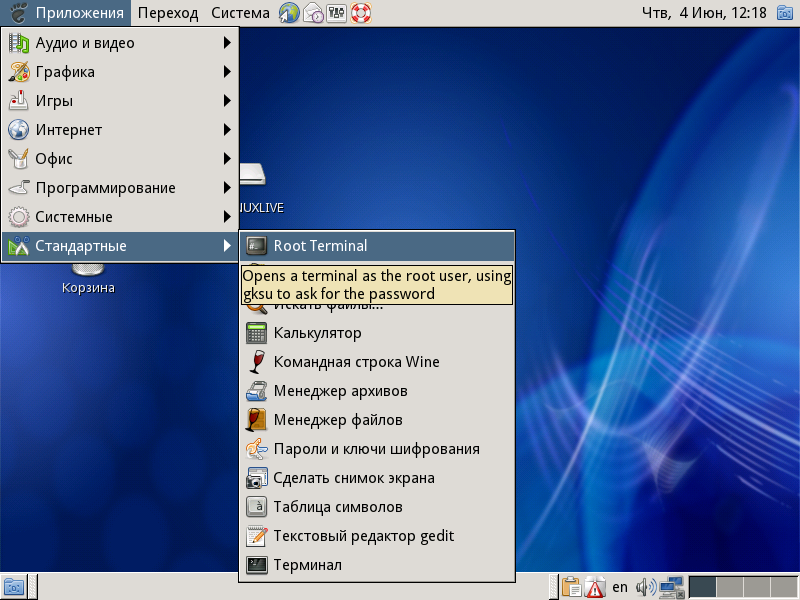
When starting the terminal on behalf of the superuser, the system will ask you to enter its password, enter the password set for the superuser (System Administrator) during the installation of the Alt Linux OS.
In the terminal, enter the command to enable the superuser mode:
su-
Next, we will update the modules and kernel of the OS in order to better navigate, enter the command to determine the kernel version of your OS:
uname –r
After entering the command, you will see information about the installed kernel.

After installing Alt Linux, I had a 2.6.32-el-smp -alt42.M60C.1 kernel
Then enter the Synaptic package manager start command:
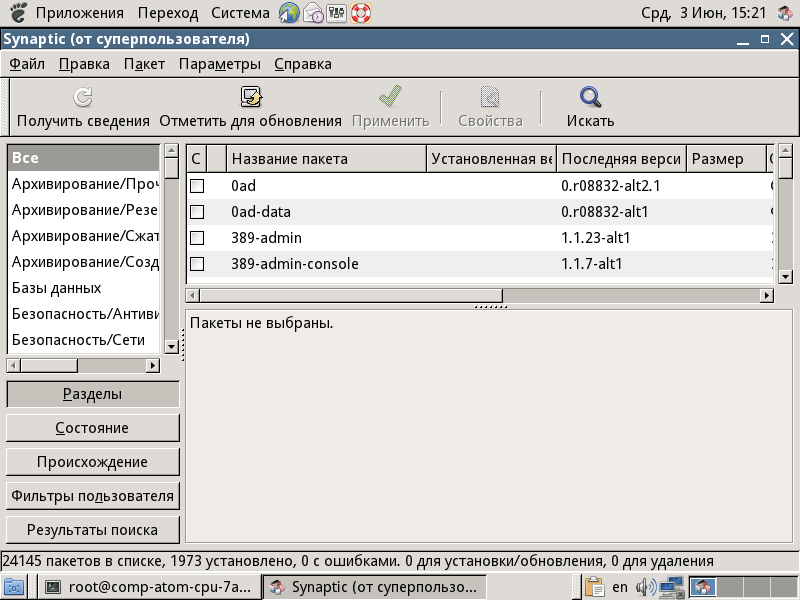
synaptic
The Synaptic Package Manager opens.
Enable Repositories
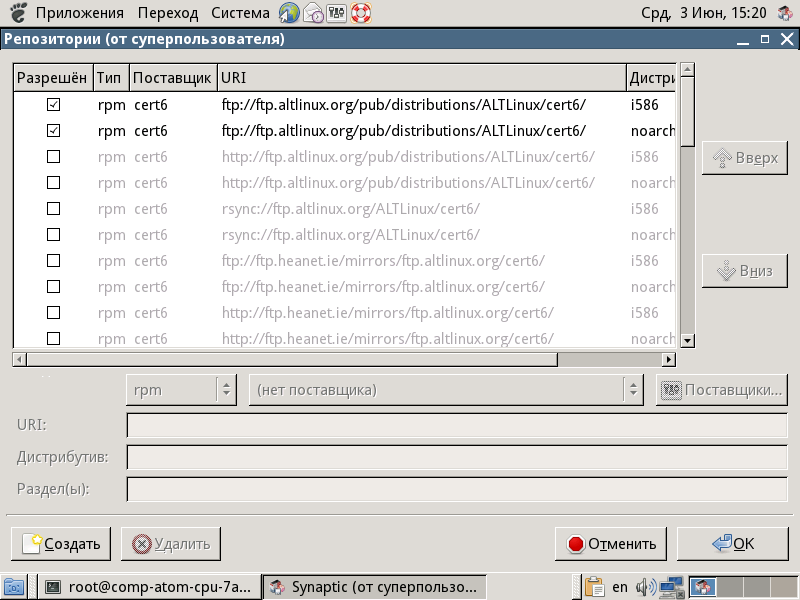
In order to update the packages we need, you must enable repositories. To do this, in the Synaptic package manager menu, click “Options” -> “Repositories” . We only need the Atl Linux server ftp. Tick the following repositories:
- ftp.altlinux.org/pub/distributions/ALTLinux/Linux/cert6 - The i586 distribution;
- ftp.altlinux.org/pub/distributions/ALTLinux/Linux/cert6 - The noarch distribution.
Then click "OK" .
To update the list of packages from the added repositories, in the main window of the Synaptic package manager, click the "Get Details" button.
Module Updates / Kernel Updates
The list of required modules for updating:
- kernel-image-std-def # 1: 3.0.26-alt0.M60P.1
- gcc4.5
- glibc-devel
- kernel-headers-modules-std-def
- glibc
- kernel-headers-std-def
- kernel-headers-common
- glibc-kernheaders
- kernel-source-3.0
To reduce the time to search for the necessary components, use the search. After you find the first package, step on it and click on the “Mark for update” button on the panel, then go on to search for the next package. After you have checked all the packages listed in the list, click on the “Apply” button on the panel, the packages will start loading. After downloading the package manager will ask for permission to install the modules, agree.
After successful installation of all packages, check again in the list of modules whether they are all installed. For final completion, click on the "Retrieve" button a couple of times; if the update no longer occurs, you can restart the OS, the Alt Linux configuration is complete.
Alt Linux boot with new kernel
After updating the packages / modules, restart the gateway, when you start the OS, select Alt Linux with the updated kernel (in this case, the new kernel std-def 3.0).

VipNet Coordinator (Linux)
VipNet Coordinator (Linux), 3.7, InfoTeCS .
ViPNet Coordinator (/home), , «DISTRIB» . Since «installer», /home/installer/DISTRIB/. , - «*.dst» .
VipNet Coordinator
DISTRIB/distribute. :
cd /home/installer/DISTRIB/distribute
:
ll
[root@coord1 distribute]# ll
17228
drwxr-xr-x 4 installer installer 4096 24 14:30 ../
drwxr-xr-x 2 installer installer 4096 24 14:30 patch/
drwxr-xr-x 4 installer installer 4096 24 14:30 ./
-rw-r--r-- 1 installer installer 17546378 24 14:30 distribute.tar.gz
drwxr-xr-x 2 installer installer 4096 24 14:30 doc/
-rw-r--r-- 1 installer installer 5214 24 14:30 license.txt
-rw-r--r-- 1 installer installer 778 24 14:30 warning.txt
-rw-r--r-- 1 installer installer 28372 24 14:30 install.sh
-rw-r--r-- 1 installer installer 248 24 14:30 version
-rw-r--r-- 1 installer installer 20 24 14:30 noanswer
-rw-r--r-- 1 installer installer 27658 24 14:30 install.cf
«install.sh» , , :
chmod 755 install.sh
:
chown –R root /home/installer/DISTRIB/distribute/*
:
[root@coord1 distribute]# ll
17244
-rw-r--r-- 1 root root 15204 24 15:24 abn_0001.dst
-rw-r--r-- 1 root installer 17546378 24 15:24 distribute.tar.gz
drwxr-xr-x 2 root installer 4096 24 15:24 doc/
-rw-r--r-- 1 root installer 27658 24 15:24 install.cf
-rw-r--r-- 1 root installer 28372 24 15:24 install.sh
-rw-r--r-- 1 root installer 5214 24 15:24 license.txt
-rw-r--r-- 1 root installer 20 24 15:24 noanswer
drwxr-xr-x 2 root installer 4096 24 15:24 patch/
-rw-r--r-- 1 root installer 248 24 15:24 version
-rw-r--r-- 1 root installer 778 24 15:24 warning.txt
drwxr-xr-x 4 installer installer 4096 24 15:02 ./
drwxr-xr-x 4 installer installer 4096 24 14:30 ../
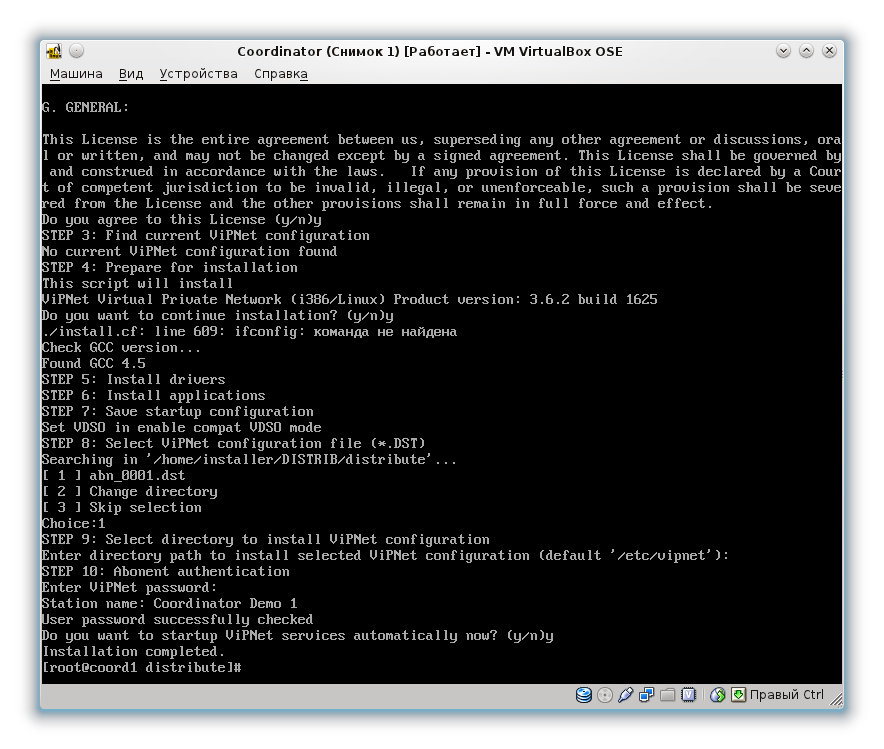
VipNet Coordinator.
:
./install.sh
C , :
- ( );
- .
. ENTER , ENTER .
, «y» .
, , , «y» .
dst , , . . . 1, . . dst .
, ENTER , /etc/vipnet/, .
. UsersPass.txt « », UsersPass.txt , . .
, «y» .
, .
:
:
Iplir check
mftp check
, PID :
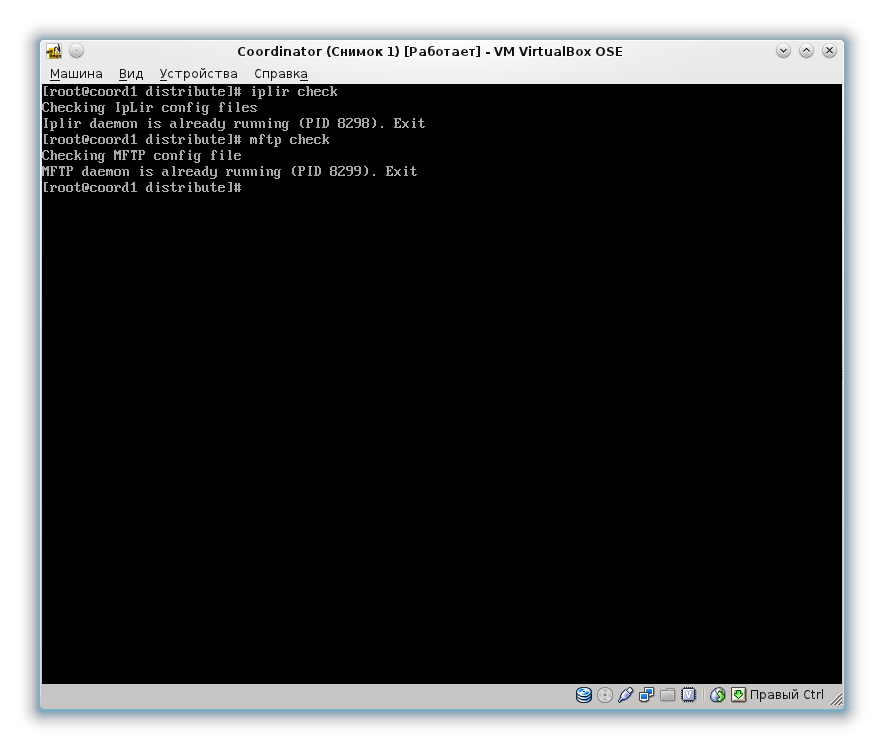
, VipNet Coordinator .
VipNet Coordinator
.
« »
.
ViPNet Coordinator Linux iplir.conf :
- [id] usefirewall on .
- [id] port 1-65535 ( 55777), .
- [adapter] , , , type external .
- [dynamic] dynamic_proxy on .
- [dynamic] forward_id id . , .
VipNet Coordinator :
Iplir stop
PS , .
Iplir.conf . Midnight Commander . :
mc
Midnight ommander. , Ctrl+O .
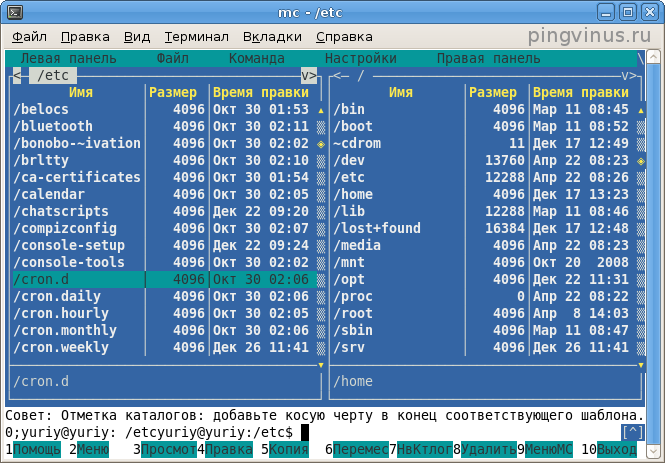
Iplir.conf : etc/vipnet/user .
Iplir.conf F4 . :
iplir.conf
[id]
id= 0x099a0e10
name= APS2 id_******
filterdefault= pass
ip= 192.168.122.1
tunnel= 193.169.176.116-193.169.176.119 to 193.169.176.116-193.169.176.119
firewallip= 192.168.122.1
port= 55777
proxyid= 0x099a0e10
usefirewall= on
fixfirewall= off
virtualip= 10.0.0.1
version= 3.0-670
[id]
id= 0xffffffff
name= Encrypted broadcasts
filterdefault= drop
filterudp= 137, 137, pass, any
filterudp= 138, 138, pass, any
filterudp= 68, 67, pass, any
filterudp= 67, 68, pass, any, disable
filterudp= 2046, 0-65535, pass, recv
filterudp= 2046, 2046, pass, send
filterudp= 2048, 0-65535, pass, recv
filterudp= 2050, 0-65535, pass, recv
filterudp= 2050, 2050, pass, send
[id]
id= 0xfffffffe
name= Main Filter
filterdefault= pass
[id]
id= 0x099a000b
name= AP Administrator
filterdefault= pass
ip= 10.0.4.246
accessip= 10.0.0.2
firewallip= 10.0.4.245
port= 55777
proxyid= 0x099a000a
dynamic_timeout= 0
usefirewall= on
always_use_server= on
virtualip= 10.0.0.2
version= 3.2-672
[id]
id= 0x099a066d
name= CM Failover2
filterdefault= pass
ip= 85.143.100.25
ip= 10.0.4.242
ip= 169.254.241.1
ip= 192.168.0.1
accessip= 10.0.0.3
tunnel= 10.0.3.1-10.0.3.1 to 10.0.3.1-10.0.3.1
firewallip= 85.143.100.25
port= 55777
proxyid= 0x099a066d
dynamic_timeout= 0
usefirewall= on
virtualip= 10.0.0.3
version= 3.0-670
[id]
id= 0x0e18000a
name= CM-OBRNADZOR-HW-1 3608
filterdefault= pass
ip= 192.168.0.121
ip= 10.3.54.101
accessip= 10.0.0.4
tunnel= 10.3.54.15-10.3.54.15 to 10.3.54.15-10.3.54.15
firewallip= 62.76.166.101
port= 55777
proxyid= 0xfffffffe
dynamic_timeout= 0
usefirewall= on
virtualip= 10.0.0.4
version= 3.0-670
[id]
id= 0x0e18000d
name= AP-Admin3608 3608
filterdefault= pass
accessip= 0.0.0.0
port= 55777
dynamic_timeout= 0
usefirewall= on
virtualip= 10.0.0.5
[adapter]
name= eth0
allowtraffic= on
type= external
[adapter]
name= virbr0
ip= 192.168.122.1
allowtraffic= on
type= internal
[dynamic]
dynamic_proxy= on
firewallip= 192.168.122.1
port= 32466
forward_id= 0x099a066d
always_use_server= off
timeout= 25
[misc]
packettype= 4.1
timediff= 7200
warnoldautosave= on
client_pollinterval= 300
server_pollinterval= 900
iparponly= off
ifcheck_timeout= 30
ipforwarding= on
iscaggregate= on
ompnumthreads= 1
mssdecrease= 0
ciphertype= gost
[debug]
debuglevel= 3
debuglogfile= file:/var/log/iplircfg.debug.log
[servers]
server= 0x099a066d, CM Failover2
server= 0x0e18000a, CM-OBRNADZOR-HW-1 3608
[virtualip]
startvirtualip= 10.0.0.1
endvirtualip= 10.0.0.6
maxvirtualip= 10.0.254.254
; Do not delete or change the following line!!!
startvirtualiphash= 0x18E80620
[visibility]
default= auto
, .
, . 2 , . 4 iplir.conf-eth0 . : etc/vipnet/user .
:
iplir.conf-eth0
[mode]
mode= 2
[db]
maxsize= 50 MBytes
timedif= 60
registerall= off
registerbroadcast= off
registertcpserverport= off
mode= 2
[db]
maxsize= 50 MBytes
timedif= 60
registerall= off
registerbroadcast= off
registertcpserverport= off
[mode] mode= 2 mode= 4 , .
Vipnet :
Iplir start
, .
, , , ip- :
- 192.168.xxx.xxx;
- 172.16.xxx.xxx;
- 10.1.xxx.xxx 10.255.xxx.xxx.
Ip- ( ).
ip-, , .
, , ip- . , Iplir.config .
[id] tunnel ip-.
:
iplir.conf
[id]
id= 0x099a0e10
name= APS2 id_*****
filterdefault= pass
ip= 192.168.122.1
tunnel= 193.169.176.116-193.169.176.119 to 193.169.176.116-193.169.176.119
firewallip= 192.168.122.1
port= 55777
proxyid= 0x099a0e10
usefirewall= on
fixfirewall= off
virtualip= 10.0.0.1
version= 3.0-670
id= 0x099a0e10
name= APS2 id_*****
filterdefault= pass
ip= 192.168.122.1
tunnel= 193.169.176.116-193.169.176.119 to 193.169.176.116-193.169.176.119
firewallip= 192.168.122.1
port= 55777
proxyid= 0x099a0e10
usefirewall= on
fixfirewall= off
virtualip= 10.0.0.1
version= 3.0-670
:
iplir.conf
[id]
id= 0x099a0e10
name= APS2 id_*****
filterdefault= pass
ip= 192.168.122.1
tunnel= 193.169.176.116-193.169.176.119 to 193.169.176.116-193.169.176.119
tunnel= 192.168.xxx.xxx
tunnel= 172.16.xxx.xxx
tunnel= 10.1.xxx.xxx
firewallip= 192.168.122.1
port= 55777
proxyid= 0x099a0e10
usefirewall= on
fixfirewall= off
virtualip= 10.0.0.1
version= 3.0-670
. ip- ' . ip- ' :
ifconfig
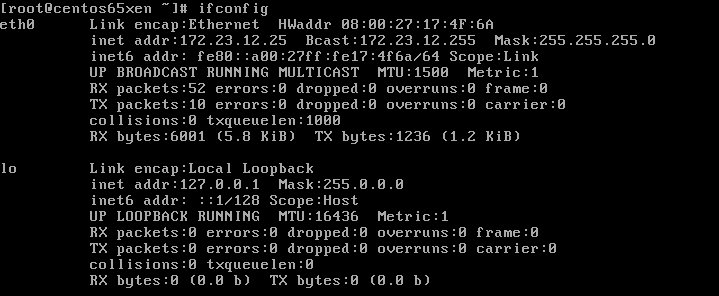
, , eth0, ip- inet addr.
, VPN . IE – 10.0.3.1 – 10.3.54.15. , . , .
:
Iplir view
«Enter» . , .
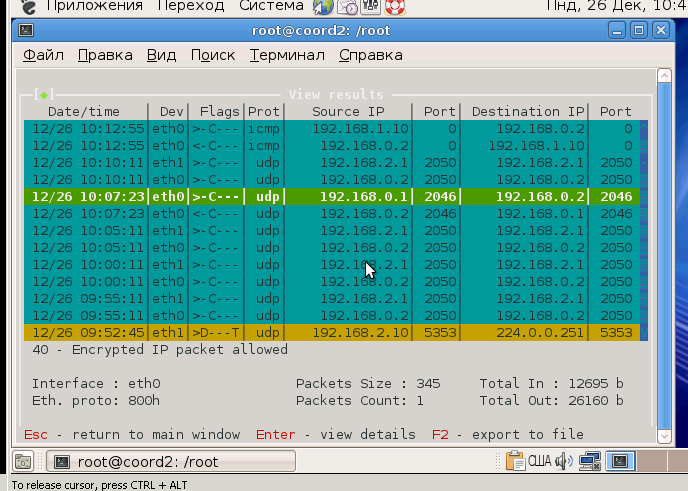
ip- , , ip-.
, . firewall.conf .
[forward] c ip-, :
rule= proto any from 172.16.xxx.xxx to any pass
rule= proto any from 192.168.xxx.xxx to any pass
rule= proto any from 10.1.xxx.xxx to any pass
rule= proto any from 10.255.xxx.xxx to any pass
rule= proto any from 192.168.xxx.xxx to any pass
rule= proto any from 10.1.xxx.xxx to any pass
rule= proto any from 10.255.xxx.xxx to any pass
, , ip- . .
, Linux , , .. . Linux. :
- Ctrl+O – / ;
- Alt+F1 – ;
- Ctrl+Q – ;
- Ctrl+T – ;
- F10 – ;
- F11 – .
Sources used
1. Wiki Alt Linux — www.altlinux.org
2. InfoTeCS — www.infotecs.ru/forum
3. VipNet Coordinator Linux — files.infotecs.ru/_dl/sess/vipnet_coordinator_linux/docs/ViPNet_Coordinator_Linux_docs.zip
4. Google — www.google.ru
5. !
Source: https://habr.com/ru/post/260413/
All Articles