HTML5 and drag & drop multiple objects
Dragging objects onto HTML5 won't surprise anyone anymore, but I'll still try to tell you about something interesting, namely, how to make a beautiful dragging of several objects using only HTML5.
On the page there is a set of elements of type A, which can be dragged one by one or by a group into an element of type B. The user must see if he is dragging one element or several. To drag one element is simple, just assign the
I have already prepared a page with dragging "one by one". Items with the
')
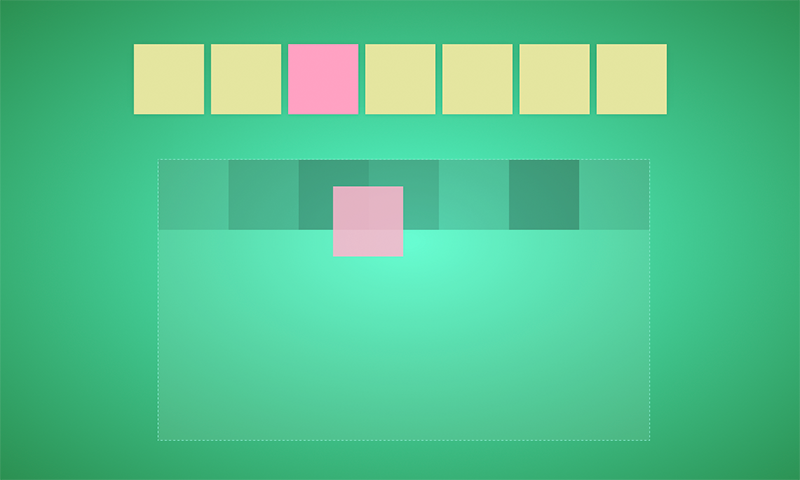
Demo of ugly drag and drop
To select, you need to click on the element, you can only drag selected elements, you can drag a few elements at a time.
Page structure:
Code:
If you tried to select and drag a few elements, you noticed that during this action only one is visually dragged. Now we fix it!
In the old manner, this is done simply by subscribing to mouse events and dragging a group of elements behind the mouse. With the advent of HTML5, a part of this routine can be eliminated by shifting the concern for animation onto the shoulders of the browser. Will work as well as in the case of a single element.
In order to get a “correct image” when dragging several elements, we use the
So, before starting the drag and drop, after we set the data for dragging
Using the
Add copies of selected items to
Final chord:
We use the
Demo of beautiful drag and drop
Sample code on github
On the page there is a set of elements of type A, which can be dragged one by one or by a group into an element of type B. The user must see if he is dragging one element or several. To drag one element is simple, just assign the
draggable property to true , for sure, everyone did it. I have already prepared a page with dragging "one by one". Items with the
item class can be selected and transferred to the item with the dropzone class ( dropzone by clicking on the box).')
Demo of ugly drag and drop
To select, you need to click on the element, you can only drag selected elements, you can drag a few elements at a time.
Page structure:
<div class="items-container"> <div class="items"> <div class="item"><span>a</span></div> <div class="item"><span>b</span></div> <div class="item"><span>c</span></div> <div class="item"><span>d</span></div> <div class="item"><span>e</span></div> <div class="item"><span>f</span></div> <div class="item"><span>g</span></div> </div> </div> <div class="dropzone-container"> <div class="dropzone"></div> </div> Code:
// jQuery "" , , HTML5 // jQuery, dataTransfer. jQuery.event.props.push('dataTransfer'); // . jQuery.event.props.push('pageX'); jQuery.event.props.push('pageY'); // . $('.item') // / , draggable. .on('click', function(e) { e.preventDefault(); $(this).toggleClass('selected'); this.draggable = $(this).hasClass('selected'); }) // , .on('dragstart', function(e) { var html = '', // , $selectedItems = $('.items .selected'); // HTML . $selectedItems.each(function() { html += this.outerHTML; }); // HTML . // . e.dataTransfer.setData('text/html', html); return true; }) .on('dragend', function(e) { resetUI(); }); // $('.dropzone') // dragover .on('dragenter', function(e) { $(this).addClass('dragover'); }) // dragover .on('dragleave', function(e) { $(this).removeClass('dragover'); }) .on('dragover', function(e) { // drop, dragover if (e.preventDefault) e.preventDefault(); return false; }) // drop .on('drop', function(e) { // HTML var html = e.dataTransfer.getData('text/html'); // HTML $(this).append(html); resetUI(); return true; }); function resetUI() { $('.selected').removeClass('selected').attr('draggable', false); $('.dragover').removeClass('dragover'); } If you tried to select and drag a few elements, you noticed that during this action only one is visually dragged. Now we fix it!
In the old manner, this is done simply by subscribing to mouse events and dragging a group of elements behind the mouse. With the advent of HTML5, a part of this routine can be eliminated by shifting the concern for animation onto the shoulders of the browser. Will work as well as in the case of a single element.
In order to get a “correct image” when dragging several elements, we use the
setDragImage method of the setDragImage object.function setDragImage(image, x, y)image - the item whose image will be used when dragging.x and y is the offset.So, before starting the drag and drop, after we set the data for dragging
e.dataTransfer.setData('text/html', html) , we need to collect the correct picture element for transfer to the setDragImage method. First we define the variables that will be needed for this: // , . var $draggedItem = $(e.currentTarget), draggedItemOffset = $draggedItem.offset(), // , . frame = getFrame($selectedItems), // , . dx = e.pageX - draggedItemOffset.left + (draggedItemOffset.left - frame.lx), dy = e.pageY - draggedItemOffset.top + (draggedItemOffset.top - frame.ly), // , image setDragImage. $image = $(document.createElement('div')); Using the
frame , set the desired size and coordinates of the picture element: $image.css({ position: 'absolute', // , dragstart. zIndex: -1, left: frame.lx, top: frame.ly, width: Math.abs(frame.lx - frame.rx), height: Math.abs(frame.ly - frame.ry) }); Add copies of selected items to
$image : $selectedItems.each(function(i, item) { var $item = $(item), $clone = $item.clone(), itemOffset = $item.offset(); // $image. $clone.css({ position: 'absolute', left: itemOffset.left - frame.lx, top: itemOffset.top - frame.ly }); $image.append($clone); }); Final chord:
// $image . $('body').append($image); // $image . e.dataTransfer.setDragImage($image.get(0), dx, dy); // $image 1 . , // setDragImage $image. window.setTimeout(function() { $image.remove(); }, 1); We use the
getFrame method to find a rectangle into which the selected elements fit: function getFrame($items) { var offset = $items.first().offset(), frame = { lx: offset.left, ly: offset.top, rx: offset.left, ry: offset.top }; $items.each(function() { var $this = $(this), offset = $this.offset(), width = $this.width(), height = $this.height(); if (offset.left < frame.lx) frame.lx = offset.left; if (offset.top < frame.ly) frame.ly = offset.top; if (offset.left + width > frame.rx) frame.rx = offset.left + width; if (offset.top + height > frame.ry) frame.ry = offset.top + height; }); return frame; } Demo of beautiful drag and drop
Sample code on github
Source: https://habr.com/ru/post/187590/
All Articles