Simple overlay of 2 images
This is an entertaining story about how one image overlaps another. If you were engaged in raster graphics, wrote games or graphic editors, you will hardly find something for yourself in the article. I hope everyone else will be interested to know that this task is not as trivial as it seems at first glance.
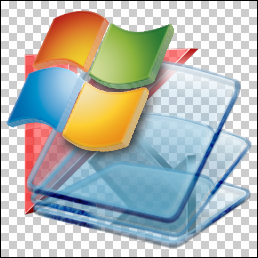
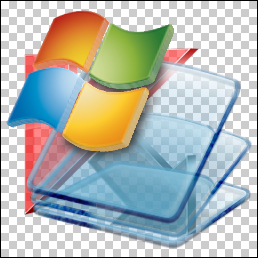
So, we have 2 pictures in the RGBA format (ie, 3 colors + alpha channel):


Note 1: The criterion for picking pictures was the presence of transparent, opaque and translucent areas. What is depicted on them is not so important.
Note 2: Pictures will look like they are visible in Photoshop, links lead to real pictures.
')
The task is to assemble a third of them, in the same RGBA format with the correct transparency and colors. This is how Photoshop copes with this, let's take this image as a reference:

Examples I will show on python using PIL .
So, the simplest code:
We mix both images using the alpha channel of the second one. At the same time, each component of each pixel of the resulting image (including the alpha channel) will be calculated as X 2 × a + X 1 × (1-a), where a is the alpha value for this pixel from the transferred alph2 channel im2.
The code gives the following result:

Immediately visible inconsistencies - in the place where the red check mark is overlapped by the second picture, it became even more transparent than on the original, although logic dictates that when one translucent object blocks the other, the result should be more opaque than both objects. This happened because, in addition to mixing colors, alpha channels are also mixed. The intensity of the second alpha-channel was approximately 0.25, the intensity of the first 0.5. We mixed them with the intensity of the second: 0.25 × 0.25 + 0.5 × (1-0.25) = 0.44.
If the background (first) picture were generally opaque, then after such a blending, translucent places would appear on it, which contradicts all the laws of physics.
Let's try to eliminate this effect by cleaning the alpha channel of the second image before mixing:
The result will be:

The transparency in the overlapping area became normal, but the shadow of the figure, which was barely noticeable on the original, turned into clearly visible black stripes. This happened because the overlay algorithm no longer takes into account the fact that the second image in this place is more intense than the first one (where does it get this data, because the second image no longer has an alpha channel), so it mixes colors honestly, from the transmitted alpha channel of the second image. And in the alphanal in this place the intensity is about 0.5. Because black, which is actually quite a bit, participates in equal proportion with blue.
But rather guessing, we better think about how real objects with such properties would look.
Imagine 2 translucent glass: one blue, the other red. Blue is closer than red. Then, the total opacity of both glasses is equal to the sum of the opacity of the glass nearest to us and the transparency of the near glass (ie, 1- ) multiplied by the far opacity: + (1- ) × .
What about color? More precisely, the interest is not the color itself, but the proportion of the color of the passing glass. It is equal to the opacity of the passing glass divided by the total opacity. Those. in general, the opacity value that is used to calculate colors is not equal to the opacity of the resulting pixel.
In this model, each glass is one pixel of the image. If you collect an image from them, you will get a more general conclusion - the alpha channel used to calculate the color of the resulting pixels is not equal to the alpha channel of the resulting image.
If you implement the “right” transparency with python tools, you’ll have something like this:
And, actually, the result:

It almost does not differ from the result created in Photoshop. By the way, if someone knows if it is possible to get the same result using PIL without pixel-by-pixel work with the image, let us know.
So, we have 2 pictures in the RGBA format (ie, 3 colors + alpha channel):


Note 1: The criterion for picking pictures was the presence of transparent, opaque and translucent areas. What is depicted on them is not so important.
Note 2: Pictures will look like they are visible in Photoshop, links lead to real pictures.
')
The task is to assemble a third of them, in the same RGBA format with the correct transparency and colors. This is how Photoshop copes with this, let's take this image as a reference:

Examples I will show on python using PIL .
So, the simplest code:
im1 = Image.open('im1.png') im2 = Image.open('im2.png') im1.paste(im2, (0,0), im2) # — , im1.save('r1.png') We mix both images using the alpha channel of the second one. At the same time, each component of each pixel of the resulting image (including the alpha channel) will be calculated as X 2 × a + X 1 × (1-a), where a is the alpha value for this pixel from the transferred alph2 channel im2.
The code gives the following result:

Immediately visible inconsistencies - in the place where the red check mark is overlapped by the second picture, it became even more transparent than on the original, although logic dictates that when one translucent object blocks the other, the result should be more opaque than both objects. This happened because, in addition to mixing colors, alpha channels are also mixed. The intensity of the second alpha-channel was approximately 0.25, the intensity of the first 0.5. We mixed them with the intensity of the second: 0.25 × 0.25 + 0.5 × (1-0.25) = 0.44.
If the background (first) picture were generally opaque, then after such a blending, translucent places would appear on it, which contradicts all the laws of physics.
Let's try to eliminate this effect by cleaning the alpha channel of the second image before mixing:
im1 = Image.open('im1.png') im2 = Image.open('im2.png') im1.paste(im2.convert('RGB'), (0,0), im2) im1.save('r2.png') The result will be:

The transparency in the overlapping area became normal, but the shadow of the figure, which was barely noticeable on the original, turned into clearly visible black stripes. This happened because the overlay algorithm no longer takes into account the fact that the second image in this place is more intense than the first one (where does it get this data, because the second image no longer has an alpha channel), so it mixes colors honestly, from the transmitted alpha channel of the second image. And in the alphanal in this place the intensity is about 0.5. Because black, which is actually quite a bit, participates in equal proportion with blue.
But rather guessing, we better think about how real objects with such properties would look.
Imagine 2 translucent glass: one blue, the other red. Blue is closer than red. Then, the total opacity of both glasses is equal to the sum of the opacity of the glass nearest to us and the transparency of the near glass (ie, 1- ) multiplied by the far opacity: + (1- ) × .
What about color? More precisely, the interest is not the color itself, but the proportion of the color of the passing glass. It is equal to the opacity of the passing glass divided by the total opacity. Those. in general, the opacity value that is used to calculate colors is not equal to the opacity of the resulting pixel.
In this model, each glass is one pixel of the image. If you collect an image from them, you will get a more general conclusion - the alpha channel used to calculate the color of the resulting pixels is not equal to the alpha channel of the resulting image.
If you implement the “right” transparency with python tools, you’ll have something like this:
def alpha_composite(background, image): # get alphachanels alpha = image.split()[-1] background_alpha = background.split()[-1] new_alpha = list(background_alpha.getdata()) new_blending = list(alpha.getdata()) for i in xrange(len(new_alpha)): alpha_pixel = new_blending[i] if alpha_pixel == 0: new_alpha[i] = 0 else: new_alpha[i] = alpha_pixel + (255 - alpha_pixel) * new_alpha[i] / 255 new_blending[i] = alpha_pixel * 255 / new_alpha[i] alpha.putdata(new_alpha) background_alpha.putdata(new_blending) del new_alpha del new_blending result = background.copy() result.paste(image, (0, 0), background_alpha) result.putalpha(alpha) return result im1 = Image.open('im1.png') im2 = Image.open('im2.png') alpha_composite(im1, im2).save('r3.png') And, actually, the result:

It almost does not differ from the result created in Photoshop. By the way, if someone knows if it is possible to get the same result using PIL without pixel-by-pixel work with the image, let us know.
Source: https://habr.com/ru/post/98743/
All Articles