Simple rss client on Android
A step-by-step guide to creating an RSS client on Android. Article for novice developers.
Android - the operating system for mobile devices from Google.
The system is very promising and dynamically developing. Basic development skills will not be superfluous.
Caution many screenshots!
1. Start
First you need to go to the official website and get acquainted with the capabilities of the latest version of Android 2.2. The site has a special section for developers . Here you can download all the necessary tools , find the installation instructions, instructions for creating the first application and help for packages and classes of the library.
2. Install SDK
')
The computer must have JDK version 5 or 6 installed. To develop for Android, you need to download and install the Android SDK , which has an Android emulator. Next you need to install Eclipse version 3.4 or 3.5. Lastly, you need to install the ADT plugin for Eclipse.
3. Creating an RSS client
For a basis I took the article Creating Rss Reader in Android . But there are errors in the article, and it’s impossible to get a working application right away. At my request, the author has posted a full working draft . But while the correspondence was going on, I myself corrected the mistakes and wrote my version of the program.
3.1. Creating a project
Launch Eclipse, select the menu File-> New-> Project. The New Project dialog starts, select the Android folder and the Android Project, click Next.

The New Android Project window opens. Fill in the field Project name: uRSS, Select the line Android 2.2 in the Build Target table. Next you need to fill in the project properties in the Properties section.
Application name: uRSS.
Package name: rembo.network.urss.
RSSactivity.
Min SDK Version: 8.
We click Next and in the next window we change nothing and click Finish.


All project is created.
3.2. Code writing
Eclipse will create a lot of folders and project files (it's easy to get confused).
The main files are:
src / rembo.network.rss / RSSactivity.java - file with the class RSSactivity, which sets the logic of the main window (here we write event handlers);
res / layout / main.xml - XML description of the main window (here we will create controls);
AndroidManifest.xml - the application properties description file (here we associate the XML description with the code and set the permission to work in the network).
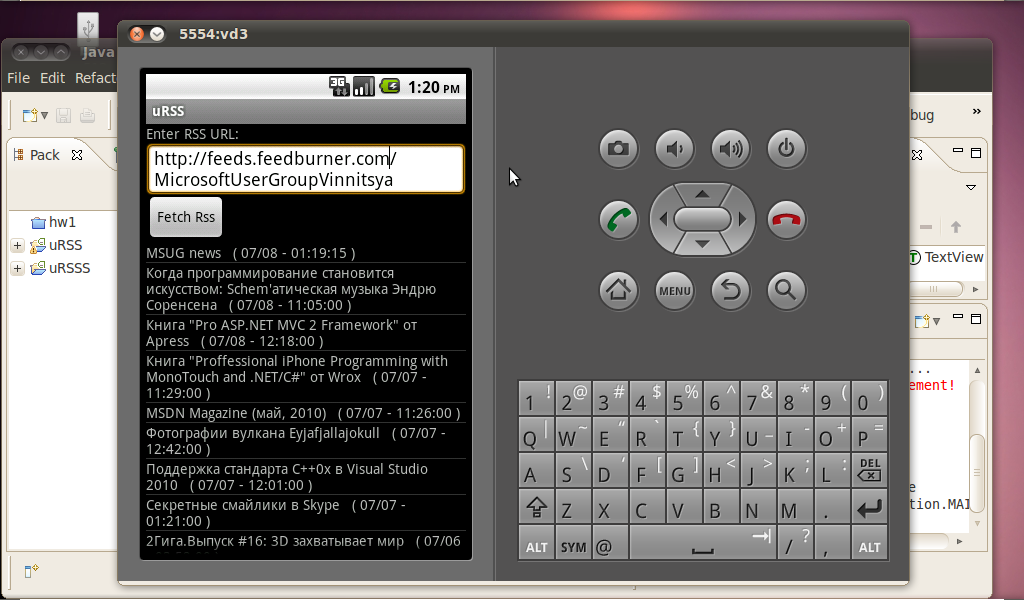
First, let's set the contents of the main window in the res / layout / main.xml file. The main window will be built on the basis of the container LinearLayout. It contains TextView, an EditText text field, a Button button, and a ListView. Please note that each element has android: id. This is the identifier by which the interface element can be contacted from the code.
For the list item you need to specify the content To do this, create the file res / layout / list_item.xml.
When you click on the list item, the news should open in a new window. Create a res / layout / rss_item_displayer.xml file for this window.
So, the interface is created. Now you need to write code. Create a new class RssItem in the file src / rembo.network.rss / RssItem.java. The class receives RSS content from the Internet.
Now we will create the RssItemDisplayer class in the src / rembo.network.rss / RssItemDisplayer.java file. He is responsible for the logic of the window, which shows the full text of the news. Notice how by the id of the control it is obtained in the code TextView titleTv = (TextView) findViewById (R.id.titleTextView);
Now we write the code for the class RSSactivity in the file src / rembo.network.rss / RSSactivity.java.java. He is responsible for the logic of the main window. Notice how event handlers are created to click on the button and on the list item fetchRss.setOnClickListener (new View.OnClickListener () ...
Stayed the final touch. You need to link the interface and code in the AndroidManifest.xml file and allow the application to access the Internet.
3.3. Launch
It's time to launch our application. But first you need to create a virtual machine. To do this in Eclipse go to the menu Window-> Android SDK and AVD Manager.
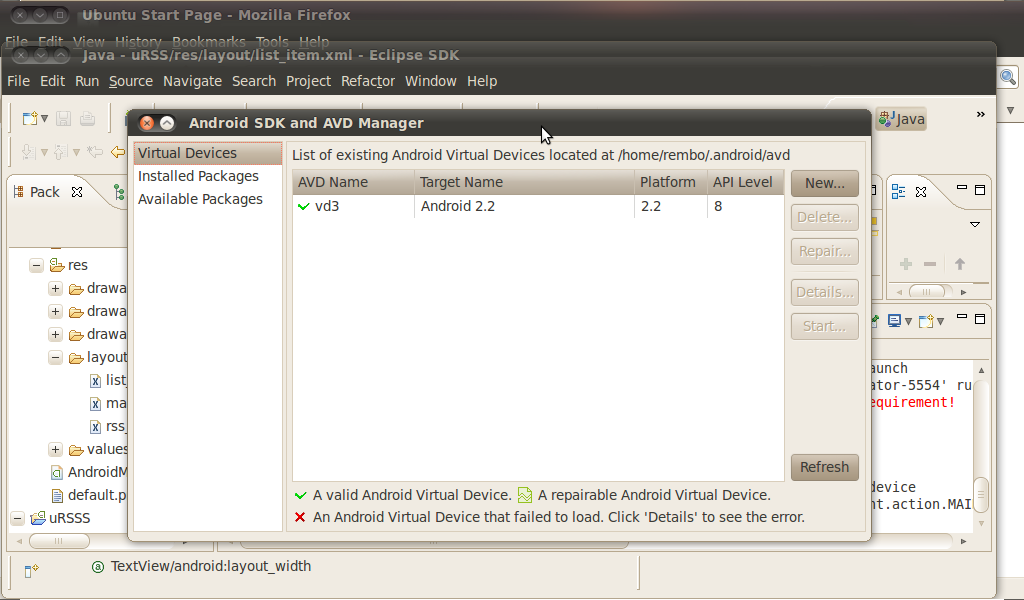
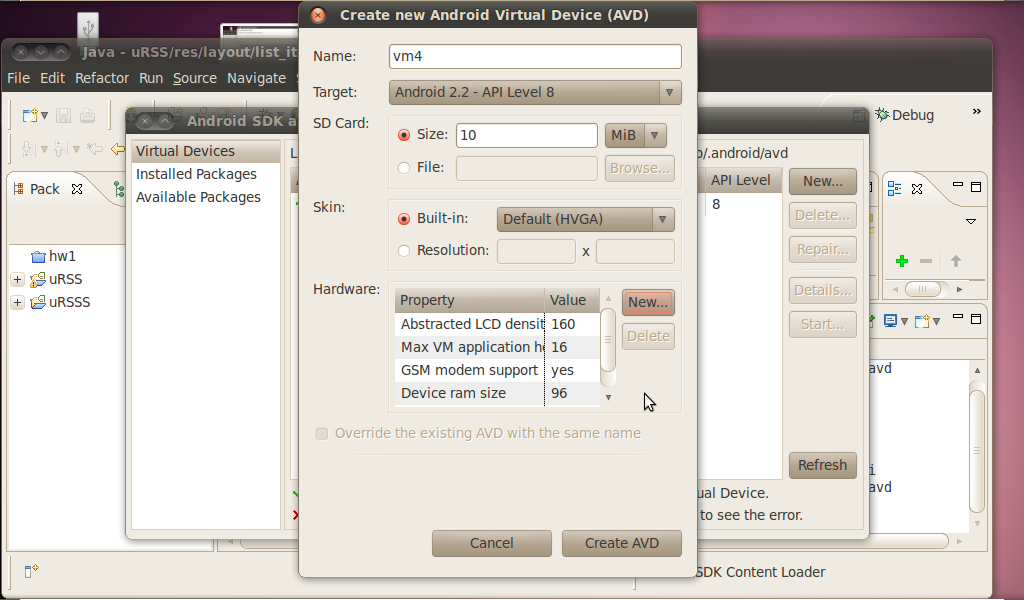
Click New and select the properties of the virtual machine. In the Hardware section, you must add GSM modem, support for Touchscreeen, Device ram size and Max VM application heap size (with this configuration, the device successfully connects to the Internet). We press Create AVD (here it is necessary to wait a little).
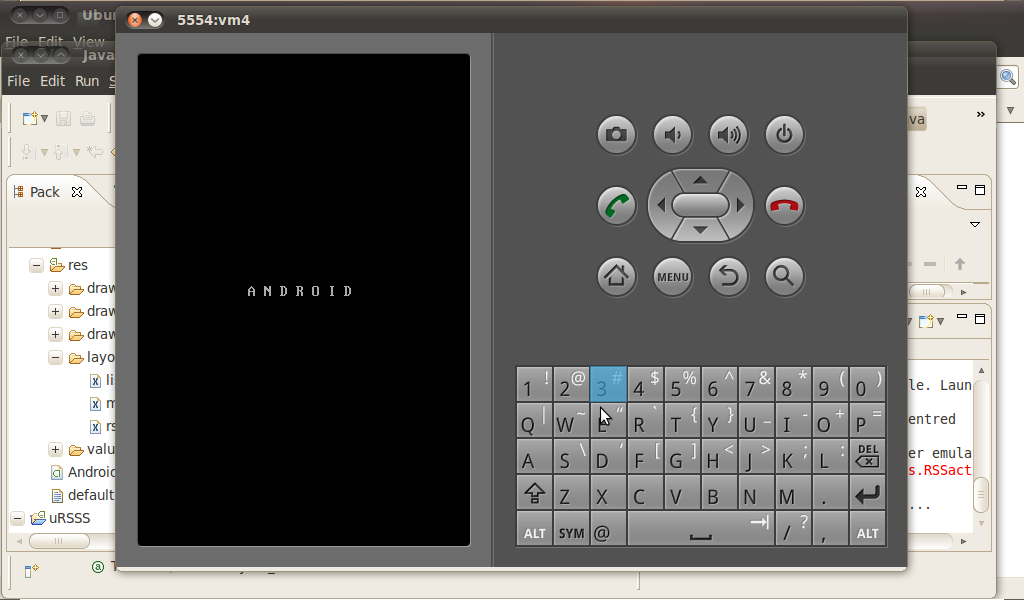
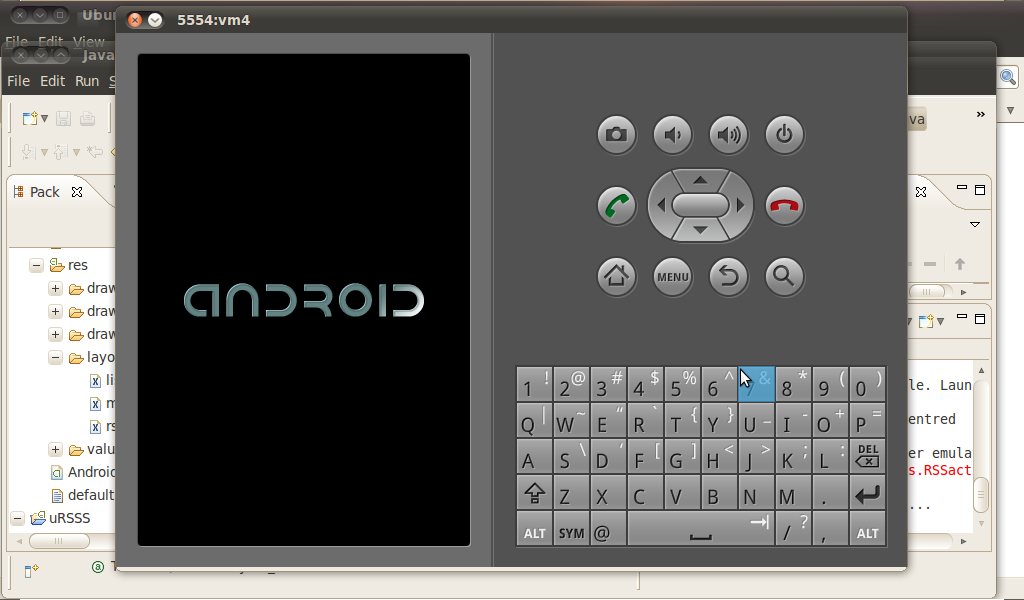
Click the start button and start the virtual machine. Here you need to be patient. You have to wait 10-20 minutes until the machine is loaded. Make sure the virtual device is connected to the Internet. If not, try to reboot or create a new car.
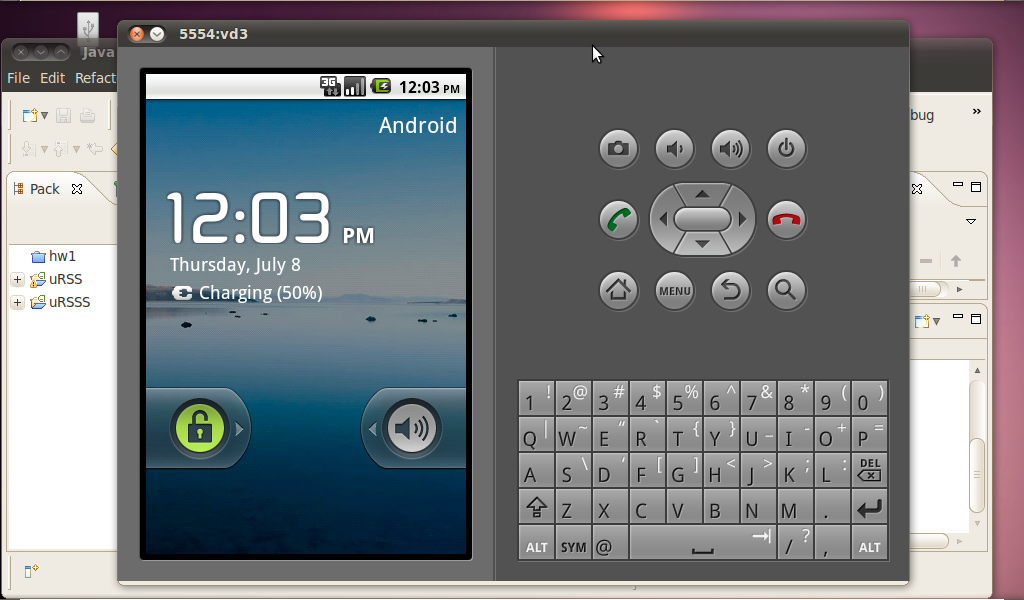
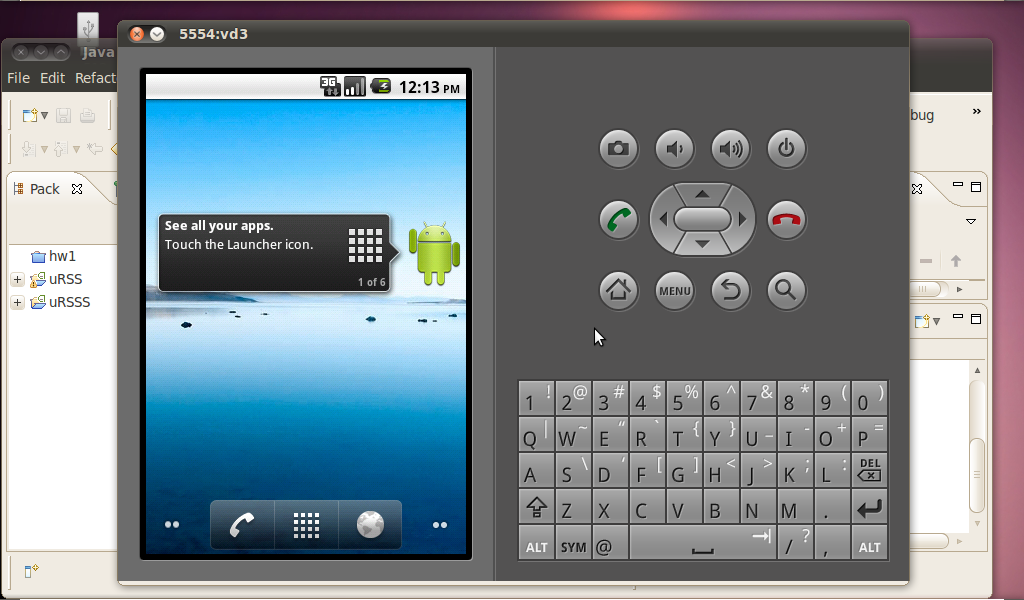
After starting the virtual machine, go to Eclipse and start the application (click Run). Again, you have to wait 5 minutes until the application is installed on the virtual machine and starts up. If the application does not start, then try to turn off the virtual machine and start the application (here you will have to wait a long time until the virtual machine starts up again).

Android - the operating system for mobile devices from Google.
The system is very promising and dynamically developing. Basic development skills will not be superfluous.
Caution many screenshots!
1. Start
First you need to go to the official website and get acquainted with the capabilities of the latest version of Android 2.2. The site has a special section for developers . Here you can download all the necessary tools , find the installation instructions, instructions for creating the first application and help for packages and classes of the library.
2. Install SDK
')
The computer must have JDK version 5 or 6 installed. To develop for Android, you need to download and install the Android SDK , which has an Android emulator. Next you need to install Eclipse version 3.4 or 3.5. Lastly, you need to install the ADT plugin for Eclipse.
3. Creating an RSS client
For a basis I took the article Creating Rss Reader in Android . But there are errors in the article, and it’s impossible to get a working application right away. At my request, the author has posted a full working draft . But while the correspondence was going on, I myself corrected the mistakes and wrote my version of the program.
3.1. Creating a project
Launch Eclipse, select the menu File-> New-> Project. The New Project dialog starts, select the Android folder and the Android Project, click Next.
The New Android Project window opens. Fill in the field Project name: uRSS, Select the line Android 2.2 in the Build Target table. Next you need to fill in the project properties in the Properties section.
Application name: uRSS.
Package name: rembo.network.urss.
RSSactivity.
Min SDK Version: 8.
We click Next and in the next window we change nothing and click Finish.
All project is created.
3.2. Code writing
Eclipse will create a lot of folders and project files (it's easy to get confused).
The main files are:
src / rembo.network.rss / RSSactivity.java - file with the class RSSactivity, which sets the logic of the main window (here we write event handlers);
res / layout / main.xml - XML description of the main window (here we will create controls);
AndroidManifest.xml - the application properties description file (here we associate the XML description with the code and set the permission to work in the network).
First, let's set the contents of the main window in the res / layout / main.xml file. The main window will be built on the basis of the container LinearLayout. It contains TextView, an EditText text field, a Button button, and a ListView. Please note that each element has android: id. This is the identifier by which the interface element can be contacted from the code.
<? xml version ="1.0" encoding ="utf-8" ? >
< LinearLayout xmlns:android ="http://schemas.android.com/apk/res/android"
android:orientation ="vertical"
android:layout_width ="fill_parent"
android:layout_height ="fill_parent"
>

< TextView
android:id ="@+id/label"
android:layout_width ="fill_parent"
android:layout_height ="wrap_content"
android:text ="Enter RSS URL:"
/>

< EditText
android:id ="@+id/rssURL"
android:layout_width ="fill_parent"
android:layout_height ="wrap_content"
android:background ="@android:drawable/editbox_background"
android:text ="http://feeds.feedburner.com/MicrosoftUserGroupVinnitsya"
/>

< Button
android:id ="@+id/fetchRss"
android:layout_width ="wrap_content"
android:layout_height ="wrap_content"
android:layout_marginRight ="10dip"
android:text ="Fetch Rss" />

< ListView
android:id ="@+id/rssListView"
android:layout_width ="fill_parent"
android:layout_height ="wrap_content" />
</ LinearLayout >

* This source code was highlighted with Source Code Highlighter .
For the list item you need to specify the content To do this, create the file res / layout / list_item.xml.
<? xml version ="1.0" encoding ="utf-8" ? >
< TextView
xmlns:android ="http://schemas.android.com/apk/res/android"
android:layout_width ="fill_parent"
android:layout_height ="fill_parent"
android:padding ="10dp"
android:textSize ="13sp"
android:autoLink ="all" >
</ TextView >

* This source code was highlighted with Source Code Highlighter .
When you click on the list item, the news should open in a new window. Create a res / layout / rss_item_displayer.xml file for this window.
<? xml version ="1.0" encoding ="utf-8" ? >
< LinearLayout
xmlns:android ="http://schemas.android.com/apk/res/android"
android:layout_width ="fill_parent"
android:layout_height ="fill_parent"
android:orientation ="vertical"
>

< TextView
android:id ="@+id/titleTextView"
android:text ="Title:"
android:layout_width ="fill_parent"
android:layout_height ="wrap_content"
android:padding ="10dp"
android:textSize ="13sp"
android:autoLink ="all"
/>

< TextView
android:id ="@+id/contentTextView"
android:text ="Content:"
android:layout_width ="fill_parent"
android:layout_height ="wrap_content"
android:textSize ="13sp"
android:autoLink ="all"
/>

</ LinearLayout >

* This source code was highlighted with Source Code Highlighter .
So, the interface is created. Now you need to write code. Create a new class RssItem in the file src / rembo.network.rss / RssItem.java. The class receives RSS content from the Internet.
package rembo.network.urss;
import java.util.*;
import java.text.*;
import java.net.*;
import java.io.*;
import javax.xml.parsers.*;
import org.w3c.dom.*;

public class RssItem {

private String title;
private String description;
private Date pubDate;
private String link;

public RssItem( String title, String description, Date pubDate, String link) {
this .title = title;
this .description = description;
this .pubDate = pubDate;
this .link = link;
}

public String getTitle()
{
return this .title;
}

public String getLink()
{
return this .link;
}

public String getDescription()
{
return this .description;
}

public Date getPubDate()
{
return this .pubDate;
}

@Override
public String toString() {

SimpleDateFormat sdf = new SimpleDateFormat( "MM/dd - hh:mm:ss" );

String result = getTitle() + " ( " + sdf.format( this .getPubDate()) + " )" ;
return result;
}

public static ArrayList <RssItem> getRssItems( String feedUrl) {

ArrayList <RssItem> rssItems = new ArrayList <RssItem>();

RssItem rssItemT = new RssItem( "MSUG news" , "Best IT news." ,
new Date(), "http://msug.vn.ua/" );

rssItems.add(rssItemT);

try {
//open an URL connection make GET to the server and
//take xml RSS data
URL url = new URL(feedUrl);
HttpURLConnection conn = (HttpURLConnection) url.openConnection();

if (conn.getResponseCode() == HttpURLConnection.HTTP_OK) {
InputStream is = conn.getInputStream();

//DocumentBuilderFactory, DocumentBuilder are used for
//xml parsing
DocumentBuilderFactory dbf = DocumentBuilderFactory
.newInstance();
DocumentBuilder db = dbf.newDocumentBuilder();

//using db (Document Builder) parse xml data and assign
//it to Element
Document document = db.parse( is );
Element element = document.getDocumentElement();

//take rss nodes to NodeList
NodeList nodeList = element.getElementsByTagName( "item" );

if (nodeList.getLength() > 0) {
for ( int i = 0; i < nodeList.getLength(); i++) {

//take each entry (corresponds to <item></item> tags in
//xml data

Element entry = (Element) nodeList.item(i);

Element _titleE = (Element) entry.getElementsByTagName(
"title" ).item(0);
Element _descriptionE = (Element) entry
.getElementsByTagName( "description" ).item(0);
Element _pubDateE = (Element) entry
.getElementsByTagName( "pubDate" ).item(0);
Element _linkE = (Element) entry.getElementsByTagName(
"link" ).item(0);

String _title = _titleE.getFirstChild().getNodeValue();
String _description = _descriptionE.getFirstChild().getNodeValue();
Date _pubDate = new Date(_pubDateE.getFirstChild().getNodeValue());
String _link = _linkE.getFirstChild().getNodeValue();

//create RssItemObject and add it to the ArrayList
RssItem rssItem = new RssItem(_title, _description,
_pubDate, _link);

rssItems.add(rssItem);
}
}

}
} catch (Exception e) {
e.printStackTrace();
}

return rssItems;
}

}

* This source code was highlighted with Source Code Highlighter .
Now we will create the RssItemDisplayer class in the src / rembo.network.rss / RssItemDisplayer.java file. He is responsible for the logic of the window, which shows the full text of the news. Notice how by the id of the control it is obtained in the code TextView titleTv = (TextView) findViewById (R.id.titleTextView);
package rembo.network.urss;
import android.app.Activity;
import android.os.Bundle;
import android.widget.*;
import java.util.*;
import java.text.*;
import java.net.*;
import java.io.*;
import javax.xml.parsers.*;
import org.w3c.dom.*;
import android.view.*;
public class RssItemDisplayer extends Activity {
@Override
public void onCreate(Bundle savedInstanceState) {
super.onCreate(savedInstanceState);
setContentView(R.layout.rss_item_displayer);

RssItem selectedRssItem = RSSactivity.selectedRssItem;
//Bundle extras = getIntent().getExtras();
TextView titleTv = (TextView)findViewById(R.id.titleTextView);
TextView contentTv = (TextView)findViewById(R.id.contentTextView);

String title = "" ;
SimpleDateFormat sdf = new SimpleDateFormat( "MM/dd - hh:mm:ss" );
title = "\n" + selectedRssItem.getTitle() + " ( "
+ sdf.format(selectedRssItem.getPubDate()) + " )\n\n" ;

String content = "" ;
content += selectedRssItem.getDescription() + "\n"
+ selectedRssItem.getLink();

titleTv.setText(title);
contentTv.setText(content);
}
}

* This source code was highlighted with Source Code Highlighter .
Now we write the code for the class RSSactivity in the file src / rembo.network.rss / RSSactivity.java.java. He is responsible for the logic of the main window. Notice how event handlers are created to click on the button and on the list item fetchRss.setOnClickListener (new View.OnClickListener () ...
package rembo.network.urss;

import android.app.Activity;
import android.os.Bundle;
import android.widget.*;
import java.util.*;
import java.text.*;
import java.net.*;
import java.io.*;
import javax.xml.parsers.*;
import org.w3c.dom.*;
import android.view.*;
import android.view.View;
import android.widget.*;
import android.content.*;

public class RSSactivity extends Activity {

public static RssItem selectedRssItem = null ;
String feedUrl = "" ;
ListView rssListView = null ;
ArrayList <RssItem> rssItems = new ArrayList <RssItem>();
ArrayAdapter<RssItem> aa = null ;


/** Called when the activity is first created. */
@Override
public void onCreate(Bundle savedInstanceState) {
super.onCreate(savedInstanceState);
setContentView(R.layout.main);

// get textview from our layout.xml
final TextView rssURLTV = (TextView) findViewById(R.id.rssURL);

// get button from layout.xml
Button fetchRss = (Button) findViewById(R.id.fetchRss);

// define the action that will be executed when the button is clicked.
fetchRss.setOnClickListener( new View.OnClickListener() {

//@Override
public void onClick(View v) {
feedUrl = rssURLTV.getText().toString();
//TextView TVtitle=(TextView)findViewById(R.id.label);
//CharSequence cs="fetching";
//TVtitle.setText(cs);
aa.notifyDataSetChanged();
refressRssList();
//cs="Feed:";
//TVtitle.setText(cs);
}
});

// get the listview from layout.xml
rssListView = (ListView) findViewById(R.id.rssListView);
// here we specify what to execute when individual list items clicked
rssListView.setOnItemClickListener( new AdapterView.OnItemClickListener() {

//@Override
public void onItemClick(AdapterView<?> av, View view, int index,
long arg3) {
selectedRssItem = rssItems. get (index);

// we call the other activity that shows a single rss item in
// one page
Intent intent = new Intent(
"rembo.network.urss.displayRssItem" );
startActivity(intent);
}
});

//adapters are used to populate list. they take a collection,
//a view (in our example R.layout.list_item
aa = new ArrayAdapter<RssItem>( this , R.layout.list_item, rssItems);
//here we bind array adapter to the list
rssListView.setAdapter(aa);
feedUrl = rssURLTV.getText().toString();
refressRssList();
}

private void refressRssList() {

ArrayList <RssItem> newItems = RssItem.getRssItems(feedUrl);

rssItems.clear();
rssItems.addAll(newItems);

//TextView TVtitle=(TextView)findViewById(R.id.label);
//CharSequence cs="0";
//if(newItems.size()>0) cs="is 1";
//if(newItems.size()>5) cs="is 5";
///TVtitle.setText(cs);

aa.notifyDataSetChanged();
}

}

* This source code was highlighted with Source Code Highlighter .
Stayed the final touch. You need to link the interface and code in the AndroidManifest.xml file and allow the application to access the Internet.
<? xml version ="1.0" encoding ="utf-8" ? >
< manifest xmlns:android ="http://schemas.android.com/apk/res/android"
package ="rembo.network.urss"
android:versionCode ="1"
android:versionName ="1.0" >
< application android:icon ="@drawable/icon" android:label ="@string/app_name" >
< activity android:name =".RSSactivity"
android:label ="@string/app_name" >
< intent-filter >
< action android:name ="android.intent.action.MAIN" />
< category android:name ="android.intent.category.LAUNCHER" />
</ intent-filter >
</ activity >
< activity android:name =".RssItemDisplayer" android:label ="Display Rss Item" >
< intent-filter >
< action android:name ="rembo.network.urss.displayRssItem" />
< category android:name ="android.intent.category.DEFAULT" ></ category >
</ intent-filter >
</ activity >


</ application >
< uses-permission android:name ="android.permission.INTERNET" />

</ manifest >

* This source code was highlighted with Source Code Highlighter .
3.3. Launch
It's time to launch our application. But first you need to create a virtual machine. To do this in Eclipse go to the menu Window-> Android SDK and AVD Manager.
Click New and select the properties of the virtual machine. In the Hardware section, you must add GSM modem, support for Touchscreeen, Device ram size and Max VM application heap size (with this configuration, the device successfully connects to the Internet). We press Create AVD (here it is necessary to wait a little).
Click the start button and start the virtual machine. Here you need to be patient. You have to wait 10-20 minutes until the machine is loaded. Make sure the virtual device is connected to the Internet. If not, try to reboot or create a new car.
After starting the virtual machine, go to Eclipse and start the application (click Run). Again, you have to wait 5 minutes until the application is installed on the virtual machine and starts up. If the application does not start, then try to turn off the virtual machine and start the application (here you will have to wait a long time until the virtual machine starts up again).
Source: https://habr.com/ru/post/98704/
All Articles