How to install Ubuntu on your Nexus One
This guide is for those who want to install Ubuntu as a subsystem on their Nexus One or any other Android device (with open root rights, of course). I tried to make it as simple as possible so that no one has any questions.
As you can see, I used Nexus One with root rights. On other Android devices, the installation process may differ, but only slightly. In the end, if you don’t try, you don’t know;)
I’m also working on launching Ubuntu on my HTC Evo 4G and will post a launch guide a bit later on HTCEvoHacks.com
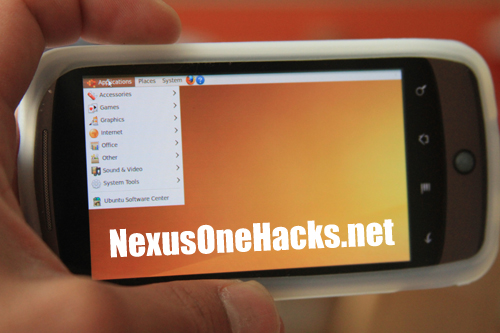
You can also try running Ubuntu as the main system on a Nexus One or other Android device, but this will most likely mean that the device cannot be used as a phone, and the camera may stop working. The most practical would be to run Ubuntu on top of Android, which I will show.
Installing Ubuntu will in no way affect Android. Ubuntu will run in the background, as an Android VNC application.
Why do I need to install Ubuntu over Android? And then, that you can run Linux applications on your phone! For example, it can be useful for programmers - hardly anyone will compile x86 applications for Android, but under Ubuntu it is quite possible. And if you wish, you can turn the phone into a compact web server.
And there are no reasons why you need to install Ubuntu on Nexus One, so you can experiment with other operating systems and devices. Just keep in mind that most Android devices use ARM processors, which means that they cannot run systems for x86 or x86-64 platforms.
Translator's note: I did not translate individual pieces of the article, such as “what is chroot?”. I think this is understandable to everyone.
')
So, how do you install Ubuntu on Android?
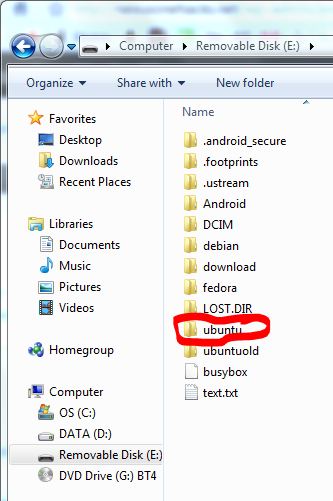
First of all, download ubuntu.zip ( from here or from here ) and unpack it.
1. You will need root rights on your device. If you do not know what it is and how to get it, google a little (for Nexus One this is described here ).
2. You will need to install the latest version of Busybox in this guide .
3. You will need an Android SDK, which you can download from here .
Copy the files from the archive to the phone's memory card in the “ubuntu” folder, and then unmount the memory card on the device (Turn off USB storage).
4. Make sure that the device has USB debugging enabled (settings -> applications -> development), and the animal itself is connected to the computer via USB.
5. Now we need to start the ADB console. Open the directory with the Android SDK in the console, go to the tools directory and execute the "adb shell" command (or "sudo ./adb shell" if you have Linux). If you saw the # symbol, then you did everything right.
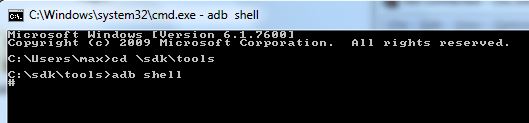
6. Enter the “su” command to enter root mode. If it curses and displays an error, it means that you still have not received the rights of the root on your device and you need to google on this topic.
7. Using the “cd / sdcard / ubuntu” command, go to our Ubuntu folder and start the installation with the “sh ./ubuntu.sh” command.
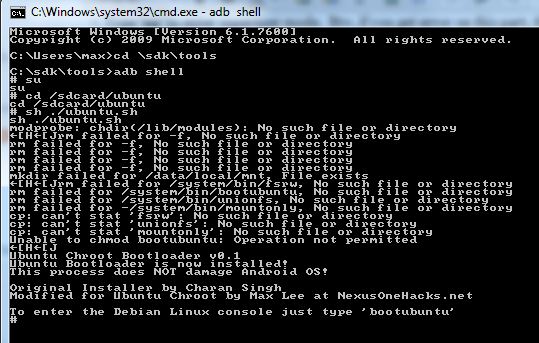
8. When the program confirms the work and you are presented with an empty line with a # sign at the beginning, execute the “bootubuntu” command to start Ubuntu.

If you see a line like “root @ localhost: / #”, then you did everything right and started Ubuntu! And if something went wrong and you brought a whole bunch of errors, then do not worry - I had two days in a row, so you are not alone. Just try to repeat all the actions starting from step 5. However, if you don’t have a Nexus One, it may not work (for example, I still cannot get Ubuntu on my HTC Evo 4G).
How to run X11
In general, I prefer the command line, because the GUI is eating too much memory. But the GUI allows the use of graphical applications, so we will run it.
9. First of all, install Android VNC Viewer (you can download it here ). If suddenly you do not know how to install apk applications, then use the Installer program from the market.
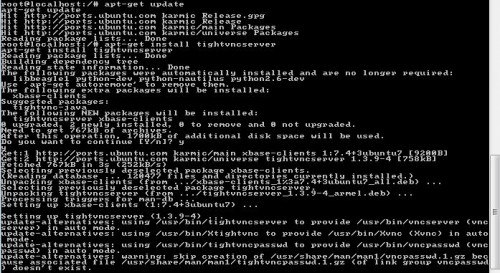
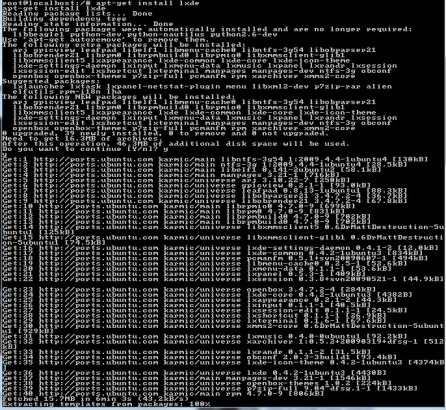
10. For Ubuntu, you also need to install a couple of programs (via the terminal):
apt-get update
apt-get install tightvncserver lxde
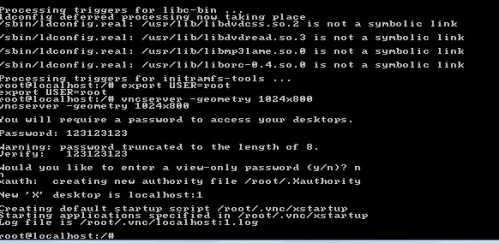
11. Configure the Ubuntu graphics mode settings (also via the terminal):
export USER=root
vncserver -geometry 1024x800
Screen resolution you can specify any other.
When you are asked for a password, you can specify which one you want, it will only be needed to connect to the Ubuntu desktop.
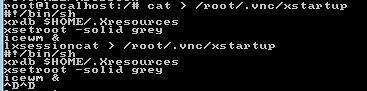
12. Now we just need to write this:
cat > /root/.vnc/xstartup
#!/bin/sh
xrdb $HOME/.Xresources
xsetroot -solid grey
icewm &
lxsession
Then press Ctrl-D twice and Enter once.
13. On the device, open the Android VNC application. In it write your password (which you wrote in step 11) and specify port 5901.
14. Poke the Connect button and voila! Before you desktop Ubuntu :)
15. In order to be able to launch the desktop without additional manipulations with the console, execute these commands in the terminal:
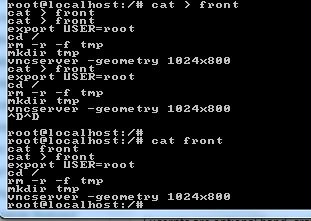
cat > front
export USER=root
cd /
rm -r -f tmp
mkdir tmp
cd /
vncserver -geometry 1024x800
Permission we specify again any one you like, and after running, press Ctrl-D twice and Enter once.
After that, execute two more commands:
cat front /root/.bashrc > temp
cp temp /root/.bashrc
That's it, now the Ubuntu desktop connection will always be available if Ubuntu is running.
How to run Ubuntu next time
In the terminal emulator for Android, write this:
su
bootubuntu
If you have problems downloading
If you have any problems downloading Ubuntu, then try downloading the updated bootubuntu file and executing these commands via the ADB console to install it:
su
cd /sdcard/ubuntu
sh ./ubuntu.sh
Then try running Ubuntu.
Thank you
Thanks to developers with XDA Developers for the image of Ubuntu ARM for HTC HD2 .
Thank you so much AndroidFanatic for explaining how to run X11 through VNC.
And thanks to Saurik (Jay Freeman) for the Debian G1 script that helped launch Ubuntu on the Nexus One.
Source: https://habr.com/ru/post/98592/
All Articles