When you need a cool 2. Vane active cooling
After reading " When you need coolness, " I remembered my long-standing idea, which the hands did not reach.
The idea is banal, it has been in the head for a long time, but now it's summer. And now, it's time to implement it.
For the manufacture we need:
')
The first thing to do is find out what size the hole is - the vent window or, perhaps, the chimney, ventilation. And then go to the store and buy fans. In our age of globalization and standardization, spit once again - stumble upon window vents of various sizes. In order not to get upset later, it is better to measure the window in advance, relying also on the fact that apart from the fans, a frame should enter the window window, which in the case of foam plastic is better not to do very thin.
I decided to ask in advance and downloaded the price of a local store:
The choice fell on one of the cheapest, at the same time overall fans. Naturally, an option with bearings. The trip to the store was a success and I began to prepare the fans for their purpose.
Here I will advise you not to buy cheap fans with lighting. Maybe it is beautiful, but in practice it is not enough light and sense from them. They rotate more slowly than their fellows.
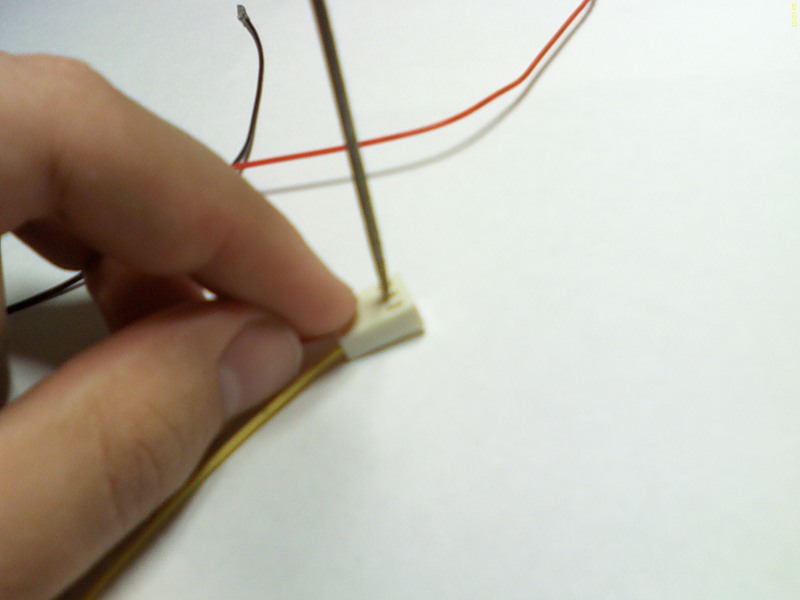
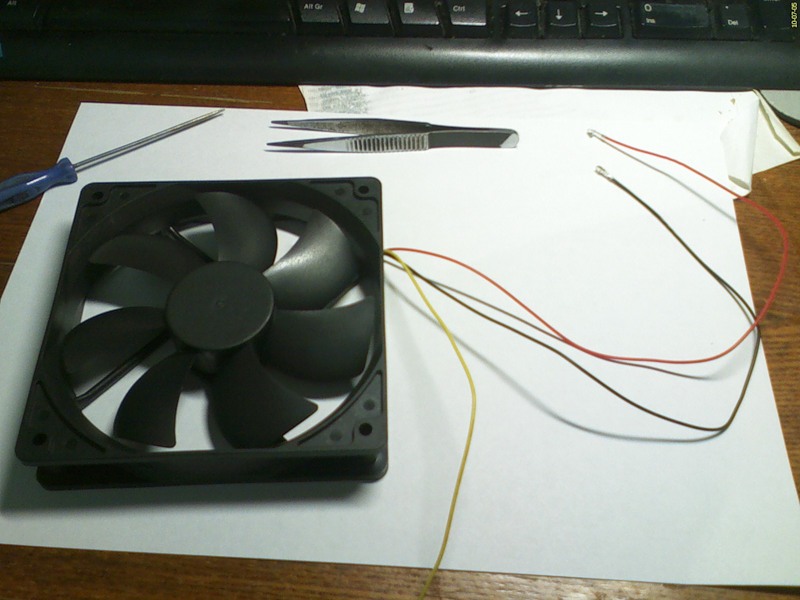
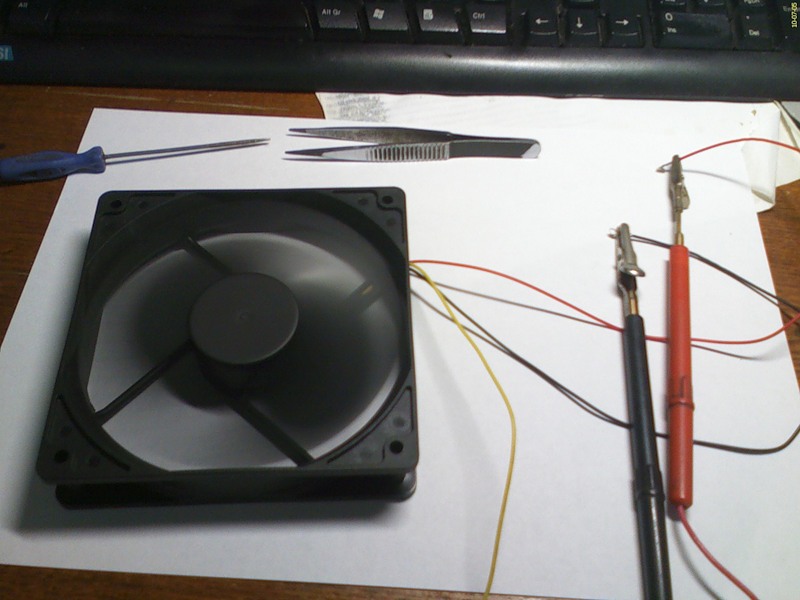
For a start, it was necessary to deal with the wires. There are two and a half approaches:
I am not a barbarian, but I don’t particularly strive for the elegance of the design, so I chose the second option.
Check the fan. My fan was designed for 12 volts, exactly what I gave him.
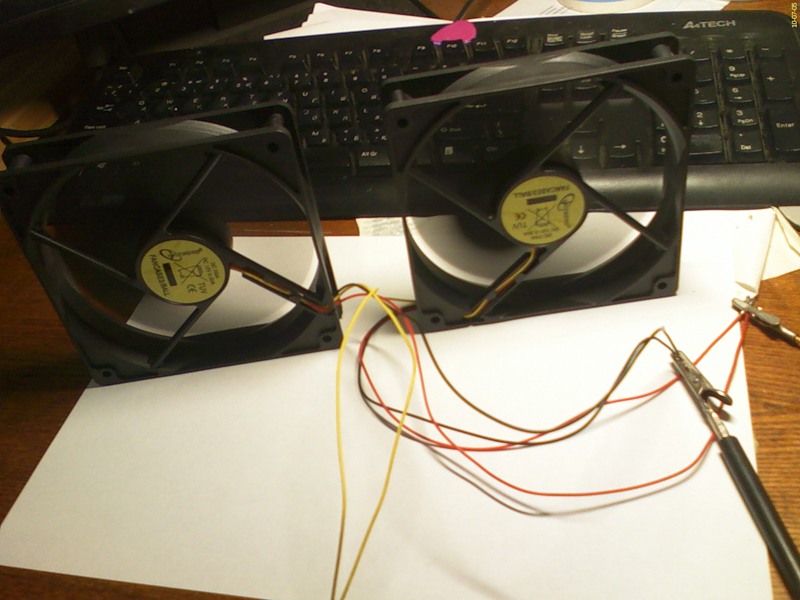
After checking the two fans on the table did not want to do more :) It was already cool. But it was also stupid to stop there, because there were still two coolers, and the air was fresh outside.
For installation, the best available material was chosen - a piece of foam from a box of some household appliances.
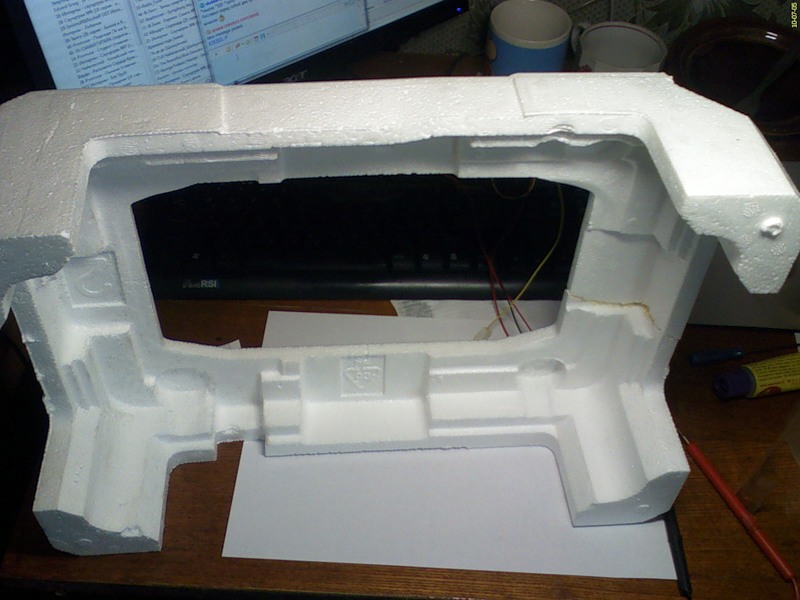
It turned out to be slightly broken, it had to be glued.
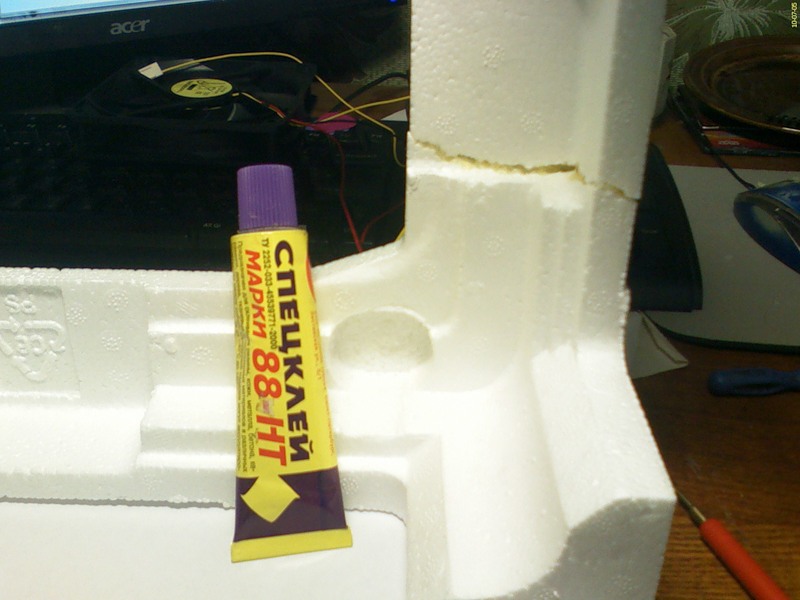
As it turned out, this glue also dissolves the foam, so it bonded well, almost melted. The effect was similar to dichloroethane, which is convenient to use in case of plastic fracture.
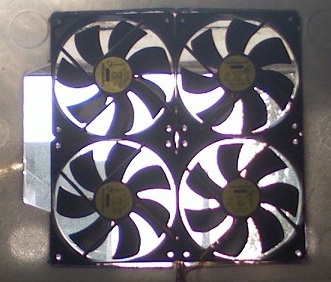
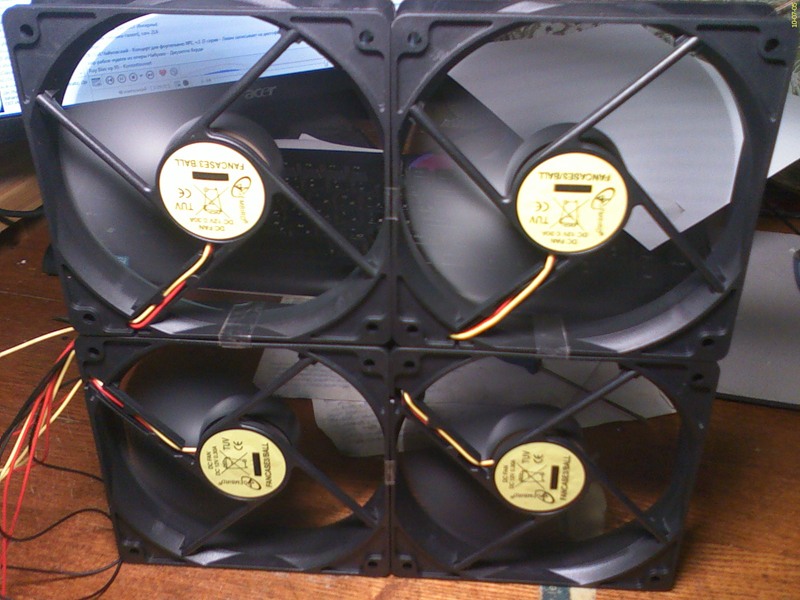
Next, the fans need to be interconnected. I wanted to connect them with elastic bands, but they were not found. I had to use scotch tape. It is also possible to fasten the coolers with staples in their mounting holes, you can fasten them with screws in different places of the rail, in case it is not made of foam plastic. Many options - you choose. I used scotch (later I just found black elastic tape) and connected the fans in pairs, after which I connected the two blocks into one.

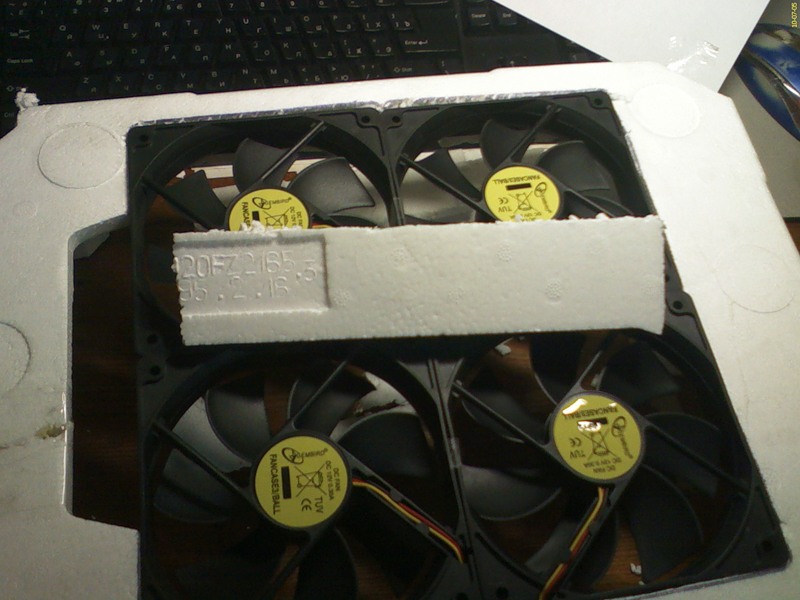
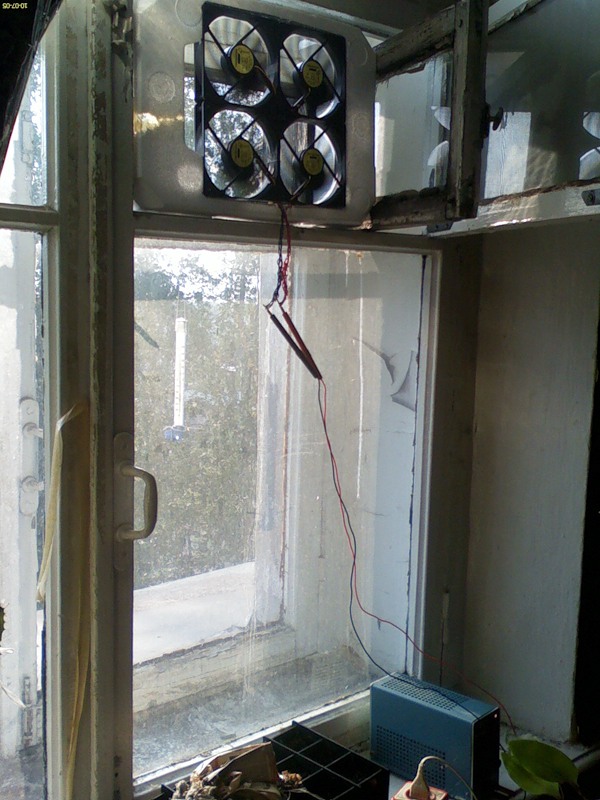
Next, I marked the contour of the fan block on the foam plastic plate with a marker for the discs and cut it out. Cut, of course, is better already than expected. Trim so that the fans can always enter, and if you overdo it, they will fall out. They sat down so tightly with me that I decided not to fasten them.

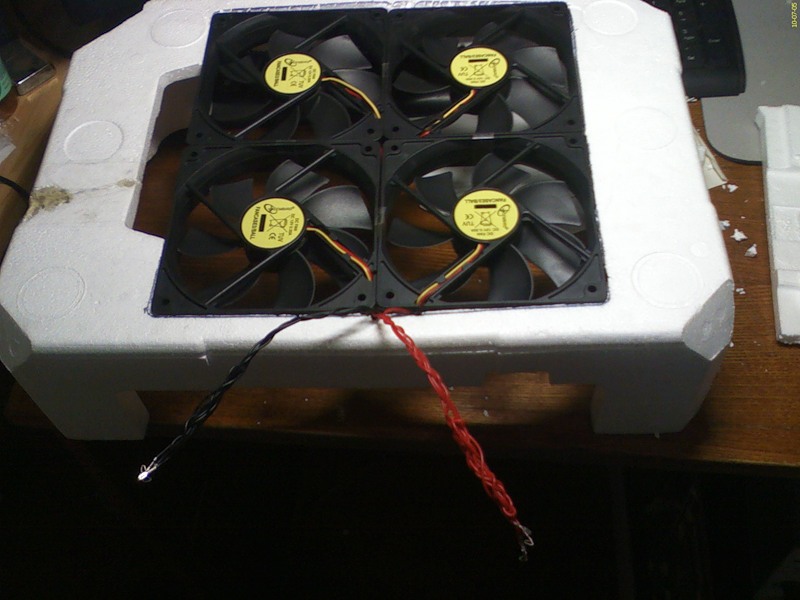
Once done, it will only remove the wires. I wove the black and red wires into pigtails, and put the yellow ones inside the frame, so as not to interfere. In the same place, there were also plugs inside, which can be, if you need to return to the wires and use coolers for their intended purpose.
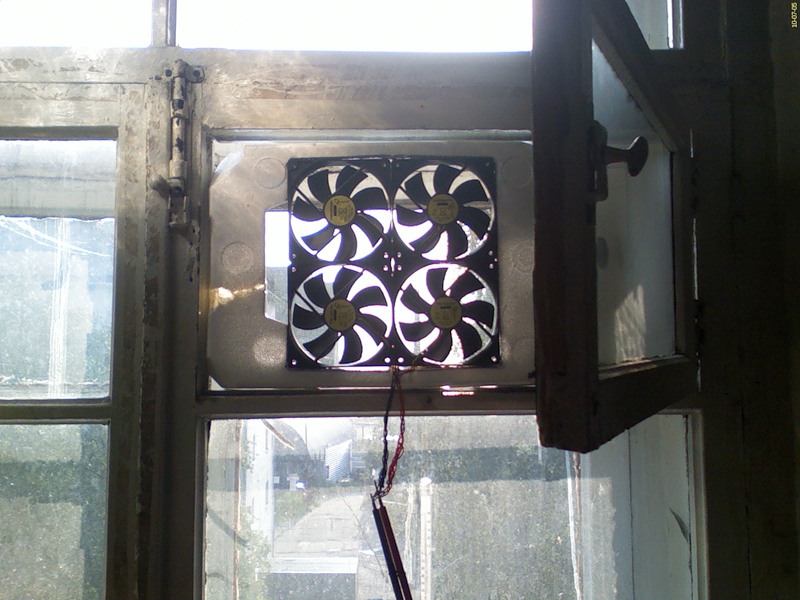
Mount the fan in the window, connect to the power supply and enjoy the fresh air!
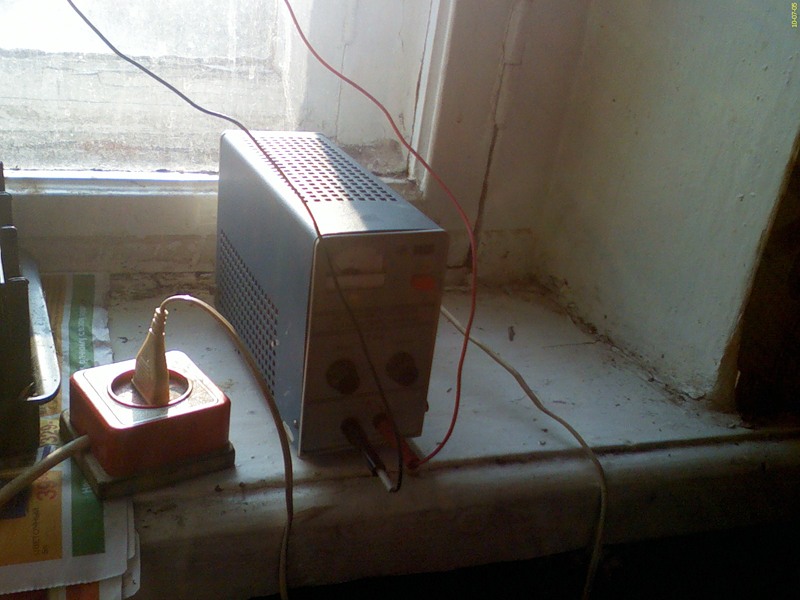
You can power the whole thing from the computer's power supply or from another power supply. In my case, it was a Soviet 15 volt power supply with a stabilizer.
Will only improve the device to taste:
Fresh air to you!
The idea is banal, it has been in the head for a long time, but now it's summer. And now, it's time to implement it.
For the manufacture we need:
- Plank from any material, whether it be a cardboard, polyfoam or a dural sheet.
- 2-4 coolers to taste
- Fastener
- Wires
')
The first thing to do is find out what size the hole is - the vent window or, perhaps, the chimney, ventilation. And then go to the store and buy fans. In our age of globalization and standardization, spit once again - stumble upon window vents of various sizes. In order not to get upset later, it is better to measure the window in advance, relying also on the fact that apart from the fans, a frame should enter the window window, which in the case of foam plastic is better not to do very thin.
I decided to ask in advance and downloaded the price of a local store:
The choice fell on one of the cheapest, at the same time overall fans. Naturally, an option with bearings. The trip to the store was a success and I began to prepare the fans for their purpose.
Here I will advise you not to buy cheap fans with lighting. Maybe it is beautiful, but in practice it is not enough light and sense from them. They rotate more slowly than their fellows.
For a start, it was necessary to deal with the wires. There are two and a half approaches:
- Barbaric. The wires are cut off, soldered in one pile. Further use of coolers for their intended purpose in the computer is difficult, at least you need to mount the plug back.
- Poluvarsky. From the plugs neatly removed need wires (and you can and everything, but I left the plugs in place, so as not to lose). Further use in the computer occurs without problems, you just need to return the wires to their place in the connector.
- Elegant. Four (or how many fans do you have?) Connectors are installed on the frame; they are powered in parallel. They include coolers. The most time consuming and requires the installation of connectors, connectors themselves and soldering.
I am not a barbarian, but I don’t particularly strive for the elegance of the design, so I chose the second option.
Check the fan. My fan was designed for 12 volts, exactly what I gave him.
After checking the two fans on the table did not want to do more :) It was already cool. But it was also stupid to stop there, because there were still two coolers, and the air was fresh outside.
For installation, the best available material was chosen - a piece of foam from a box of some household appliances.
It turned out to be slightly broken, it had to be glued.
As it turned out, this glue also dissolves the foam, so it bonded well, almost melted. The effect was similar to dichloroethane, which is convenient to use in case of plastic fracture.
Next, the fans need to be interconnected. I wanted to connect them with elastic bands, but they were not found. I had to use scotch tape. It is also possible to fasten the coolers with staples in their mounting holes, you can fasten them with screws in different places of the rail, in case it is not made of foam plastic. Many options - you choose. I used scotch (later I just found black elastic tape) and connected the fans in pairs, after which I connected the two blocks into one.
Next, I marked the contour of the fan block on the foam plastic plate with a marker for the discs and cut it out. Cut, of course, is better already than expected. Trim so that the fans can always enter, and if you overdo it, they will fall out. They sat down so tightly with me that I decided not to fasten them.
Once done, it will only remove the wires. I wove the black and red wires into pigtails, and put the yellow ones inside the frame, so as not to interfere. In the same place, there were also plugs inside, which can be, if you need to return to the wires and use coolers for their intended purpose.
Mount the fan in the window, connect to the power supply and enjoy the fresh air!
You can power the whole thing from the computer's power supply or from another power supply. In my case, it was a Soviet 15 volt power supply with a stabilizer.
Will only improve the device to taste:
- Add fasteners to the window
- Make your converter to work from the outlet, it is possible to embed in the frame
- Add switch
- Any other upgrade that came to mind
Fresh air to you!
Source: https://habr.com/ru/post/98152/
All Articles