Laptop as a work of art
A month ago on Habré was published a wonderful topic Notubuk in paints . Nowadays, a laptop is not a luxury, but a tool, an excellent idea, and many people, including myself, have caught fire. Oddly enough, I found colors before I had time to cool down to this idea, and there was nowhere to retreat. Here I will talk about my experience in coloring the laptop and show what came out of it.
So, for coloring laptop you need two main components - a laptop and paint. My DELL acted as the first one with a comfortable matte lid, on which paints fit perfectly and not so well - artist's fingerprints :-)
As for the paints, I used this set of stained glass paints Amos Glass Deco.
')
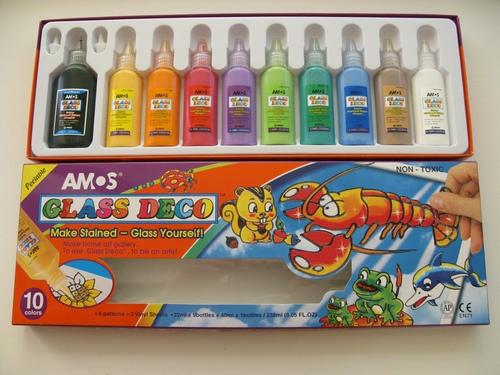
Before the original topic, I hadn’t even heard of such colors, however, they are quite easy to find. In Kiev, the source of colors can be either an online office stationery store (this is not PR, so I don’t give a link :-)), or a shop for children's art, for example, on the third floor of the Darnytsa shopping center (Leningradskaya Square).
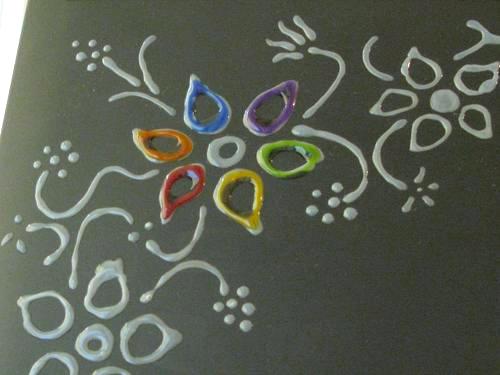
I can draw badly (and this is still an understatement :-)), so I had been experimenting with colors and patterns for two weeks before the main drawing. The result was something like this:
A few practical observations made at this stage:
- Paints need time to dry. According to the instructions, it is 12 hours, but I suspect that this is for large painted areas; if you draw with lines, they dry for 6 hours. Slightly dried lines can be gently pressed down to make the drawing more flat. Freshly applied paints are easily lubricated, so I personally break the pattern into pieces and paint iteratively - this slows down the process, but allows you to make adjustments in the process and not be afraid of spoiling the existing pattern.
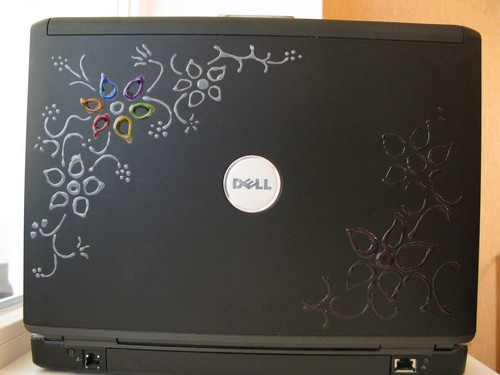
- In the process of drying, the colors change color. In tubes, the colors are absolutely wonderful - bright, saturated and opaque. But the paint is stained! If you look at the light, they remain colored, although they fade, but on the black laptop there is trouble - only black paint remains the same as when applied, white becomes whitish (although quite noticeable), and everyone else gets shades of black. With a certain light you can catch the difference between different colors, but this is clearly not enough for a full-fledged color picture. The pattern in the lower right corner of the laptop is made of lilac and black colors, there is no particular difference between them, except at an angle.

- In order to make a drawing on a black laptop still color, you can draw it in two layers - the desired color over a white background.
Of course, the white tube will end much faster, and the drawing will be less neat, more convex and less stable, but there are no alternatives yet. Google suggests that the colors of the same company are also opaque, and in much more colors, but (alas!) Not in Ukraine.
- If necessary, paints are easily removed. Freshly applied ones are simply wiped off with a napkin (in two steps - the main layer and the remnants), dried ones are either scraped off, or gently hooked to the edge and removed. A shot can be pasted somewhere; On the mirror, I now have samplers of my favorite flowers and a wolf :-) After taking pictures, traces remain, but they are safely removed with a napkin.
- Perhaps the most difficult thing is to apply paint in an even layer. All the time, the beginning of the line turns out to be thicker than the end, because for squeezing the first portion of paint out of the tube, a greater effort than necessary is automatically applied. This can be corrected if, immediately after drawing the line, gently redistribute the paint along the line, by running the tip of the tube over it. On the other hand, when drying, the paint is pulled to the places where the line is wider.
- It is necessary to take into account the fact that the paint is liquid, so the real sharp corners and sharp turns of the line will not work - the paint spreads out a bit from its original boundaries. In addition, in one iteration, it is not worthwhile to draw two separate contours that are next to each other - when the paint spreads, they can merge and spoil the drawing. Drawing with different colors with purposeful blurring of their borders is my next experiment :-)
- An interesting effect is given by small air bubbles trapped inside a layer of paint.
I painted the final version of the pattern for about a week - first three main flowers, then they were gradually overgrown with stalks in the gaps and small flowers (although this is most likely due to the banal lack of time).
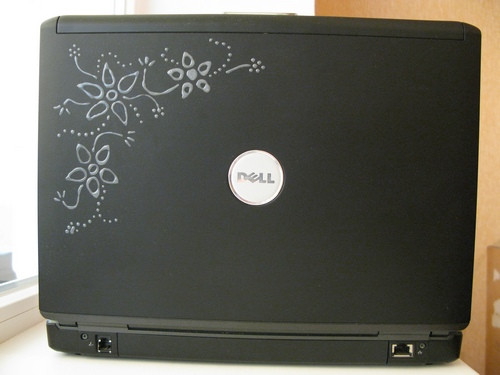
However, as long as he is still so dry, I have already come to the conclusion that he is too laconic, and came up with a dozen of the following :-)
So, for coloring laptop you need two main components - a laptop and paint. My DELL acted as the first one with a comfortable matte lid, on which paints fit perfectly and not so well - artist's fingerprints :-)
As for the paints, I used this set of stained glass paints Amos Glass Deco.
')
Before the original topic, I hadn’t even heard of such colors, however, they are quite easy to find. In Kiev, the source of colors can be either an online office stationery store (this is not PR, so I don’t give a link :-)), or a shop for children's art, for example, on the third floor of the Darnytsa shopping center (Leningradskaya Square).
I can draw badly (and this is still an understatement :-)), so I had been experimenting with colors and patterns for two weeks before the main drawing. The result was something like this:
A few practical observations made at this stage:
- Paints need time to dry. According to the instructions, it is 12 hours, but I suspect that this is for large painted areas; if you draw with lines, they dry for 6 hours. Slightly dried lines can be gently pressed down to make the drawing more flat. Freshly applied paints are easily lubricated, so I personally break the pattern into pieces and paint iteratively - this slows down the process, but allows you to make adjustments in the process and not be afraid of spoiling the existing pattern.
- In the process of drying, the colors change color. In tubes, the colors are absolutely wonderful - bright, saturated and opaque. But the paint is stained! If you look at the light, they remain colored, although they fade, but on the black laptop there is trouble - only black paint remains the same as when applied, white becomes whitish (although quite noticeable), and everyone else gets shades of black. With a certain light you can catch the difference between different colors, but this is clearly not enough for a full-fledged color picture. The pattern in the lower right corner of the laptop is made of lilac and black colors, there is no particular difference between them, except at an angle.
- In order to make a drawing on a black laptop still color, you can draw it in two layers - the desired color over a white background.
Of course, the white tube will end much faster, and the drawing will be less neat, more convex and less stable, but there are no alternatives yet. Google suggests that the colors of the same company are also opaque, and in much more colors, but (alas!) Not in Ukraine.
- If necessary, paints are easily removed. Freshly applied ones are simply wiped off with a napkin (in two steps - the main layer and the remnants), dried ones are either scraped off, or gently hooked to the edge and removed. A shot can be pasted somewhere; On the mirror, I now have samplers of my favorite flowers and a wolf :-) After taking pictures, traces remain, but they are safely removed with a napkin.
- Perhaps the most difficult thing is to apply paint in an even layer. All the time, the beginning of the line turns out to be thicker than the end, because for squeezing the first portion of paint out of the tube, a greater effort than necessary is automatically applied. This can be corrected if, immediately after drawing the line, gently redistribute the paint along the line, by running the tip of the tube over it. On the other hand, when drying, the paint is pulled to the places where the line is wider.
- It is necessary to take into account the fact that the paint is liquid, so the real sharp corners and sharp turns of the line will not work - the paint spreads out a bit from its original boundaries. In addition, in one iteration, it is not worthwhile to draw two separate contours that are next to each other - when the paint spreads, they can merge and spoil the drawing. Drawing with different colors with purposeful blurring of their borders is my next experiment :-)
- An interesting effect is given by small air bubbles trapped inside a layer of paint.
I painted the final version of the pattern for about a week - first three main flowers, then they were gradually overgrown with stalks in the gaps and small flowers (although this is most likely due to the banal lack of time).
However, as long as he is still so dry, I have already come to the conclusion that he is too laconic, and came up with a dozen of the following :-)
Source: https://habr.com/ru/post/98140/
All Articles