I2P - Creating your site
Good day again to all!
Today I will try to describe the process of creating your site (eng. Eepsite ) in an anonymous network I2P .

')
The creation process is divided into several stages:
(Who already has Apache2, he can safely skip this section)
In the standard I2P delivery there is a Jetty server, but we will not use it, since it is written in Java (which increases its load on the system) and for the lack of plug-ins (since we have LAMP configuration, we need PHP, which only connects via CGI. This is not good). We will install Apache.
This part varies for different operating systems, so I will describe separately.
The easiest way to use ready-made server package. There are many of them, such as AppServ , Denwer , TopServer , etc. We will put AppServ, but in principle, any one will do. They are the same in configuration.
I'll write a process for Ubuntu, since the rest, I think, know how to install Apache :)
Apache2 without additional modules is installed with the command:
Then, if necessary, you can deliver PHP and mysql:
Go to the tunnel manager: 127.0.0.1 : 7657 / i2ptunnel / index.jsp
Create a new HTTP server tunnel:

We fall into the settings:

Now the points:
Click "Save". Then "Run." After starting, go to the tunnel settings and copy the local destination address (L). It is useful to us when registering in the DNS.
Registration on a site that provides hosts.txt is generally optional, because in I2P DNS is completely distributed. Clients themselves exchange “address books” among themselves. But if you want to, then ... go to the stats.i2p server and enter your host [Website Name (W)] and Local Destination Address (L).
Registration is complete!
Optional: add the redirection of the created host to 127.0.0.1 to the file
Windows:% WINDIR% / system32 / drivers / etc / hosts
Linux: / etc / hosts
So we will specify the OS that the site is hosted by us.
Well, now we have a residence in this network. You can arrange there a torrent tracker, imageboard, or even something like wikileaks.org . No one will find you =).
Other related articles:
I2P - Project Invisible Internet
Today I will try to describe the process of creating your site (eng. Eepsite ) in an anonymous network I2P .
')
The creation process is divided into several stages:
- Web server installation
- Configuring I2P to work with the server
- Register in DNS
Installing a web server.
(Who already has Apache2, he can safely skip this section)
In the standard I2P delivery there is a Jetty server, but we will not use it, since it is written in Java (which increases its load on the system) and for the lack of plug-ins (since we have LAMP configuration, we need PHP, which only connects via CGI. This is not good). We will install Apache.
This part varies for different operating systems, so I will describe separately.
Windows (WAMP):
The easiest way to use ready-made server package. There are many of them, such as AppServ , Denwer , TopServer , etc. We will put AppServ, but in principle, any one will do. They are the same in configuration.
- Download AppServ: sourceforge.net/projects/appserv/files (At the time of this writing, the latest version is 2.6.0, but it’s better to install 2.5.10, because here PHP5 is stable)
- Install (A couple of screenshots from the Vine;)):
Choosing the right components: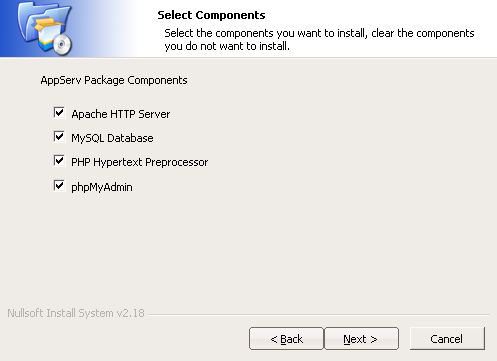
Enter server information:
- Done!
Linux (LAMP):
I'll write a process for Ubuntu, since the rest, I think, know how to install Apache :)
Apache2 without additional modules is installed with the command:
sudo apt-get install apache2Then, if necessary, you can deliver PHP and mysql:
sudo apt-get install libapache2-mod-php5 php5-mysqlConfiguring I2P to work with the server
Go to the tunnel manager: 127.0.0.1 : 7657 / i2ptunnel / index.jsp
Create a new HTTP server tunnel:
We fall into the settings:
Now the points:
- Name (N) and Description (e) - Just the name and description of the tunnel. Do not affect anything.
- Address (H) and Port (P) - The address and port of our web server. We will bet on 127.0.0.1 and port 80.
- Website Name (W) - Domain on which we plan to keep the site.
- Secret Key File (k) - The file in which the key will be stored, which generates the address of the tunnel. Tip: after generating the file (size 663 bytes), immediately make a backup copy of it, otherwise, if you lose it, you will lose the domain name. It will be scored for you, but you will not have access to it.
Click "Save". Then "Run." After starting, go to the tunnel settings and copy the local destination address (L). It is useful to us when registering in the DNS.
Register in DNS (optional)
Registration on a site that provides hosts.txt is generally optional, because in I2P DNS is completely distributed. Clients themselves exchange “address books” among themselves. But if you want to, then ... go to the stats.i2p server and enter your host [Website Name (W)] and Local Destination Address (L).
Registration is complete!
Optional: add the redirection of the created host to 127.0.0.1 to the file
Windows:% WINDIR% / system32 / drivers / etc / hosts
Linux: / etc / hosts
So we will specify the OS that the site is hosted by us.
Total
Well, now we have a residence in this network. You can arrange there a torrent tracker, imageboard, or even something like wikileaks.org . No one will find you =).
Other related articles:
I2P - Project Invisible Internet
Source: https://habr.com/ru/post/97996/
All Articles