Boomburum office
Careful traffic! But you can at least see the pictures)
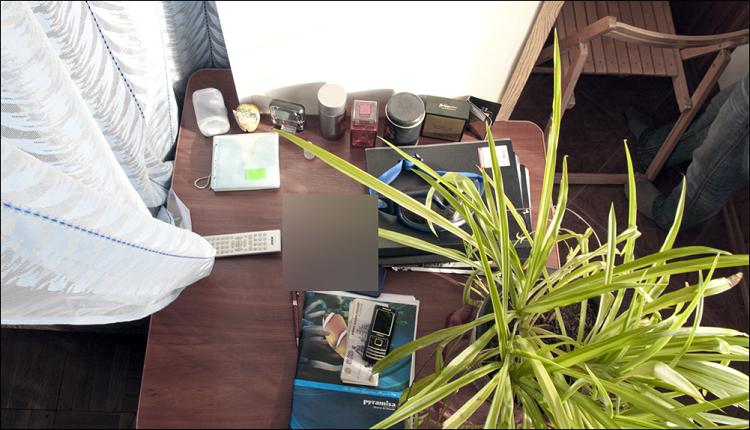
The idea of creating my own “study” at home was long overdue - somehow he himself came to realize its need, although a long-term contribution to the undertakings was made by this long-time post on Habré . I had my own workplace - a large comfortable table where almost everything and even more was placed ... but, in fact, it was a courtyard - all the time someone walked, was near, distracted ... this very often makes it difficult to concentrate and start working. Sometimes, it happens, you sit at the computer all evening and you understand that you have done absolutely nothing, although I told my relatives that “I must work.”

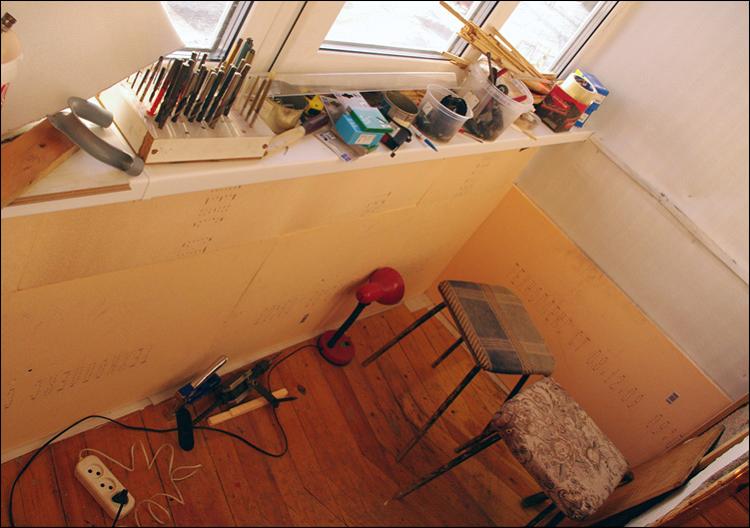
There were only two or two balconies in the place where a cozy nest could be made. More precisely, one thing - on one of the loggias, there were already some cabinets, piled with tools, shovels and other snow-bicycles. In general, I didn’t have to choose for a long time - a loggia adjacent to the children's room (where my wife and child are huddling together). The size of the loggia is 110x350.
')
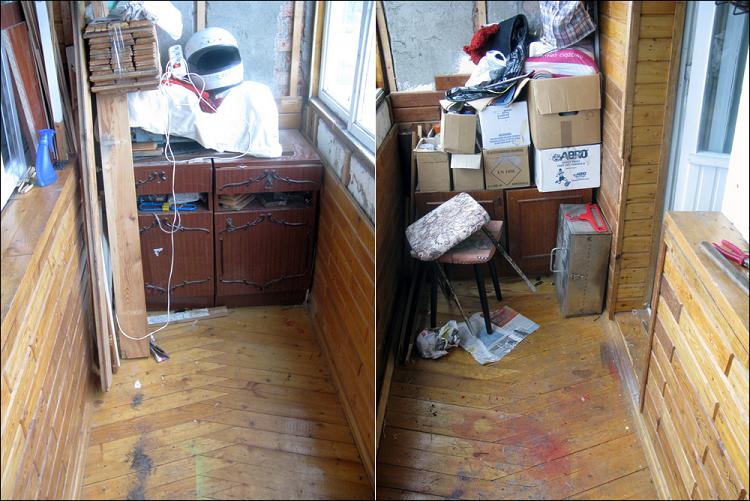
The first thing with the loggia was taken out all the long-term trash. Sometimes it is difficult to part with potentially useful things, but if everything potentially useful to store, then there will be no place. Therefore ... some boards, helmets, magazines, packages, boxes - all mercilessly broke up.
Windows
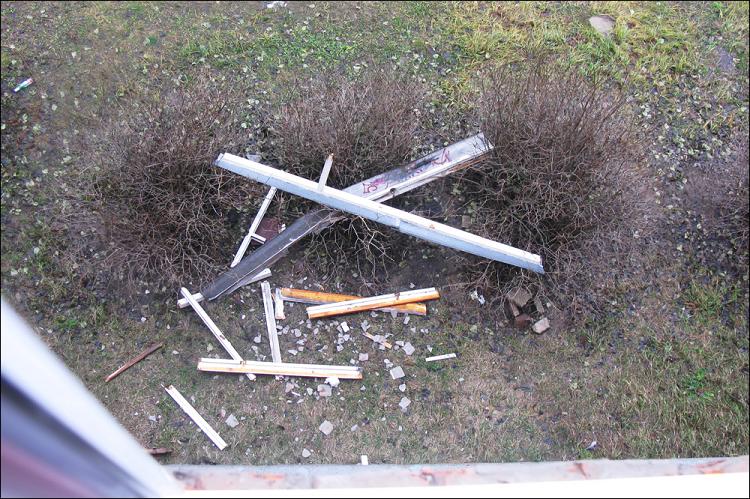
First of all, the windows were replaced on the loggias. This, I confess, is one of the most pleasant changes. Prior to that, self-made wooden everywhere stood - for the entire time of their existence, they have pretty worn out; they were painted many times, but they didn’t open better. Rain, melted snow - often all this slurry was on the floor; a strong wind necessarily leaked into the cracks, which made it impossible to sleep with an open balcony (not to mention the window).

I ripped off a dozen "window" ads at the entrance - began to ring round. After spending an hour, I had a general idea of the price of services, terms, as well as many tips on choosing windows and insulation of the room as a whole. Then he found out who has his production, and who just resells with a premium - he turned to the first. A little later, the guy came with a tape measure and said - “here it is necessary to remove it, here too; let's draw up an agreement and after the prepayment we will come again. ” We made, signed - in a couple of days the installers arrived, to whose work everything was already ready.
I think it’s not worth telling about the installation procedure of windows) Let me just say that they put it perfectly well - the installation foam was required in a minimal amount.

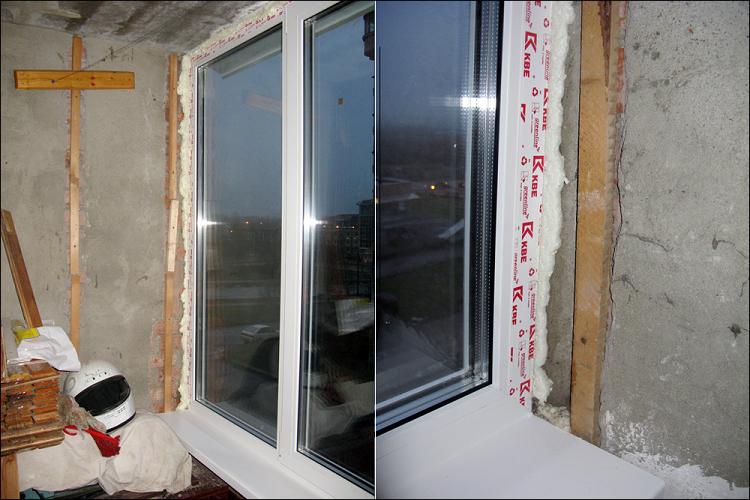
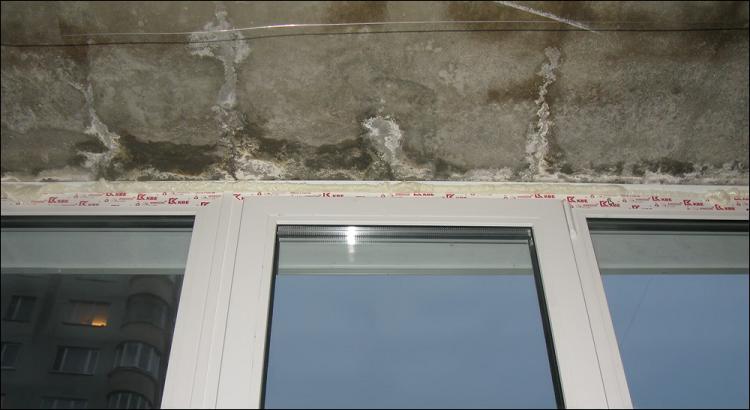
The configuration of the windows was as follows - 160x350, 70th profile, double glazing (three glasses with two air gaps); 5 sections, two of which opened in a tilt and turn way. For me, this option seemed optimal - 4 sections are more “spacious”, but if you open one of them, it will block the entire balcony) And I didn’t want to do windows on the rails.
Put the clock for 5, the price includes delivery, disassembly, installation, mosquito net, visor and two window sills - inside (20 cm) and outside.
It was late autumn, almost snow - but the heat felt immediately (compared to the wooden windows that were). It was already possible to go out onto the balcony in shorts, but it was still cool — the same floor was cold. Accordingly, with a thinner profile, single-chamber or aluminum windows would be even colder. In general, on the eve of winter, it was decided to warm up carefully.
A little later, several metal corners were made of thick sheets of iron, with which the sill was reinforced from below. The parapet was drilled through, a metal rod with a thread at both ends was inserted into the hole, thanks to which the "corner" was tightened with nuts on both sides of the parapet - after the completion of this simple operation, it was possible to sit in a dead window-sill.

Kind warmth
Since I started all this spontaneously, I had to learn everything and study it along the way. Which time I step on a similar rake, but someday I will definitely see my sight.
So, the parapet was to be warmed - this is the coldest and thinnest of the walls; on the left - neighbors, who have everything insulated; right - masonry 2 or 3 bricks thick, behind which is a cold street. There is no need to warm the wall adjacent to the room - on the contrary, only heat comes from it.
Began to learn what, what and how to warm. “There are plenty of options, a menu for all tastes” - indeed, there are a lot of materials. Here are a couple of top rankings:
Glass wool (mineral wool, ursa, isover) - the older generation was advised on this particular material, they say, it has been tested over the years ... but I never thought of something. Of course, it can fit all pipes there, but I have exceptionally smooth surfaces. Secondly, it is thick, it needs a lot, it is necessary to work with it carefully and carefully approach the creation of a "frame" of wooden lag. Additionally, I heard that it becomes wet, grows thick and in every possible way accumulates condensate - in general, in whatever form it sold there, I didn’t want to mess with it and almost immediately crossed out the candidate.
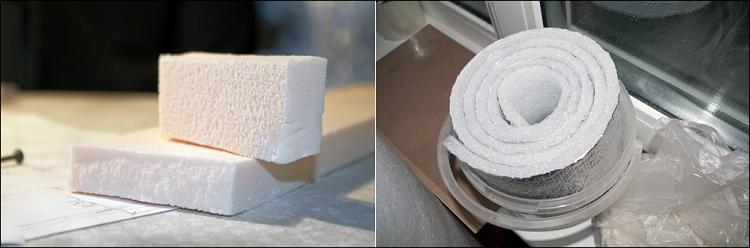
Styrofoam (foam; cork) - artificial materials that are sold in sheets of almost any thickness, from centimeters to 10 (if not more). Polystyrene foam balls contain a large amount of air, thanks to which the material has very good beneficial properties. But there are enough harmful ones - all rodents love it, it is amazingly burning with toxic secretions, it is not very convenient to cut it and in general it is quite fragile with small thicknesses (and the place is strictly limited).
Penoplex (technoplex) - about the same breed, extruded polystyrene foam. This material, even with a small thickness, is durable enough; you will not squeeze it with your finger; but it is convenient to cut, it does not crumble. It seems like it does not burn, does not absorb water and steam, durable. 20mm foam plastic for thermal insulation is identical to 30mm foam, 40mm mineral wool, 250mm wood or 370mm brickwork.
Penofol (tepfol) - foamed polyethylene (with closed air pores), one or both sides of which are covered with a layer of thin aluminum foil. It is an environmentally friendly material with good heat-reflecting properties. Practical, durable, lightweight, easy to cut (scissors) and fits any relief. But the most interesting is his skills. It possesses paro-, hydro-, wind- and sound-proofing properties, moreover, a layer of 4 (!) Mm is identical in its thermal insulation properties to 50 mm of foam plastic, 80 mm mineral wool, or 840 (!) Mm of silicate brick! You can, of course, not believe all this, or at least double the numbers, but then I decided everything for myself. Such material, by the way, is used in tourist rugs.
Penofol is of several types and thicknesses. Type A - foil on one side only, B - foil already on both sides and C - one of the sides is self-adhesive (it is convenient for them to glue the car for the winter). The numbers in the marking mean thickness - for example, I took two rolls, A10 and A04 - best-priced, single-sided rolls (10m) of penofol with a thickness of 10 and 4 mm, respectively. This material is most effective in the event that there is an air gap of 1-2 centimeters on each side during installation.
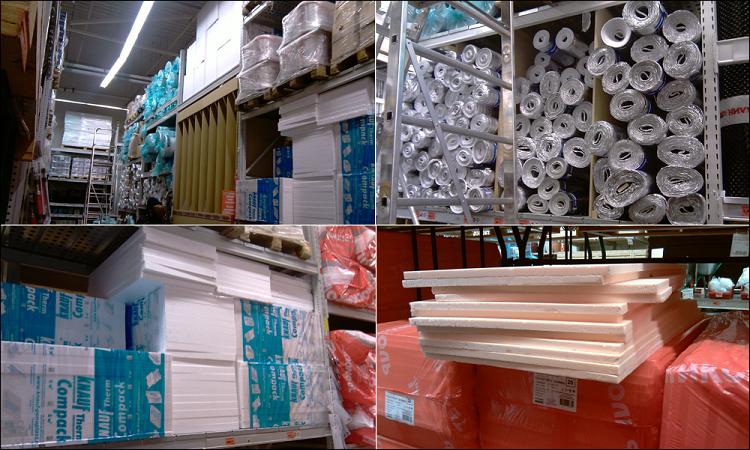
By the way, I was very lucky that OBI is just a few kilometers from home - there really is everything, there is always something to choose from at quite adequate prices.
Then I did this - at first all the wall paneling was removed, under which there were wooden logs (on which the wall paneling was kept), sticking out a centimeter above the wall. All corners and seams, from where something else could have blown, were taped with a sealed self-adhesive tape (gerlen).
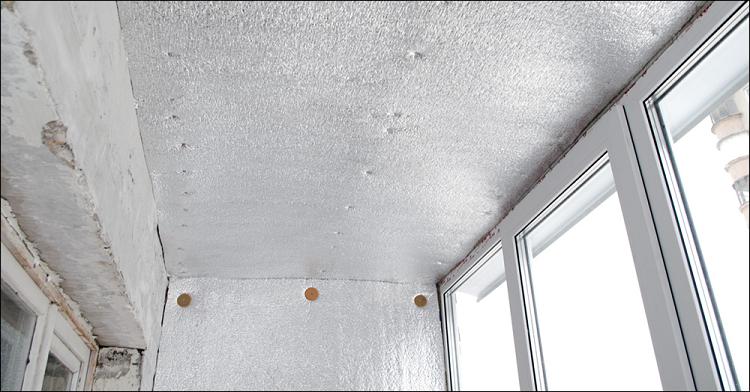
The first (thin, 4mm) layer of penofol was nailed to the lags, which made it possible to obtain the desired air cushion. On top of it was attached a layer of foam sheets (2 cm thick). And already on top of all this - another, centimeter layer of penofol. The total thickness of the heat insulating layer turned out to be about 5 centimeters, which is equivalent to other materials even reluctant.


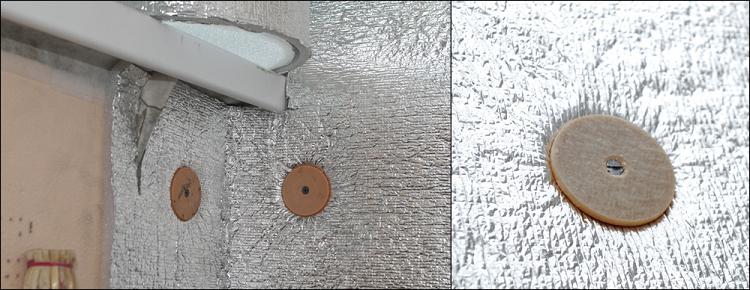
Because All these materials are quite soft, and it was necessary to fasten it conscientiously, a large number of plastic pancakes were made on a lathe - a tapped hole for the cap of long self-tapping screws was in the center of each pancake. As a result, everything was kept well and the plane was practically not broken.

The sealed tape was abundant, so just in case all corners were taped again.
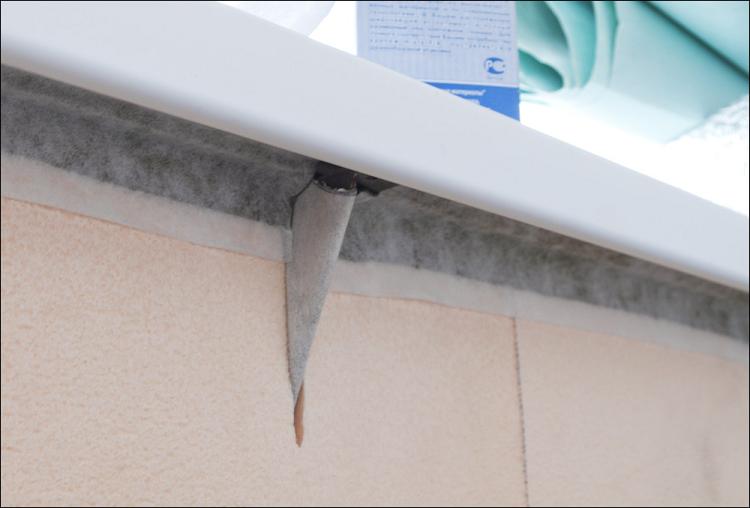
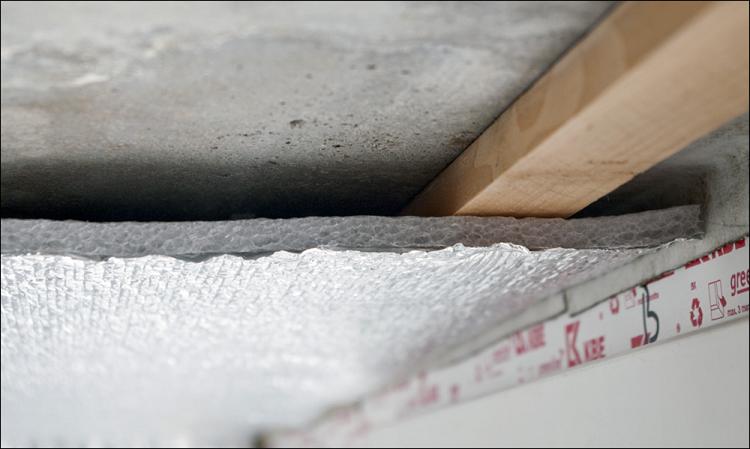
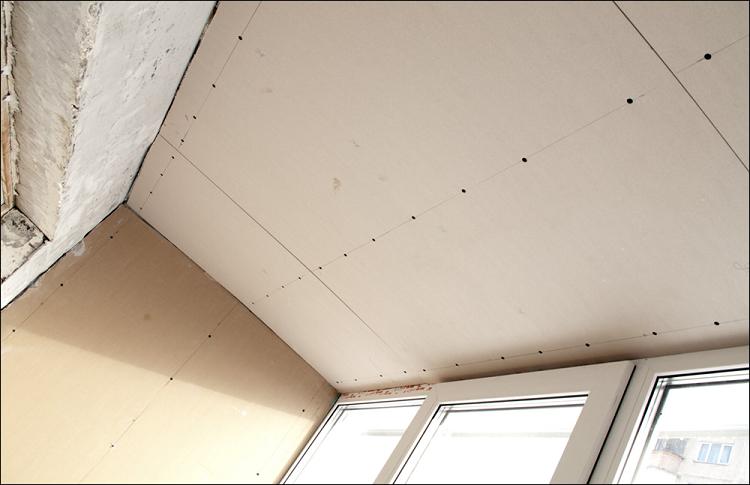
It was also decided to warm the ceiling - on the bare concrete slab all the same wooden logs were nailed to which the foam layer was bolted (again, an effective air gap was obtained).
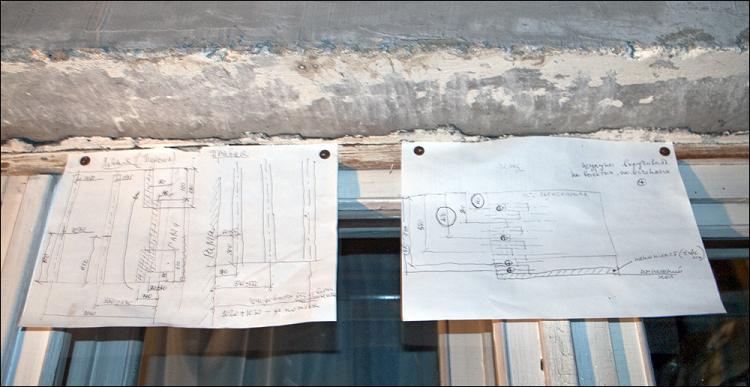
The important point is to sketch the "map" of the location of all the elements (lags and "pancakes") on all the walls - for the future.
For a long time nothing lay on the floor - so as not to waste time. Already at the very end, a sheet of penofol was also laid on which the laminate was immediately laid. Laminate (in fact, it is pressed cardboard, but fireproof) is of six classes - 21, 22, 23 (for residential premises with light, medium and high floor loads) and 31, 32, 33 (for office use). They differ, for the most part, wear resistance. I chose the most indestructible, 33 - so that it would be possible to arrange a race on a chair with wheels without consequences.


Massive plinths (not plastic handicrafts that break with a heel or even on their own) were screwed onto special brackets — an idiotic mechanism, but they seem to hold on.

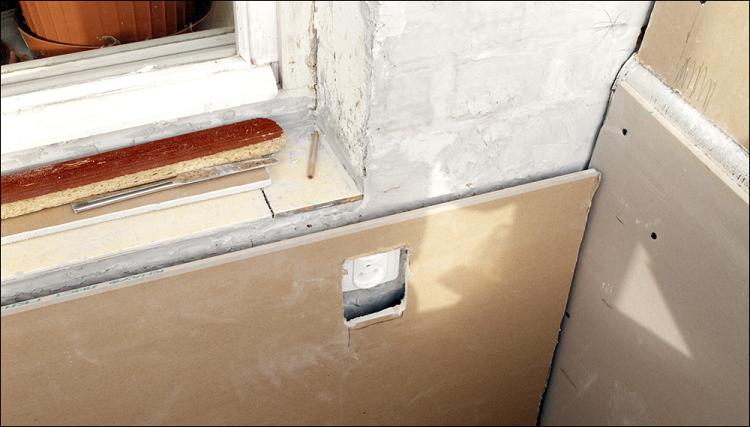
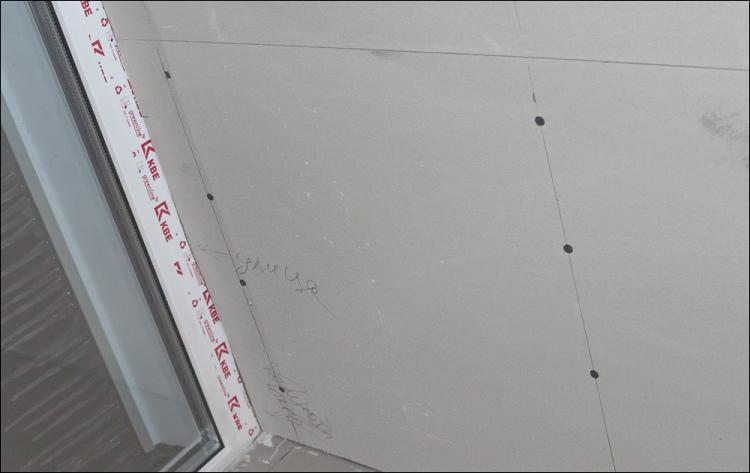
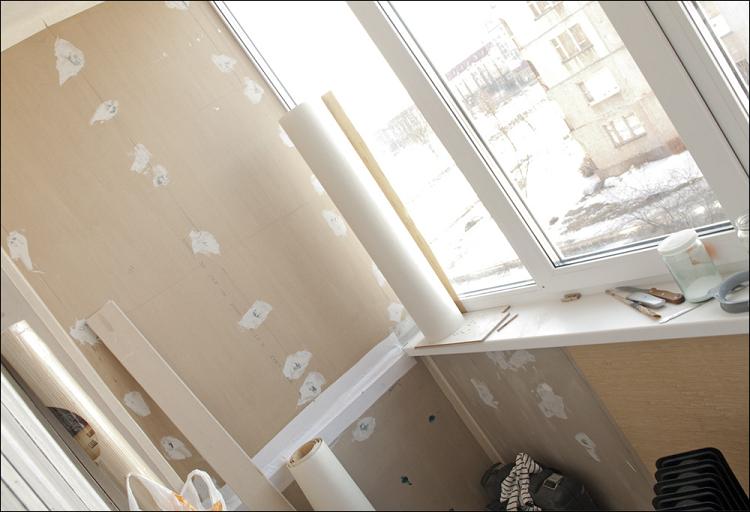
On the soft material do not stick, it is clear. Therefore, it was necessary to come up with something with a final layer for the walls. There are few options here - I chose drywall. It is inexpensive, is everywhere, easily cut and processed; fireproof and practical enough. It is a pity that it is best to take it in large sheets that you can’t and will not take - you can’t do without delivery (and sometimes it costs more than cardboard itself). Incredibly, in order to finish the entire area of the balcony (it would seem, what is there), it took 7 sheets of drywall with dimensions of 120x250!
By the way, it was the longest stage of work - slow slaughter of material in the stairwell, constant adjustments and finishing and other misfortunes. And to fix a centimeter drywall on the ceiling is akin to a feat. a few small pieces will give a lot of seams, decide to use a few large pieces. And their figs lift-hold-screw. Okay, nothing, screwed.
Because all the drywall seams and joints were mostly uneven, we had to glue them with a cloth, which after drying the glue became hard. They also worked on the screws' hats - they painted and sanded them (so that they would not rust with time and did not stain the wallpaper).
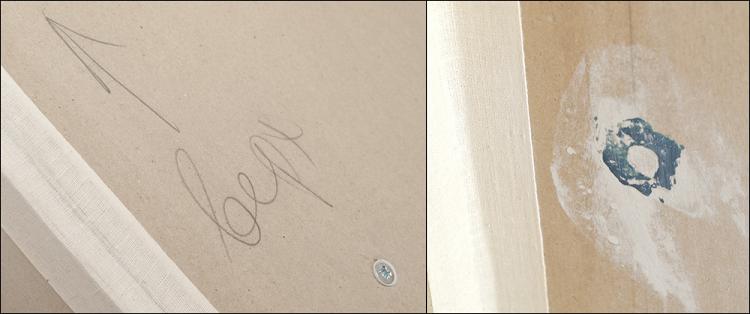
Speaking of wallpaper. Many people make out loggias with boards (an example of a wagon was removed) - I really didn’t want to return to this. Finishing options, again mass, but I chose the wallpaper. Before they were glued, the entire drywall was carefully primed, after which everything was perfectly glued. I bought prohibitively expensive natural wallpapers, but I really wanted something so unusual - I liked their heterogeneous structure, which is much more interesting than many other things. Two rolls (1000x110cm) were enough for the whole space.

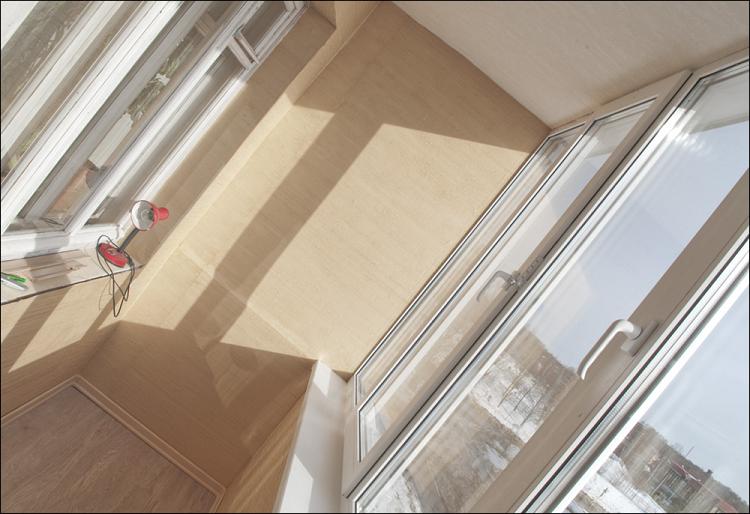
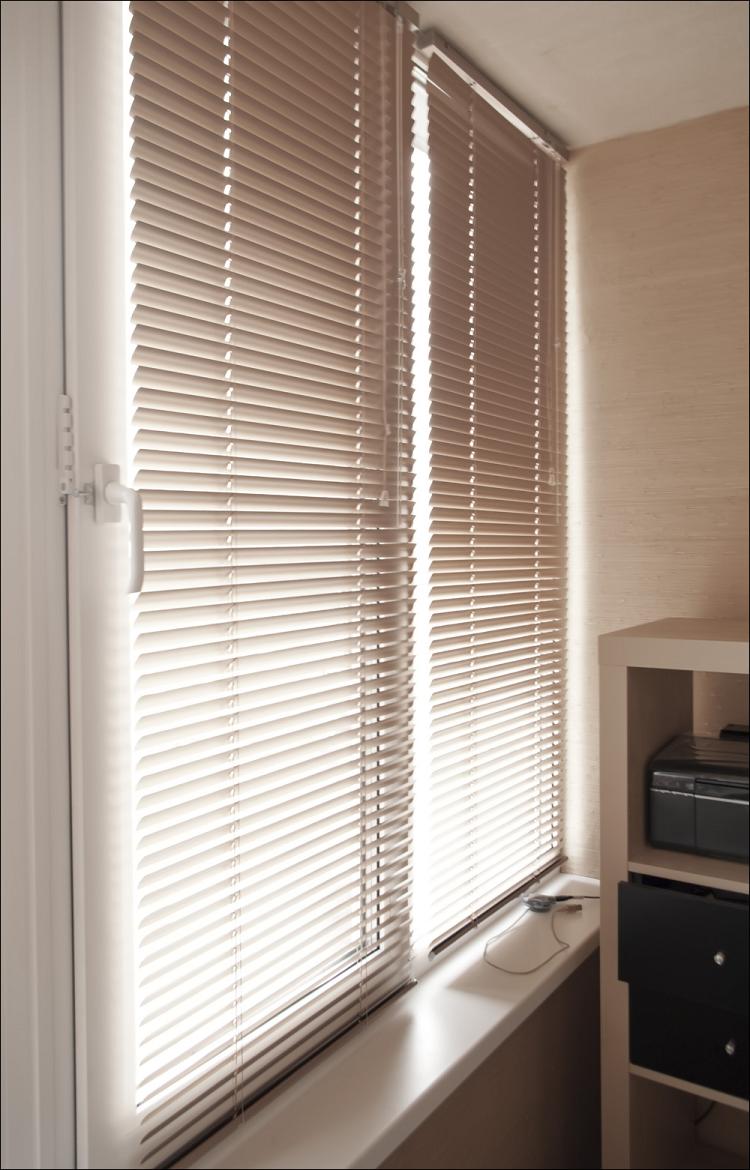
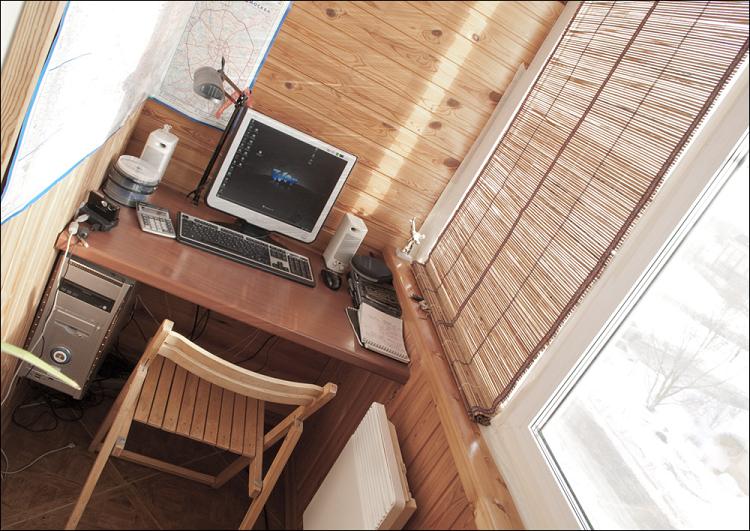
Hooray. Outside the window there is snow to the tomatoes, and I stand on the balcony and it’s not cold to me) Even when there is no sun, in the room is +25; it is worth the sun to appear and already beyond 30. In order not to be constantly in the sun and there was no glare on the monitor, I bought metal blinds on each of the windows, and later (due to the very bright light from the monitor, even at minimum brightness) and on all windows between the room and the balcony. They can be raised, lowered, and just rotated - very convenient.
The loggia became noticeably lighter than it was; the joy of the upcoming finale of the whole action did not give rest.
Finish line
The threshold and the window-sill adjacent to the room were made from the tile that was once left. Top - plastic corners on liquid nails.
So what's left? In fact, everything has just begun, but we should already begin to build a nest for a newly assembled company - you will enter quickly, you will start to work faster.
It was decided to start from the tabletop. Because the dimensions of the “room” are quite specific, then hoping to buy a suitable tabletop was stupid, not to mention the wishes for thickness and color. Measured with a tape measure the dimensions of the space that would fit for work and with the given dimensions went to my wife for production. There, of two sheets of chipboard (18mm), the tabletop I needed was glued to the thickness I needed (36 mm, a thicker one would interfere with the opening of the window) - I didn't want a thin, dead one; and on this one, at least sit down (after all, the windowsill was strengthened at the very beginning).
On the left side, the tabletop was cut out according to the pattern - so that there was no sharp (hanging over the left window sill) corner ... well, so that there was a depression for the router.

The second tabletop, under the mouse and keyboard, was deliberately made thin - so that it was easy to push. I did not dare to hang it on purchased sliding rails - I didn’t try how many, they are all dead; so I took out U-shaped profiles that were carefully bolted to the walls. I have already done such a mechanism in one of the previous self-made tables, and he proved himself very well - everything is moving back and forth normally, and you can safely rest on the table top.
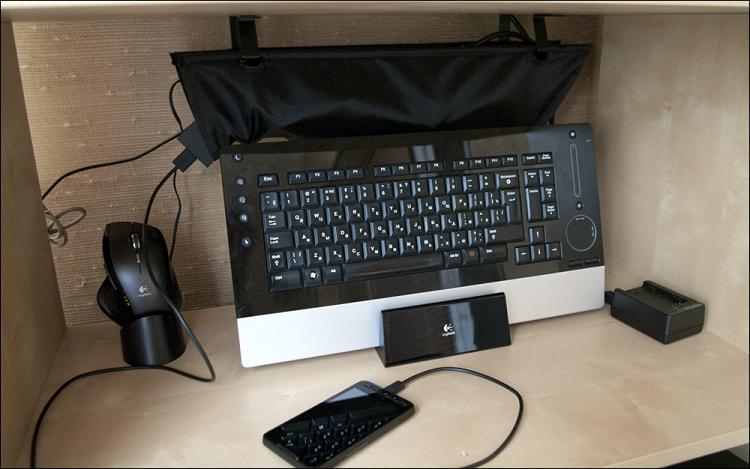
It extends more than half a meter - it fits easily the mouse with the largest carpet from Razer, the keyboard and A5 tablet.
Specially chose a bright surface, in this case it is Riga birch. Against such a background, it is very convenient to photograph something, both light and dark objects. And the dust can be seen minimally - unlike, for example, the color of wenge. It is beautiful in its own way, but on most chipboards over time it looks just disgusting (and, in general, such gloom is depressing - checked), and buying an array - yes, well, with such and such prices.
Final touches
So that the part of the loggia that is behind was not empty, I bought a “ Expedit ” series rack in Ikea - you can swear at the quality of the store for a long time, but if someone doesn’t like it, buy something more expensive, nobody forbids it. In this case, it is absolutely normal shelving, which is the perfect color for the wallpaper and the color of the table (including the thickness of the walls).
At first I bought a rack with 8 compartments (2x4), but then I realized that the extra space disappears and bought another 2x2. The result is a whole wall into which you can fit anything ... and I started working on it.
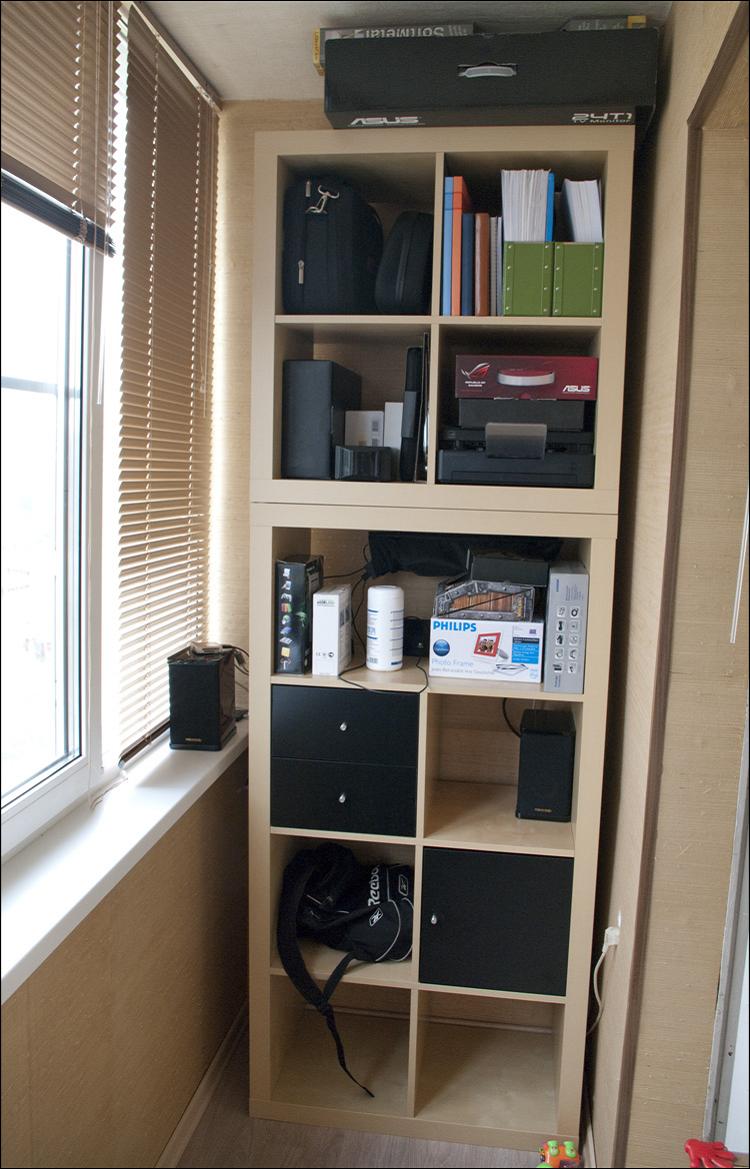
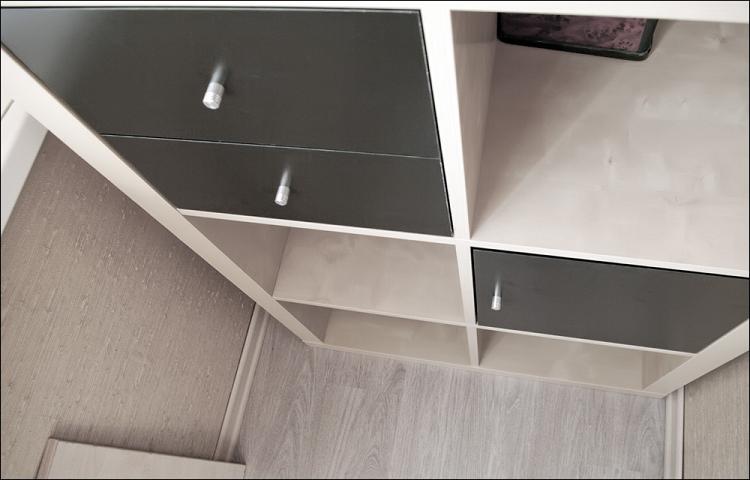
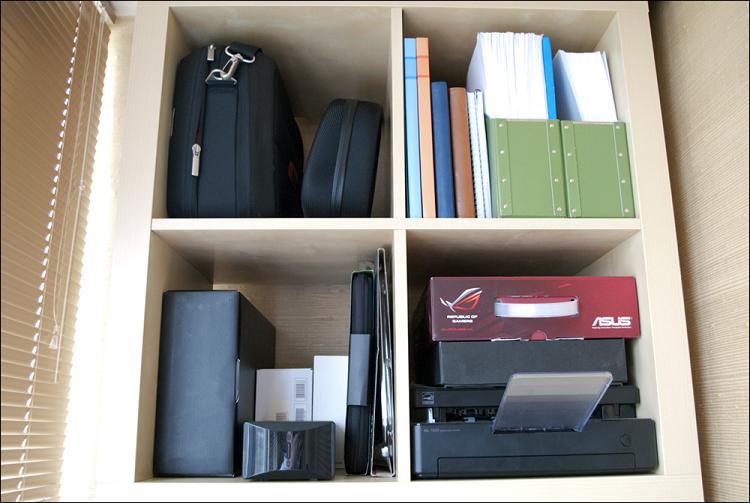
I wanted to put a sub in the very bottom (it perfectly fits the Microlab H300 and H500), but then I realized that the cable to the computer was not enough - I moved it to the "legs". Just above, I bought two more compartments, which are 2 pull-out drawers and an opening door - all small junk is stored there.
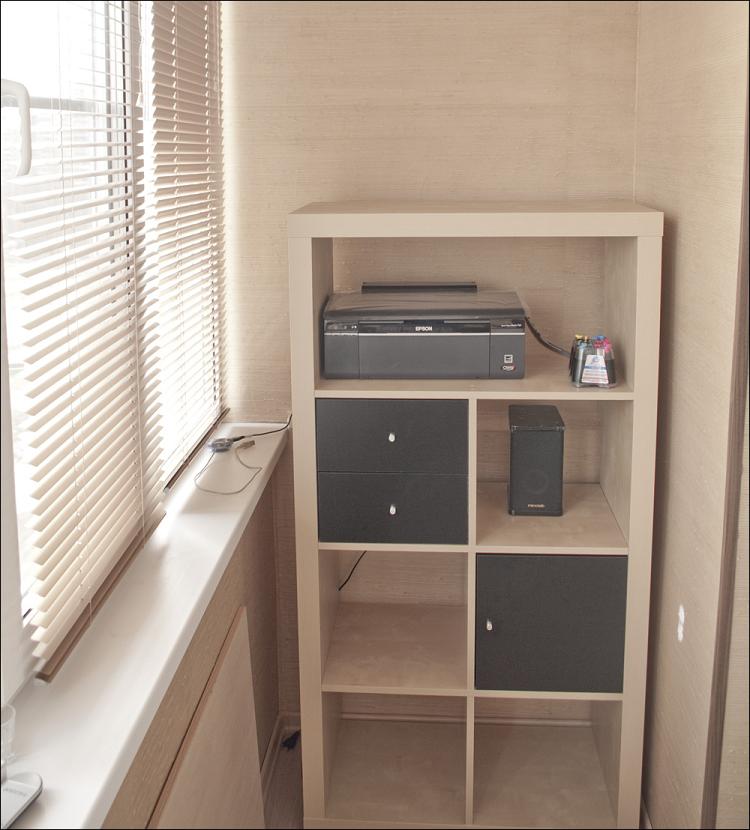
In the upper compartment of the lower rack, I deliberately did not install one of the partitions, so that you could put something dimensional. Initially I put a printer with a CISS there, but after the first hints of condensation in ink tanks, I took the printer back.
Now on this shelf, only all kinds of charging - for the mouse, keyboard, batteries, phones, etc. However, the “content” of the shelves is still at the stage of deliberation, so it will still change more than once.
The power filter is conveniently located; it hangs in a special ikein suspension - it costs 250 rubles, but it turns a pile of wires and adapters into a very aesthetic picture.
Above one, the Samsung ML-1630 laser printer fit perfectly into one of the compartments. Great luck for it. There are blank paper in the green folders and in the neighborhood there are a lot of drafts for all sorts of things, as well as a couple of blank notebooks and notebooks. Everything else is stupidly crammed with device boxes.
One of the rear speakers speakers is in the rack, to her the signal goes under the plinths. The second is located on the windowsill - to her wire stretched under the sill. A little further behind the column is an active USB hub (with a card reader) into which the printer is plugged, an external drive (so that even the minimum noise from it is not audible) and another drive will soon be inserted.

The USB cable to the hub from the computer also goes under the window sill, so nothing hinders or hangs.
Two front speakers are still on the table - there is no other place for them at the moment. The central column is not connected (and removed by software) - there is no room for it at all. The acoustics control unit is on the left hand side - you can always switch to a signal from a computer (5.1, more precisely, 4.1) or listen to music from a player (Cowon S9 or phone via AUX). The remote control is practically not involved, but lies behind the unit. The router settled behind the cut in the tabletop - there is nothing to threaten its links.
Above is a shelf on which there is a camera and a mini-stand for it on the old rug from SS (so as not to crash down) - everything is at hand.

As a bonus, I begged a wonderful paper organizer from a friend — I liked his thoughtfulness so much that this is the first time in history when I started writing in such books to be marked on the calendar. Now all events and deadlines will be under close supervision.

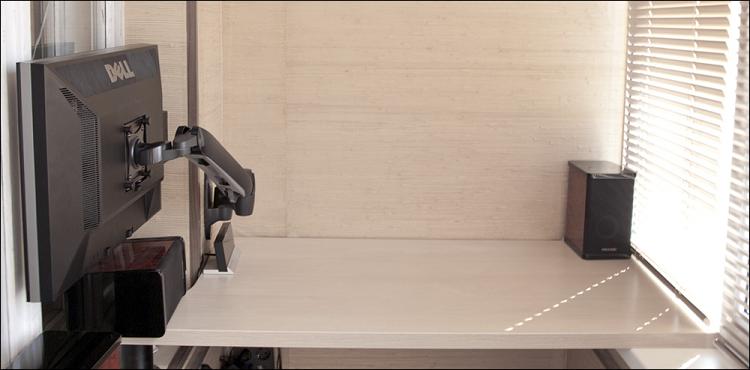
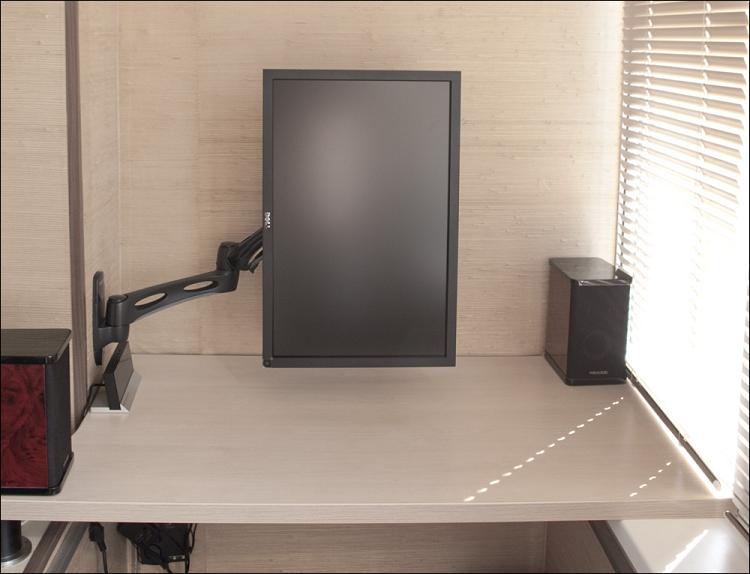
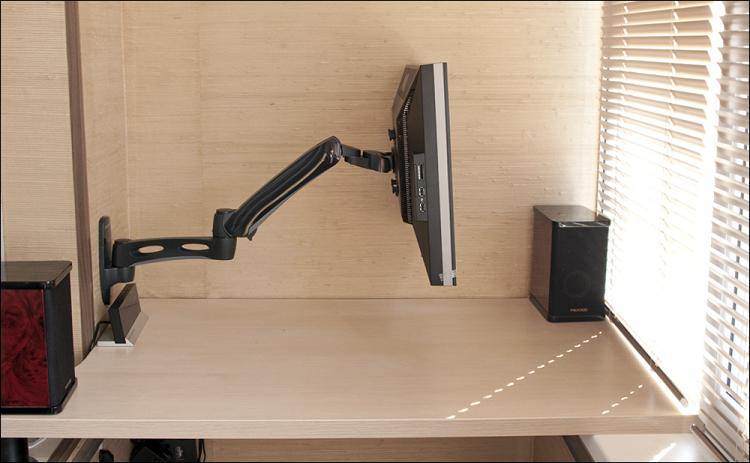
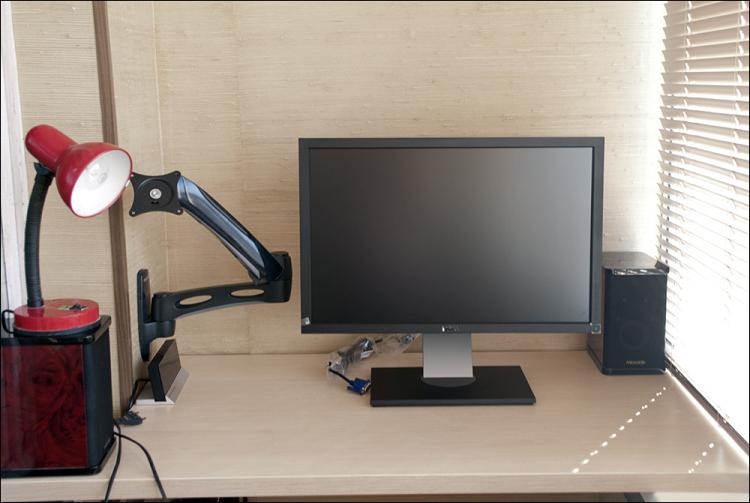
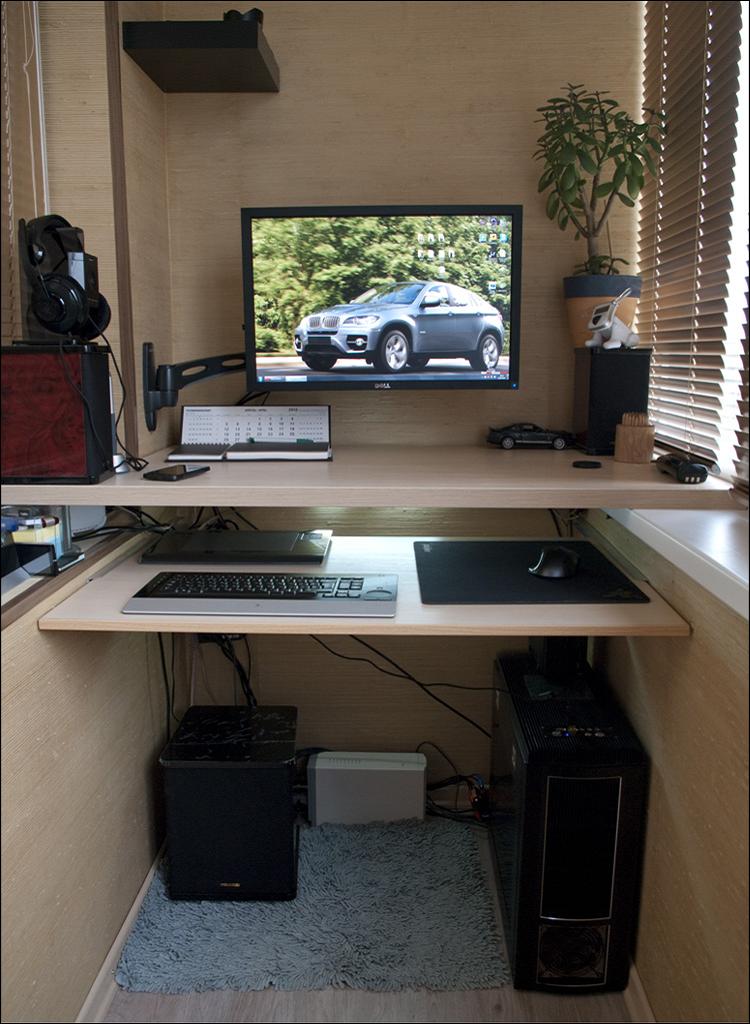
Well, the most interesting thing for many (judging by the comments and numerous requests) is a story about mounting the monitor. As I said, it is from the company Ergotron and it holds neither more nor less - a 10-pound display.
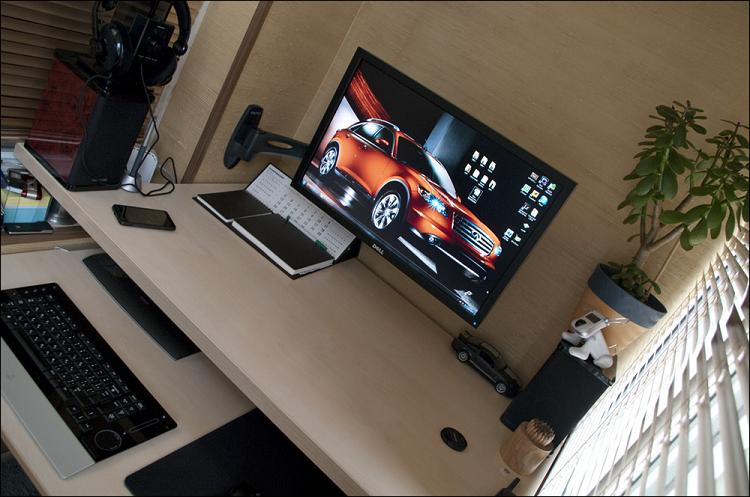
The full name of the piece of iron is Ergotron LX Wall Arm .I had a desktop mount before ( Ergotron NeoFlex , review ), but here it wouldn’t work because of the design features of the tabletop - I decided to hang the monitor on the wall for a number of reasons. First, the tabletop is periodically removed and moved away - it would be extremely difficult to do this with a monitor. Secondly, the monitor is part of my “photosystem” - when you need to take a picture of something, I just put it to the wall, freeing up almost a cubic meter of bright space - that is why it is rather empty on the table.
It is VERY convenient to do one job, without departing far from another. However, I am so lazy that I take more and more photos without removing the monitor - it seems to me that the photos are only “more alive”. Photos of almost all recent reviews were taken in this particular area.
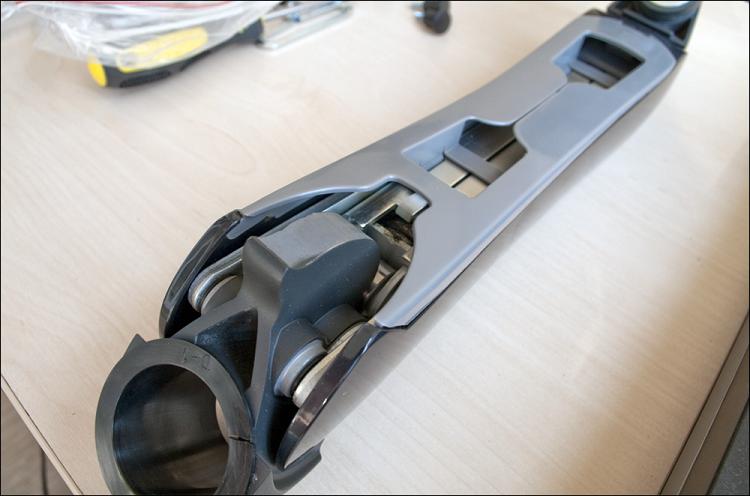
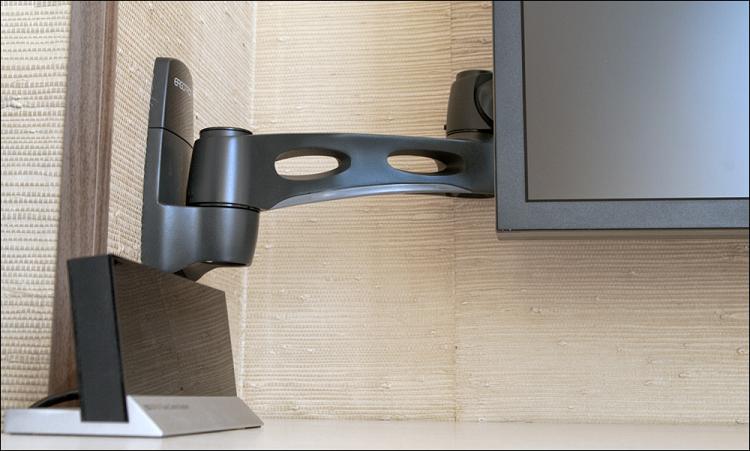
The mount is metal and consists of 3 parts - the first one is attached to the wall:

... the second (optional - it can be left or removed) serves to extend the mount and the third one, in fact, is attached to the monitor.
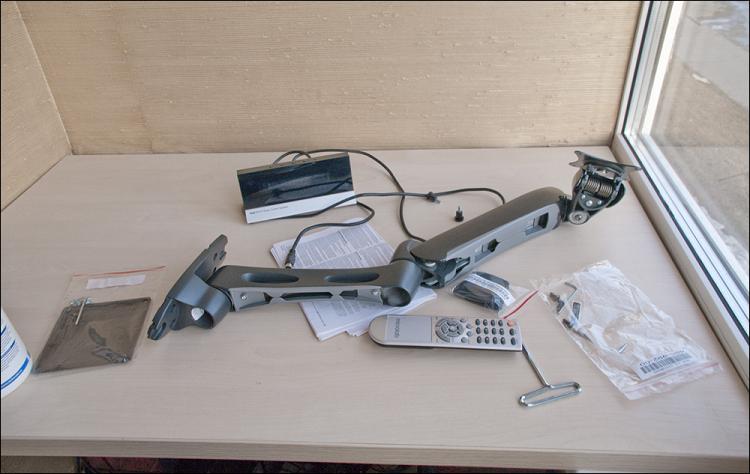
I decided to use all three elements in order to have maximum flexibility.


Each link (they are put on each other without any extra effort) has its own channel for laying wires (everything is held very securely) and screws hidden from prying eyes, which can adjust the degree of rigidity of the system as a whole.
You can fix it so that the mount will be stationary, and you can do it like me, so that the monitor rotates in absolutely any direction with one finger.
I already wrote about the classification of VESA-mounts - if with the previous monitor everything worked right away for me, in the case of the monitor from DELL I had to use a special adapter (with distances of 75mm by 100mm between the holes), which was included.


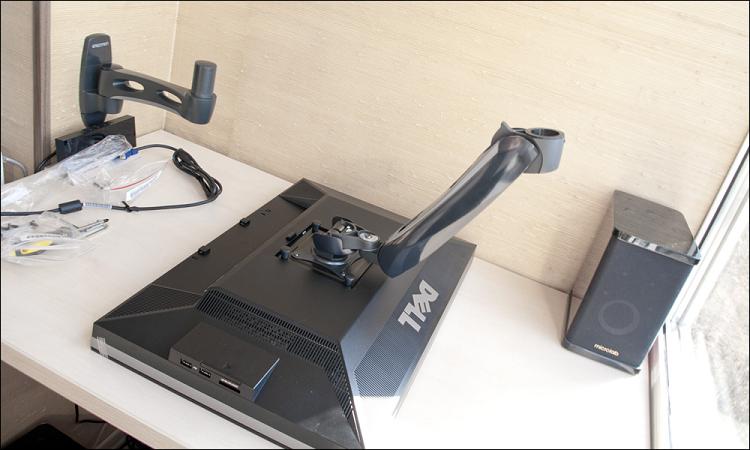
The manufacturer offers to fix the piece of iron to the wall with several bolts that did not fit me, because I have a “real” wall hidden behind a layer of drywall - I didn't want to risk it. Therefore, I bought several long anchor bolts - so if for sure, then for sure.

Naturally, they did not fit into the mounting holes initially - I had to use a drill to drill out.
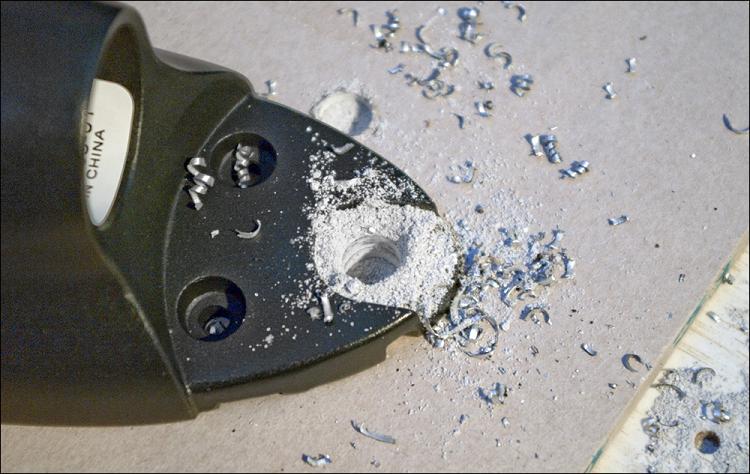
After 5 minutes, the mount was tightly screwed to the wall, to which the monitor happily agreed.

Nothing sags, does not creak and does not fall - from all kinds of ikei, such “fasteners” never dreamed of. The standard mount of the monitor is nothing, but the possibilities and convenience of the new mount are very far away; Yes, and move back and forth the monitor would be much more difficult.

Yes, expensive, but high-quality things are not cheap. I think one-time spending on your own comfort is possible. Yes, and other __ mounts, by and large, are expensive. I strongly recommend to look at the range of this company (which, however, in Russia is very little represented) - their range allows you to tie anything to anything.
Hints
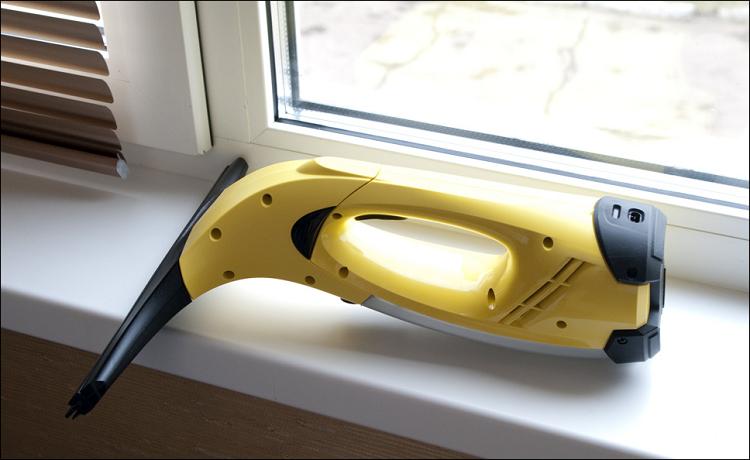
Knowing how the windows on the windy side get dirty (during even a simple rain), I thought out in advance a cunning plan. Understanding that no one will wash the windows to me, I tried to ease my work - to wash, so with comfort) In general, while wandering around OBI, I came across a washing-vacuum cleaner from Kärcher, which I presented to my wife on March 8. Many people do not like this company for annoying advertising (or am I confused with Kirby?), But I liked how it copes with dirt on mirrors and glass. It washes it really well, if you try it out - much faster than with rags or newspapers. This “vacuum cleaner” works from the built-in battery (there is enough charge to wash everything in the apartment), lightweight, fully disassembled, so that all parts can be thoroughly washed from dirt. No consumables are needed - unless, like Mr. Muscle's fluid. And because the windows are always clean,as well as mirrors in all rooms ... and it seems like I gave a gift) It is much more pleasant to look through a clean window, yes? By the way, it’s good that 5 sections were ordered in the windows - in order to wash out the far corners in the outermost windows, you have to lean out carefully ... and if sections 4 were, it would be impossible not to reach out.
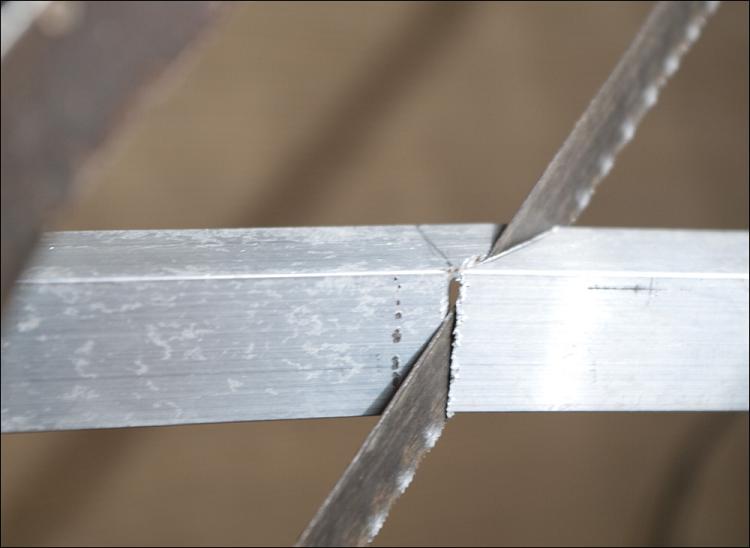
Due to the fact that the window sills inside the balcony are at different levels, I had to solve the problem of support for the table top. Papa turned a smaller model of the large core collider on a machine - from a piece of metal pipe. At one side of the pipe there is a small gap in the defense - it was made on purpose. For reliability, additional supports were machined. I did not fasten and fasten everything, because still have to pull all sorts of wires ... although everything is fine so far.
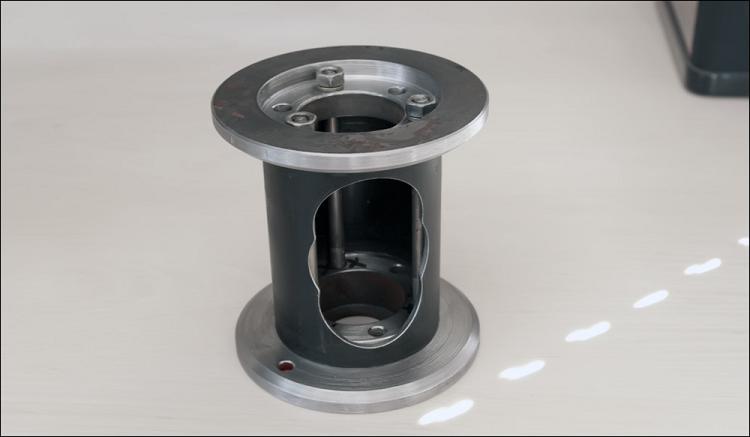
Initially it looked scary - pasted over the support with a metal self-adhesive film. As a result, it turned out very nice and reliable. And in the slot you can keep a crap, flash drives, sim cards or something else that is especially secret and valuable - and I will know for sure that the child will not get there for another couple of years, the wind will not blow away or by chance someone will not steal.


In the plans
In the near future it will be necessary to resolve the issue with the columns. I understand that the 5.1 system for such a room is a bust, but there was simply no other system. Even if you change it to some good 2.1, I don't like the speakers on the table - it's ugly and take up a useful place. Ideally, they should be hung just above the monitor, but so far the attachment question remains open (I liked one version from Bose, but I have not yet matured it).
Laminate, though not cold, but you need to buy some kind of rug - so as not to scratch the cover of the chair's wheels and it was not so noisy. Well, so that the child was played more conveniently.
The tablet now lies on the tabletop under the keyboard - this is inconvenient. It is necessary to attach it to the bottom of the upper tabletop L-shaped figovinkami that need to be done somehow. In addition, you need to buy another 1 small shelf over the existing one - there is always something to remove there (now, the free space just disappears).
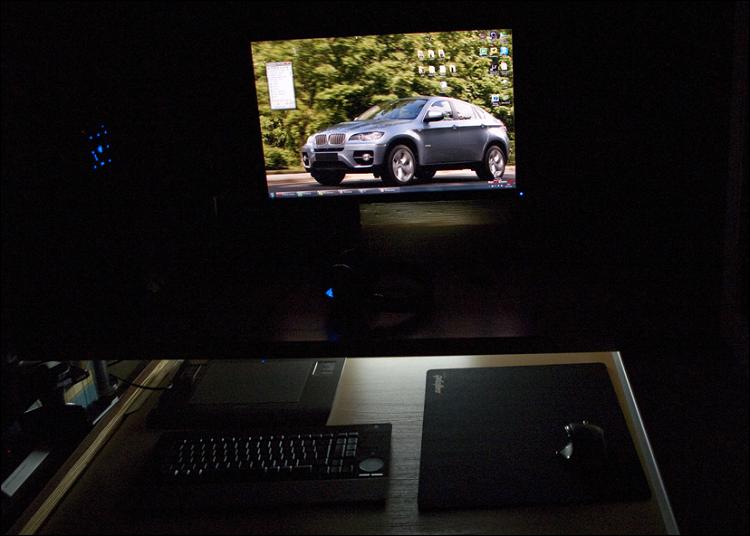
Cable management is useless for now - it works, but it looks awful. I'm thinking about solving this problem - there will be either a cable channel or some small wooden fence, behind which will be the UPS, the pilot and all the wires. Additionally, you need to put in order the neon lamp (and its switch), which illuminates the keyboard at night (I already wrote about this life hacking).
Not far from the computer is a large TV with HDMI. I'm thinking about how you can display an image on it if you want to play (me or dumplings). More precisely, over how to lay the HDMI cable itself.
In the immense future - to make a video surveillance system. So that some powerful camera overboard could monitor the car under the window (thanks to the lantern for our bright present and future), and write all the data to a network drive. Nine, of course, there is no special reason to watch, but suddenly in this life I will still buy myself some typewriter ...
Time is money
Those who looked at least attentively at the pictures could have noticed that everything was done in a very long period of time - windows were inserted when there was still grass, they were insulated in winter, and the result was when the grass appeared again and the warm spring sun was scorching. Yes, I am surprised myself - it took me almost 6 months to do all this, although, in an amicable way, there are cases for a maximum of a week, if not less.
This is due to the fact that during the day you had to work, and in the evening all the work was a maximum of one or two hours before the child went to bed. You are no longer ridiculous and nothing can be done - your own nerves are more expensive) Yes, and so, not every evening time + desire was found ... therefore, everything was done “in grains” - no more than 5 hours a week. Slowly but surely…
Accordingly, all expenses were also stretched for the entire period, which, again, did not work so expensive. However, this time the “little blood” was not enough. Some prices have already forgotten, so all the costs are very approximate:
30,000 - plastic windows
5500 - 8 sets of blinds
2000 - laminate
3000 - 2 rolls of penofol
2000 - 10 plates of foam plastic
2000 - 7 sheets of drywall
3700 - two rolls of wallpaper
2500 - two countertops
8000 - two shelves (2x4 + 2x2) and a shelf + 2 cells in the racks (drawers and a door)
1000 - USB hub, USB wire (5 m)
3500 - Washing Karcher
5000 - construction stapler, brackets, a bunch of screws of different lengths, dowel-nails, anchor bolts, primer, glue, brushes, corners, sockets and other trifle.
Total ~ 70,000 rubles or another one of my cars) The monitor mount costs from 6000, but I already counted its cost in a computer review.
There is practically nothing to save here, although some items of expenses could be avoided and reduced - if, for example, to wash windows in the old-fashioned way, there is a stapler and some grandmother's wardrobes.

Failz
A couple of files from those that I remembered (although they were many times more):
- It was necessary to order mosquito nets on both windows - now you can fully open only one window. If you open the second, then mosquitoes fly and all evil from the street. On the other hand ... the grid would have to be removed every time, and you can throw out something unnecessary in the window) Joke. I practically do not practice this, but to lean out of the window at night, to breathe fresh air is very great.
- When priming the ceiling, I made a special “skirt” for the brush, so as not to drip onto myself. However, it was a little dripping down ... and if I covered the floor, the window sill by the window is not. At first, I didn’t give the drops any special meaning, but when they dried out, I could barely otter them.
- When the countertop was measured, everything seemed to be okay ... and when it was made, it turned out that the angle between the two walls is not straight) This caused a small gap in the countertop, which, however, does not interfere - it is easier to push the wires through it.
- When the monitor mount was turning, he accidentally dropped one of the “shoulders” on the tabletop - as a result, a small dent appeared in the most prominent place (It's a shame that the guilty were punished.
- Blinds. At about one o'clock in the afternoon, one of the intervals between the blinds, a good ray of light falls on the monitor - the decision is being considered.
- Still, it was necessary to remove the frame-partition between the room and the loggia - this would give great space. But parents were against it and they can be understood.
The main fatal error surfaced after all the work was completed. First of all, even now it’s already hot - I don’t have any idea what will happen in the summer (and whether fans and constantly open windows will save) - I hope the coolers will cope with the work assigned to them. Well, I will be optimistic about tracking USB fans on Dealextreme - after all, according to the specification, the USB bus holds up to 127 devices)

Secondly ... the new room really liked my miniband, it literally became his favorite room. Very quickly, he made it clear that he pulled out the 6 lower compartments of the shelving - all my things were pulled out from there, thrusting his own) Maybe for hours to look out the window (all this time he should be kept), somewhere to climb under the table ... well, It’s impossible to work, as I had originally planned, because I won’t refuse the child ... and I’m already used to toys, crumbs and other sausages on the floor. My wife also breathes unevenly to a new place - in her naive plans she will hang a clothes dryer on the ceiling.
So, initially it was necessary to build a “base” on another loggia - there would definitely not interfere with anyone; there is no scorching sun and strong winds ... and it would be possible to monitor not only the car, but also the people entering the entrance (and the yard as a whole). But it's' too late.
Neighbors
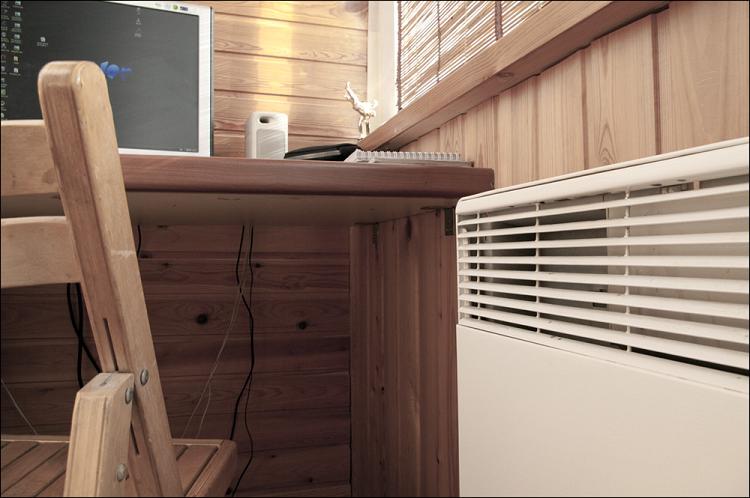
I know that I have already tortured everybody) But still, taking this opportunity, it is impossible not to show pictures of a similar workplace - from a neighbor. Partly and he made a contribution to my "dvizhuha." His partition between the room was removed, which resulted in a lot of space, which I wrote about above.

Everything is trimmed with wood - well, don `t know ...
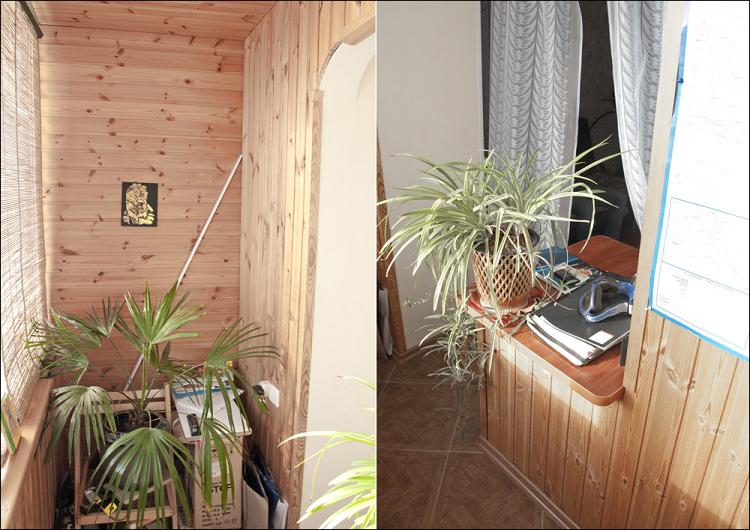
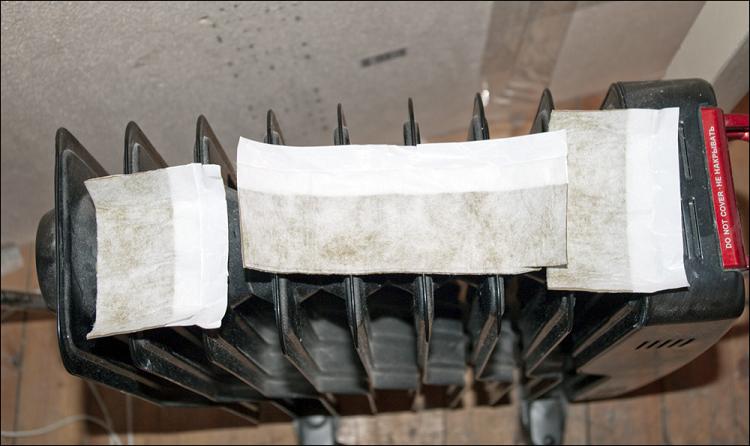
Flooring tiles, heated - also a great solution. He has a single-chamber double-glazed window and he said that the winter feels cold - you have to use a mounted radiator. Otherwise, everything is about the same as mine.
The end
It's one thing to just put wallpaper in a room or lay laminate ... here is my first more or less serious step along the career ladder of Ravshan and Dzhamshut. In an attempt to create a cozy nest for comfortable work, I received invaluable experience, albeit a bit. Everything happened in the parents' apartment, so if I once have my own apartment, at least I will know what to do and where, what kind of pitfalls are waiting for. By the way, thank you so much Daddy for helping us implement this plan - without it, it would still have lasted longer. I learned the golden rule of repair - do not throw anything out of materials until the repair is completed)
It was possible to do almost everything that had been planned, although he repeatedly stepped on a children's rake, and in most cases on his own stupidity. Careful thinking of everything and everything before the start of any actions can have a very beneficial effect on saving money, time and nerves in the future. In any case, the balcony was ennobled and now at least you can go out.

Initially, I planned there to “get out of sight” of the family, so that you could work at any time of the day or night — it didn't work out. But I am not really upset - the new workplace is much more convenient to the old one, and this already changes a lot. In addition, there is a pleasant change in the situation itself, something new - usually such changes also have a positive effect on something. Now everything is in one place - a smart computer, all the bells and whistles to it, a place for photographing, etc. - it is very convenient and already saves a lot of time. It is necessary in the very near future to finish the "tails" and to do a thorough study of the camera (and photos in general), video editing and 3D modeling. Well, or just read all sorts of materiel to be in the know - there was no time for it at all.
In general, I am very satisfied) I still feel the “wow-effect” of the result. Heat without any batteries and heaters (warm air from the video card + processor does not count). Despite the three meters of space, it is convenient for me - and yet someone has balconies many times more ... there, probably, you can live in general. Beautiful view outside the window (a large corn field and the Moskva River; by the way, it became very convenient to do exercises for the eyes), without any hint of noise; the possibility of always breathing fresh air - no office, no coworking center will give this opportunity. And, it seems, I will soon love the most heinous season, autumn - to work by the window in the rain ... indescribable!

Successes!
Source: https://habr.com/ru/post/91646/
All Articles