EeePad DIY
After buying the Acer 1410 as the main laptop for use at home / on business trips, the good old EeePC 900 remained out of work and lay in a desk drawer for half a year. Once again, stumbling upon it, I realized that I needed to either sell it or make something useful out of it. Something useful was the use in everyday life as:
- Torrento rocking / swing
- Devices for permanent display of Yandex.Probok and weather forecast (It is convenient when you can quickly look at the situation on the street and plan a route before leaving the house)
- Print server for an old, but economical and smoothly working Canon printer LBP-810
- Hours
The first item could, of course, be implemented using equipment that was already installed in the home network — the Asus WL-500gP or NASa D-link DNS-323 router, but first of all I’m not friends with Linux and even the detailed instructions are not enough time to figure it out, and secondly, Linux is not particularly friendly with the above-mentioned printer.
So, to implement the venture was acquired:
but. Touch-screen (1500r with delivery from China) dealextreme.com
b. Fasteners for mounting on the wall (100r per 4 pieces) OBI
at. Subsequently, a new matrix, as well, as a result of an error during the installation of the touchscreen, the old one died. (3000r) Savelovsky market (contacts in the “flea market” section of the forum eee-pc.ru )
')
The process of installing the touchscreen will take one evening (if you do not break the matrix) and does not require much effort and special skills, guarantees, of course, you lose.
Required tool:
- small cross and flat face screwdrivers (a set of time screwdrivers would be best)
- tweezers - desirable, but not necessarily
- good sharp knife (with breakable blades)
- needle or pin
- double sided tape
- any plastic card
- thermogun and glue (it is possible without it, but easier with it)
Getting Started:
Remove the battery and disassemble the hedgehog. This is not easy, but very simple -
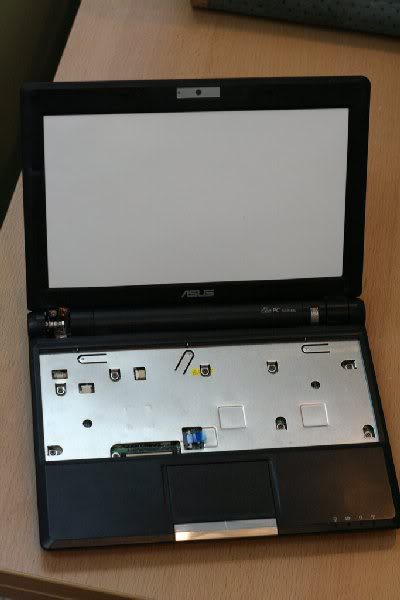
Remove the keyboard by pressing with a thin screwdriver on the three latches at the top of the keyboard:

We take it out and disconnect the cable (with a thin screwdriver, move the latch up on both sides). Disconnect the touch pad cable - slide the latch to the right and pull out the cable with tweezers.

Unscrew all the screws that we see above
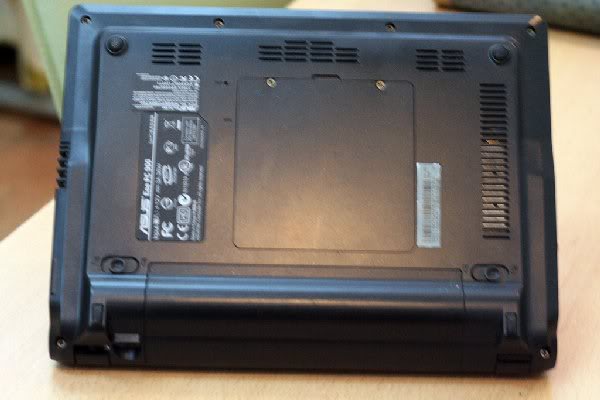
and bottom
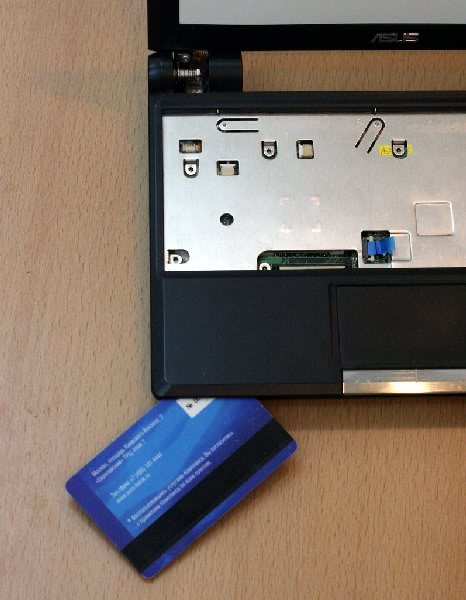
Using a plastic card, snap off all the internal latches around the perimeter and remove the upper part of the case:
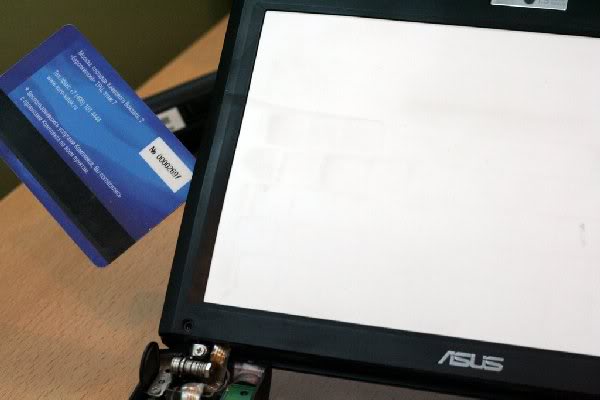
Now take up the cover:
We take out all the plugs with a needle and unscrew the screws that are hidden under them.
All the same card gently snap off the latch, gently running it along the seam.
The process of bullying the lid, unfortunately, is not captured.
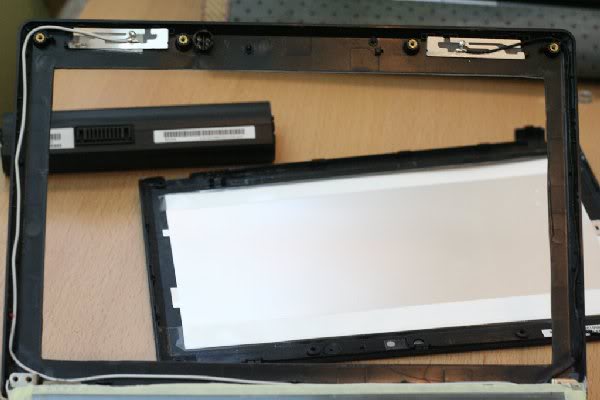
We divide the cover into two parts. Unhook the camera, microphone. We unscrew the screws securing the screen to the cover, pull out the cable and take out the matrix. Remove the foil and remove the wifi antenna from it.
Unscrew the hinge caps and separate the cap. It is easiest and most accurate to cut a hole in it with a knife, using the metal frame of the matrix as a template. To do this, remove the mounting brackets, unscrew the 4 small screws and snap off the frame from the matrix. Then we turn the frame back over and screw it to the brackets, and the brackets to the lid, so that the frame fits snugly to the lid. Cut a hole with a knife on the resulting pattern. We sand the edges of the paper on both sides.
Unscrew the frame from the cover and set the matrix in it.
Important! It is necessary to file the mounting holes of the brackets a little so as to form an oval hole. This is needed to install the matrix-touch sandwich in the lid without distortions.
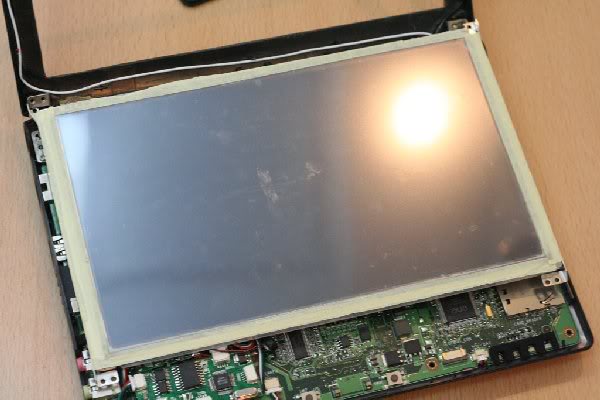
If desired, before installing the touch-screen, you can remove the anti-reflective film from the matrix to increase its brightness. The process is described in detail on the eee-pc.ru forum (I did a similar procedure with the native matrix, but then broke it during installation, and bought a new one that is glossy. I can’t say the process is simple. Straight arms just don’t interfere)
Cut out thin strips of double-sided tape, glue around the perimeter and glue the touch-screen onto the frame. (In some descriptions of the process, it is recommended to put the touch inside the frame. I tried to do this and killed the glass splitting matrix).
Set the sandwich in the cover. Glue the antenna on top of the cover. If desired, you can connect the camera and microphone by making holes for them. I didn’t bother with the camera, I just connected a microphone. The magnet closing the reed switch with the lid closed, I moved to the edge of the lid - now it holds the stylus.
So, it remains to connect the touchscreen controller and collect everything back.
A place for the controller, which was part-time usb-hub, I chose at the bottom left of the motherboard. Glue the board on hot melt glue. With the wires from the kit we connect the controller input with the web-cam connector, in the controller connectors we connect a touch-screen loop, a web-camera (if needed). Along the way, I installed Bluetooth in my laptop, pulling the board out of unnecessary USB Dlink Bluetooth and also attaching it with hot melt to the motherboard. Wires fix double-sided tape.
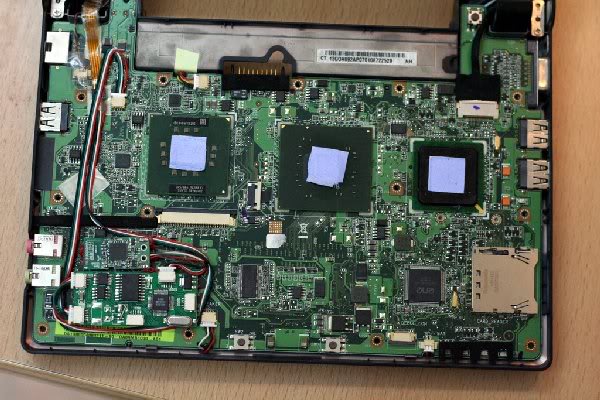
Regarding the controller in the network, information was found that some instances may burn the USB port, since their polarity is confused. There was no such problem with my copy.
Turn on, install the touchscreen driver from here: 210.64.17.162/web20/eg/drivers.htm
check if everything works, we assemble the device in the reverse order. In order for the blue-tooth to work well, we remove the shielding from the inside of the case.
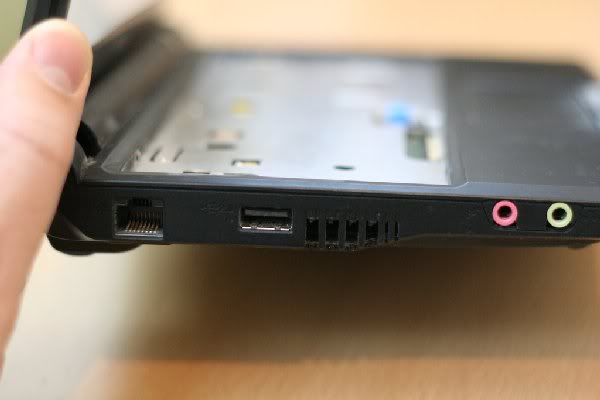
I also advise you to remove some of the jumpers on the hole for blowing hot air
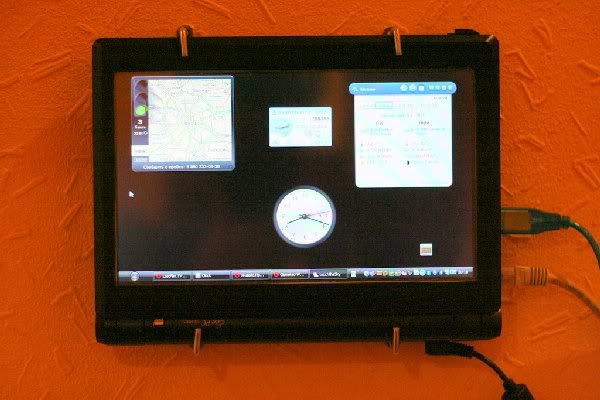
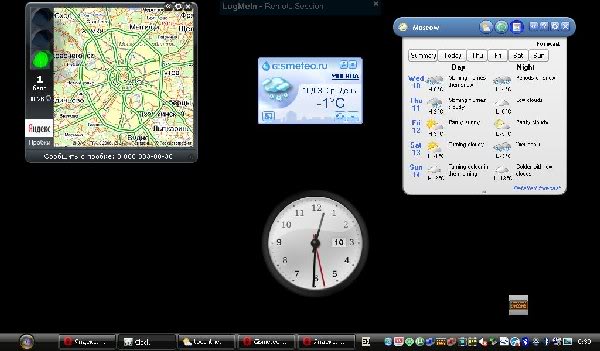
The result is this:

And here you can see my IT corner: Wl
Additionally you want:
- somehow arrange the cover (paint or stick vinyl to make the opening under the screen in the cover look more neat)
- Come up with something to improve the heat dissipation from the chip and the chipset (the radiator is a metal plate under the keyboard and when the lid is closed, it does not do it very well. The processor temperature stays around 58-60 degrees while the bus frequency decreases to 70 and the fan is 30 %. Removing the keyboard does not lead to any temperature change. While looking for the right radiator to put in place of the plate and the keyboard. If you have any ideas how to improve heat dissipation, share, plz.)
The banal WinXp is installed on the animal. (Regarding the stability of work, I can say that the device has been working steadily 24/7 since last November.)
From the software installed:
- eeectl (reduced tire frequency to 70% to reduce heat generation)
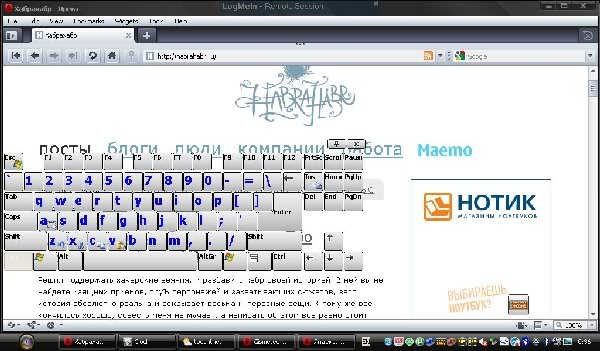
- software for touchscreen - surprisingly turned out to be very functional and even translated into Russian
- On-screen Keyboard Lite on-screen keyboard
- Opera with a set of widgets (Yandex.Probki, Clock, Weather)
- Auto-it script that controls the backlight of the matrix through Eeectl - in standby mode, I remove the backlight at the very minimum
- server part of the LogMeIn remote administration program
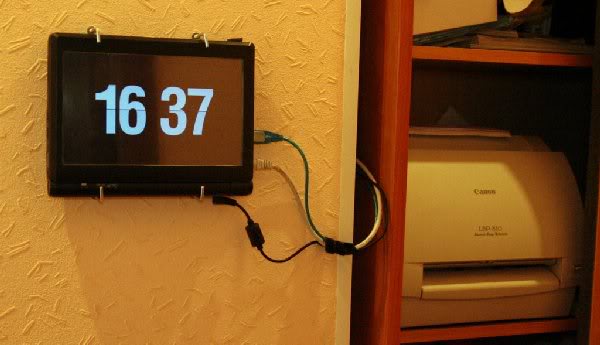
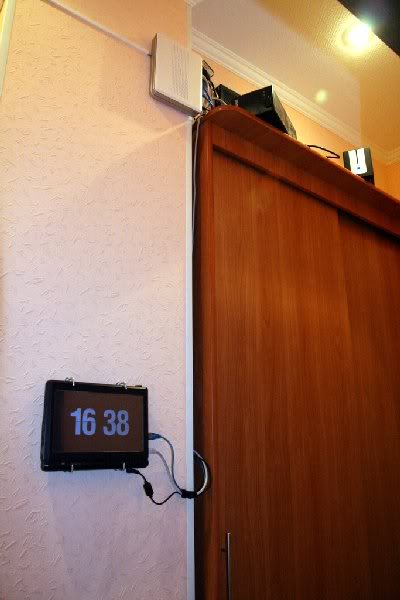
- screensaver in the form of a digital-analog clock
- mTorrent
Eee Pad is ready.
The device can be mounted on the wall either upwards with a battery or downwards. In the second case, you can adjust the tilt of the screen. In the first tilt is enough to place the laptop at eye level.
- Torrento rocking / swing
- Devices for permanent display of Yandex.Probok and weather forecast (It is convenient when you can quickly look at the situation on the street and plan a route before leaving the house)
- Print server for an old, but economical and smoothly working Canon printer LBP-810
- Hours
The first item could, of course, be implemented using equipment that was already installed in the home network — the Asus WL-500gP or NASa D-link DNS-323 router, but first of all I’m not friends with Linux and even the detailed instructions are not enough time to figure it out, and secondly, Linux is not particularly friendly with the above-mentioned printer.
So, to implement the venture was acquired:
but. Touch-screen (1500r with delivery from China) dealextreme.com
b. Fasteners for mounting on the wall (100r per 4 pieces) OBI
at. Subsequently, a new matrix, as well, as a result of an error during the installation of the touchscreen, the old one died. (3000r) Savelovsky market (contacts in the “flea market” section of the forum eee-pc.ru )
')
The process of installing the touchscreen will take one evening (if you do not break the matrix) and does not require much effort and special skills, guarantees, of course, you lose.
Required tool:
- small cross and flat face screwdrivers (a set of time screwdrivers would be best)
- tweezers - desirable, but not necessarily
- good sharp knife (with breakable blades)
- needle or pin
- double sided tape
- any plastic card
- thermogun and glue (it is possible without it, but easier with it)
Getting Started:
Remove the battery and disassemble the hedgehog. This is not easy, but very simple -
Remove the keyboard by pressing with a thin screwdriver on the three latches at the top of the keyboard:

We take it out and disconnect the cable (with a thin screwdriver, move the latch up on both sides). Disconnect the touch pad cable - slide the latch to the right and pull out the cable with tweezers.

Unscrew all the screws that we see above

and bottom

Using a plastic card, snap off all the internal latches around the perimeter and remove the upper part of the case:

Now take up the cover:
We take out all the plugs with a needle and unscrew the screws that are hidden under them.
All the same card gently snap off the latch, gently running it along the seam.

The process of bullying the lid, unfortunately, is not captured.
We divide the cover into two parts. Unhook the camera, microphone. We unscrew the screws securing the screen to the cover, pull out the cable and take out the matrix. Remove the foil and remove the wifi antenna from it.
Unscrew the hinge caps and separate the cap. It is easiest and most accurate to cut a hole in it with a knife, using the metal frame of the matrix as a template. To do this, remove the mounting brackets, unscrew the 4 small screws and snap off the frame from the matrix. Then we turn the frame back over and screw it to the brackets, and the brackets to the lid, so that the frame fits snugly to the lid. Cut a hole with a knife on the resulting pattern. We sand the edges of the paper on both sides.

Unscrew the frame from the cover and set the matrix in it.
Important! It is necessary to file the mounting holes of the brackets a little so as to form an oval hole. This is needed to install the matrix-touch sandwich in the lid without distortions.
If desired, before installing the touch-screen, you can remove the anti-reflective film from the matrix to increase its brightness. The process is described in detail on the eee-pc.ru forum (I did a similar procedure with the native matrix, but then broke it during installation, and bought a new one that is glossy. I can’t say the process is simple. Straight arms just don’t interfere)
Cut out thin strips of double-sided tape, glue around the perimeter and glue the touch-screen onto the frame. (In some descriptions of the process, it is recommended to put the touch inside the frame. I tried to do this and killed the glass splitting matrix).

Set the sandwich in the cover. Glue the antenna on top of the cover. If desired, you can connect the camera and microphone by making holes for them. I didn’t bother with the camera, I just connected a microphone. The magnet closing the reed switch with the lid closed, I moved to the edge of the lid - now it holds the stylus.
So, it remains to connect the touchscreen controller and collect everything back.
A place for the controller, which was part-time usb-hub, I chose at the bottom left of the motherboard. Glue the board on hot melt glue. With the wires from the kit we connect the controller input with the web-cam connector, in the controller connectors we connect a touch-screen loop, a web-camera (if needed). Along the way, I installed Bluetooth in my laptop, pulling the board out of unnecessary USB Dlink Bluetooth and also attaching it with hot melt to the motherboard. Wires fix double-sided tape.

Regarding the controller in the network, information was found that some instances may burn the USB port, since their polarity is confused. There was no such problem with my copy.
Turn on, install the touchscreen driver from here: 210.64.17.162/web20/eg/drivers.htm
check if everything works, we assemble the device in the reverse order. In order for the blue-tooth to work well, we remove the shielding from the inside of the case.
I also advise you to remove some of the jumpers on the hole for blowing hot air

The result is this:


And here you can see my IT corner: Wl

Additionally you want:
- somehow arrange the cover (paint or stick vinyl to make the opening under the screen in the cover look more neat)
- Come up with something to improve the heat dissipation from the chip and the chipset (the radiator is a metal plate under the keyboard and when the lid is closed, it does not do it very well. The processor temperature stays around 58-60 degrees while the bus frequency decreases to 70 and the fan is 30 %. Removing the keyboard does not lead to any temperature change. While looking for the right radiator to put in place of the plate and the keyboard. If you have any ideas how to improve heat dissipation, share, plz.)
The banal WinXp is installed on the animal. (Regarding the stability of work, I can say that the device has been working steadily 24/7 since last November.)
From the software installed:
- eeectl (reduced tire frequency to 70% to reduce heat generation)
- software for touchscreen - surprisingly turned out to be very functional and even translated into Russian
- On-screen Keyboard Lite on-screen keyboard

- Opera with a set of widgets (Yandex.Probki, Clock, Weather)

- Auto-it script that controls the backlight of the matrix through Eeectl - in standby mode, I remove the backlight at the very minimum
- server part of the LogMeIn remote administration program
- screensaver in the form of a digital-analog clock
- mTorrent
Eee Pad is ready.
The device can be mounted on the wall either upwards with a battery or downwards. In the second case, you can adjust the tilt of the screen. In the first tilt is enough to place the laptop at eye level.
Source: https://habr.com/ru/post/90229/
All Articles