Javascript authorization widget OpenID
About half a year ago, I became very interested in OpenID and everything connected with it. My main occupation at this time was the unhurried reading of specifications, forums, blogs and openID topics.
All the knowledge that I received during this time, I "materialized" in the project of the company in which I actually work.
Studying the OpenID specification and its other extensions (SREG, AX) and add-ons, I got the idea to develop a JavaScript widget with its API-layer, to help other developers not wanting to “pass away” days and nights studying the specs of various authorization methods and their extensions.
')
Actually about it further.
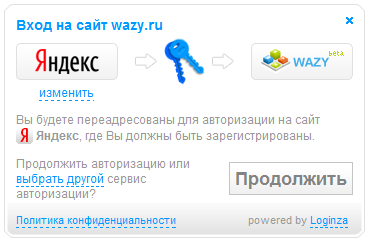
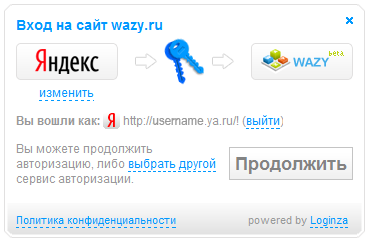
The task assigned to the widget was simple, to provide an easy and understandable for the end user authorization interface through OpenID. At the same time, the widget is essentially a consumer of OpenID authorization.
Everyone knows that the term OpenID is not familiar to all ordinary web users. Therefore, in the widget UI there is at least this terminology.
Here's what happened:

As I mentioned above, the widget is not just a UI, but also a working consumer. He completely takes the user authorization process on himself, and communicates with the final site (which uses it) through a simple API .
Using the widget is easy, you just need to install the following HTML code on the page:
After the user is authorized, he will be redirected to the [RETURN_URL] page specified in the token_url parameter. A unique token key will be transferred to this page in POST, which is required to get an authorized user profile (profile data is “ pulled ” via the SREG OpenID extension).
In order to get a profile, you need to make an interserver request to the URL:
where [TOKEN_KEY_VALUE] is the secret key obtained in POST.
The data format of the JSON profile is an array with data about the user who is authorized. Example:
Actually, it turned out to be such a simple, but at the same time functional, method of authorizing OpenID users with uploading profile data.
I offer my work for criticism, because I want to get a response back from developers, opinions and feedback on the usefulness of this widget option for them. Is it worth it to develop the idea, to include support for other types of authorization besides OpenID (Vkontakte, Twitter, Windows Live, etc.) in this widget.
Who cares to see the widget itself in work, now it is used here in beta mode.
UPD (May 5):
I am glad to announce that today (May 5) we have updated our JavaScript widget OpenID Loginza . The following corrections are made and functions are added:
1. Implemented support for Vkontakte OpenAPI in the authorization widget. The VKontakte user profile is transmitted in a normalized form (uniform format), as with the selection of other providers;
2. Now you can create several links to the Loginza JavaScript widget; to do this, specify the class = "loginza" parameter in the required links;
3. There was an OpenID authorization problem on other sites, if Loginza's login had uppercase characters. Corrected, now works like a clock;
4. Enhanced authorization security, now we use https .
UPD (July 11):
Added the long-awaited opportunity that many have been waiting for:
- parameter providers_set - it is responsible for the set of authorization providers in the Loginza widget.
If you need to limit the set of provider buttons available to users or change their order, then use this parameter in the address href links to the widget. The order of the buttons will correspond to the order of listing providers in the providers_set parameter.
All the knowledge that I received during this time, I "materialized" in the project of the company in which I actually work.
Studying the OpenID specification and its other extensions (SREG, AX) and add-ons, I got the idea to develop a JavaScript widget with its API-layer, to help other developers not wanting to “pass away” days and nights studying the specs of various authorization methods and their extensions.
')
Actually about it further.
What does this widget do?
The task assigned to the widget was simple, to provide an easy and understandable for the end user authorization interface through OpenID. At the same time, the widget is essentially a consumer of OpenID authorization.
Everyone knows that the term OpenID is not familiar to all ordinary web users. Therefore, in the widget UI there is at least this terminology.
Here's what happened:
How does the widget work and how to use it?
As I mentioned above, the widget is not just a UI, but also a working consumer. He completely takes the user authorization process on himself, and communicates with the final site (which uses it) through a simple API .
Using the widget is easy, you just need to install the following HTML code on the page:
<script src= "http://loginza.ru/js/widget.js" type= "text/javascript" ></script>
<a href= "https://loginza.ru/api/widget?token_url=[RETURN_URL]" id= "loginza" > OpenID</a>

* This source code was highlighted with Source Code Highlighter .
After the user is authorized, he will be redirected to the [RETURN_URL] page specified in the token_url parameter. A unique token key will be transferred to this page in POST, which is required to get an authorized user profile (profile data is “ pulled ” via the SREG OpenID extension).
In order to get a profile, you need to make an interserver request to the URL:
http://loginza.ru/api/authinfo?token=[TOKEN_KEY_VALUE]
where [TOKEN_KEY_VALUE] is the secret key obtained in POST.
The data format of the JSON profile is an array with data about the user who is authorized. Example:
{ "identity" : "http:\/\/admin.loginza.ru\/" , "provider" : "http:\/\/loginza.ru\/server\/" ,
"name" :{ "full_name" : "\u0421\u0435\u0440\u0433\u0435\u0439 \u0421\u0435\u0440\u0433\u0435\u0439" },
"nickname" : "admin" , "email" : "admin@loginza.ru" , "gender" : "M" , "dob" : "1985-01-31" }

* This source code was highlighted with Source Code Highlighter .
Actually, it turned out to be such a simple, but at the same time functional, method of authorizing OpenID users with uploading profile data.
Todo
- Plans to implement backward compatibility with OpenID 1.0 (at the moment, only version 2.0 is supported);
- Add support for microformats hCard, vCard;
Conclusion
I offer my work for criticism, because I want to get a response back from developers, opinions and feedback on the usefulness of this widget option for them. Is it worth it to develop the idea, to include support for other types of authorization besides OpenID (Vkontakte, Twitter, Windows Live, etc.) in this widget.
Who cares to see the widget itself in work, now it is used here in beta mode.
UPD (May 5):
I am glad to announce that today (May 5) we have updated our JavaScript widget OpenID Loginza . The following corrections are made and functions are added:
1. Implemented support for Vkontakte OpenAPI in the authorization widget. The VKontakte user profile is transmitted in a normalized form (uniform format), as with the selection of other providers;
2. Now you can create several links to the Loginza JavaScript widget; to do this, specify the class = "loginza" parameter in the required links;
3. There was an OpenID authorization problem on other sites, if Loginza's login had uppercase characters. Corrected, now works like a clock;
4. Enhanced authorization security, now we use https .
UPD (July 11):
Added the long-awaited opportunity that many have been waiting for:
- parameter providers_set - it is responsible for the set of authorization providers in the Loginza widget.
If you need to limit the set of provider buttons available to users or change their order, then use this parameter in the address href links to the widget. The order of the buttons will correspond to the order of listing providers in the providers_set parameter.
Source: https://habr.com/ru/post/89944/
All Articles