New version of Image Composite Editor
A new version of the Image Composite Editor has been released - a free program for convenient, quick and automatic creation of panoramas from a set of arbitrary photos. I have already talked about the program in this article , you can read if interested.
Here, I would like to tell you that the program has a new one: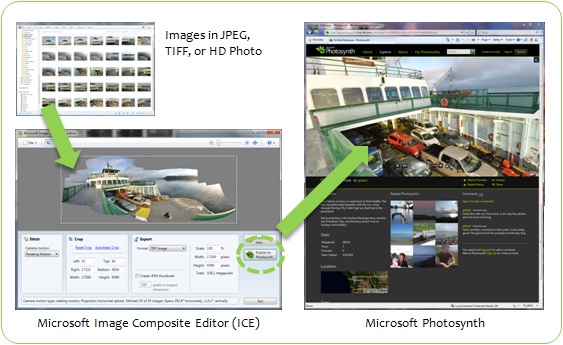
Consider the most interesting functionality: creating a panorama for publication in the Photosynth service and further sharing of the synth in your blog. First you need to download the ICE distribution , it is available for both Windows x86 and 64-bit.
')
The installed ICE looks like this:
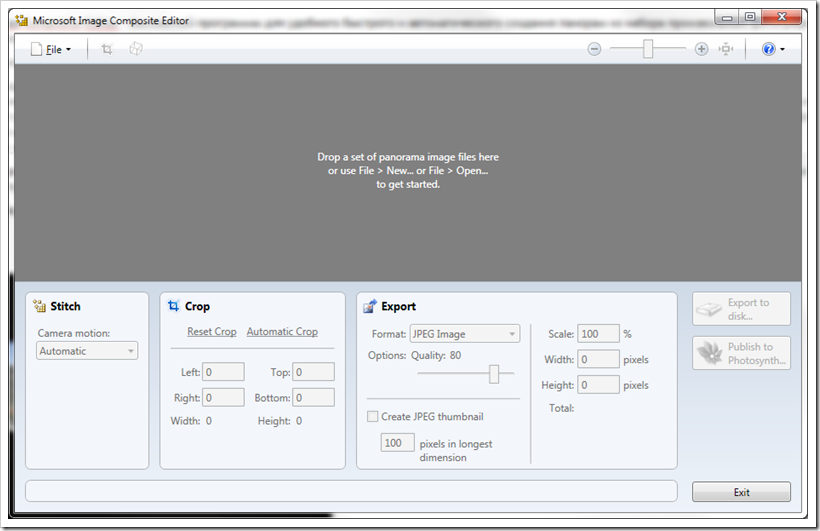
To get started, you need to add a set of photos from the File menu from which you want to build a panorama. The panorama can be any: made by turning the camera, when moving, at 360 degrees. After selecting the files will begin automatically gluing images. I added my old photos and got what I got:
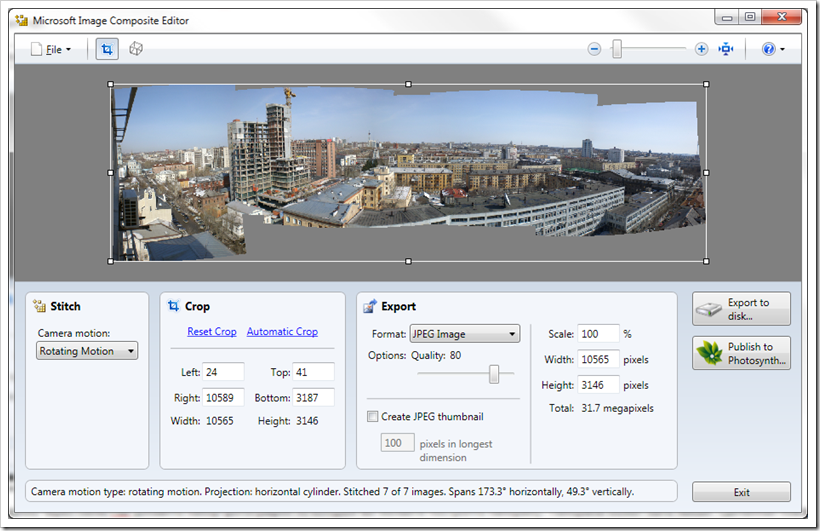
If you are not satisfied with automatic recognition of the type of panorama, you can choose one of the types below in the Stitch part. To obtain a rectangular image without characteristic teeth, you can crop the image using the Crop part. To configure the export, use the elements of the Export part. Here you can select the format of the output file: JPEG, TIFF, tiles for DeepZoom, BMP, PNG projects and a new format for storing photos of HD Photo. It is also possible to create a thumbnail, set the scaling and size of the output image. As you can see, my image contains 31.7 megapixels.
In addition, it is possible to adjust the projection and orientation of the panorama through the setting in the top panel.
To export the finished panorama, click Export to disk. But now we are more interested in a new opportunity: export to the Photosynth service.
Click on Publish to Photosynth. ICE will check for photosynth updates and may ask you to download the update to support the service. After that, the panorama loading window will open.
In the settings window of the download, you can specify the name, tags, description, set a piece that will represent the reduced image of the panorama. To publish, you must select the type of license under which you publish your materials, reative ommons, public domain or Copyright licenses are available. It will be necessary to indicate the availability of photosynt for visitors: public or only through a special link.
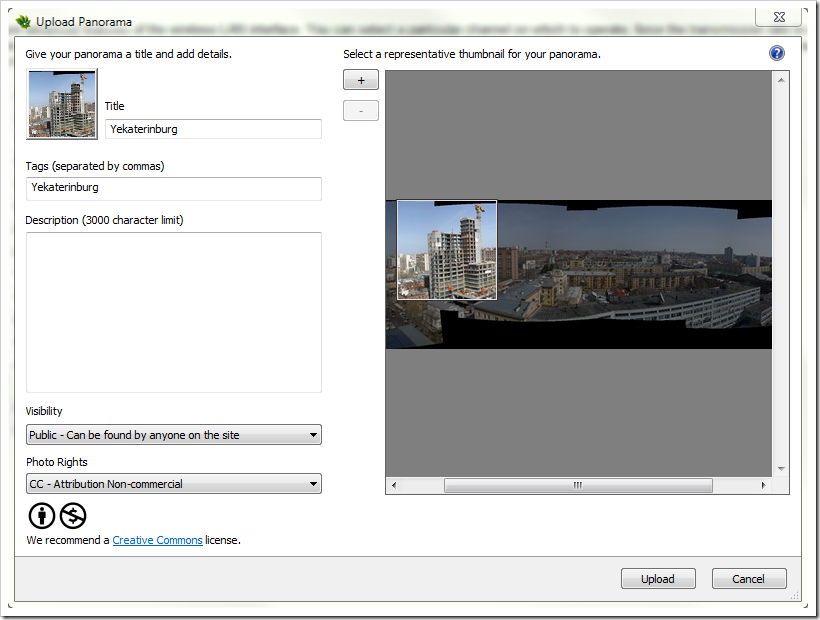
By clicking Upload you will start uploading photosynt to the service.
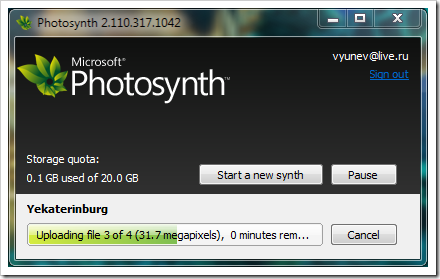
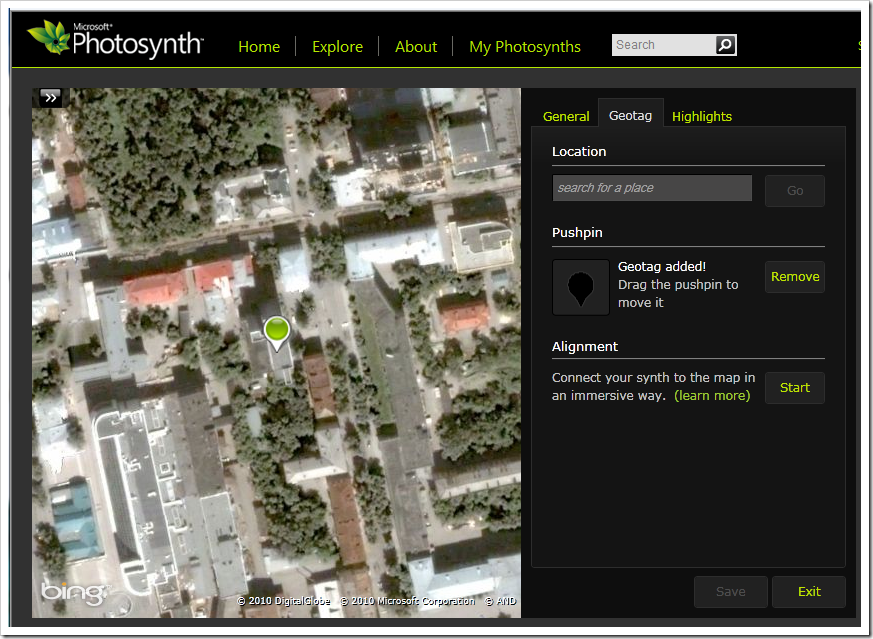
After downloading, you can go to your page in Photosynth. There is a useful opportunity to bind photosynt to the location.
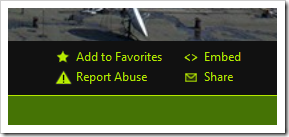
That's all. Now go to the synth page and use the Embed button to copy the embed code into your blog:
I hope it was interesting. Make panoramas, share with friends.
PS: the announcement of innovations and an example of the synth built into the blog can be found here .
Here, I would like to tell you that the program has a new one:
- support for multi-core processors and accelerated processing of panoramas due to multiple cores;
- the ability to publish your panoramas on the public social service Photosynth, which is designed to create three-dimensional scenes based on a set of images;
- support of “structured panoramas” - panoramas that are created on the basis of hundreds of photos in the form of a grid of rows of images (such sets of photos can be created using special automation, like GigaPan );
- the limit on the image size is removed; the size of the created panoramas is now unlimited, make your gigapixel panoramas and publish them on the web;
- Support for Windows 7 features.

Consider the most interesting functionality: creating a panorama for publication in the Photosynth service and further sharing of the synth in your blog. First you need to download the ICE distribution , it is available for both Windows x86 and 64-bit.
')
The installed ICE looks like this:

To get started, you need to add a set of photos from the File menu from which you want to build a panorama. The panorama can be any: made by turning the camera, when moving, at 360 degrees. After selecting the files will begin automatically gluing images. I added my old photos and got what I got:

If you are not satisfied with automatic recognition of the type of panorama, you can choose one of the types below in the Stitch part. To obtain a rectangular image without characteristic teeth, you can crop the image using the Crop part. To configure the export, use the elements of the Export part. Here you can select the format of the output file: JPEG, TIFF, tiles for DeepZoom, BMP, PNG projects and a new format for storing photos of HD Photo. It is also possible to create a thumbnail, set the scaling and size of the output image. As you can see, my image contains 31.7 megapixels.
In addition, it is possible to adjust the projection and orientation of the panorama through the setting in the top panel.
To export the finished panorama, click Export to disk. But now we are more interested in a new opportunity: export to the Photosynth service.
attention, you must have a Photosynth service account to upload to it from ICE
Click on Publish to Photosynth. ICE will check for photosynth updates and may ask you to download the update to support the service. After that, the panorama loading window will open.
In the settings window of the download, you can specify the name, tags, description, set a piece that will represent the reduced image of the panorama. To publish, you must select the type of license under which you publish your materials, reative ommons, public domain or Copyright licenses are available. It will be necessary to indicate the availability of photosynt for visitors: public or only through a special link.

By clicking Upload you will start uploading photosynt to the service.

After downloading, you can go to your page in Photosynth. There is a useful opportunity to bind photosynt to the location.

That's all. Now go to the synth page and use the Embed button to copy the embed code into your blog:

I hope it was interesting. Make panoramas, share with friends.
PS: the announcement of innovations and an example of the synth built into the blog can be found here .
Source: https://habr.com/ru/post/88272/
All Articles