Create Twitter application for Windows Phone 7
 So, on Monday I had the opportunity to open MIX 2010 Day 1 Keynote in Las Vegas ( video attached ). In keynot, I made the announcement of the Silverlight 4 RC version (the final version will be available next month) and the VS 2010 RC tools for Silverlight 4. I also had the opportunity for the first time to discuss the use of Silverlight and XNA for developing Windows Phone 7 applications.
During the talk, I created two small Windows Phone 7 applications using Silverlight: a simple “Hello World” application and an application that receives data from Twitter. Both programs are easy to create, it only takes a couple of minutes. Below are the steps you can take to create applications on your machine.
Creating a “Hello World” Windows Phone 7 application.
First of all, make sure that you have Windows Phone Developer Tools CTP installed, it includes Visual Studio 2010 Express for development for Windows Phone (it will always be free, this is the only thing you need to develop Windows Phone 7 applications), as well as the add-in for VS2010 RC.
After downloading and installing Windows Phone Developer Tools CTP , start Visual Studio 2010 Express for Windows Phone or run VS 2010 RC (if you have it installed), and select File-> New Project. You will see the usual list of project template types, but with a new category - “Silverlight for Windows Phone”. The first CTP offers two types of projects. The first template is “Windows Phone Application”, we will use it for this example. The second is the “Windows Phone List Application”, which the application offers a standard master-details template:
')

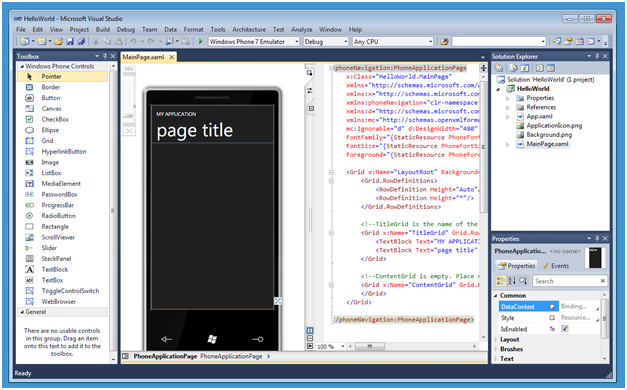
Having created a new project, you will see the device and markup. Notice that the device shows the phone's UI, allowing you to see what your application looks like during development. Those familiar with Visual Studio will easily find the ToolBox, Solution Explorer and Properties panel.
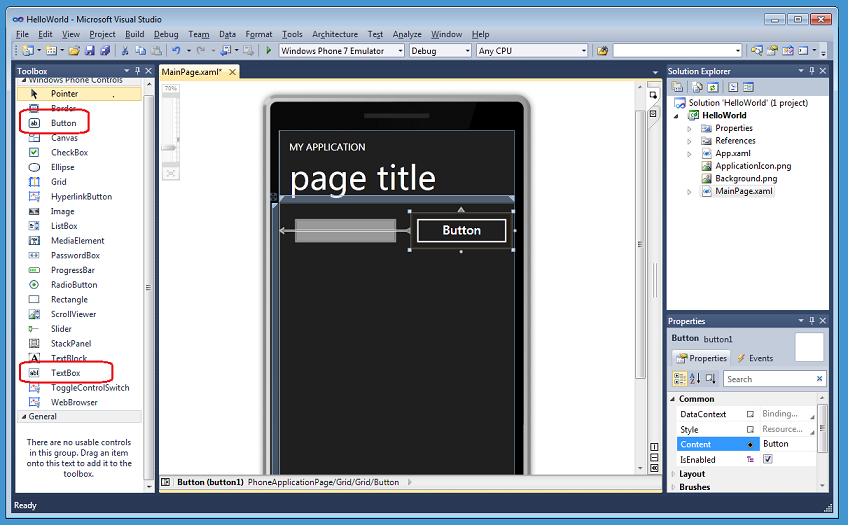
For the HelloWorld application, we start by adding the TextBox and Button from the Toolbox. Note that all actions are identical with Silverlight on the web or on the desktop. You can easily resize, move and align controls directly in the designer. changing properties is also easy via the Properties panel. We will change the name of the TextBox that is added to the username and change the page title to “Hello world”.
Next, we write the code by clicking twice on the button and creating an event handler in the code-behind file (MainPage.xaml.cs).

We will start by changing the application title. The project template includes a TextBlock header with the name textBlockListTitle (this name incorrectly contains the word “list”, in the final version we will fix this). In the course of writing code, intellisense, showing the available members. Below we set the TextBlock header property as “Hello” + Text property from the TextBox username:

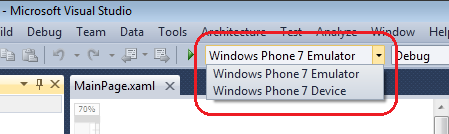
Now we have all the necessary code for the Hello World application. We have two options for deploying and running the application. We can do this on a real device or through the built-in emulator:
We get full functionality in the emulator, as this is a real operating system running on a virtual machine. For our example, we simply hit F5 to start the application in debug mode using the emulator. As soon as the operating system boots up, the emulator will launch a new “Hello world” application, in the same way, if it were a real device:
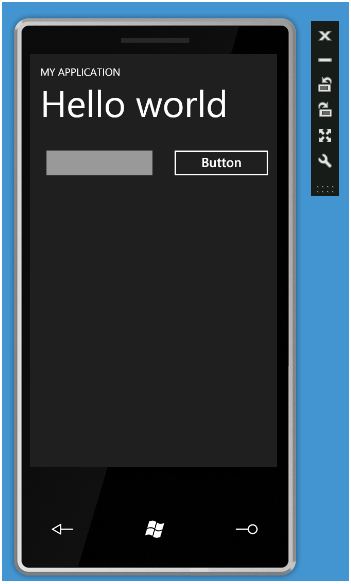
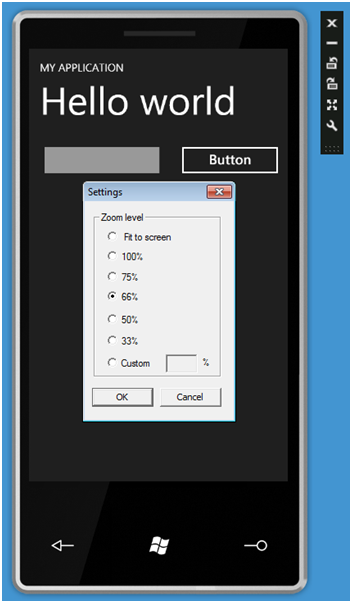
Note that we can change several settings of the emulator through the emulator toolbar - it is a floating panel in the upper right corner. You have the ability to change the size / scale of the emulator and two buttons for rotation. The scale allows us to enlarge areas with the smallest details of the application:
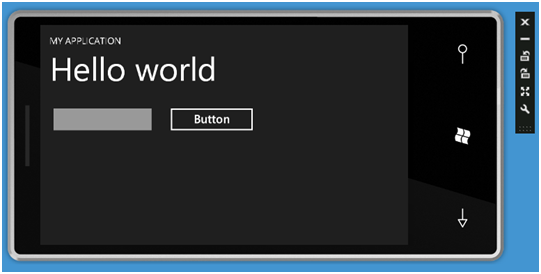
These orientation settings allow us to see how the application will look in horizontal mode (orientation changes are supported directly in the standard template):
Please note that the emulator is re-used in the following F5 debugging sessions - this means that you will not have to start the emulator for each application launch. We have added a window that helps you not to turn off the emulator by accident if you want to use it again. Running the application on an already running emulator should take about 3 seconds to deploy and launch.
In our Hello World app, we will click on the “username” text box to focus. This action automatically opens the software input panel (software input panel, SIP). We can type a message or, since we are using an emulator, type text using the virtual keyboard. I want to note that the emulator works fine with the multitouch screen in Windows 7, if you have one, then you will enjoy full interaction with the device.

We will write “MIX 10” in the text field and click on the button, changing the title to “Hello MIX 10”:

We provide the same Visual Studio development experience for the phone as for other .NET applications. This means that we can put a breakpoint in the event handler of the button, press the button again and get the stop in the debugger:

Creating a Twitter Windows Phone 7 application with Silverlight
Instead of dwelling on “Hello World”, let's continue and develop the applications to a simple Twitter client.
We will return to the application layout and add a ListBox using the guides in the designer to place the element on the screen and allowing you to make the most of the space on the screen. Change the text on the buttons to “Lookup”:

Next, let's go back to the button event handler in Main.xaml.cs and delete the original “Hello World” code and use the advantages of the class for working with the WebClient network to asynchronously download the Twitter feed. It only takes three lines of code: (1) declare and create a WebClient, (2) attach an event handler, (3) call the asynchronous DownloadStringAsync method.
In the call to DownloadStringAsync, we give Twitter the address and query string that pulls the text from the “username” TextBox. This feed will return the user's latest posts in XML format. After the call is completed, the DownloadStringCompleted event is triggered and, accordingly, our generated event handler twitter_DownloadStringCompleted.

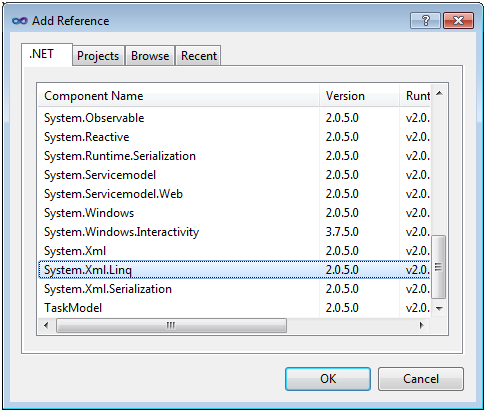
The result is returned from Twitter in a specific XML format. For analysis we will use LINQ to XML. LINQ to XML allows us to create a simple query for accessing data in an xml tape. To use this library, we first add a link to the collection (right-click on the References folder in Solution Explorer and select Add Reference):
Add the namespace “using System.Xml.Linq” to the code-behind header of the Main.xaml.cs file:

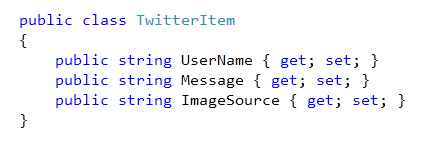
Next, add a simple auxiliary class to our project and name it TwitterItem, which will have three members - UserName, Message and ImageSource:
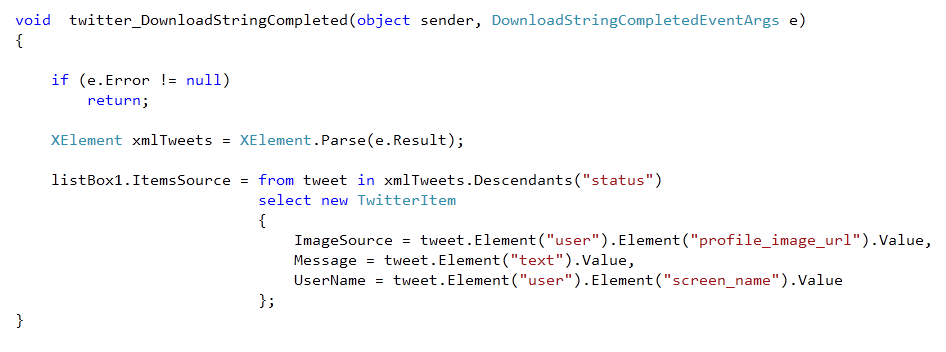
Next, we implement the twitter_DownloadStringCompleted event handler and use LINQ to XML to parse the returned XML string from Twitter. What the request does is - it pulls out three key pieces of information for each Twitter message from the user we sent in the request. ImageSource is used for image profile, Message for tweet, well, UserName. For each tweet in XML, we create a new TwitterItem in the IEnumerable returned by the Linq query.
We set the TwitterItem sequence to the ItemsSource property for the ListBox:
Do one more step to complete the application. In the Main.xaml file, add an ItemTemplate to the ListBox. For the demonstration, I used a simple template that uses data binding to display user profile images, their tweets, and username.
< ListBox Height ="521" HorizonalAlignment ="Left" Margin ="0,131,0,0" Name ="listBox1" VerticalAlignment ="Top" Width ="476" >

< ListBox.ItemTemplate >
< DataTemplate >
< StackPanel Orientation ="Horizontal" Height ="132" >
< Image Source ="{Binding ImageSource}" Height ="73" Width ="73" VerticalAlignment ="Top" Margin ="0,10,8,0" />
< StackPanel Width ="370" >
< TextBlock Text ="{Binding UserName}" Foreground ="#FFC8AB14" FontSize ="28" />
< TextBlock Text ="{Binding Message}" TextWrapping ="Wrap" FontSize ="24" />
</ StackPanel >
</ StackPanel >
</ DataTemplate >
</ ListBox.ItemTemplate >

</ ListBox >
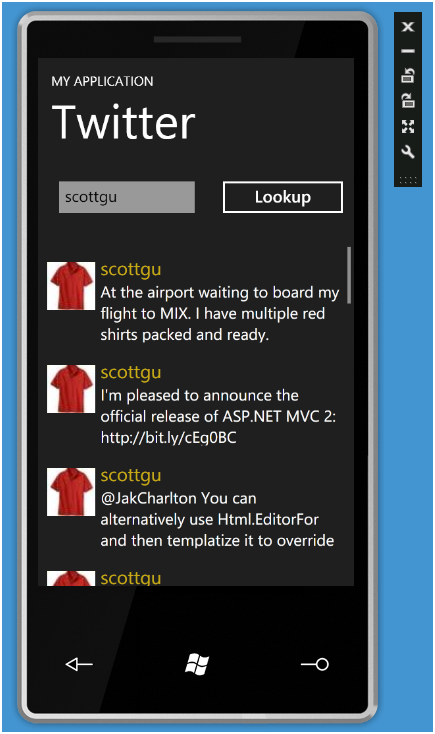
Now press F5, we use the already running emulator and restart the application. Once the application is launched, we can type the username on Twitter and click a button to get the result. Try typing my user (scottgu):
Try using the mouse, and if you have a touch screen, then with your finger, to scroll through the ListBox, have you noticed how it scrolls quickly in the emulator? This is because the emulator uses hardware acceleration and provides the same performance that you get on a real device.
Total
Silverlight and VS 2010 Tools for Windows Phone (and therefore Expression Blend Tools for Windows Phone ) make it very fast and fun to create applications.
On MIX, several excellent partners, including Netflix, FourSquare, Seesmic, Shazaam, Major League Soccer, Graphic.ly, Associated Press, Jackson Fish, etc., showed some killer prototypes of the applications they developed in a few weeks. You can view the full record of the first day of the keynote to see it with your own eyes. I think they demonstrated the full potential of Silverlight on Windows Phone 7. In the coming months, expect an article on this topic from me.
Source: https://habr.com/ru/post/88143/
All Articles