Setting up a Google Code project in Eclipse + bugtracker
I’ve been going to write step-by-step instructions for beginners for a long time and finally there was time. A couple of people helped, I hope to help someone from the campers :)
First we need a Google account. If you already have one, go to http://code.google.com/hosting/ and select Create a new project . After entering the data, the project management panel will open:
')

Next, we need to install the pydev Eclipse extension to be able to develop Python projects in it, as well as subclipse , a plugin for working with SVN.
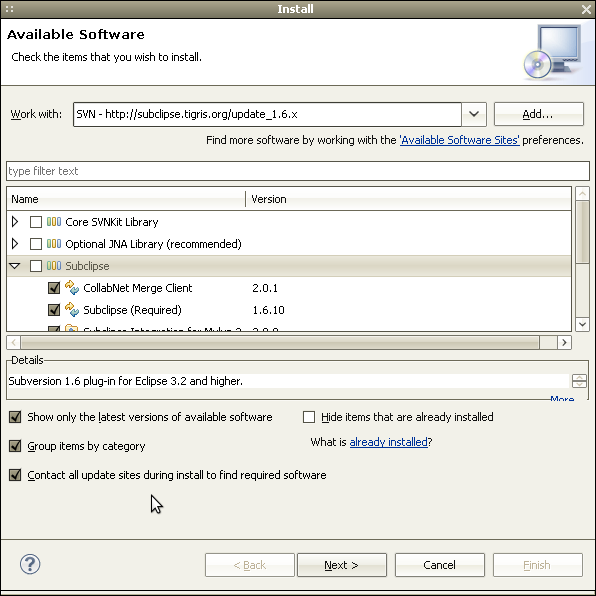
Go to Eclipse, select the Install New Software item in the Help menu ... First add pydev.org/updates as the source, select PyDev from the list and click Next . Follow the instructions of the installer. The same should be done with the site subclipse.tigris.org/update_1.6.x , by selecting, respectively, in the list of Subclipse . After installing the plugins, you need to restart Eclipse.
Now let's do, in fact, the creation of a new project.
In the Pydev Package Explorer (you can open it here Window - Show view - Pydev Package Explorer ) in the context menu select New - Project ... from the list in the SVN folder - Checkout Projects from SVN . We create a new repository location by specifying the URL of the view like your_project_name.googlecode.com / svn . You will be prompted to enter a username / password. The first, in fact, is your login to Google, the second can be viewed on the Source tab in the project control panel via the link “When prompted, enter your generated googlecode.com password” . In the list of directories that appears, select the trunk , which will be the main development branch of our project. Further, Eclipse will offer a choice of either creating a new project file or using an existing one. Since we are creating a project from scratch, select Check out as a project configured using the New Project Wizard and proceed to setting it up.

After you specify all the necessary data to create a pydev project, in the Pydev Package Explorer workspace you will see your project, which still has nothing in it :) Create a file or folder in it, for example main.py , after which Give him a team - Add to Version Control . This will allow it to be added to the repository at the next commit. The commit itself is carried out respectively by the Team - Commit ...

UPD : Setting up Google Code Issues bug tracker in Eclipse
In order to implement a bugtracking system in our newly-baked project, we need to install two more extensions (all the same, through the Installer Help - Install New Software .. )
download.eclipse.org/tools/mylyn/update/weekly/extras
from here we need Mylyn Connector: Trac
download.eclipse.org/tools/mylyn/update/weekly/incubator
here choose Mylyn Connector: Web Templates (Advanced)

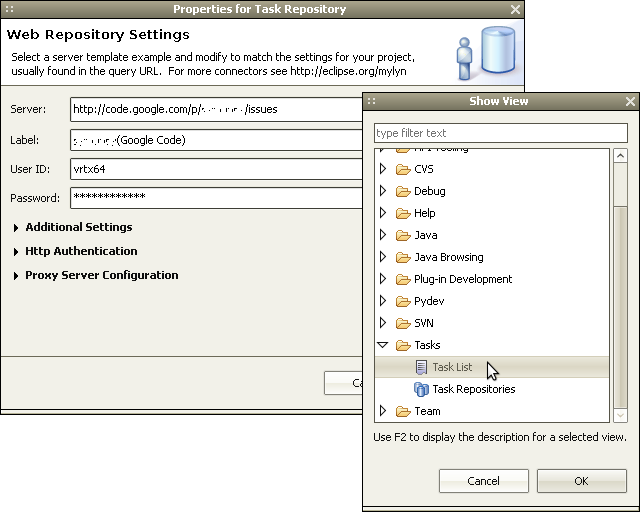
After installing the add-ons, Eclipse will ask you to restart it. Next, go to Window - Show View - Other .. and drag out to the workspace Task List . In the appeared tab we add a new repository Add Repository and from the list we select the Web Template (Advanced) installed by us. Next, Eclipse will offer to enter the login, password (specify all the same as when adding the project) and a link to the tracker. An example of filling is shown in the screenshot:
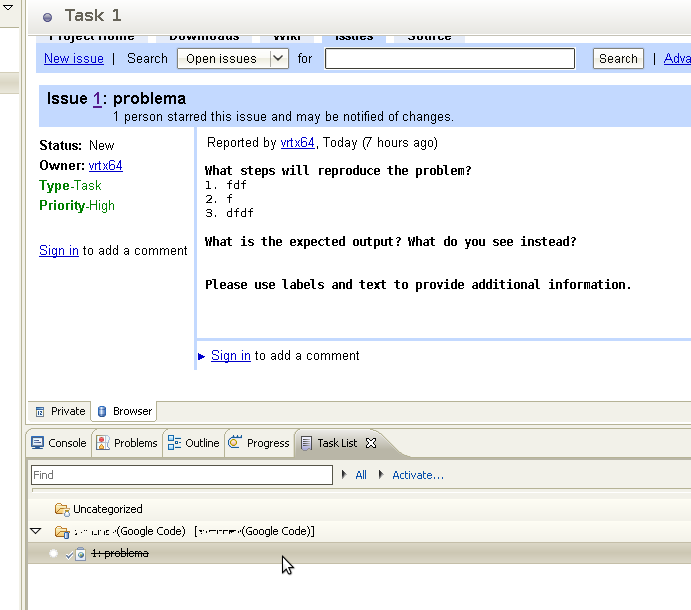
Next will be the automatic synchronization of data between the tracker and the Eclipse, after which we can fully work on the tasks.
UPD: Thanks to Bonart
You can also make the setting to filter information from the tracker - and then, for example, the priority for the task does not fall into the tasklist - inconvenient. To do this, you need to add & q = $ {search} in the task request settings, and add the search parameter, specifying the filter supported by the Google code (for example, priority: high).
That's all. As you can see, there is nothing difficult in this, but I hope someone will come in handy :)
First we need a Google account. If you already have one, go to http://code.google.com/hosting/ and select Create a new project . After entering the data, the project management panel will open:
')
Next, we need to install the pydev Eclipse extension to be able to develop Python projects in it, as well as subclipse , a plugin for working with SVN.
Go to Eclipse, select the Install New Software item in the Help menu ... First add pydev.org/updates as the source, select PyDev from the list and click Next . Follow the instructions of the installer. The same should be done with the site subclipse.tigris.org/update_1.6.x , by selecting, respectively, in the list of Subclipse . After installing the plugins, you need to restart Eclipse.
Now let's do, in fact, the creation of a new project.
In the Pydev Package Explorer (you can open it here Window - Show view - Pydev Package Explorer ) in the context menu select New - Project ... from the list in the SVN folder - Checkout Projects from SVN . We create a new repository location by specifying the URL of the view like your_project_name.googlecode.com / svn . You will be prompted to enter a username / password. The first, in fact, is your login to Google, the second can be viewed on the Source tab in the project control panel via the link “When prompted, enter your generated googlecode.com password” . In the list of directories that appears, select the trunk , which will be the main development branch of our project. Further, Eclipse will offer a choice of either creating a new project file or using an existing one. Since we are creating a project from scratch, select Check out as a project configured using the New Project Wizard and proceed to setting it up.
After you specify all the necessary data to create a pydev project, in the Pydev Package Explorer workspace you will see your project, which still has nothing in it :) Create a file or folder in it, for example main.py , after which Give him a team - Add to Version Control . This will allow it to be added to the repository at the next commit. The commit itself is carried out respectively by the Team - Commit ...
UPD : Setting up Google Code Issues bug tracker in Eclipse
In order to implement a bugtracking system in our newly-baked project, we need to install two more extensions (all the same, through the Installer Help - Install New Software .. )
download.eclipse.org/tools/mylyn/update/weekly/extras
from here we need Mylyn Connector: Trac
download.eclipse.org/tools/mylyn/update/weekly/incubator
here choose Mylyn Connector: Web Templates (Advanced)
After installing the add-ons, Eclipse will ask you to restart it. Next, go to Window - Show View - Other .. and drag out to the workspace Task List . In the appeared tab we add a new repository Add Repository and from the list we select the Web Template (Advanced) installed by us. Next, Eclipse will offer to enter the login, password (specify all the same as when adding the project) and a link to the tracker. An example of filling is shown in the screenshot:
Next will be the automatic synchronization of data between the tracker and the Eclipse, after which we can fully work on the tasks.
UPD: Thanks to Bonart
You can also make the setting to filter information from the tracker - and then, for example, the priority for the task does not fall into the tasklist - inconvenient. To do this, you need to add & q = $ {search} in the task request settings, and add the search parameter, specifying the filter supported by the Google code (for example, priority: high).
That's all. As you can see, there is nothing difficult in this, but I hope someone will come in handy :)
Source: https://habr.com/ru/post/87240/
All Articles