PicKit3 in-circuit debugger
So, without which almost any device on the microcontroller can not do? That's right, without a microcontroller! But, alas, it will not be possible to program it without a programmer (unless it is of course not Arduino ).
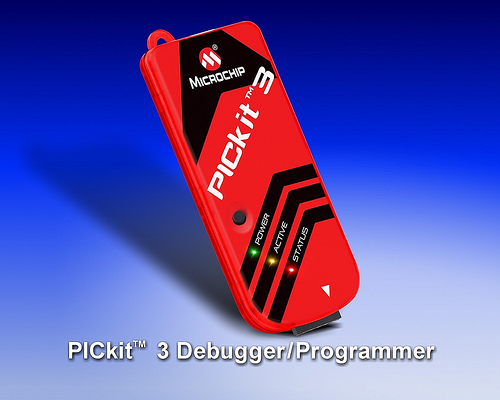
So, let's consider the PicKit 3 in-circuit programmer-debugger, which I am thehappy owner.
I will not describe the functionality of this device here, since you can read it yourself here http://pickit2.ru/doku.php/chto.takoy.pickit3 that you have already done. And my goal is to bring you information from the point of view of an ordinary user.
When ordering this device in the online store, I thought for a long time, thinking PicKit2 or PicKit3. At that time I knew little about these programmers, except that they work via USB and are in-circuit, plus you can debug the program directly in the microcontroller using PicKit 2 and 3.
In-circuit ICSP (In-circuit serial programming) programming directly on the end device that we assemble on the PIC controller. And we do not have to pull it out of the programmer programmed microcontroller and stick it back into the final circuit. Would it be difficult to debug it in such conditions? So the ICSP thing is very convenient and practical. The only thing you need to do is to provide an ICSP / ICD connector on the end device for connecting a programmer.
')
I knew little about the differences between PicKit 3 and Pickit2, but I reasoned like this. PicKit 2 proven by time and people, reliable and convenient. And PicKit 3 should be the next version, more refined, more powerful, modern and functional than PicKit 2. In addition, PicKit 3 was not much more expensive than the programmer of the previous version. And although the functionality of Pikkit 2 was completely abundant to me, it was finally decided to buy PicKit 3 with an expectation for the future, so to speak, “for growth”.

They sent me this beautiful box by mail. Inside the programmer itself, USB-miniUSB wire. A couple of pieces of paper, including a poster with an explanation of how and where to connect the programmer and a disc with MPLAB 8.36 and examples. Naturally everything is in English.
We reach, connect to the computer through the supplied cord. The computer identifies the connected HID compatible device. This means that dtov is not needed for the programmer. 3 lights light up - it seems to work.
Next, install MPLAB IDE 8.38. With newer versions, certain problems will arise, until the new versions eliminate the bug. I will talk about the problems and their solution in new versions a bit later.
Install, run! We climb into the Programmer - Select Programmer - Pickit 3 menu. The MP should determine the programmer, but if it is not connected to the controller, or the controller is not powered, it will complain about it. At the first connection, MPlab said that he had found a newer firmware for the programmer in the internet and offered to download and upload it - we agree!
I would like to separately focus on the power of the microcontroller. There are 2 possible options:
1. food from an external source;
2. powered by a programmer.
If you don’t have an external power source, select Programmer - Settings in the settings ... and go to the Power tab. Put a tick and change the value of the voltage value if required.
Most PIC controllers will normally have 5V., But in some cases the controllers can be powered from a lower voltage and installing 5V on it can damage it. If you are not sure, it is best to familiarize yourself with the controller specification.
If you decide to power the circuit from an external source, and at the same time connect the voltage from the pickit, then nothing terrible will happen - the programmer will measure the voltage and if it will be + 5V. then he will not let the voltage pass through him and will not provide additional power to the controller, despite the set setting in the MPlab. At least this is what is written in the datasheet, but just in case, the external power supply and the power supply from the programmer are switched off with a fixed button.
Now about a barrel of tar in a spoon of honey. Disadvantages, so far, PicKit3 has more than advantages compared to PicKit2. To begin with, there is Russian documentation for the second pikkit, and for the third one I have not found it. In addition, programming through PICkit 3 is possible only in the MPLAB IDE environment, and for the second pikkit, in addition to the MPLAB IDE, there is a special compact and convenient utility PICkit 2 Programmer. And at the end I want to say that in Linux (not everyone can sit under Windows), I haven’t found any programs, for programming through PICkit 3, but for PICkit 2. And although in the future these problems are solved, but for now, in my humble opinion, this programmer is not worth its money and therefore it will be better, more reliable and cheaper to buy PICkit 2.
So, let's consider the PicKit 3 in-circuit programmer-debugger, which I am the
I will not describe the functionality of this device here, since you can read it yourself here http://pickit2.ru/doku.php/chto.takoy.pickit3 that you have already done. And my goal is to bring you information from the point of view of an ordinary user.
When ordering this device in the online store, I thought for a long time, thinking PicKit2 or PicKit3. At that time I knew little about these programmers, except that they work via USB and are in-circuit, plus you can debug the program directly in the microcontroller using PicKit 2 and 3.
In-circuit ICSP (In-circuit serial programming) programming directly on the end device that we assemble on the PIC controller. And we do not have to pull it out of the programmer programmed microcontroller and stick it back into the final circuit. Would it be difficult to debug it in such conditions? So the ICSP thing is very convenient and practical. The only thing you need to do is to provide an ICSP / ICD connector on the end device for connecting a programmer.
')
I knew little about the differences between PicKit 3 and Pickit2, but I reasoned like this. PicKit 2 proven by time and people, reliable and convenient. And PicKit 3 should be the next version, more refined, more powerful, modern and functional than PicKit 2. In addition, PicKit 3 was not much more expensive than the programmer of the previous version. And although the functionality of Pikkit 2 was completely abundant to me, it was finally decided to buy PicKit 3 with an expectation for the future, so to speak, “for growth”.
They sent me this beautiful box by mail. Inside the programmer itself, USB-miniUSB wire. A couple of pieces of paper, including a poster with an explanation of how and where to connect the programmer and a disc with MPLAB 8.36 and examples. Naturally everything is in English.
We reach, connect to the computer through the supplied cord. The computer identifies the connected HID compatible device. This means that dtov is not needed for the programmer. 3 lights light up - it seems to work.
Next, install MPLAB IDE 8.38. With newer versions, certain problems will arise, until the new versions eliminate the bug. I will talk about the problems and their solution in new versions a bit later.
Install, run! We climb into the Programmer - Select Programmer - Pickit 3 menu. The MP should determine the programmer, but if it is not connected to the controller, or the controller is not powered, it will complain about it. At the first connection, MPlab said that he had found a newer firmware for the programmer in the internet and offered to download and upload it - we agree!
I would like to separately focus on the power of the microcontroller. There are 2 possible options:
1. food from an external source;
2. powered by a programmer.
If you don’t have an external power source, select Programmer - Settings in the settings ... and go to the Power tab. Put a tick and change the value of the voltage value if required.
Most PIC controllers will normally have 5V., But in some cases the controllers can be powered from a lower voltage and installing 5V on it can damage it. If you are not sure, it is best to familiarize yourself with the controller specification.
If you decide to power the circuit from an external source, and at the same time connect the voltage from the pickit, then nothing terrible will happen - the programmer will measure the voltage and if it will be + 5V. then he will not let the voltage pass through him and will not provide additional power to the controller, despite the set setting in the MPlab. At least this is what is written in the datasheet, but just in case, the external power supply and the power supply from the programmer are switched off with a fixed button.
Now about a barrel of tar in a spoon of honey. Disadvantages, so far, PicKit3 has more than advantages compared to PicKit2. To begin with, there is Russian documentation for the second pikkit, and for the third one I have not found it. In addition, programming through PICkit 3 is possible only in the MPLAB IDE environment, and for the second pikkit, in addition to the MPLAB IDE, there is a special compact and convenient utility PICkit 2 Programmer. And at the end I want to say that in Linux (not everyone can sit under Windows), I haven’t found any programs, for programming through PICkit 3, but for PICkit 2. And although in the future these problems are solved, but for now, in my humble opinion, this programmer is not worth its money and therefore it will be better, more reliable and cheaper to buy PICkit 2.
Source: https://habr.com/ru/post/86527/
All Articles