Remote control for Panasonic FZ-20
This post was originally born almost 2 years ago, and for many it will be completely irrelevant. But maybe someone will come in handy.
- Once I bought myself such a camera. I will not discuss its merits and demerits (and they are), but immediately get down to business.
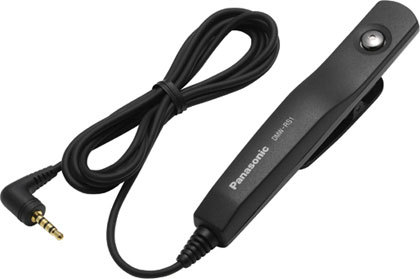
So, accessories for this camera are expensive (the same DMW-RS1 costs from $ 25), and you will not find it, but many people have this device. And I wanted this device:
but here I could not find it, but somehow it was impossible to go to the capital.
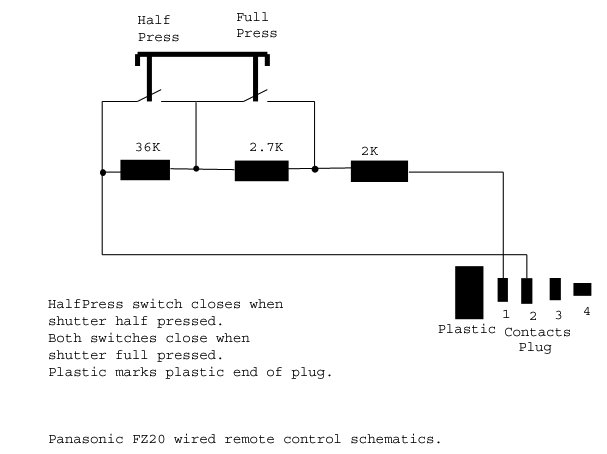
I found once on the Internet the shutter scheme for my FZ-20.
As I understand it, the scheme is also suitable for the FZ-30, but I have not tried it. The scheme is simple, like a 3 cop ... oh, three resistances.
')
For advanced, there is an option with a radio lock, where instead of buttons a block from a radio-controlled model is used.
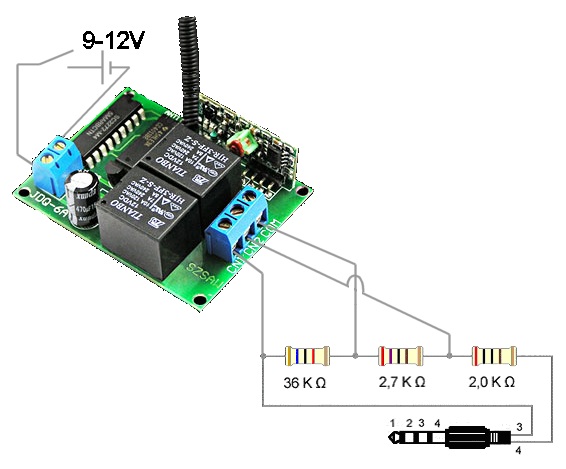
power for this circuit, by the way, can be taken from the jack for external power.
without thinking twice, I went to the nearest radio store and bought:
1. three resistances of the desired value
2. wire , 2-3 meters, to whom it is convenient
3. button.
Here I was waited by the first bummer, I did not find the buttons with half pressing. immediately tried to come up with something absurd with springs, etc., but in the end I bought 2 buttons
4. plug.
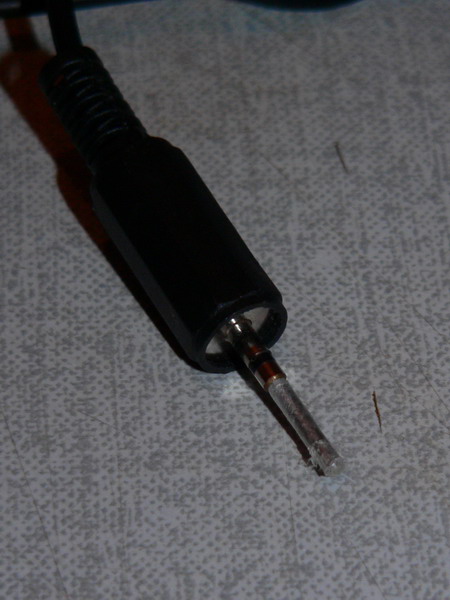
and here is the second bummer. plug that in the figure, it is 4-pin , not a simple 3-pin stereo jack. and a diameter of 2.5 and not 3.5 mm. but it does not matter, I bought a 2.5 mm stereo jack
home was found:
5. film canister
6. a piece of plywood
7. glue.
8. thin carnation
9. bag is cellophane
10 metal files
Unfortunately, the device was done for a long time and I didn’t document everything, but the disassembling ... the model was not collapsible. So I will try to describe in more detail.
The first thing I did was cut out the plywood (p.6) so that it would fit tightly into the jar from under the films (p.5).
Then I made 2 cuts at the end of the plywood (p.6), and fitted the buttons there (p.3).
Secured - that is stuck it.
Soldered the scheme (proudly said, soldered, there is a business for 2 minutes), and stuck to the plywood.
In the lid, dig a hole and put the wire through (p.2). Soldered the wire to the circuit.
I put the plywood in the can (item 5) and cut 2 button holes in the side of the can.
There are two buttons (for lack of one with half pressing), they work as follows:
we press one - the camera does autofocus, then without releasing it we press the second one - “shot”!
Simple and quite convenient.

Now plug.
As you remember, I bought a 3-pin plug, 5 minutes and it turns into a 2-pin ...
And more is not necessary.
In principle, it is already possible to check the scheme, fill it with glue, twist it and put it in the photo bag. But ... But such a short plug falls out of the nest, and this is sad and inconvenient.
The solution on the photo is a thin nail on the glue in the middle, and in order not to enclose anything inside there (well, you never know) roll it up with a piece of cellophane and melt it with a lighter ... a little. Insulating tape is thick, and so is it.
That's all. We collect
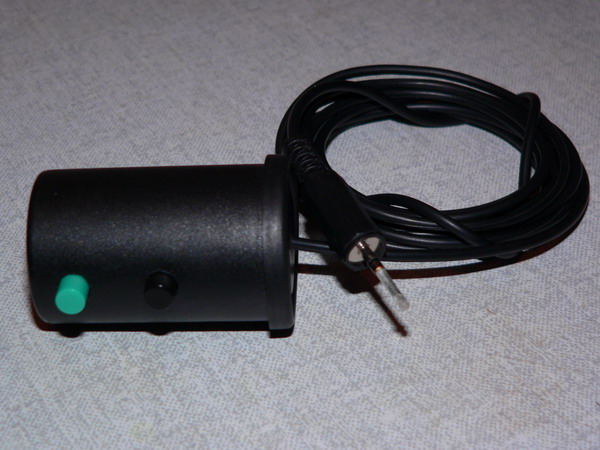
Works like a clock. There were no failures. Do and use.
- UPD: moved to DIY or DIY
- Once I bought myself such a camera. I will not discuss its merits and demerits (and they are), but immediately get down to business.
So, accessories for this camera are expensive (the same DMW-RS1 costs from $ 25), and you will not find it, but many people have this device. And I wanted this device:
but here I could not find it, but somehow it was impossible to go to the capital.
I found once on the Internet the shutter scheme for my FZ-20.
As I understand it, the scheme is also suitable for the FZ-30, but I have not tried it. The scheme is simple, like a 3 cop ... oh, three resistances.
')
For advanced, there is an option with a radio lock, where instead of buttons a block from a radio-controlled model is used.
power for this circuit, by the way, can be taken from the jack for external power.
without thinking twice, I went to the nearest radio store and bought:
1. three resistances of the desired value
2. wire , 2-3 meters, to whom it is convenient
3. button.
Here I was waited by the first bummer, I did not find the buttons with half pressing. immediately tried to come up with something absurd with springs, etc., but in the end I bought 2 buttons
4. plug.
and here is the second bummer. plug that in the figure, it is 4-pin , not a simple 3-pin stereo jack. and a diameter of 2.5 and not 3.5 mm. but it does not matter, I bought a 2.5 mm stereo jack
home was found:
5. film canister
6. a piece of plywood
7. glue.
8. thin carnation
9. bag is cellophane
10 metal files
Unfortunately, the device was done for a long time and I didn’t document everything, but the disassembling ... the model was not collapsible. So I will try to describe in more detail.
The first thing I did was cut out the plywood (p.6) so that it would fit tightly into the jar from under the films (p.5).
Then I made 2 cuts at the end of the plywood (p.6), and fitted the buttons there (p.3).
Secured - that is stuck it.
Soldered the scheme (proudly said, soldered, there is a business for 2 minutes), and stuck to the plywood.
In the lid, dig a hole and put the wire through (p.2). Soldered the wire to the circuit.
I put the plywood in the can (item 5) and cut 2 button holes in the side of the can.
There are two buttons (for lack of one with half pressing), they work as follows:
we press one - the camera does autofocus, then without releasing it we press the second one - “shot”!
Simple and quite convenient.
Now plug.
As you remember, I bought a 3-pin plug, 5 minutes and it turns into a 2-pin ...
And more is not necessary.
In principle, it is already possible to check the scheme, fill it with glue, twist it and put it in the photo bag. But ... But such a short plug falls out of the nest, and this is sad and inconvenient.
The solution on the photo is a thin nail on the glue in the middle, and in order not to enclose anything inside there (well, you never know) roll it up with a piece of cellophane and melt it with a lighter ... a little. Insulating tape is thick, and so is it.
That's all. We collect
Works like a clock. There were no failures. Do and use.
- UPD: moved to DIY or DIY
Source: https://habr.com/ru/post/86488/
All Articles