LDAP. Configuring a fault tolerant LDAP server
 In this article I will tell you about the 389 Directory Server (also known as Fedora Directory Server, also known as Redhat Directory Server). It so happened that the LDAP protocol is used to access the directory server. If you haven't worked with LDAP, I highly recommend reading the articles on Wikipedia ( here’s about directory services, and here’s about LDAP).
So, first, briefly, why use a directory service server at all (hereinafter referred to as the LDAP server). LDAP servers are mainly used for the centralized storage of user accounts, and everything connected with them. An LDAP server is a hierarchical database, which means you can store any data in it.
It would seem that the question is quite logical: why LDAP? What prevents to store accounts in MySQL or PostgreSQL? The answer is obvious - nothing =)
')
But over any RDBMS directory service has a number of advantages:
- This is the standard. Many applications support authentication / authorization via LDAP;
- Data is stored as a hierarchical tree, which allows you to make effective search operations by selecting the desired part of the tree;
- The number of read operations is thousands of times higher than the number of write operations, in connection with this there is a huge number of advantages: there is no need to use transactions and rollbacks, replication works without problems that are inherent in RDBMS;
- The application should see the same information on all directory service servers; if the server does not store the information needed by the client application, it can request it from another server or redirect the application to another server;
- Due to the directory service properties described above, this service scales horizontally well.
The choice of server directory service fell to 389 Directory Server. The history of this LDAP server is closely connected with the company Netscape (if you're interested, you can read the story here ).
Key features of this LDAP server:
- Multimaster replication. On all servers, participants of MM replication, you can record data at the same time, and replication conflicts are resolved automatically thanks to the changelog database and the automatic conflict resolution system. MM replication can be combined with master-slave and cascade replication, so you can get a flexible and scalable service. Partial replication is also supported, which is extremely useful if we do not want some data to be present on the replica;
- Powerful ACL mechanism. Using the ACL, you can specify to whom, when, on which LDAP server, with which attribute and what action to perform. The ACL is stored with the data as operational attributes, thanks to which replication and backup operations work for them, as well as for other data.
- Synchronization with Microsoft Active Directory. Bidirectional synchronization of users, groups and passwords is supported (to synchronize passwords from AD to 389-ds, you must install special software for each domain controller)
- SSL / TLS. Simple SSL / TLS support won't surprise anyone now. 389-ds supports authentication / authorization based on SSL certificates. It is also possible to encrypt attributes when writing to disk. When manually entering a key when starting the server, this can protect against data leakage by copying files from the database.
- Server management via LDAP. The server supports the configuration by changing the attributes in cn = config, most of the parameters are applied without rebooting the server. You can also run backup / restore and other tasks on the server by adding a new entry to cn = tasks, cn = config.
- Plugins. All functionality is implemented as plugins (MM replication, synchronization with AD, ACL, etc.). It is quite easy to write and add your plugin, because there is good documentation with examples.
After reviewing the capabilities of 389 Directory Server, let's take a closer look at its structure.
General Structure 389 Directory Server
389 DS consists of several components.
- Directory server itself. This application is ns-slapd, it is this process that receives and processes requests from the client, replicates, reads and writes data to the database, transfers control to the plugins, etc.
- Administration Server (Administration Server). It manages the directory server. The server provides a management interface via the HTTP (S) protocol, it also provides a web interface for viewing logs and replication status. Physically, these are apache + modules for managing ns-slapd.
- Administration Console. A Java application that connects to the administration server and allows you to configure the directory server through a user-friendly interface. There is a version under windows and linux, under mac os it works through forwarding an X session from a linux machine.
At first I wanted to write the theoretical and practical parts separately, but then it became clear that the first part would become too boring, and the second too dry. Therefore, immediately after the piece of theory there will be practical application.
So, the task. You need to configure a fault tolerant directory service. To do this, we will configure two servers, configure multimaster replication between them, and raise the moving IP address (pacemaker + openais).

If one of the servers becomes unavailable, the other will take over this IP and the service will continue to work.
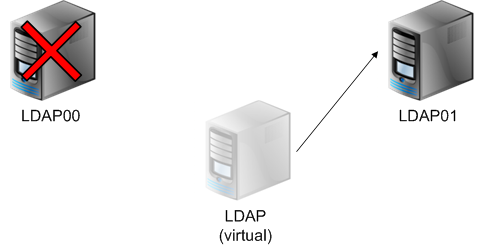
After the server is restored, the data will be replicated to it and the IP address will switch back to LDAP00, or, depending on the cluster configuration, will remain on LDAP01.
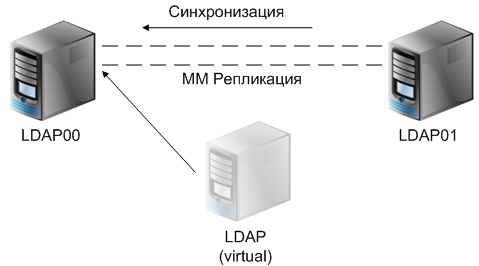
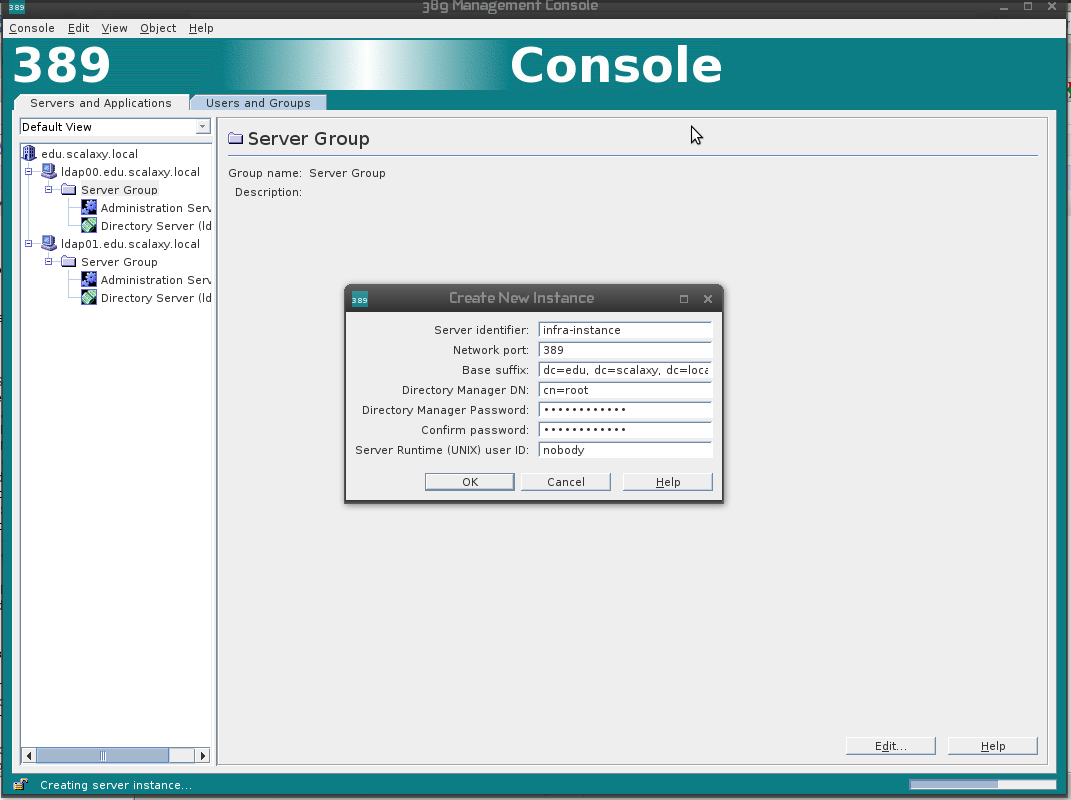
On one server there can be several isolated ns-slapd instances with their own settings, schema, replication rules, etc. To be able to manage these instances from the management console, each server must have an Administration Server (hereinafter referred to as the admin server). The admin server itself needs one LDAP server instance, since it stores the run-time configuration there. By default, the admin server configuration is stored with user data, but I consider it unsafe, so we will have two instances on each server: one will contain the configuration for the admin server, and the second data. In such a scheme, in the event of a failure of one of the nodes, not only is the LDAP service operational, but also the ability to manage it.
For our directory service, we use two servers, ldap00 and ldap01. On each of them two instances of LDAP servers will be installed, one for the needs of admin servers, the second for our data.
The installation plan will be as follows:
- Installing the first server on ldap00;
- Setting up replication on ldap00;
- Install and configure the ldap instance on ldap01;
- Installing the admin server on ldap01;
- Install and configure ldap instances to store user data.
Installing the first server on ldap00
Finished rpm are collected in the EPEL repository for Centos, RHEL and Fedora Core. If you have one of these systems, connect the EPEL repository and perform the installation via yum.
We use SLES, so we had to build all the packages for this system in our OpenSUSE Build Service. If you have debian / ubuntu, read this document.
Along with 389 DS is a set of perl scripts that are used to install server instances.
Here are some of them:
- setup-ds.pl - installs the LDAP server instance, the server is created not connected to the admin server;
- setup-ds-admin.pl - installs the admin server, if necessary, installs an LDAP server instance to store its configuration;
- register-ds-admin.pl - connects the instance to the admin server; if necessary, installs the admin server;
- remove-ds.pl - removes the instance;
- remove-ds-admin.pl - removes the admin server and all instances;
- dsktune - displays system parameters that need to be changed in order to achieve greater performance.
First, run dsktune:
ldap00: ~ # dsktune
389 Directory Server system tuning analysis version 10-AUGUST-2007.
NOTICE: System is x86_64-unknown-linux2.6.27.42-0.1-xen (1 processor).
NOTICE: The net.ipv4.tcp_keepalive_time is set to 7200000 milliseconds
(120 minutes). This may cause temporary server congestion from lost
client connections.
WARNING: There are only 1024 file descriptors (hard limit) available, which
limit the number of simultaneous connections.
WARNING: There are only 1024 file descriptors (soft limit) available, which
limit the number of simultaneous connections.
The utility wrote about the system parameters that need to be tweaked. In my case, it is net.ipv4.tcp_keepalive_time and the limit of open files.
tcp_keepalive_time is the time from the last packet sent to the first keepalive parcel. With a large value, if the client is "dead", the connection will remain open for a long time (120 minutes by default). Set this value to 10 minutes.
echo 600 > /proc/sys/net/ipv4/tcp_keepalive_timeAdd to /etc/sysctl.conf:
net.ipv4.tcp_keepalive_time = 600To increase the limit of open files, add to /etc/security/limits.conf:
* - nofile 8192run dsktune again and make sure that everything is ready for installation.
Now run the setup-ds-admin.pl script
We will be asked if we want to install 389 Directory and Administration Server, if we agree with the license, run dsktune again and, finally, the installation type selection menu appears.
Choose a setup type:
1. Express
Allows you to set up the servers using the most
common options and pre-defined defaults. Useful for quick
evaluation of the products.
2. Typical
Allows you to specify common defaults and options.
3. Custom
Allows you to specify more advanced options. This is
recommended for experienced server administrators only.
To accept the default shown in brackets, press the Enter key.
Choose a setup type [2]:
Select the third item (we are experienced server administrators =)
Further it will be offered to specify FQDN and a name / group from which (oops) the LDAP server will be started.
Configuration directory server, enter 'no' to
be prompted to set up one.
Do you want to register this software with an existing
configuration directory server? [no]:
Here we are asked if we want to use an existing directory server to save information about the server. Since this is our first server, we answer No.
Next come the admin server questions: administrator ID, password, Administration Domain, and leave the answers to them by default (except for the password).
Then you will need to specify which port will listen to the LDAP server. We agreed that this is an instance that stores only the configuration for the admin server, so we transfer it to port 6389. Next we specify the Directory server identifier. Let's call our instance config-instance. We answer the question about the suffix of the root tree by default, there will be no root tree in this instance, so you can delete it later.
Then we will have a question about the Directory Manager DN.
Directory Manager is a user with root privileges in the LDAP server. Each instance has its own local directory manager.
Next are questions about the password to the Directory Manager, whether we want to put examples of entries in our root suffix and whether we want to fill our new instance with some data, ask for the port name, IP address and username from which the admin server will work . After that, the last time they ask for confirmation and start the installation.
Setting up replication on ldap00
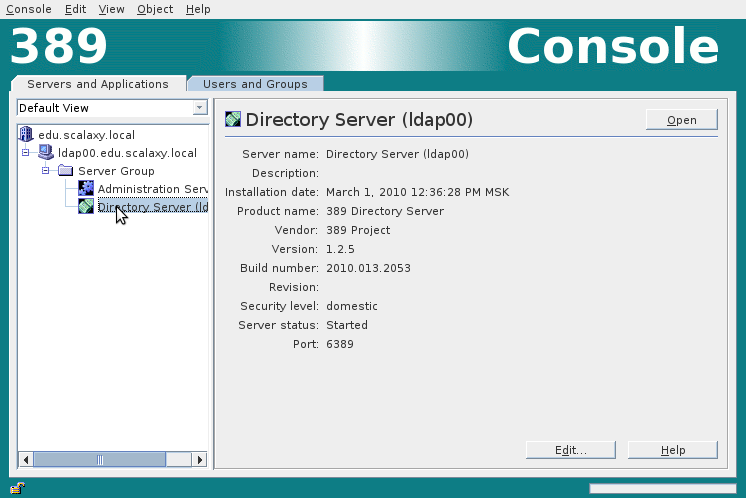
To connect to the server, you need to install and run the 389-console management console.
As the Adminstration URL, you need to enter the admin server address and the port you specified during installation.
Next we get to the server control panel. We now have only one instance, choose it.
From the management console, remove the suffix dc = edu, dc = scalaxy, dc = local

We have only one suffix left and the base in which the configuration data for the admin server is located.
Now a little theory about the principles of replication.
Two types of servers are involved in replication, supplier and consumer.
A supplier is a server that copies a replica to another server.
Server supplier duties:
- respond to customer requests for reading and writing;
- maintaining information about the status of changes of the replica;
- initialization of replication to a consumer server.
The supplier server must always be available, since the record is made only on this server, and then replicated to other routes.
If the connection with the supplier server is lost, then writing to the directory will become impossible.
consumer is a server that stores a replica from another server. In the case of multimaster replication, the two servers are both supplier and consumer.
consumer must:
- respond to read requests from clients;
- forward requests for updates to the server;
- upon receiving a request to add, delete or update an entry, the request is sent to the supplier server.
Each supplier server has its own changelog, which stores information about all changes that have occurred on the replica.
The supplier server repeats these changes on each consumer server.
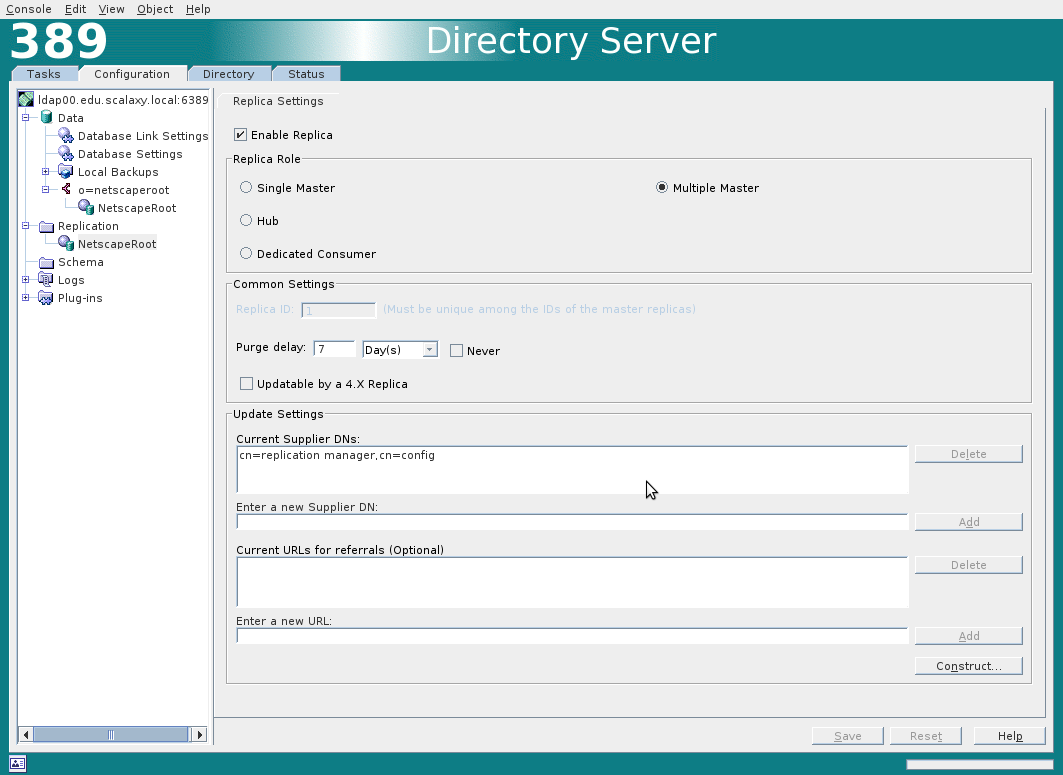
Now that we’re a bit theoretical, you can set up a multimaster instance replication with a configuration.
Keeping changelog changes is disabled by default, it is enabled in the Replication tab. Changelog is enabled for all databases simultaneously.
Further we include replication for the NetscapeRoot base. You must specify Replica ID and Supplier DNs.
Supplier DN is the name of the user who is allowed to replicate on the LDAP server. This user must be created on all LDAP servers that participate in multimaster replication.
The fastest way to do this is through the ldapmodify utility. This utility allows you to modify data in LDAP online or take commands from the ldif file.
ldapmodify -h 127.0.0.1 -p 6389 -x -D "cn=root" -W
Enter LDAP Password:
dn: cn=replication manager,cn=config
changetype: add
objectClass: inetorgperson
objectClass: person
objectClass: top
objectClass: organizationalPerson
cn: replication manager
sn: RM
userPassword: <password>
passwordExpirationTime: 20380119031407Z
The answer should be
adding new entry "cn=replication manager,cn=config"So we got:
Immediately create a Replication Agreement for the second server. In the context menu for the base NetscapeRoot, select the New Replication Agreement and fill in the same way:
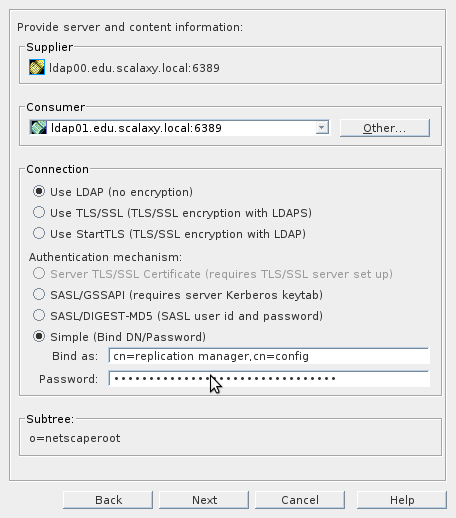
We will be warned that the connection to the server is impossible (since it is not there yet), we reach the last item, set Do not initialize consumer .
Installing and configuring the ldap instance on ldap01
Now you need to configure a second LDAP server. With him a little different, because The admin server installation should already occur in the installed LDAP server and we will perform the initial configuration from the console using the ldapmodify utility (which is a good thing if the task is to figure out how this directory server works).
First, on the second server, using the setup-ds.pl script, you need to create an instance that is not managed by the admin server.
Answers to script questions are similar to the previous ones.
After installing the LDAP server, connect to it via ldapmodify and configure it.
Connection is approximately as follows:
ldapmodify -h 127.0.0.1 -p 6389 -D "cn=root" -W1) Enable the changelog :
dn: cn=changelog5,cn=config
changetype: add
objectclass: top
objectclass: extensibleObject
cn: changelog5
nsslapd-changelogdir: /var/lib/dirsrv/slapd-ldap01/changelogdb
changelogdir should point to a directory with the name of your instance.
2) add user replication manager :
dn: cn=replication manager,cn=config
changetype: add
objectClass: inetorgperson
objectClass: person
objectClass: top
objectClass: organizationalPerson
cn: replication manager
sn: RM
userPassword: <passowrd>
passwordExpirationTime: 20380119031407Z
20380119031407Z means that the password is not limited.
3) Create the netscaperoot suffix:
dn: cn="o=netscaperoot",cn=mapping tree,cn=config
changetype: add
objectclass: top
objectclass: extensibleObject
objectclass: nsMappingTree
nsslapd-state: backend
nsslapd-backend: NetscapeRoot
cn: "o=netscaperoot"
4) Create a base for the netscaperoot suffix:
dn: cn=NetscapeRoot,cn=ldbm database,cn=plugins,cn=config
changetype: add
objectclass: extensibleObject
objectclass: nsBackendInstance
nsslapd-suffix: o=netscaperoot
By the way, the default 389 DS for storing directory entries uses a modified version of the non-relational database Berkeley DB. If you wish, you can read more here .
5) Create a root o = NetScapeRoot :
dn: o=NetscapeRoot
changetype: add
objectClass: organization
objectClass: top
o: NetscapeRoot
6) Allow replication for o = netscaperoot:
dn: cn=replica,cn="o=netscaperoot", cn=mapping tree, cn=config
changetype: add
objectClass: nsDS5Replica
objectClass: top
nsDS5ReplicaId: 2
nsDS5ReplicaRoot: o=netscaperoot
cn: replica
nsDS5Flags: 1
nsDS5ReplicaBindDN: cn=replication manager,cn=config
nsds5ReplicaChangeCount: 0
nsds5ReplicaPurgeDelay: 604800
nsDS5ReplicaType: 3
Do not forget to change nsDS5ReplicaId to your server number ( nsDS5ReplicaType - type of replication, 3 - multimaster).
At this stage, we already have configured one-way replication from ldap00 to ldap01.
The final step will be:
7) Configure replication from ldap01 to ldap00:
dn: cn=Multimaster replication, cn=replica, cn="o=netscaperoot", cn=mapping
tree, cn=config
changetype: add
objectClass: top
objectClass: nsDS5ReplicationAgreement
cn: Multimaster replication
description: replication for netscaperoot
nsDS5ReplicaBindDN: cn=replication manager,cn=config
nsDS5ReplicaBindMethod: SIMPLE
nsds5replicaChangesSentSinceStartup:
nsDS5ReplicaCredentials: <password>
nsDS5ReplicaHost: ldap00.edu.scalaxy.local
nsDS5ReplicaPort: 6389
nsDS5ReplicaRoot: o=netscaperoot
nsDS5ReplicaTransportInfo: LDAP
nsds5replicaUpdateInProgress: FALSE
nsDS5ReplicaBindDN - the name of the user on whose behalf replication will be performed
nsDS5ReplicaCredentials - password
8) Initial initiation of replication from ldap00 to ldap01:
On the first server, execute this command:
dn: cn=Multimaster replication,cn=replica,cn="o=netscaperoot",cn=mapping tree,cn=config
changetype: modify
replace: nsds5beginreplicarefresh
nsds5beginreplicarefresh: start
This command replicates data from ldap00 to ldap01, this operation is required, and the server on the second server is now empty o = netscaperoot.
Now we have fully replicated directories with admin server configuration.
Installing admin server on ldap01
You need to raise the admin server on the second server. Run the
register-ds-admin.pl scriptWhen we are prompted to specify the Configuration directory server URL , enter the LDAP URL of the second server ldap: //ldap01.edu.scalaxy.local: 6389 / o = NetscapeRoot
Further configuration is trivial, follow the instructions of the script.
Installing and configuring ldap instances to store user data
Now you can connect via the management console to any admin server.
On each of the servers in the Server Group we create a new LDAP server instance, this will be the LDAP server in which we will store our data.
We configure multimaster replication between two instances by the same principle (now you can configure replication through both the GUI and the console).
Congratulations! You have configured a failsafe directory service! Next, you need to configure openais + pacemaker to eliminate downtime in the service.
Documentation used:
directory.fedoraproject.org/wiki/Documentation
www.redhat.com/docs/manuals/dir-server
Source: https://habr.com/ru/post/86090/
All Articles