Excursion to Hell with GIMP
 Hello, habrasoobschestvo! Probably, many of you with delight look at the images of the underworld and dream of acquiring a personal photo against the background of the landscapes of hell, but the lack of a return trip to earthly life scares you? But what to do if you so want to flash against the background of burning tongues of flame and sparkling depths of hell? I bring to your attention the result of my efforts and capabilities of GIMPa - a simple lesson in turning your photo into a real hell of a picture)
So, as this is my debut article, I will tell a little about myself. I have been working as an accountant for more than a year and a half, but the blood of a creative person has always flowed in my veins and working with papers for me has finally turned into a hated way of making money. For a long time I could not decide to step onto the design path, because I could not lose my existing position. But I found an alternative - little by little I learn GIMP.
')
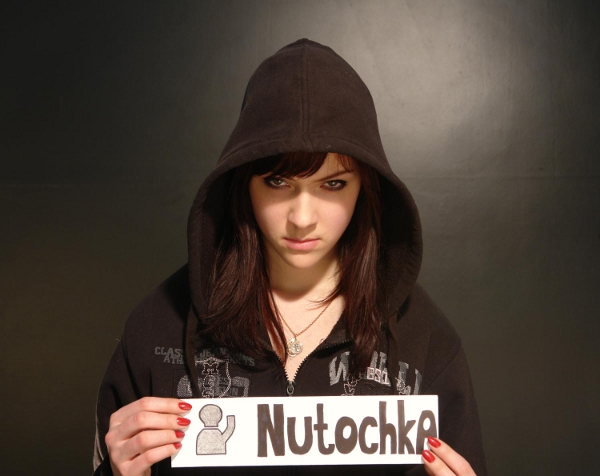
And so, let us return to our task. Naturally, I also did not mind getting such a picture, so for the beginning I asked to take a picture of me - that's what happened:
Step 1. To begin with - we cut off the excess. Select the fragment we need and select the menu item “Image” “Frame to selection” :

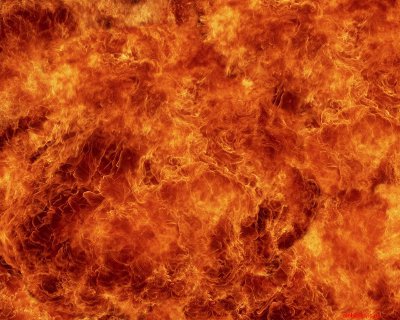
Step 2. Now we need the background. Everyone has their own idea of what hell looks like, but I limited myself to the option proposed by Google. To the request "fire wallpaper" he issued the appropriate image:
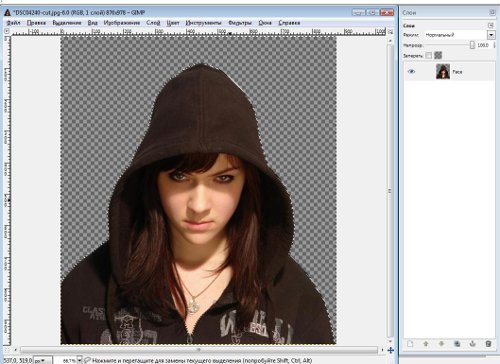
Step 3. In order to place your face on the background of the background, it is necessary to crop the black background of the photo. But so that after clipping the remote area of the image is transparent, right-click on the “Face” layer and select the “Add alpha channel” position.
Step 4. Now proceed to crop the image. To do this, activate the tool "Free selection" and act. We select not the figure itself, but the background that needs to be removed. Now we have a face image without an unnecessary background:
Step 5. In order to avoid the negative consequences of inserting an image onto another background, use the menu item "Selection" "Shade ..." . I left the default value of 5,000 raster points. By zooming in on the image, you can see that its edges are gradually blurred, and not sharply cropped.
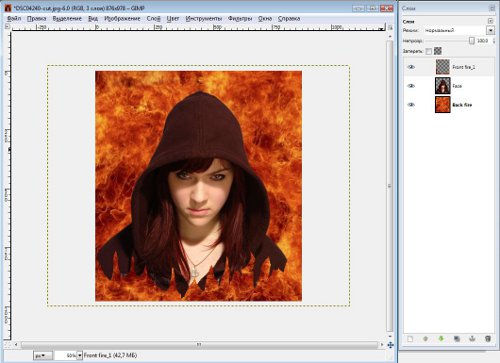
Step 6. And so, the next step is to create a new layer. To do this, just find the picture and drag it to the "Layers " window. A new layer “Back fire” has appeared, it needs to be placed under the “Face” layer:

Step 7. For the image to be realistic, it is necessary to add redness to the clothes, because compared to the background fire, the clothes appear greenish. To do this, select it (clothes) on the “Face” layer using the “Free selection” . Go to the menu "Color" , where we select the item "Color Balance" and perform the correction of color levels, adding red and removing blue and green.
Step 8. Next you need to add fire over the image. To do this, create a new “Front fire_1” layer by dragging the “Fire” image to the “Layers” panel or duplicating the “Back fire” layer. Right-click on the new layer and select “Add alpha channel” . Using the tool “Free selection” we cut off the upper part of the image so that the face and shoulders can be seen:
Step 9. In order to portray the flames we select on the “Smudge” toolbar (looks like a finger) and on the “Front fire_1” layer we achieve approximately the following result with it:
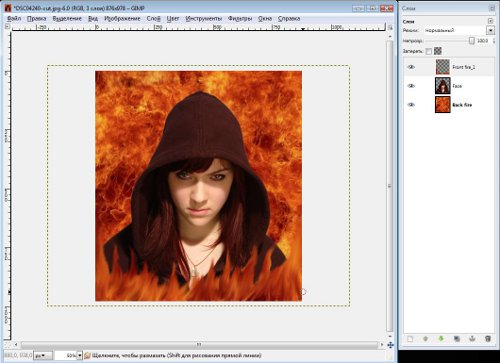
Step 10. In order to add a flame to the hood, insert a new layer “Front fire_2”. Using the context menu, add an alpha channel. After that we cut off the lower part of the image, since we are only interested in the part of the image that is above the hood and using the “Smudge” tool we make the hood a reddish highlight around the edges.
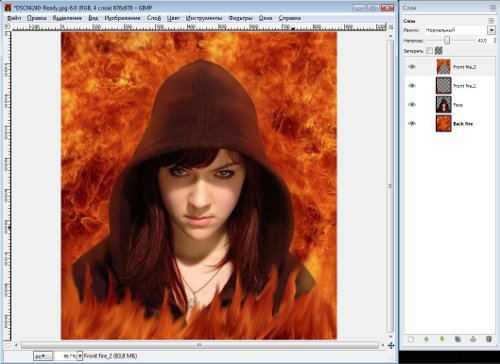
Step 11. It seems that everything is ready, only a face betrays your distance from hell. By this, it is necessary to get a reflection of the flame on the face. To do this, create a new layer “Front fire_3” or duplicate the layer “Back Fire”. Reduce the opacity to around 70-80. And set up the "Mode" , which is located on the "Layers" panel. For example, I used "Multiplication" .
Well, now you can admire the result of the work done by yourself:
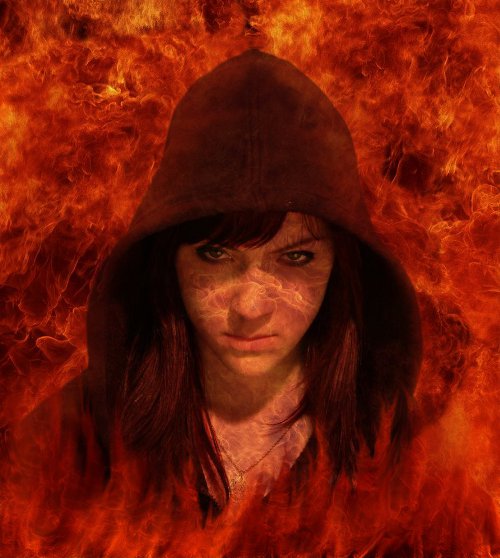
Thank you all for your attention! Pleasant and easy excursion to you)
Source: https://habr.com/ru/post/86087/
All Articles