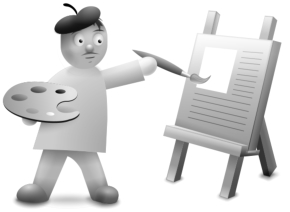
Reactive websites. We work on illustrations. Characters
In the first post, I superficially described the process of creating an illustration for a book . Let's try to consider it now in more detail.
When there is no big experience of creating illustrations behind our shoulders and you start with a clean slate, the first thing to start with is the development of style. It takes a lot of time and paper. Helps a large number of articles, lessons step by step drawing illustrations.
Developing a style, we invent characters, their behavior and environment.

If you have not studied at art school, it is desirable to be able to "touch" the character. In particular, this is necessary in order to draw the desired pose. A wooden doll bought three years ago at IKEA helped me a lot.

')
In addition, it may be useful clay, foam and other improvised means. To digitize the results of their work can not do without a scanner and camera. If in the case of the latter it is possible not to be too sophisticated and any soap dish will work (unless of course you are planning to use fragments of photographs in the illustrations), then it is better to select the scanner more closely.
I bought myself an Epson Perfection V30. For me, the determining factors in choosing turned out to be the speed of work and the convenience of opening the lid - it opens on the wide side of the page, which greatly simplifies scanning thick books. It is, by the way, inexpensive.

You can, of course, still purchase a graphics tablet. However, a more or less adequate size is worth a lot of money, and it is not convenient to draw small ones. Especially vector images. Easier with the mouse, and sketches themselves draw on paper.
Paper is quite suitable for ordinary office. It is not very thick and can be enlightened if necessary. As for the pencils, I won't say much. In addition, they will have to constantly sharpen. Every half hour To do this, it is better to have a regular office knife and a wastebasket (so as not to move away from the workplace). The latter, by the way, is useful for other garbage: unsuccessful sketches, handicrafts made from paper and plasticine, etc. And of course you need a good erase. Many advise to buy special, soft erasers that can crush and give them any shape, but I did the usual.
To draw pictures on a computer, we use a vector editor. Many people prefer to work in a raster, however, when you don’t know exactly what the final size will be and often experiment with vector elements, the only right choice.
I work in the Xara program. The program is not as popular as Illustrator or Corel, but it has several advantages that attract a lot of fans to it. I like it because of its speed and convenience. Although the latter, of course, is a very subjective factor. Xara has drawbacks, the most serious of which is no CMYK support (although its support is officially stated in the product description). By the way, Xara is used in the studio Icon.Ru and a number of other talented illustrators.
The first rendering can be done quite roughly.

The main thing is to make the different parts of the character as independent as possible: arms, legs, and head may have to be displaced relative to each other. In addition, if you draw body parts with separate objects, you can later use them for other characters and illustrations.
Drawing shadows and gradients is highly dependent on the specific program. There is a very powerful tool in Illustrator - meshes. In some literature they are called “gradient cells”. Their essence lies in the fact that the plane-plate can be filled with complex gradients, with different colors, shape, etc. Some manage to draw a rather complex illustration with one object and only using meshes . Corel has its counterpart.
In Xara, there is nothing like that * - (and you have to pervert in other ways. Namely, impose separate dies for each gradient and combine them with the help of transparency:

By the same principle the whole character is colored.

Having drawn the first character, I immediately made several variants of the head for it.

This has significantly saved time when rendering other scenes and characters.

As ruskar rightly noted when printing on paper, everything looks different and often shades disappear when printed. For the selection of colors I had to make several variants of some scenes and print them out in order to choose the best one.

When there is no big experience of creating illustrations behind our shoulders and you start with a clean slate, the first thing to start with is the development of style. It takes a lot of time and paper. Helps a large number of articles, lessons step by step drawing illustrations.
Developing a style, we invent characters, their behavior and environment.
If you have not studied at art school, it is desirable to be able to "touch" the character. In particular, this is necessary in order to draw the desired pose. A wooden doll bought three years ago at IKEA helped me a lot.
')
In addition, it may be useful clay, foam and other improvised means. To digitize the results of their work can not do without a scanner and camera. If in the case of the latter it is possible not to be too sophisticated and any soap dish will work (unless of course you are planning to use fragments of photographs in the illustrations), then it is better to select the scanner more closely.
I bought myself an Epson Perfection V30. For me, the determining factors in choosing turned out to be the speed of work and the convenience of opening the lid - it opens on the wide side of the page, which greatly simplifies scanning thick books. It is, by the way, inexpensive.
You can, of course, still purchase a graphics tablet. However, a more or less adequate size is worth a lot of money, and it is not convenient to draw small ones. Especially vector images. Easier with the mouse, and sketches themselves draw on paper.
Paper is quite suitable for ordinary office. It is not very thick and can be enlightened if necessary. As for the pencils, I won't say much. In addition, they will have to constantly sharpen. Every half hour To do this, it is better to have a regular office knife and a wastebasket (so as not to move away from the workplace). The latter, by the way, is useful for other garbage: unsuccessful sketches, handicrafts made from paper and plasticine, etc. And of course you need a good erase. Many advise to buy special, soft erasers that can crush and give them any shape, but I did the usual.
To draw pictures on a computer, we use a vector editor. Many people prefer to work in a raster, however, when you don’t know exactly what the final size will be and often experiment with vector elements, the only right choice.
I work in the Xara program. The program is not as popular as Illustrator or Corel, but it has several advantages that attract a lot of fans to it. I like it because of its speed and convenience. Although the latter, of course, is a very subjective factor. Xara has drawbacks, the most serious of which is no CMYK support (although its support is officially stated in the product description). By the way, Xara is used in the studio Icon.Ru and a number of other talented illustrators.
The first rendering can be done quite roughly.
The main thing is to make the different parts of the character as independent as possible: arms, legs, and head may have to be displaced relative to each other. In addition, if you draw body parts with separate objects, you can later use them for other characters and illustrations.
Drawing shadows and gradients is highly dependent on the specific program. There is a very powerful tool in Illustrator - meshes. In some literature they are called “gradient cells”. Their essence lies in the fact that the plane-plate can be filled with complex gradients, with different colors, shape, etc. Some manage to draw a rather complex illustration with one object and only using meshes . Corel has its counterpart.
In Xara, there is nothing like that * - (and you have to pervert in other ways. Namely, impose separate dies for each gradient and combine them with the help of transparency:
- Draw the elements of the head.
- Add an elliptical gradient on the oval of the head and on the hair.
- Add gradient transparency to the eyelashes, lips and chin.
- Add gradients to the eyes and nose.
- Create eye shadows and nose. Xara has the ability to apply a blur effect to objects.
- Add a shadow for the hair (darker duplicate of the oval of the head with gradient transparency) and highlighting for the head at the edges (two duplicates of the oval of the white head with gradient transparency).
By the same principle the whole character is colored.
Having drawn the first character, I immediately made several variants of the head for it.
This has significantly saved time when rendering other scenes and characters.
As ruskar rightly noted when printing on paper, everything looks different and often shades disappear when printed. For the selection of colors I had to make several variants of some scenes and print them out in order to choose the best one.
Source: https://habr.com/ru/post/74658/
All Articles