Installation and Tuning Guide for Flight Simulator X Flight Simulator X (FSX)
At the moment there are only two air simulators in the world that can bring a virtual flight to reality - this is Microsoft Flight Simulator and X-Plane . This article will discuss FSX, the tenth, and, unfortunately, the latest version of the line of airborne simulators from Microsoft , since in January of this year, the entire team involved in the FS line was disbanded . So we hardly wait for the 11th version, although it is rumored that the development team has founded its own studio. And also does not sleep Aerosoft, and in October announced Aerosoft Flight Simulator 2012! The project is developing in the bud . And while it remains only to wait, I decided to document the entire experience gained in installing and using FSX, choosing the necessary add-ons to increase realism, tweaking FSX to increase FPS, and in general, try to get the most out of what is left of this wonderful airline -simulator. Anyone who is interested in this topic - I ask under the cat (carefully, 10 MB of pictures!).

Before you start the article, I want to immediately note that FSX and almost all add-ons, which will be discussed below - are paid . Therefore, everything that you like, you need to buy, because the simulation industry, and so it is not easy. However, if for some valid reason you cannot afford to buy one or another product, or just want to begin to evaluate its capabilities, everything described here (and another car and cart) can be found here . And further. Almost all FSX optimization tips have already been described here and there in pieces on the net. I just laid everything on the shelves. If you disagree with something or want to add something - please, comments are welcome! So:
')
FSX is quite demanding on computer resources. And whatever computer you have, in the end, everything rests on the compromise of “realism or FPS”. The math here is simple: the more add-ons you put and the better the model of aircraft (LA) you use, the less FPS you get. Therefore, I want to immediately announce the minimum (in my opinion) system requirements that can provide a high-quality and pleasant picture with reasonable FPS:
The installation of the simulator consists of two stages:
The game has a lot of different settings. I will touch only those that can affect the quality of graphics and FPS. I do not claim that the above settings are the MOST optimal. There is no such thing. For one computer they are one, for another another. This option is recommended to use as a reference point, so that you can later tweak if you have a stock of FPS, or vice versa, the shortage.
Below I provide screenshots of all tabs with settings. Basic settings:
DirectX 10 is better off, this mode, unfortunately, has not been finalized until the end, which promises some problems. The settings for the aircraft: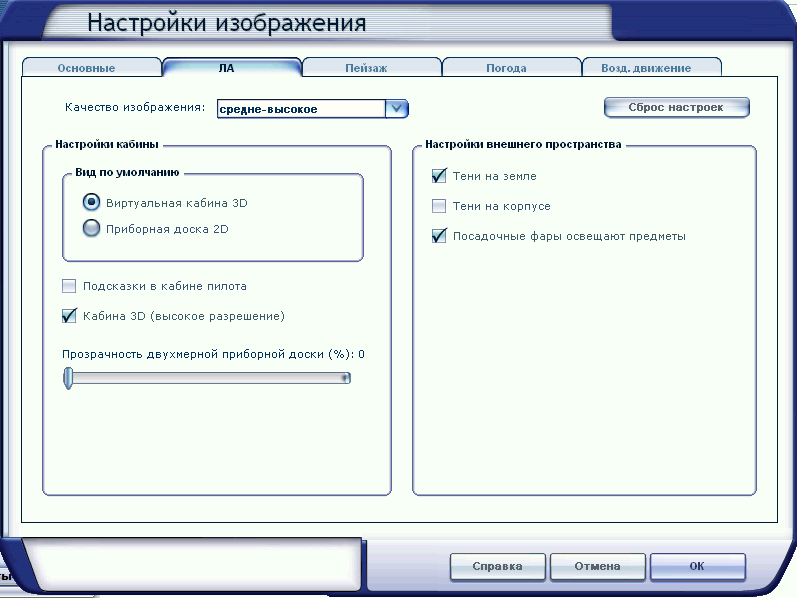
Landscape:

Weather:
Air traffic. Here everything is individual and depends on what kind of traffic you have, default or separate addon. But in any case, the rule is standard: the more objects in the game - the smaller the FPS. The level of realism you evaluate yourself.
After applying all the settings, the general settings window in FSX should look like this: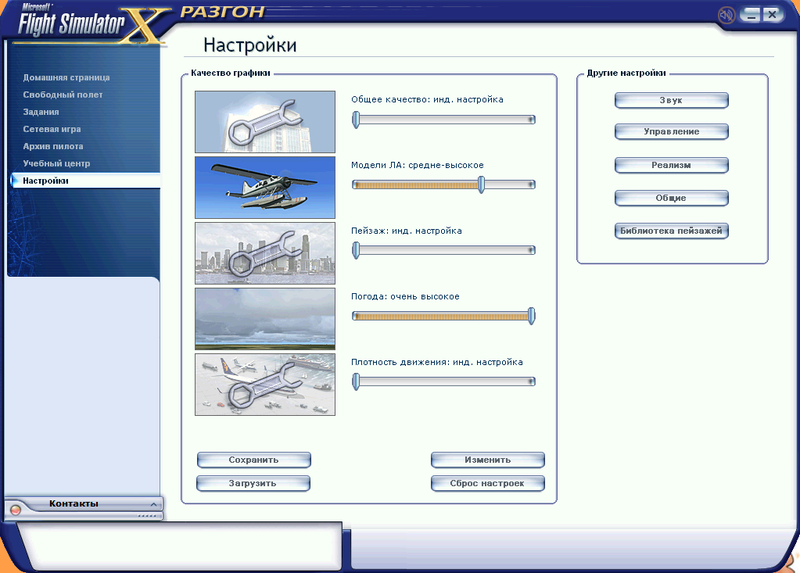
For more realism, I highly recommend that you go to the “Realism” section and tweak a few sliders there, because The default ones are no good: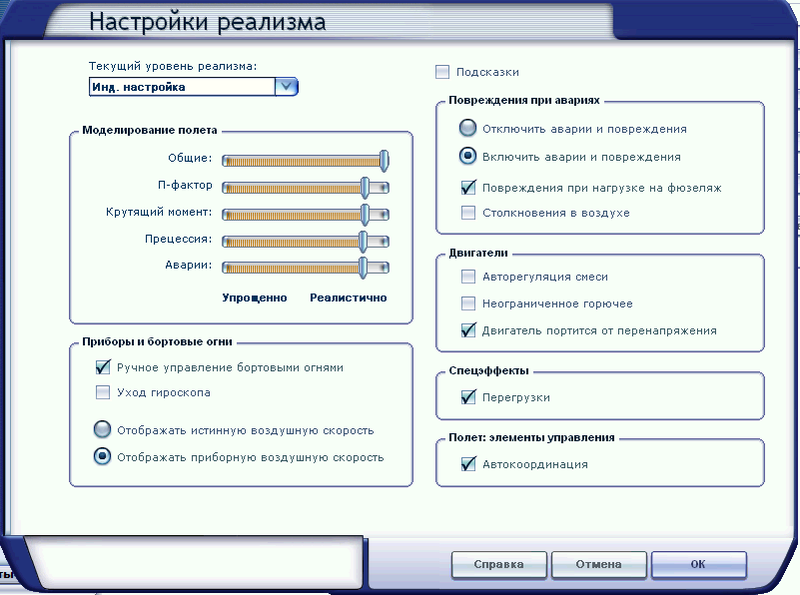
The main thing is that the “General” slider is at its maximum, as many manufacturers of LA models demand. Now, exit the simulator so that the settings are saved to a file. Then run it again to make sure that the settings have been successfully loaded. Now close the simulator again, because now you will need to fix a few lines manually in the main FSX config: fsx.cfg. This file is located in the Windows user settings folder, i.e. in the "C: \ Documents and Settings \ YOURNAME \ Application Data \ Microsoft \ FSX" or "C: \ Users \ YOURNAME \ AppData \ Roaming \ Microsoft \ FSX" directory, depending on the version of Windows. In order not to bother with the paths, you can simply select the Run command in the start-up and enter the line there:
notepad% APPDATA% / Microsoft / FSX / fsx.cfg
The config will automatically open in Notepad in any version of Windows. Do not forget, just in case, to save a copy of the file, suddenly where you go wrong. We need to change (if the parameter is already present in the file) or add the following parameters:
After saving the changes, run the simulator to evaluate the effect of the corrected settings. To measure the quality of graphics and FPS, I have always used Brisbane Airport - Australia (ICAO code: YBBN). Select any one LA and load at this airport (Free flight -> Location -> Change -> By airport code -> YBBN).
To get the maximum CPU time for FSX, you can run it with higher priority. To do this, create a .bat file and paste the following line there, substituting the full path to the fsx.exe file:
start / HIGH J: \ GAMES \ FSX \ fsx.exe
If you own any GeForce, the nHancer utility will give you much more options for fine-tuning graphics than their standard panel in the Windows control panel. The utility is completely free and can be used to customize graphics in any other game. You can download it here (I used version 2.5.7). Also, I advise you to download the latest drivers from the nVidia website. After launching the program, find the MS Flight Simulator X profile in the list, select it, make sure the Profile item is active and adjust the graphics according to the following recommended values (make changes in the right-hand part of the window ):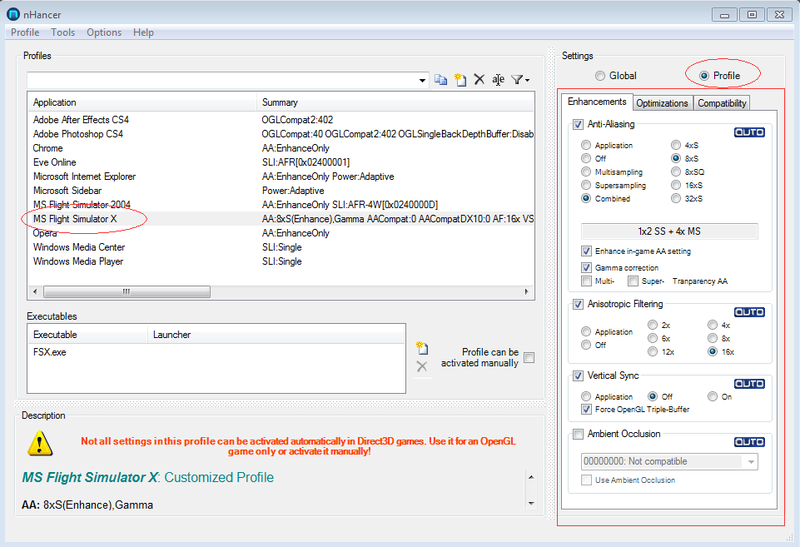


In the "Global" section also need to correct a few values: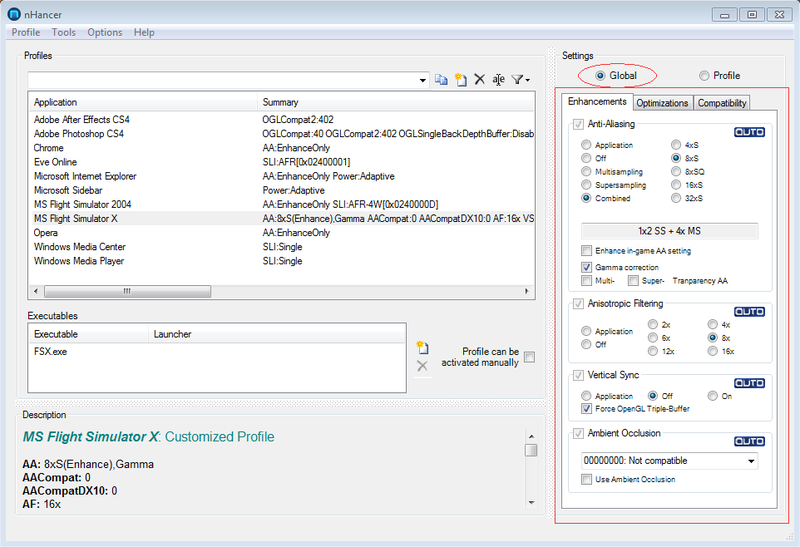
After all the manipulations you can close the program, it is no longer needed, nor in the tray, anywhere. Settings already saved globally. Although, of course, no one forbids you to play around with the parameters yourself, especially with the anti-aliasing level, there may be more optimal parameters for your video card. Restart your computer and try out the new settings in action.
To configure the version of the shaders, we need to tweak another FSX configuration file - display.cfg, which is in the root directory of the simulator. I have this "J: \ GAMES \ FSX". But first, we need the dxdiag utility included in Windows. To start it, just type “dxdiag” in “Start-> Run”. In the appeared window, click on the “Save all information ...” button and save the resulting dxdiag.txt file to any folder.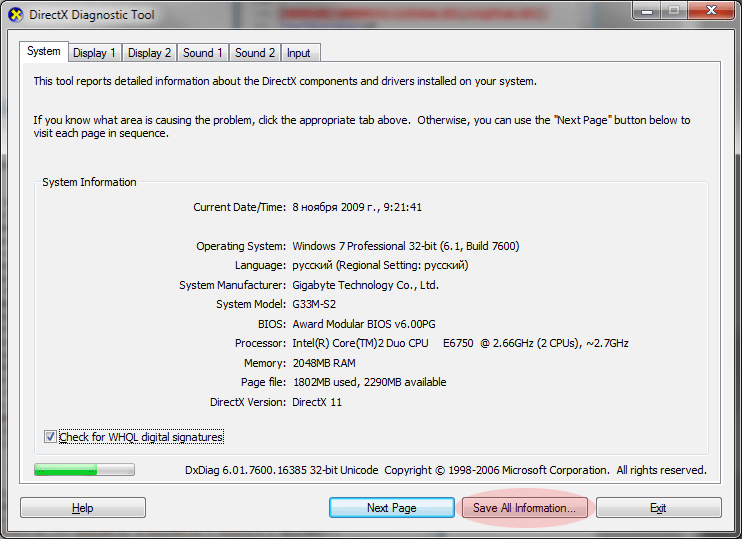 Now open both files (dxdiag.txt and display.cfg) in the notepad for editing and create (if you don’t have one yet) the [xxxx: yyyy] section in the following format:
  An example is given for the GF 8800 GT card, but it should work for ATI cards as well. After these manipulations, you may notice a slight increase in FPS and the quality of water rendering.
FSX is a very good simulator, but it’s still far from reality :) Therefore, you can find hundreds of addons in the network that can add new photorealistic landscapes to the game (in fact, earth textures in the form of satellite photos), real clouds, real weather conditions, models of almost all real aircraft, most of which are 100% complete, i.e. any lever or switch will work like a real car, air traffic and many other interesting things. Below I give a list of the most necessary add-ons (in my opinion) that significantly transform the simulator. I recommend installing in order, starting the simulator after the installation of each addon is complete:
As a result, after installing and configuring FSX and all the above-described add-ons, you can get these screenshots (full-size 1280x1024), which are even nicer in dynamics :)


Well, for a snack:
1. A small video (not mine) in which you can compare the process of landing an airplane with a view from the pilot's cabin in real life and in the simulator:
2. An interesting article about the comparison of the flight on the real Cessna and Cessna from FSX .
Several links to the most interesting sites related to the subject of simulators:

Ps. This is my first article on Habré, please do not judge strictly ...
Pps. Habraeffekt strongly loads the server with pictures, so if something does not load, try a bit later ... Thank you :)
UPD. Last updated article: 11/26/2009
Before you start the article, I want to immediately note that FSX and almost all add-ons, which will be discussed below - are paid . Therefore, everything that you like, you need to buy, because the simulation industry, and so it is not easy. However, if for some valid reason you cannot afford to buy one or another product, or just want to begin to evaluate its capabilities, everything described here (and another car and cart) can be found here . And further. Almost all FSX optimization tips have already been described here and there in pieces on the net. I just laid everything on the shelves. If you disagree with something or want to add something - please, comments are welcome! So:
Table of contents
- System requirements for comfortable playing FSX
- FSX installation
- Setting options inside FSX
- Install nHancer to fine tune nVidia video cards
- Shader Version Setup
- Installing addons that noticeably improve the graphics and realistic simulator
- Summary and Screenshots
- Links
System requirements for comfortable playing FSX
')
FSX is quite demanding on computer resources. And whatever computer you have, in the end, everything rests on the compromise of “realism or FPS”. The math here is simple: the more add-ons you put and the better the model of aircraft (LA) you use, the less FPS you get. Therefore, I want to immediately announce the minimum (in my opinion) system requirements that can provide a high-quality and pleasant picture with reasonable FPS:
- OS : Windows XP, Windows Vista or Windows 7 (I recommend the latter)
- Processor : Intel Core Duo / Quad (or better), 2 GHz and higher. The more GHz, the better , the number of cores on the FPS in FSX has almost no effect. AMD, of course, will also pull, but I am not familiar with their processors.
- Memory : 2GB and higher . Memory speed affects FPS, so it’s best to take care of frequency and timings.
- Hard disk : any modern hard drive with a free space of at least 100 GB.
- Video card : preferably from nVidia, because Radeon users sometimes have problems. GeForce 8800 GT or better. Also, it is preferable to have a higher GPU frequency and more memory (256MB - at least 512MB - good, 1024MB - excellent), rather than doing SLI or buying cool multi-core video cards.
- Joystick : joystick for the game is required ! Which one is your business, I personally use Logitech Extreme 3D Pro and am very pleased with it. Ideally, you can even get a steering wheel :)
FSX installation
The installation of the simulator consists of two stages:
- Install the basic version of Flight Simulator X (comes on two DVD discs). After installation, it is desirable to start the simulator, enter the game and exit to initiate the creation of configuration files.
- Installing add-on "Overclocking" (another DVD). This is a very important stage, because The add-on includes the necessary service pack with a bunch of solved problems. After installation, it is recommended to restart the computer, after which, to be faithful, run the simulator once.
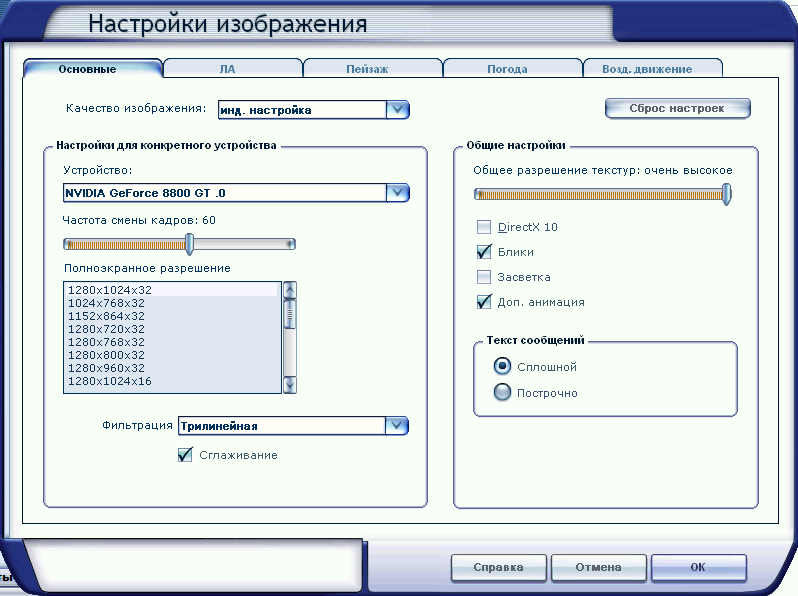
Setting options inside FSX
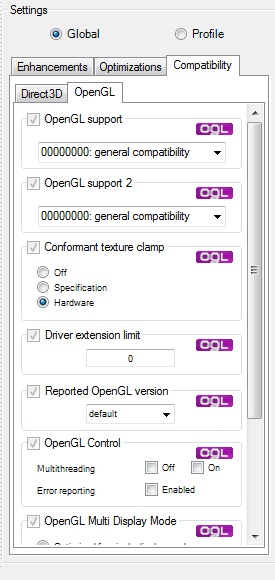
The game has a lot of different settings. I will touch only those that can affect the quality of graphics and FPS. I do not claim that the above settings are the MOST optimal. There is no such thing. For one computer they are one, for another another. This option is recommended to use as a reference point, so that you can later tweak if you have a stock of FPS, or vice versa, the shortage.
Below I provide screenshots of all tabs with settings. Basic settings:
DirectX 10 is better off, this mode, unfortunately, has not been finalized until the end, which promises some problems. The settings for the aircraft:
Landscape:
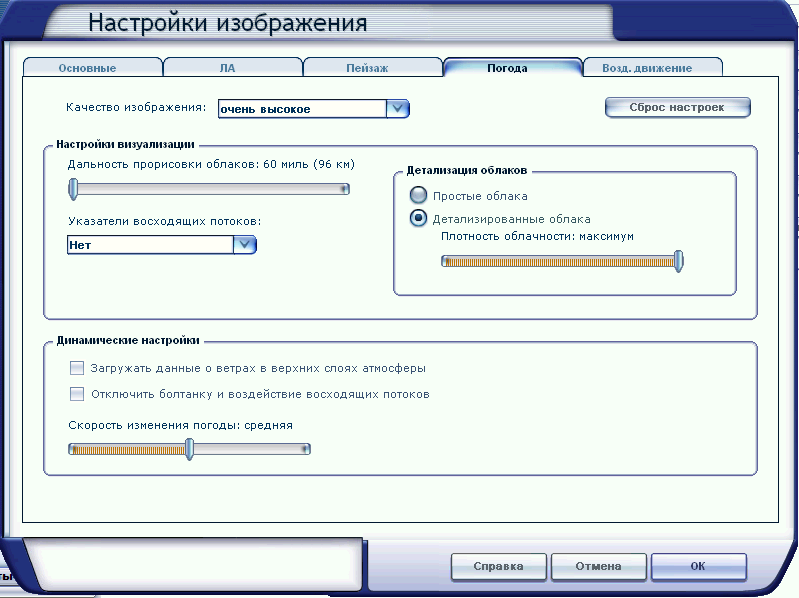
Weather:
Air traffic. Here everything is individual and depends on what kind of traffic you have, default or separate addon. But in any case, the rule is standard: the more objects in the game - the smaller the FPS. The level of realism you evaluate yourself.
After applying all the settings, the general settings window in FSX should look like this:
For more realism, I highly recommend that you go to the “Realism” section and tweak a few sliders there, because The default ones are no good:
The main thing is that the “General” slider is at its maximum, as many manufacturers of LA models demand. Now, exit the simulator so that the settings are saved to a file. Then run it again to make sure that the settings have been successfully loaded. Now close the simulator again, because now you will need to fix a few lines manually in the main FSX config: fsx.cfg. This file is located in the Windows user settings folder, i.e. in the "C: \ Documents and Settings \ YOURNAME \ Application Data \ Microsoft \ FSX" or "C: \ Users \ YOURNAME \ AppData \ Roaming \ Microsoft \ FSX" directory, depending on the version of Windows. In order not to bother with the paths, you can simply select the Run command in the start-up and enter the line there:
notepad% APPDATA% / Microsoft / FSX / fsx.cfg
The config will automatically open in Notepad in any version of Windows. Do not forget, just in case, to save a copy of the file, suddenly where you go wrong. We need to change (if the parameter is already present in the file) or add the following parameters:
[Display] <br/>TEXTURE_BANDWIDTH_MULT=70<br/> [GRAPHICS] <br/>TEXTURE_MAX_LOAD=4096<br/> [Main] <br/>DisablePreload=1<br/>FIBER_FRAME_TIME_FRACTION=0.33<br/> [TERRAIN] <br/>TERRAIN_MAX_AUTOGEN_TREES_PER_CELL=1200<br/>TERRAIN_MAX_AUTOGEN_BUILDINGS_PER_CELL=1000<br/> [BUFFERPOOLS] <br/>PoolSize=12000000<br/><br/> explain what each means:| TEXTURE_BANDWIDTH_MULT | Controls the “speed” of loading textures into memory. The recommended value of 70-80 (default 30). If the simulator slows down when turning the camera - try to set a larger value (maximum 400). |
| TEXTURE_MAX_LOAD | Maximum size of supported textures. This parameter is required for the REX add-on and (possibly) other add-ons. 4096 is the maximum. |
| DisablePreload | The simulator will not load the default flight every time you start it, which allows you to slightly increase the download speed of the game. |
| FIBER_FRAME_TIME_FRACTION | The parameter determines the ratio of the processor time required for loading the scene and rendering. For example, 0.33 in this case means that about 30% of the CPU time will be spent on loading the scene, and the remaining 70% will be spent on rendering. Recommended values for samples around 0.05 - 0.66 |
| TERRAIN_MAX_AUTOGEN_TREES_PER_CELL | The number of trees for landscape autogeneration. Larger values significantly reduce FPS. You can experiment, the range of optimal values varies from 800 to 3000. |
| TERRAIN_MAX_AUTOGEN_BUILDINGS_PER_CELL | The same thing only determines the number of 3D buildings when the landscape is auto-generated. |
| PoolSize | This parameter determines the size of the buffer for the texture memory in order to later “pull out” the necessary texture from there. Some people write that it significantly affects the quality of rendering, objects and textures appear more smoothly, without jerks, if you set the value to 12,000,000 or even more (in bytes). If you have a video card with 512+ megabytes of memory - you can try to play around looking for the optimal value. |
To get the maximum CPU time for FSX, you can run it with higher priority. To do this, create a .bat file and paste the following line there, substituting the full path to the fsx.exe file:
start / HIGH J: \ GAMES \ FSX \ fsx.exe
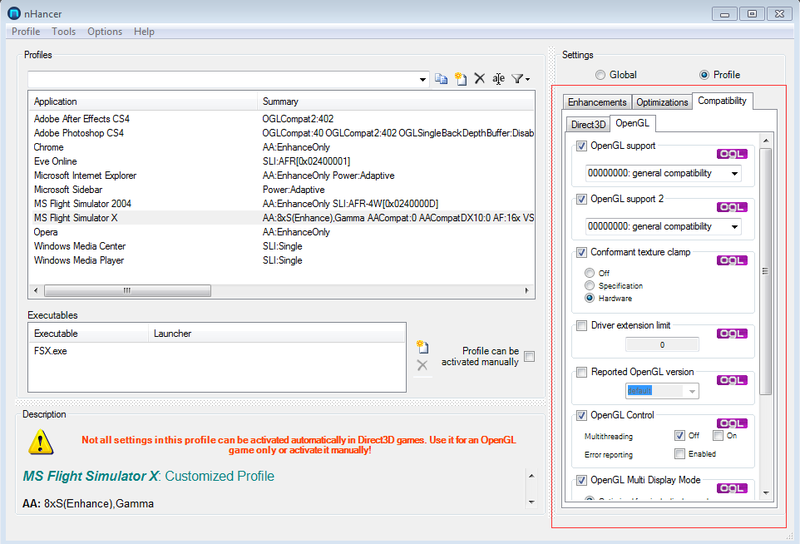
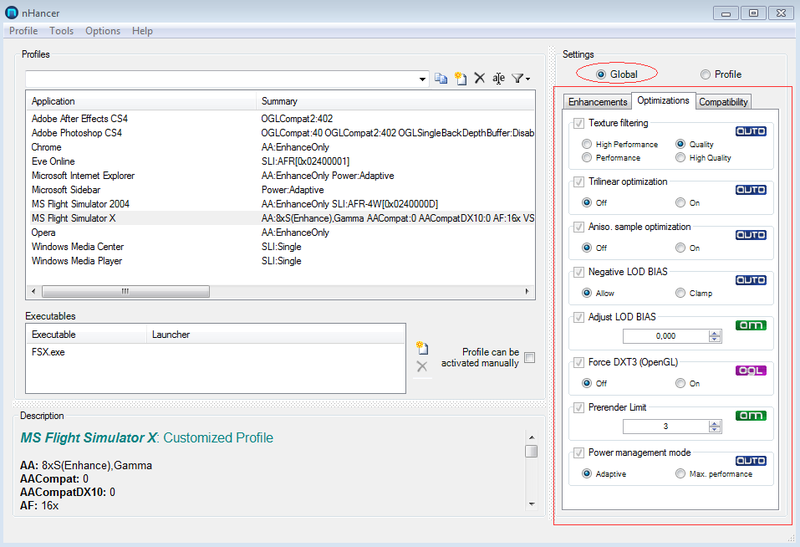
Install nHancer to fine tune nVidia video cards
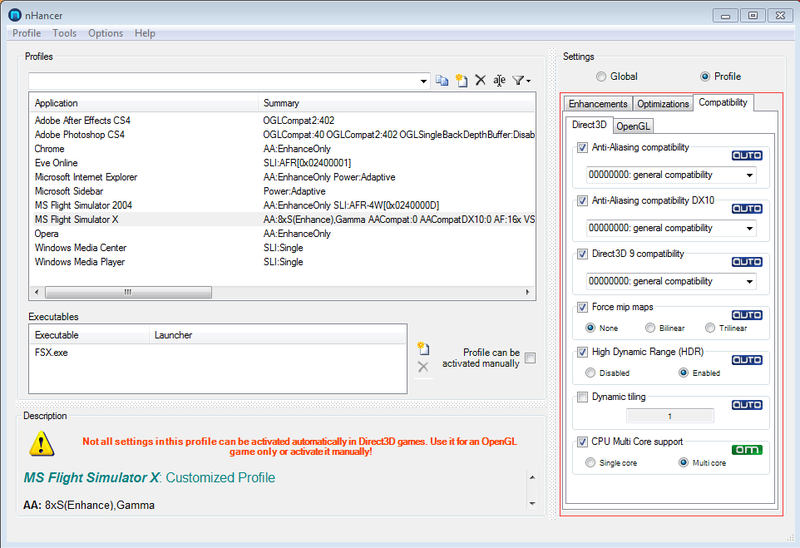
If you own any GeForce, the nHancer utility will give you much more options for fine-tuning graphics than their standard panel in the Windows control panel. The utility is completely free and can be used to customize graphics in any other game. You can download it here (I used version 2.5.7). Also, I advise you to download the latest drivers from the nVidia website. After launching the program, find the MS Flight Simulator X profile in the list, select it, make sure the Profile item is active and adjust the graphics according to the following recommended values (make changes in the right-hand part of the window ):
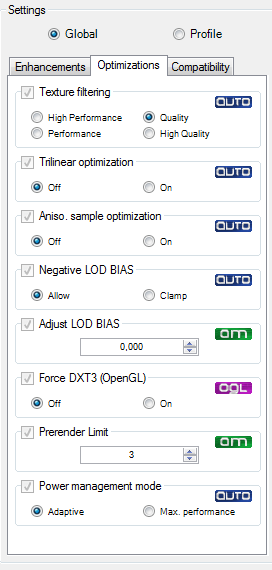
In the "Global" section also need to correct a few values:
After all the manipulations you can close the program, it is no longer needed, nor in the tray, anywhere. Settings already saved globally. Although, of course, no one forbids you to play around with the parameters yourself, especially with the anti-aliasing level, there may be more optimal parameters for your video card. Restart your computer and try out the new settings in action.
Shader Version Setup
To configure the version of the shaders, we need to tweak another FSX configuration file - display.cfg, which is in the root directory of the simulator. I have this "J: \ GAMES \ FSX". But first, we need the dxdiag utility included in Windows. To start it, just type “dxdiag” in “Start-> Run”. In the appeared window, click on the “Save all information ...” button and save the resulting dxdiag.txt file to any folder.
Now open both files (dxdiag.txt and display.cfg) in the notepad for editing and create (if you don’t have one yet) the [xxxx: yyyy] section in the following format: An example is given for the GF 8800 GT card, but it should work for ATI cards as well. After these manipulations, you may notice a slight increase in FPS and the quality of water rendering.Installing addons that noticeably improve the graphics and realistic simulator
FSX is a very good simulator, but it’s still far from reality :) Therefore, you can find hundreds of addons in the network that can add new photorealistic landscapes to the game (in fact, earth textures in the form of satellite photos), real clouds, real weather conditions, models of almost all real aircraft, most of which are 100% complete, i.e. any lever or switch will work like a real car, air traffic and many other interesting things. Below I give a list of the most necessary add-ons (in my opinion) that significantly transform the simulator. I recommend installing in order, starting the simulator after the installation of each addon is complete:
- FS Global 2010 - replaces the default grid (mesh) of the earth's surface with a more detailed resolution of up to 9 meters! .. Here are screenshots for comparison:
FSX default: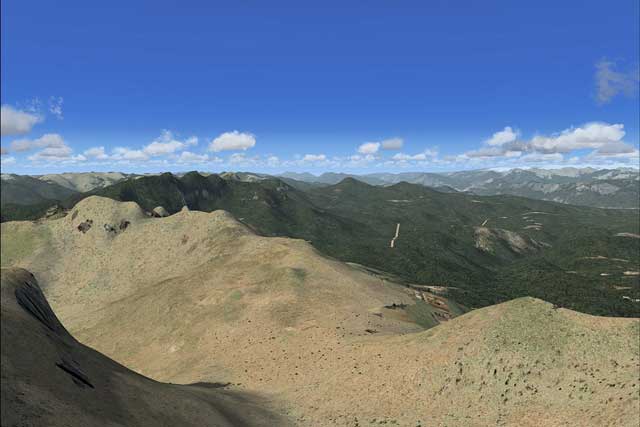
FS Global 2010: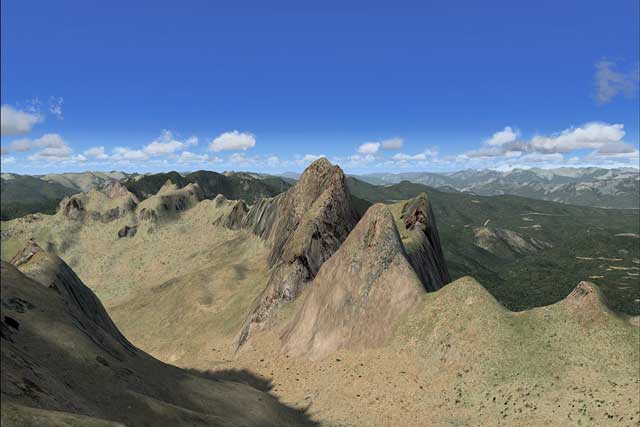
The photo:
Addon size: about 24GB! I want to add that FS Global 2010 is noticeably better than the previous version - FS Global 2008, so look for the latest version. - Ultimate Terrain X Europe - makes the European part more detailed. Adds textures, road markings and more. Addon size: 1.5GB. There are also versions for the USA and Canada.
- Ground Environment X Europe / USA / Canada - Best addon for replacing standard ground textures for Europe, USA and Canada. Can be used with Ultimate Terrain X, as there are only land classes (roads, lakes, bridges, residential zones, etc.). Addon size: ~ 3.0GB.
- ORBX Australia is a great addon that will make the whole Australian mainland photorealistic. The addon consists of four parts (northern, southern, central and western parts). Addon size: 3.5GB.
- Other scenes - There are VERY many different scenarios for different parts of the world and countries. For example, the Hawaii script from Megascenery . You can also find a cloud of detailed airports, you can continue the list yourself, just go to the simmarket and look for what you personally like.
- Real Environment Extreme (REX) - perhaps the best addon for adding photorealistic clouds and weather conditions, as well as stunning water! In this case, FPS is not much sagging. Addon size: version 1.0 - 4GB, plus updates up to 2.0 - 100MB. It has a built-in weather engine that can load the real weather at the airport of your choice and its surroundings.
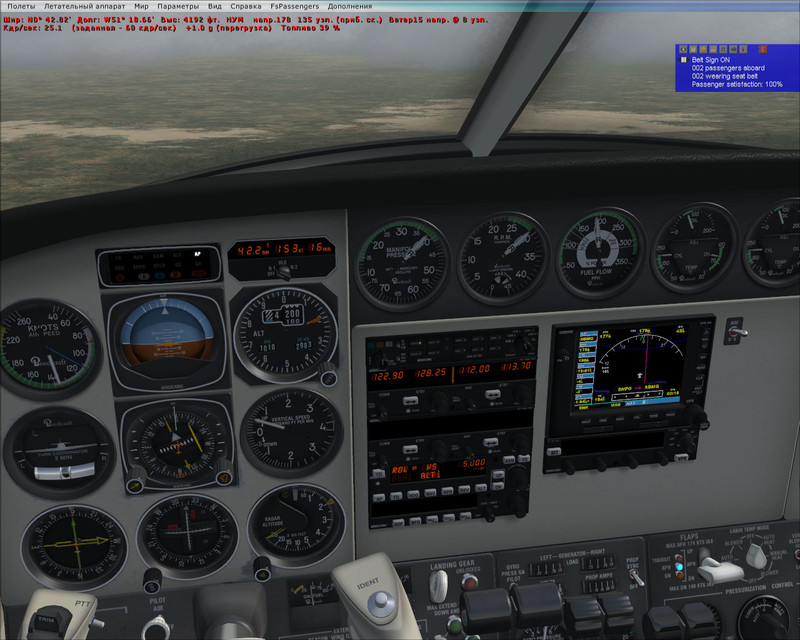
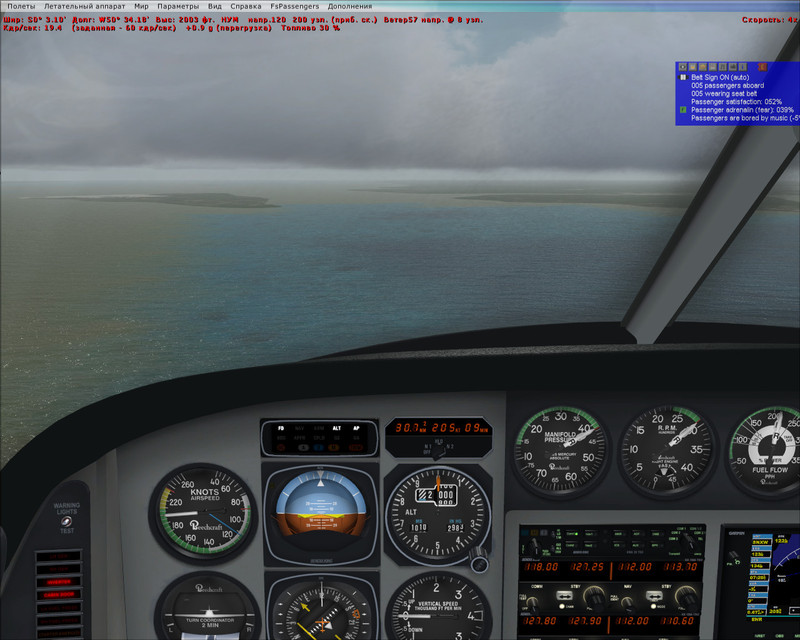
- MyTraffic 5.2 - creates more realistic traffic at airports and in the sky (it looks something like this ). FPS is not much sagging. Includes a bunch of different models of aircraft with liveries of real airlines. I want to note that there are other options for FSX traffic, for example, “World of AI Traffic”, “Morten's AI Traffic v2.2” and so on. For me personally, traffic does not play such an important role, so I didn’t compare all these products, I simply chose MyTraffic. The size is about 1GB.
- FsPassengers - addon allows you to create a virtual airline, buy virtual airplanes, transport virtual passengers and earn virtual money on it :) You have done it quite well, you can hire a crew aboard the aircraft, feed passengers during the flight and many more interesting things. With this add-on offline fly will become much more interesting.
- FSUIPC is a small add-on for the FSX SDK, which is mandatory for some add-ons, so that they can connect to the simulator to exchange data (even over a network on a separate computer).
- FlightSim Commander 8.5 - a program for planning a flight route. Of course, you can plan a route in the built-in scheduler in the simulator itself, but in FSC, in my opinion, this is done much more conveniently. Here you can easily make a route along the VOR beacons, see the airport map (taxiing, gates), etc.:
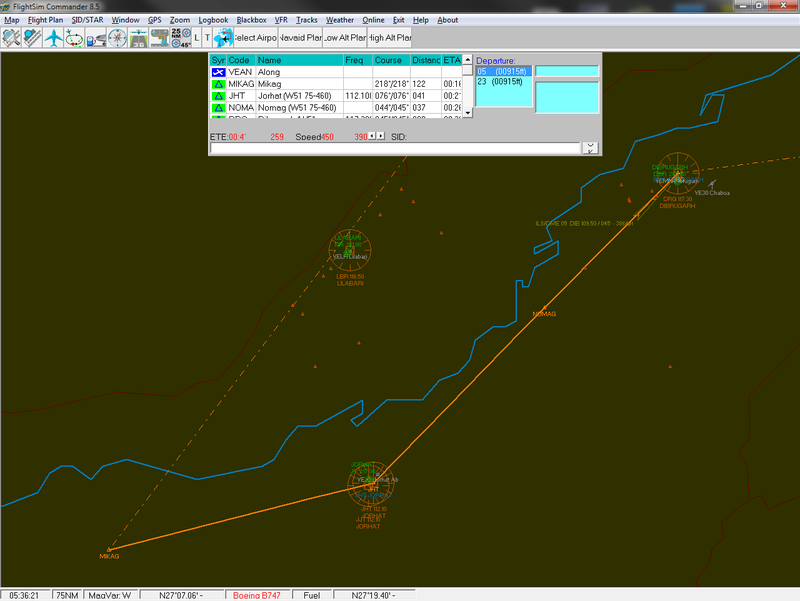
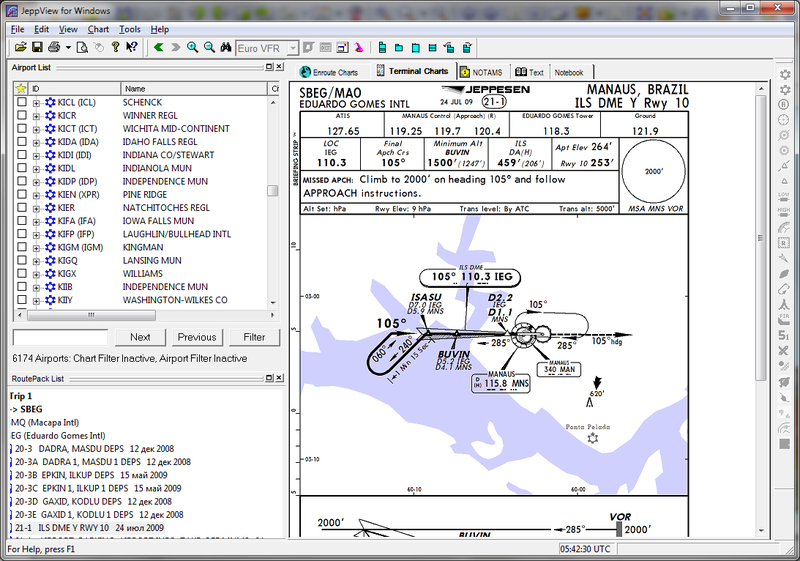
Plan a route, save to a .pln file, open it in FSX and fly. If you want even more realism, you can use real Jeppesen maps (Jeppview program), which are used by real pilots. The maps contain all the necessary information: SID / STAR schemes, calling patterns for ILS, VOR, DME, GPS, steering wheel marking, and so on. The program looks like this: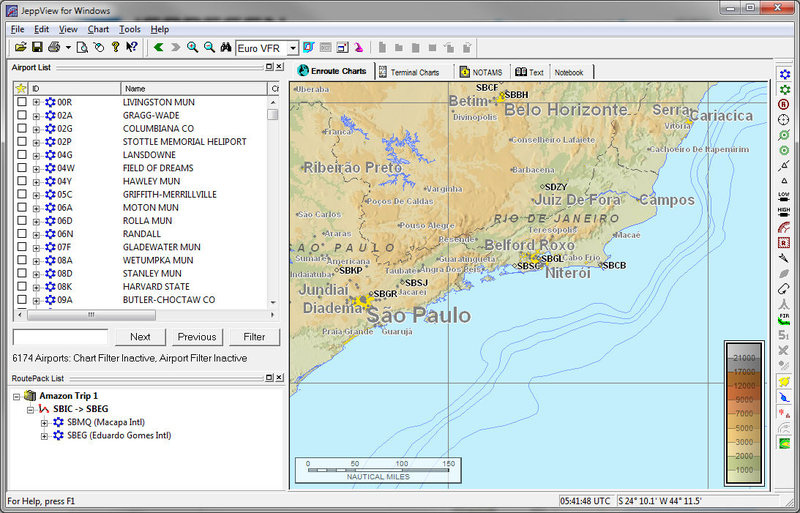
- Additional aircraft - for FSX created a lot of models of airplanes and helicopters. There are even space shuttles :) Of the light aircraft, I especially want to mention the following:
RealAir Beechcraft Duke B60 is my favorite :)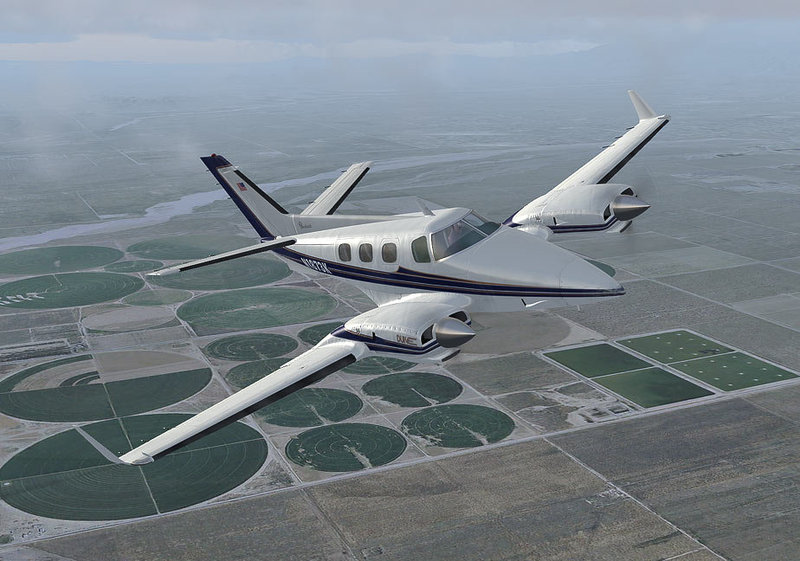
Carenado C172n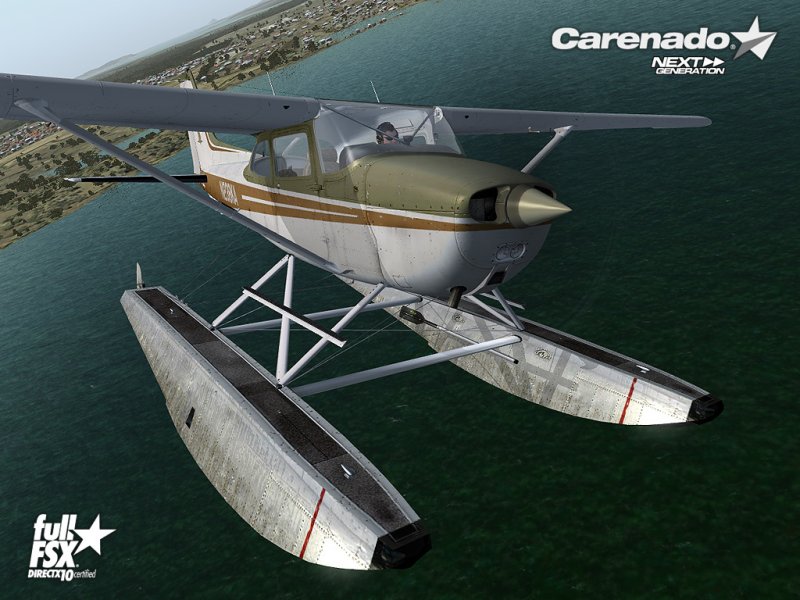
IRIS Pro Christen Eagle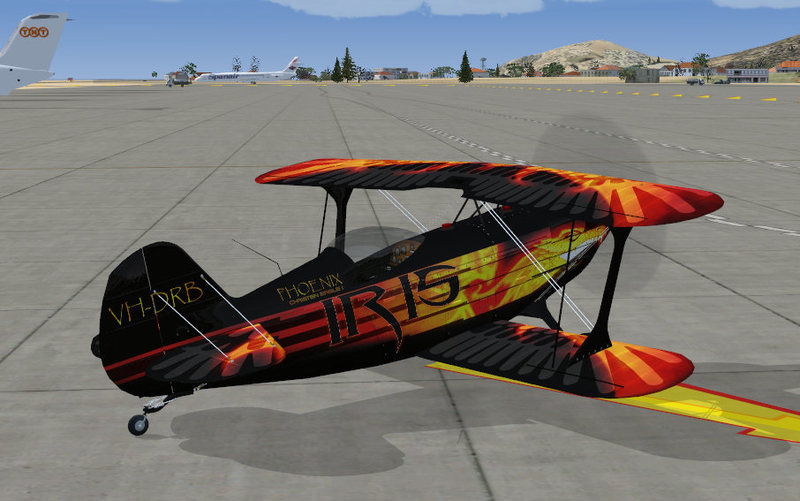
The list does not end there ! Airbuses, Boeing, Tu-shki - all at your disposal.
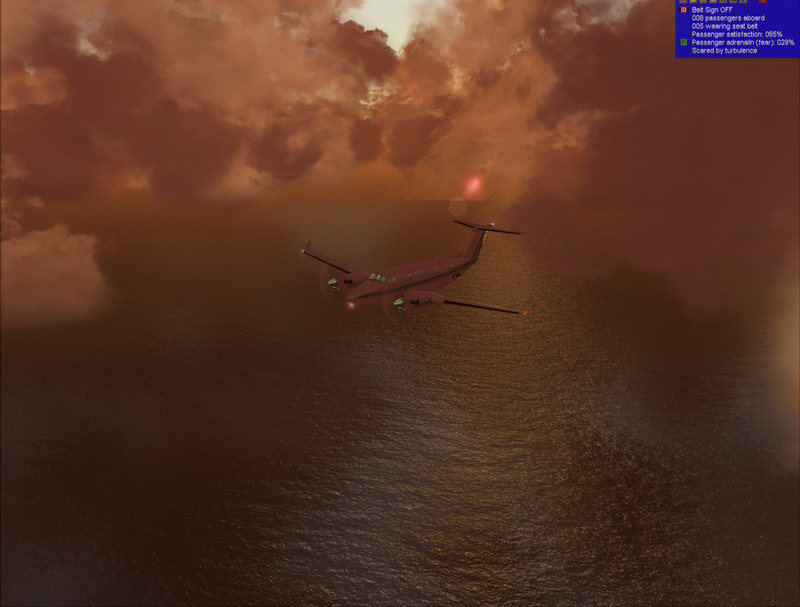
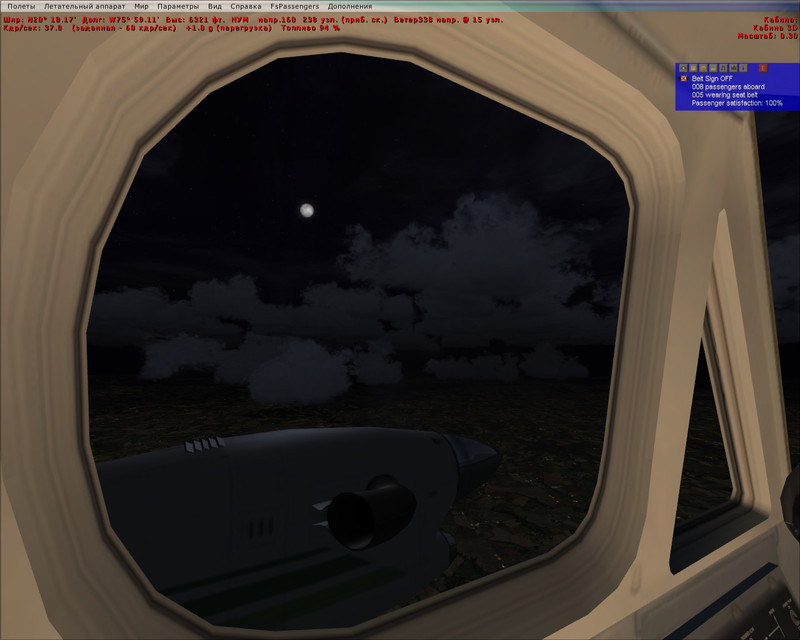
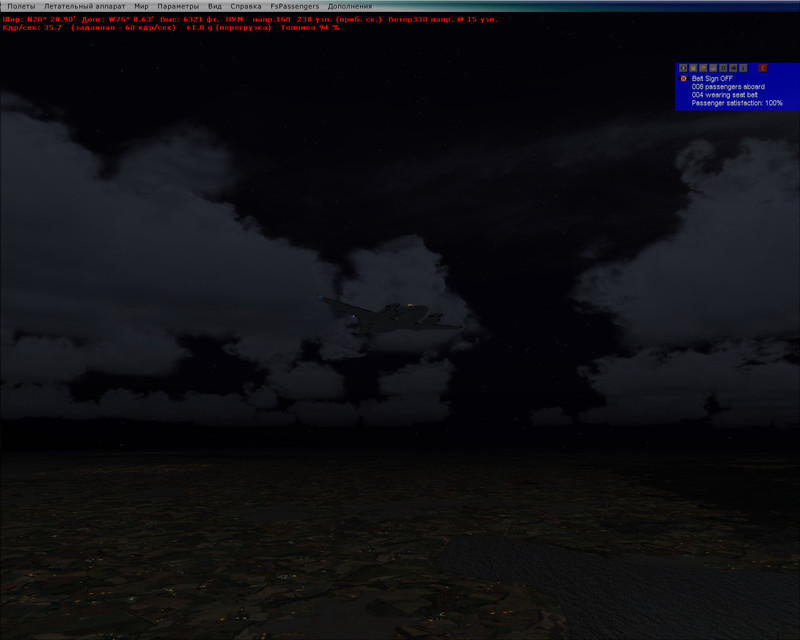
Summary and Screenshots
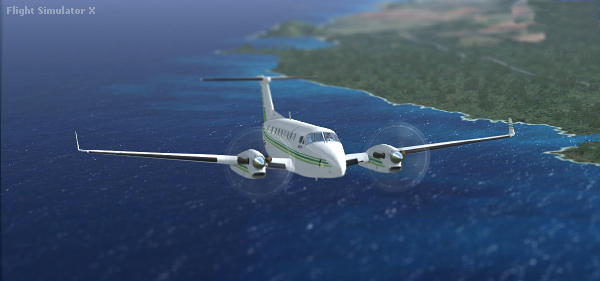
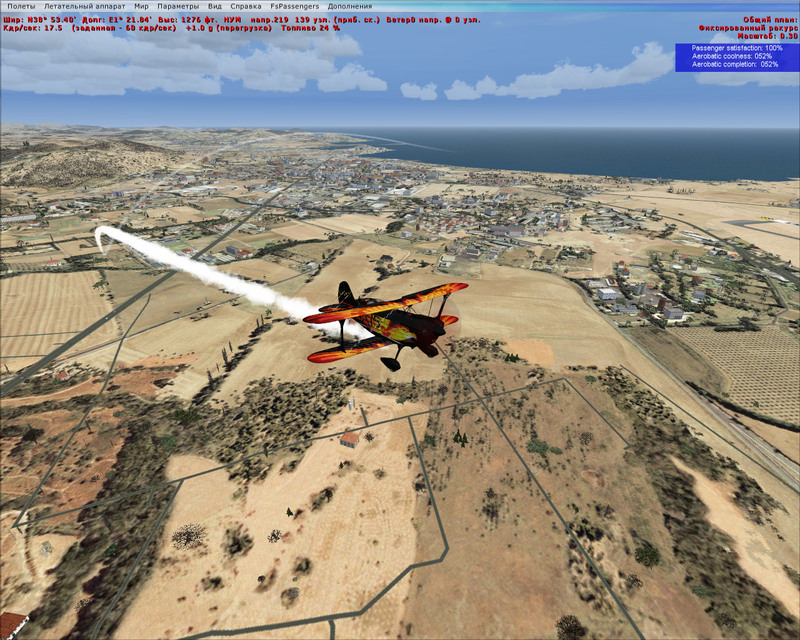
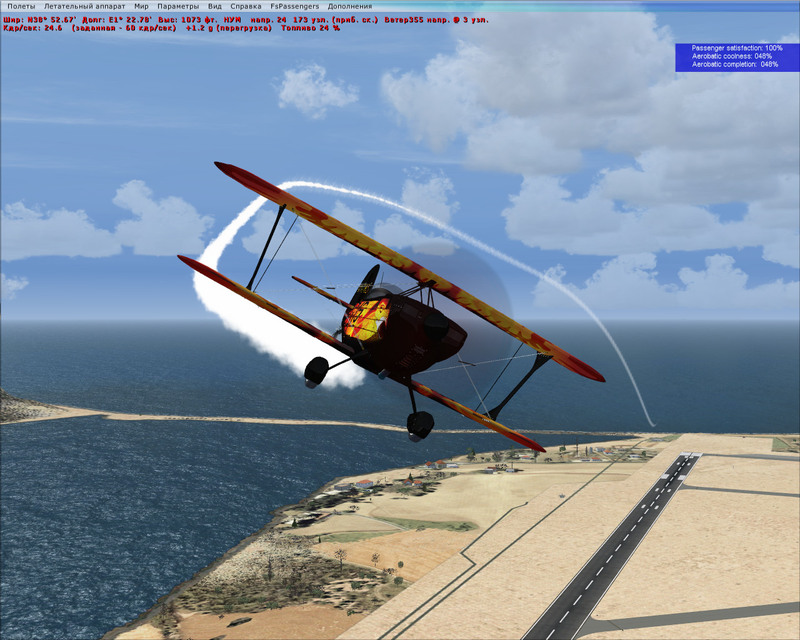
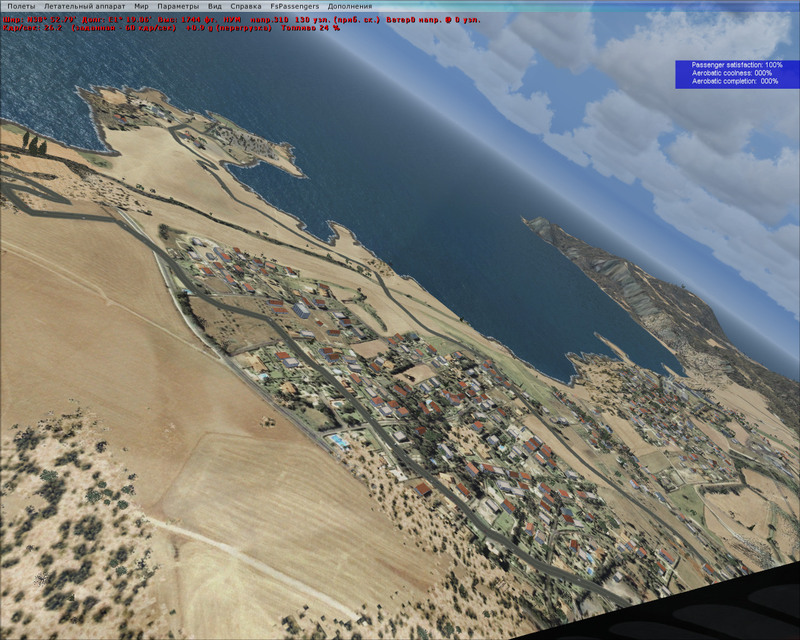
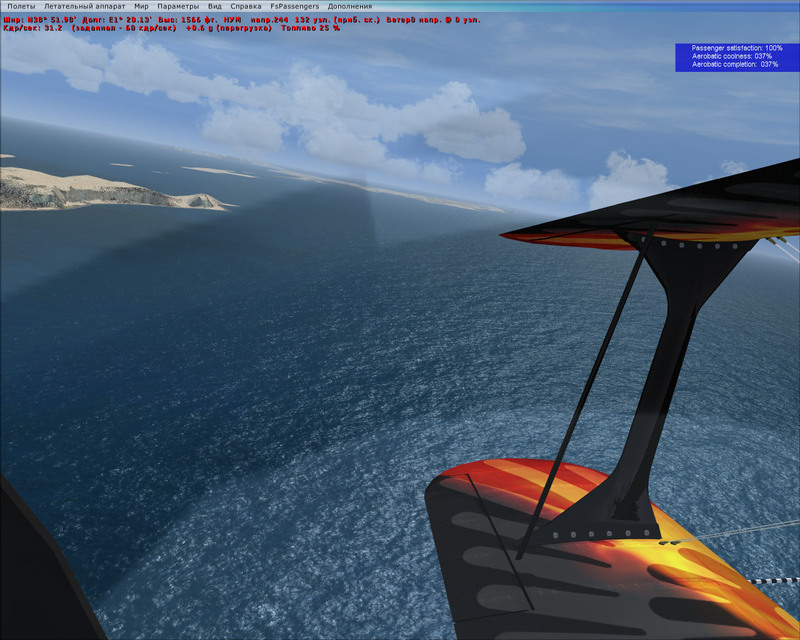
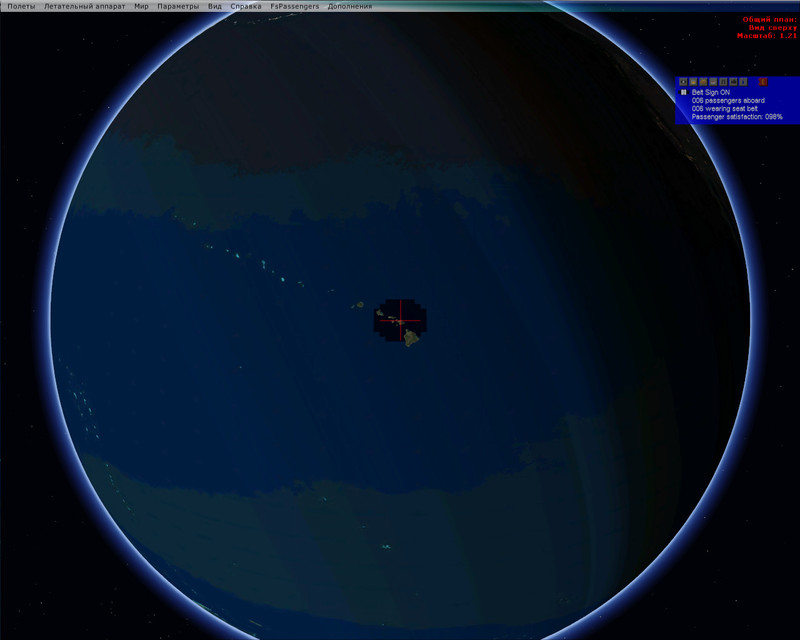
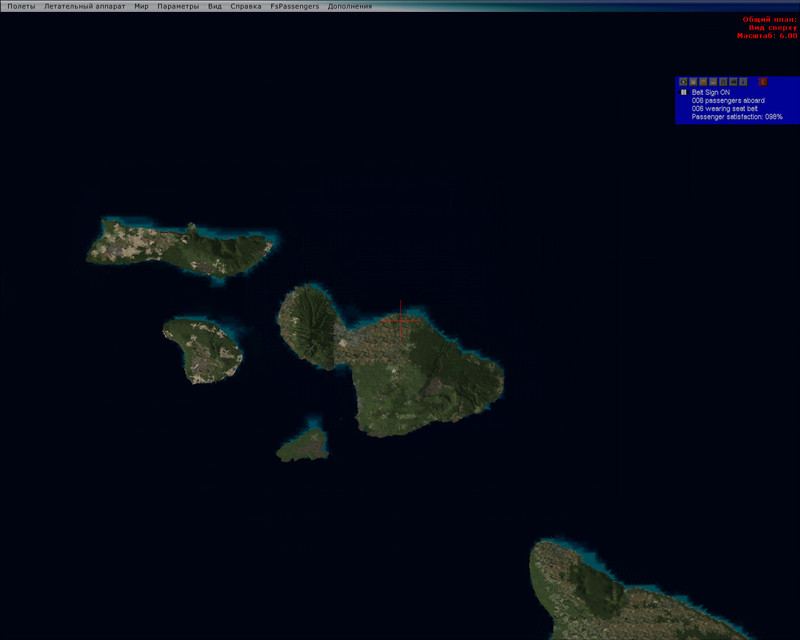
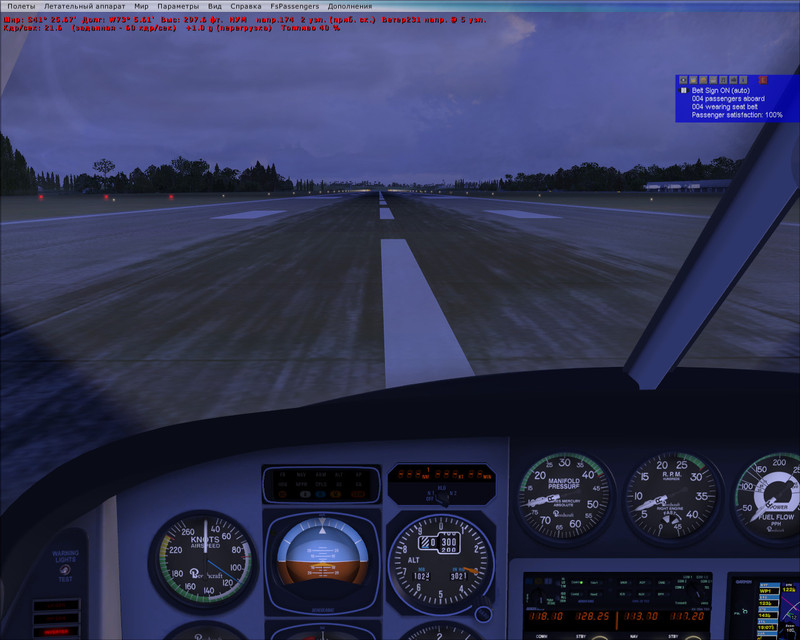
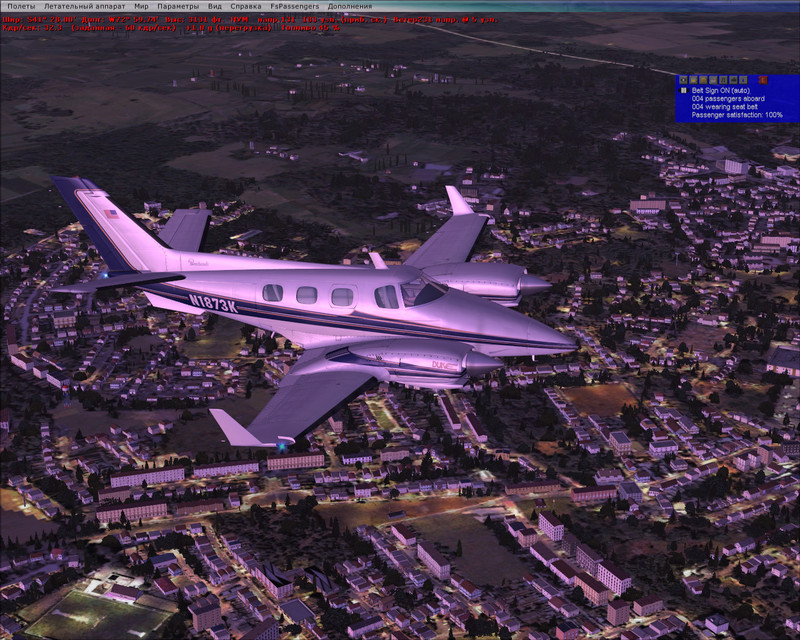
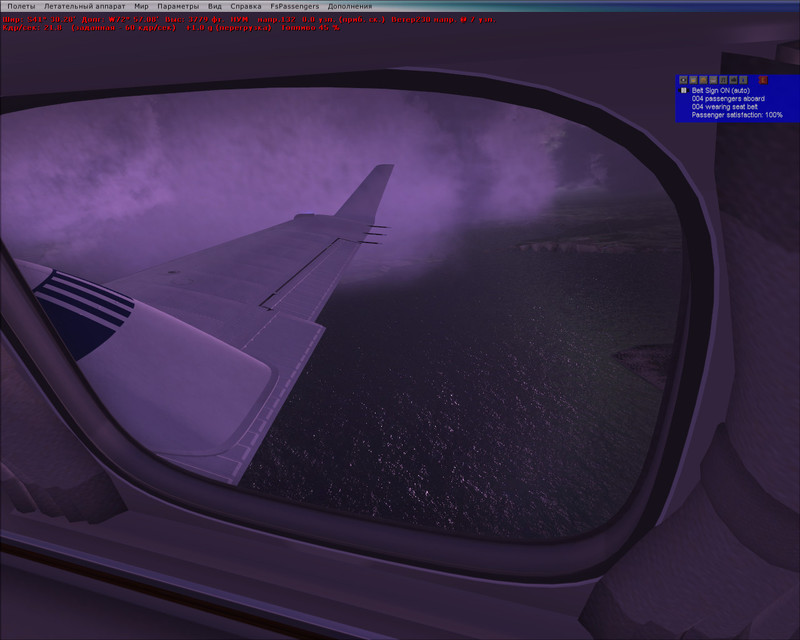
As a result, after installing and configuring FSX and all the above-described add-ons, you can get these screenshots (full-size 1280x1024), which are even nicer in dynamics :)
Air Show in Ibiza
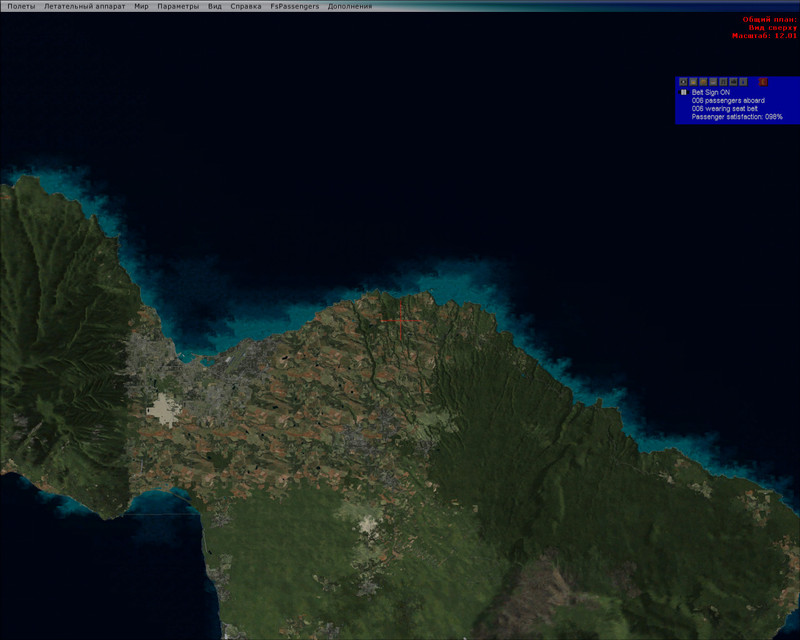
Flight Honolulu - Hawaii
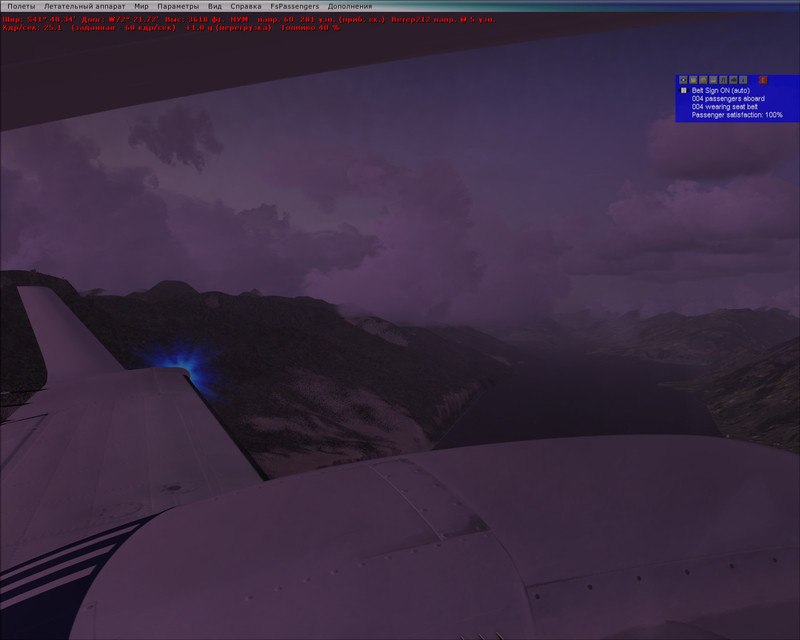
Flight through the mountains in Chile
South America, Brazil
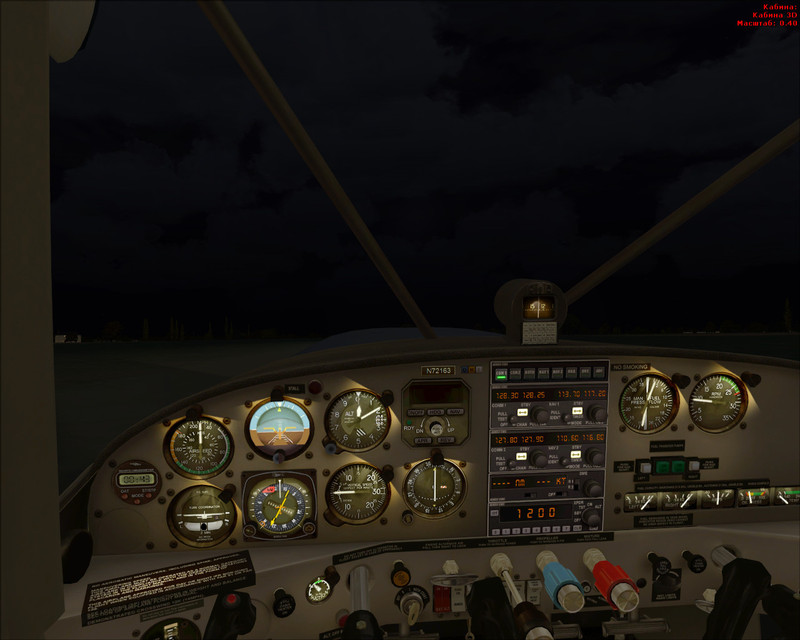
Flight at night
Well, for a snack:
1. A small video (not mine) in which you can compare the process of landing an airplane with a view from the pilot's cabin in real life and in the simulator:
2. An interesting article about the comparison of the flight on the real Cessna and Cessna from FSX .
Links
Several links to the most interesting sites related to the subject of simulators:
- Do not forget about the built-in tutorial in FSX itself. The translation into Russian is worthy, and familiarity with the simulator should begin with him. A training mission with an instructor will help test knowledge in practice.
- AVSIM.SU is the largest forum about aircraft simulators and everything connected with them: navigation, flights in online networks and so on. You can find answers to 99.99% of the questions here.
- How to read Jeppesen diagrams correctly?
- The database of airports in the world is a convenient site where you can find almost any airport (by code) and see how it looks in Google maps.
Successful to you flights!
Ps. This is my first article on Habré, please do not judge strictly ...
Pps. Habraeffekt strongly loads the server with pictures, so if something does not load, try a bit later ... Thank you :)
UPD. Last updated article: 11/26/2009
Source: https://habr.com/ru/post/74630/
All Articles