Power supply repair for iBook G4 (Photo report)
 Hello! I really hope that this article is not useful to anyone! But, if the power supply of your iBook G4 decides that you pay too little attention to it, and require fights, then this article will tell you how it works.
Or maybe you wonder why it glows when you connect it to a laptop?
All this was interesting to me, but I did not find normal information anywhere and decided that it might be useful to someone.
Yes, I almost forgot to say, do not try to repeat it at home! I do not bear any responsibility for the killed (at best) adapters or (at worst) laptops!
In general, the power supply unit from a small and old poppy broke. And obviously something with the cable, because if you pull it, then it works again, so the strut! And sometimes you think: “well, what are you, an infection, do not work? !!” and you try to insert it deeper, push it, push it ... well, nowhere else! So you can break the laptop itself! Well, I decided to check it out. But ha! Just take a multimeter and check it is almost an impossible task, because the apple decided to show off and this connector has four contacts, the most important of which are recessed so that if you start to climb, you can close something. And do not want to. So I had to open the white box, which, in fact, is the power supply. Neatly, with a knife, not like me, peel off the top cover along the perimeter:

"Ears" themselves fall off, so you should not worry about them. By the way, these ears (if they are designed to wind a cable on them), in my opinion, only harm the cable. Because an intelligent person will leave a small supply of cable at the root and only then start winding, and an ordinary people will immediately reel, and then the cable breaks at the root. Well, it doesn't matter now. After peeling off everything along the perimeter, we proceed to peeling off the cover from the internal power supply plates:

neatly climb there something thin and peel off.

Now you can see the contacts, and you can check the cable. In my case, I could not install the cable break at all, but I decided that, most likely, at the connector itself, cut off a piece of cable there, 6-7 centimeters. It turned out that the gap is even deeper in the connector, because from this piece to the block itself everything is fine. I had to disassemble the connector. First, disconnect the plastic part of the "light bulb":
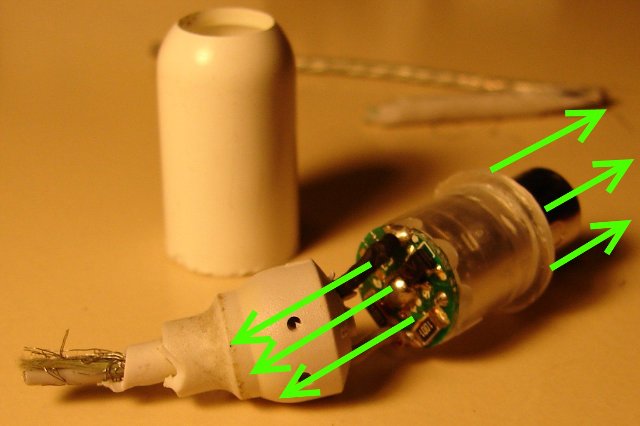
Then we unzip the metal part of the connector from the board in one place (this is easy to understand right away, if you look alive, you can't see it in the photo) and remove the “shell” (well, I don’t know how to call it again!), As shown in the figure with arrows. Everything! We get this:

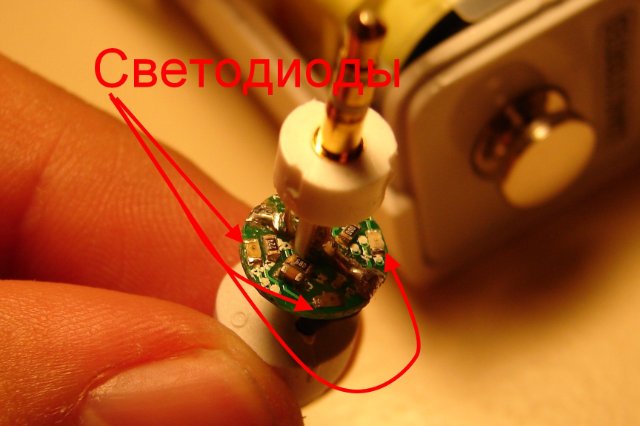
And I sadly discover that the gap is not available to me at all (indicated in blue where the gap is). In the picture I indicated where the food is suitable. We look closer at the circuit and see LEDs there that glow when the laptop is charging:
In general, it turns out that the plug itself is covered. I looked more closely ... so it looks like a headphone plug !!! But the truth is not normal, 3.5 mm, and a shorter version - 2.5 mm. But there is such a cable! Since the current flows large enough, you should not even use a short piece of cable from the headphones. Therefore, I disassembled this plug and also soldered the cable directly to the metal connectors:
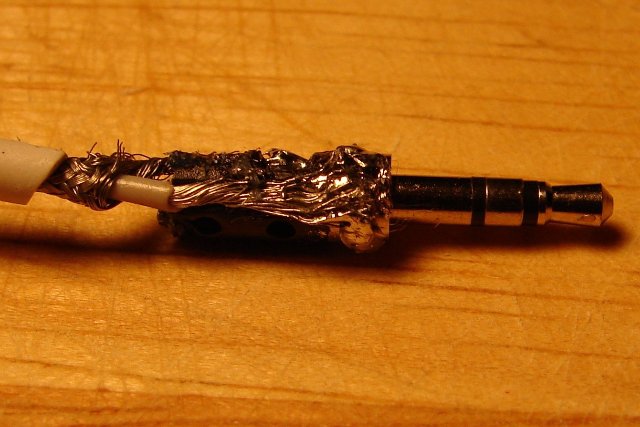
Well, yeah, not very neat! Then I melted a piece of ordinary plastic handle and quietly increased the thickness of this plug, until it exactly coincided with the inner diameter of that “shell”, which I couldn’t call differently. I collected everything, and here is the result:
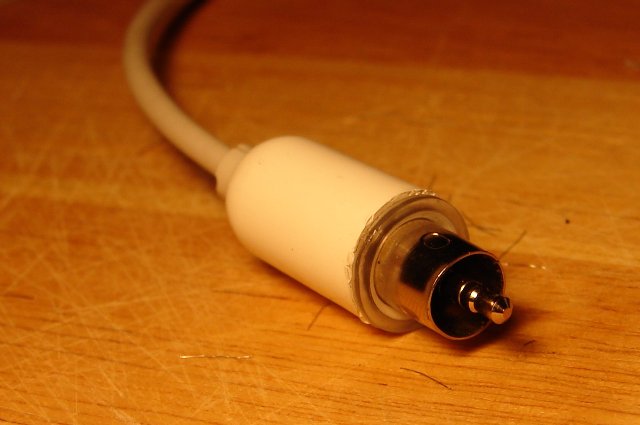
Well, let it no longer shines! (Threw that little handkerchief to hell) But it works !!!
')
Source: https://habr.com/ru/post/71907/
All Articles