OpenGL ES 2.0 to iPhone 3G S Basics
 One of the most pleasant innovations in the iPhone 3GS is a faster and more powerful graphical platform with support for OpenGL ES 2.0 . Unfortunately, there is little information from Apple about how to use the new opportunities. For almost all APIs , they have excellent documentation with sample codes, but the problem is that in the case of OpenGL, the examples always left, to put it mildly, much to be desired.
Moreover, for beginners working with OpenGL ES 2.0 , neither the basic examples nor the Xcode template are offered. To take advantage of advanced graphics capabilities, you will have to master them yourself. You should not mistakenly assume that OpenGL ES 2.0 is a slightly modified version of OpenGL ES 1.1 with a couple of new features. The differences between them are cardinal! The conveyor with fixed functions has disappeared, and now to display a regular triangle on the screen, you will need to get a deeper acquaintance with the basics of computer graphics, including shaders.
Given the complete lack of documentation, I decided to create the simplest application on the iPhone using OpenGL ES 2.0 . For users, it may well be the starting point for creating applications. I considered rotating teapots and other constructions as options, but in the end I decided not to go into details on loading the model, but simply to update the OpenGL ES 1.1 application, which is part of the XCode template. The full summary code can be downloaded here .
')
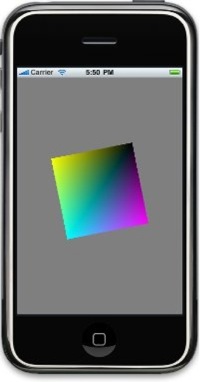
Nothing intriguing - just a rotating square. However, this is enough to get acquainted with the basics of running OpenGL , creating shaders, and connecting them to the program and then using it. Moreover, at the end we will consider the function that is impossible in OpenGL ES 1.1 . Ready?
Initialization
Initializing OpenGL is almost the same as OpenGL ES 1.1 . The only difference is that you need to report a new version of the API for ES 2.0 .
context = [[EAGLContext alloc] initWithAPI:kEAGLRenderingAPIOpenGLES2];Everything else, including EAGLView and the creation of so-called back buffers , remains the same as before - I will not dwell on these points.
Do not forget that during the initialization of OpenGL ES 2.0 it will not be possible to call functions related to OpenGL ES 1.1 . Attempting to work with them will cause the program to crash, since these functions lack the correct settings. Accordingly, if you want to take advantage of the 3GS graphics, while ensuring compatibility with previous models, you will need to check the device type in the process, activating OpenGL ES 1.1 or 2.0 — you will have your own codes for each option.
Shader creation
OpenGL ES 1.1 uses a pipeline with fixed functions for rendering polygons. To visualize an object on the screen in OpenGL ES 2.0 , it is necessary to register shaders - mini-programs created for a specific graphical platform. Their task is to transform the input data (vertices and states) into an image on the screen. Shaders are written in the language OpenGL Shader Language (abbreviated GLSL ), which does not make the slightest problem for those who are used to working with C. Of course, to use all its features, you will need to learn some of the details. Below are presented only the basic concepts and their relationships.
Shaders are of two types: vertex shaders are executed for each vertex, fragment shaders for each pixel. Technically, the latter are performed for each fragment, which may not correspond to a pixel, for example, when smoothing. So far we can safely assume that fragment shaders are executed for each pixel being rendered.
The vertex shader computes the position of the vertex in a truncated space ( Clip Space ). Optionally, other values can be calculated for later use by the fragment shader.
- The vertex shader accepts two types of data - uniform and attributes. Unified input are values that are set once from the main program and apply to all vertices processed by the vertex shader when a drawing is requested. For example, the transformation of the world view view is a unified introductory one.
- The introductory attributes of a single drawing request may vary for each vertex. The position, the normal, the color information are all introductory attributes.
At the output, the vertex shader provides two types of data:
- The implied position in the variable " gl_Position ", i.e. the position of the vertex in the truncated space (later transformed into the viewport space ).
- Varying results. Variables defined by the varying attribute will be interpolated between the vertices, and the resulting values will be passed as input to the fragment shaders.
In a typical program, the vertex shader simply transforms the position of the vertex from the Model Space to the truncated space and transmits the vertex color for interpolation by a fragment shader.
uniform mat4 u_mvpMatrix;

attribute vec4 a_position;
attribute vec4 a_color;

varying vec4 v_color;

void main()
{
gl_Position = u_mvpMatrix * a_position;
v_color = a_color;
}
Fragment shaders calculate the color of the fragment (pixel). The input parameters for them are varying variables generated by the vertex shader in addition to the variable " gl_Position ". The color calculation can be limited to adding a constant to gl_Position , or it can be a search for a texture pixel by uv coordinates or a complex operation that takes the lighting conditions into account.
Our fragmentary shader will be elementary: taking the color from the vertex shader, it applies it to this fragment.
varying vec4 v_color;

void main()
{
gl_FragColor = v_color;
}
It is quite possible that all this sounds vague and vague, but this is the beauty of shaders: no presets, rendering depends only on the desires of the user (and the capabilities of the hardware).
Compiling Shaders
We have several ready-made shaders. How to make them work? It will take several steps, the first of which will be the compilation and installation of links.
In the process of work, it is necessary to load the source code text for each vertex together with fragment shaders, and then compile it using a couple of OpenGL references.
const unsigned int shader = glCreateShader(type);
glShaderSource(shader, 1, (const GLchar**)&source, NULL);
glCompileShader(shader);
As soon as the compilation for shaders is completed, you need to create a shader program, add the shaders themselves and link them together.
m_shaderProgram = glCreateProgram();
glAttachShader(m_shaderProgram, vertexShader);
glAttachShader(m_shaderProgram, fragmentShader);
glLinkProgram(m_shaderProgram);
Linking involves overriding the vertex shader data at the output to the intended result of the fragment shader.
It is possible to diagnose errors when compiling and establishing links with displaying a message about the cause of the error.
int success;
glGetShaderiv(shader, GL_COMPILE_STATUS, &success);
if (success == 0)
glGetShaderInfoLog(shader, sizeof(errorMsg), NULL, errorMsg);
If you don’t like the idea of compiling and linking programs in the process of work, I hasten to notice that this opinion is shared by many. Ideally, this step should be performed offline, by analogy with compiling source code for the main program in Objective C. Unfortunately, the priority for Apple is openness and the ability to change the format in the future, so we are forced to compile with the installation of the connection "on the job." This is not just annoying, but, theoretically, implies a rather low speed with several shaders. No one wants to lose extra seconds when launching the application, but for now you have to take it for granted in exchange for the ability to work with shaders on the iPhone .
Binding
We are almost ready to use shaders, but first we need to specify how to properly configure the input data. The vertex shader expects a customized mvp matrix ( model-view-projection ), as well as a vertex data stream with positions and colors.
To do this, we request the desired parameters from the shader program. It returns a handle by which values are set up immediately before the model is rendered.
m_a_positionHandle = glGetAttribLocation(m_shaderProgram, "a_position");
m_a_colorHandle = glGetAttribLocation(m_shaderProgram, "a_color");
m_u_mvpHandle = glGetUniformLocation(m_shaderProgram, "u_mvpMatrix");
Work with shaders
And finally, with the help of our shaders, we can re-draw several polygons. All you need is to run a shader program ...
glUseProgram(m_shaderProgram);
... and set up correct input, using the previously requested descriptors to enter the parameters:
glVertexAttribPointer(m_a_positionHandle, 2, GL_FLOAT, GL_FALSE, 0, squareVertices);
glEnableVertexAttribArray(m_a_positionHandle);
glVertexAttribPointer(m_a_colorHandle, 4, GL_FLOAT, GL_FALSE, 0, squareColors);
glEnableVertexAttribArray(m_a_colorHandle);
glUniformMatrix4fv(m_u_mvpHandle, 1, GL_FALSE, (GLfloat*)&mvp.m[0] );
Now we simply call any of the rendering functions known from OpenGL ES 1.1 (" glDrawArrays " or " glDrawElements "):
glDrawArrays(GL_TRIANGLE_STRIP, 0, 4);
If everything went well, the correctly rendered model will appear on the screen. In our case, this is just a square, which will become the basis for rendering your own models - with the necessary transformations, shaders and effects.
And a small bonus at last
I understand that it’s not too tempting to do all this just to get the same rotating square as in the OpenGL ES 1.1 template. Of course, this is a necessary and important first step, but still ... Therefore, to demonstrate how easy it is to create various effects with GLSL , I present a modified pixel shader.
float odd = floor(mod(gl_FragCoord.y, 2.0));
gl_FragColor = vec4(v_color.x, v_color.y, v_color.z, odd);
This version of the fragment shader checks whether the pixel is an even or an odd string, and renders the even rows as completely transparent, creating a strip effect on the screen. To achieve a similar result in OpenGL ES 1.1 was very problematic, and in version 2.0 it is just a couple of simple lines.
Armed with sample code and ideas about shader functions, you can now create your own shaders and add interesting and unique visual effects to games.
The source code for the lessons can be downloaded here .
The text of the original article in English is here .
Source: https://habr.com/ru/post/68330/
All Articles