Continuous integration and code metrics
This article discusses the configuration of continuous integration process with code metrics. It is supposed to work with java code and libraries: junit, cobertura, findbugs. We use ant as the build system, and the process will be controlled from the cruise control. As scm there will be some git.
What do we get in the end? Java project with ant'ovskim build script. The build will result in a compiled project and a set of metrics: reports on junit tests, the percentage of code covered by tests, and a report on potential errors. In addition, the entire build process will be done daily automatically and the entire history of the metrics is saved for group reports.
As a starting point we take any java project. The project must contain at least several classes with several unit tests. You do not need to cover 100% of the code - so as not to see the absolute values in the reports.
An example of a finished project can be downloaded HERE
')
We assume you already have java, if not, then it's time to install the package.
Install ant. Download HERE , unpack and add the path to ant / bin in PATH
JUnit we swing HERE and we place junit.jar in ant / lib
Findbugs download here , unpack and add finbugs-ant.jar to ant / lib
Cobertura from here , and just unpack it on the screw.
First, we configure the project to compile from the command line. To do this, create a build.xml in the root of the project and place it in it
We define the goal “compile”, and we can accomplish it by calling the command line
The depends attribute causes the init target to be compiled to compile. The preliminary target creates all the necessary directories.
As many already know, in the modern world of software development it is impossible to do without unit testing. Our test project is no exception. It contains several JUnit tests for some of the functionality.
The automatic build should run all the tests and write a report: how many tests in total, how many were completed successfully.
When working with large customers, there is a requirement for a percentage of code coverage of tests. To calculate this metric, we will use cobertura.
Cobertura can work as a standalone application, generating html reports. But for automated testing we will use ant plugin and reporting in xml format.
A few words about the mechanism for calculating coverage.
First, there are two types of coatings: code lines covering, and branches covering. Line coverage simply counts the total number of lines in a project, and how many of them were affected by the tests. Branch coverage allows for branching code.
To calculate statistics on coverage, we must compile the code in a special way so that cobertura adds its markers to it. During junit work, these markers calculate the coverage.
Adding markers is an extremely simple process; it is enough to add the cobertura library to the classpath.
Let's do it.
The previous ant target simply compiled the project, the next target does the same, but with markers and saves the classes in a separate folder:
In addition, we exclude test classes from coverage calculation.
The next step is testing:
This target performs two steps: testing the code and generating a coverage report.
Thanks to the markers, cobertura writes the test execution process to the cobertura.ser file. The next step uses ser to generate the xml report in the reports folder. Also generated html report.
Testing and coverage are already quite important metrics that indirectly speak about the quality of development. The next plugin will not just give an informational report, it will help to avoid programming errors.
Findbugs is a system for analyzing code for programming errors, it notices duplication of code, incorrect design of methods, and so on.
Add another target:
The result of the work will be an xml report of potential problems. If html is specified as output, then the report will be presented in a more readable form.
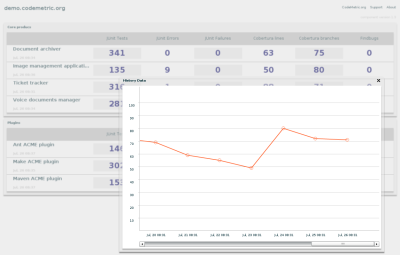
At this point, you have finished build.xml, with the project build and metrics. With each build, the system will do a new build and rewrite reports. We will tune up the system for keeping a history of changes. For this we will use the web service codemetric.org and our reports will be available in the form: demo.codemetric.org
First, you need to register at www.codemetric.org , create a space, group and build. After that, your profile will display the name of the build with its ID and token. These numbers along with your id are needed to configure the next ant plugin
First, download the plugin for the report service and write it to the lib of your ant.
http://www.codemetric.org/codemet.jar
Add another target:
Specify user, build and token values from your profile. reports is the path to previously generated reports.
Fulfill our goal
The script should confirm that the history was saved to the server, after which you can see it in your .codemetric.org
So. At the moment we have a Java project with an assembly script that performs tests, calculates metrics and saves history. The only inconvenience is that this happens in manual mode.
Let's automate this process.
Continuous integration is the practice of automatically building a project based on a certain schedule — for example, once a day. So the whole team makes successful commits, and the server can check at the end of the day that there are no conflicts and so on.
Read more about CI in wikipedia.
Set up a CruiseControl to check our project every minute.
The scenario is as follows:
Recall that we have: there is a project, there is a build script, there is a goal for publishing a report. And we lack a certain central repository.
In principle, any scm system will do, but we will try git.
We assume that git is already installed
Copy your project to the root of the disk.
Go to / testproject and execute
- this will create a new repository. The project should contain only the src and build.xml folder
Add all project files:
Now you have your repository with the project inside. Let's go to the setting of cruisecontrol.
First, download it here and unpack it.
In the projects folder you need to create a working copy of your project using git. Run in the projects folder
You will see a new working copy. Now you can go directly to writing configuration for cruise.
Open the config.xml file in the cruise folder and delete or comment out the project available by default. The resulting configuration file is:
We describe what each group does:
Bootstrappers is executed before the build cycle and actually takes the changes from the native repository.
After this modificationset checks if the files in the local copy have been changed. If there are no changes, the assembly will be postponed.
Schedule is the actual scheduler - bootstrappers and modificationset are automatically executed before the steps described in the schedule.
Last group of publishers. It depends on the result of the assembly, and is executed if successful. Ideally, you need to prescribe logic for reporting errors — for example, a letter from team lead.
ps
If you want to use another scm (cvs, svn), just mark the bootstrapper and modification set.
More information about all the options cruise can be read here .
Andrew Romanenco
www.romanenco.com
What do we get in the end? Java project with ant'ovskim build script. The build will result in a compiled project and a set of metrics: reports on junit tests, the percentage of code covered by tests, and a report on potential errors. In addition, the entire build process will be done daily automatically and the entire history of the metrics is saved for group reports.
Raw material
As a starting point we take any java project. The project must contain at least several classes with several unit tests. You do not need to cover 100% of the code - so as not to see the absolute values in the reports.
An example of a finished project can be downloaded HERE
')
What we need and where to download
We assume you already have java, if not, then it's time to install the package.
Install ant. Download HERE , unpack and add the path to ant / bin in PATH
JUnit we swing HERE and we place junit.jar in ant / lib
Findbugs download here , unpack and add finbugs-ant.jar to ant / lib
Cobertura from here , and just unpack it on the screw.
Build setup
First, we configure the project to compile from the command line. To do this, create a build.xml in the root of the project and place it in it
<target name="compile" depends="init">
<javac destdir="bin" debug="yes">
<src path="src" />
</javac>
</target>
We define the goal “compile”, and we can accomplish it by calling the command line
ant compileThe depends attribute causes the init target to be compiled to compile. The preliminary target creates all the necessary directories.
Adding tests
As many already know, in the modern world of software development it is impossible to do without unit testing. Our test project is no exception. It contains several JUnit tests for some of the functionality.
The automatic build should run all the tests and write a report: how many tests in total, how many were completed successfully.
When working with large customers, there is a requirement for a percentage of code coverage of tests. To calculate this metric, we will use cobertura.
Cobertura can work as a standalone application, generating html reports. But for automated testing we will use ant plugin and reporting in xml format.
A few words about the mechanism for calculating coverage.
First, there are two types of coatings: code lines covering, and branches covering. Line coverage simply counts the total number of lines in a project, and how many of them were affected by the tests. Branch coverage allows for branching code.
To calculate statistics on coverage, we must compile the code in a special way so that cobertura adds its markers to it. During junit work, these markers calculate the coverage.
Adding markers is an extremely simple process; it is enough to add the cobertura library to the classpath.
Let's do it.
The previous ant target simply compiled the project, the next target does the same, but with markers and saves the classes in a separate folder:
<target name="cobertura" depends="compile">
<javac destdir="bin-cob" debug="yes">
<classpath refid="cobertura.classpath" />
<src path="src" />
</javac>
<cobertura-instrument>
<fileset dir="./bin-cob">
<include name="**/*.class" />
<exclude name="**/*Test.class" />
</fileset>
</cobertura-instrument>
</target>
In addition, we exclude test classes from coverage calculation.
The next step is testing:
<target name="test" depends="cobertura">
<junit fork="yes" printsummary="yes">
<sysproperty key="net.sourceforge.cobertura.datafile" file="cobertura.ser" />
<classpath refid="cobertura.classpath" />
<!-- Note! Test are run against classes compiled with cobertura marks -->
<classpath refid="classpath.bin-cob" />
<formatter type="xml"/>
<batchtest fork="yes" todir="reports">
<fileset dir="./src">
<include name="**/*Test.java"/>
</fileset>
</batchtest>
</junit>
<!-- make xml report -->
<cobertura-report srcdir="${src.dir}" destdir="reports" format="xml" />
<!-- make html report -->
<cobertura-report destdir="coveragehtml">
<fileset dir="./src">
<include name="**/*.java"/>
</fileset>
</cobertura-report>
</target>
This target performs two steps: testing the code and generating a coverage report.
Thanks to the markers, cobertura writes the test execution process to the cobertura.ser file. The next step uses ser to generate the xml report in the reports folder. Also generated html report.
Adding Error Detector
Testing and coverage are already quite important metrics that indirectly speak about the quality of development. The next plugin will not just give an informational report, it will help to avoid programming errors.
Findbugs is a system for analyzing code for programming errors, it notices duplication of code, incorrect design of methods, and so on.
Add another target:
<target name="findbugs" depends="test">
<findbugs home="${findbugs.home}"
output="xml"
outputFile="reports/findbugs.xml" >
<sourcePath path="./src/" />
<class location="./bin/" />
</findbugs>
</target>
The result of the work will be an xml report of potential problems. If html is specified as output, then the report will be presented in a more readable form.
Saving history
At this point, you have finished build.xml, with the project build and metrics. With each build, the system will do a new build and rewrite reports. We will tune up the system for keeping a history of changes. For this we will use the web service codemetric.org and our reports will be available in the form: demo.codemetric.org
First, you need to register at www.codemetric.org , create a space, group and build. After that, your profile will display the name of the build with its ID and token. These numbers along with your id are needed to configure the next ant plugin
First, download the plugin for the report service and write it to the lib of your ant.
http://www.codemetric.org/codemet.jar
Add another target:
<taskdef name="publish" classname="org.codemetric.ant.Publish"/>
<target name="success">
<publish
user="123456"
build="234567"
token="345678"
reports="reports"
/>
</target>
Specify user, build and token values from your profile. reports is the path to previously generated reports.
Fulfill our goal
ant successThe script should confirm that the history was saved to the server, after which you can see it in your .codemetric.org
Let's go to cruise
So. At the moment we have a Java project with an assembly script that performs tests, calculates metrics and saves history. The only inconvenience is that this happens in manual mode.
Let's automate this process.
Continuous integration is the practice of automatically building a project based on a certain schedule — for example, once a day. So the whole team makes successful commits, and the server can check at the end of the day that there are no conflicts and so on.
Read more about CI in wikipedia.
Set up a CruiseControl to check our project every minute.
The scenario is as follows:
- pick up changes from a certain repository
- check for changes
- build
- if successful, send report
Recall that we have: there is a project, there is a build script, there is a goal for publishing a report. And we lack a certain central repository.
In principle, any scm system will do, but we will try git.
We assume that git is already installed
Copy your project to the root of the disk.
Go to / testproject and execute
git init- this will create a new repository. The project should contain only the src and build.xml folder
Add all project files:
git add
git commit -m "init import"
Now you have your repository with the project inside. Let's go to the setting of cruisecontrol.
First, download it here and unpack it.
In the projects folder you need to create a working copy of your project using git. Run in the projects folder
git clone /testpojectYou will see a new working copy. Now you can go directly to writing configuration for cruise.
Open the config.xml file in the cruise folder and delete or comment out the project available by default. The resulting configuration file is:
<cruisecontrol>

<project name="testproject">

<bootstrappers>
<gitbootstrapper localWorkingCopy="projects/${project.name}/" />
</bootstrappers>

<modificationset quietperiod="30">
<git LocalWorkingCopy="projects/${project.name}"/>
</modificationset>

<schedule interval="60">
<ant anthome="/home/andrew/temp/apache-ant-1.7.1" antWorkingDir="projects/${project.name}/"/>
</schedule>

<publishers>
<onsuccess>
<antpublisher anthome="/home/andrew/temp/apache-ant-1.7.1" target="success" antWorkingDir="projects/${project.name}/" />
</onsuccess>
</publishers>

</project>
</cruisecontrol>
We describe what each group does:
Bootstrappers is executed before the build cycle and actually takes the changes from the native repository.
After this modificationset checks if the files in the local copy have been changed. If there are no changes, the assembly will be postponed.
Schedule is the actual scheduler - bootstrappers and modificationset are automatically executed before the steps described in the schedule.
Last group of publishers. It depends on the result of the assembly, and is executed if successful. Ideally, you need to prescribe logic for reporting errors — for example, a letter from team lead.
ps
If you want to use another scm (cvs, svn), just mark the bootstrapper and modification set.
More information about all the options cruise can be read here .
Andrew Romanenco
www.romanenco.com
Source: https://habr.com/ru/post/68057/
All Articles