Clean the laptop matrix from traces of liquid
I got a “MacBook Black” with a full set of small defects. It came to the matrix, filled with alcohol.
I wanted to take a picture of what it looked like before the operation, but I forgot. In the process of cleaning, the whole scale of the tragedy will be seen, I will say only that about 20% of the screen (lower central part) glowed with cheerful white spots and at different angles they were of different shapes (different layers of films stuck together differently).
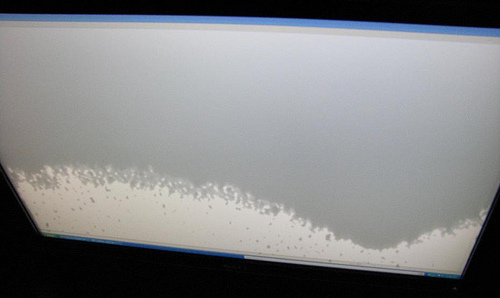
This is just an example, I had one and a half times less and in different layers-directions.
')
I looked on Youtube and found a couple of videos that I had enough for a decisive start, here they are:
- it took only a few seconds to see (3:15) to confirm my theoretical knowledge of the screen device :)
- and then just look:
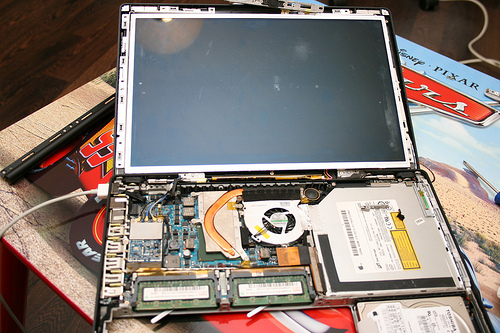
How to disassemble the cover and get the matrix will tell us iFixit . I will only add that it is not necessary after removing the top cover of the laptop itself (the one where the keyboard is) to disassemble everything else (superdrive, speakers, cables). It is enough just to unscrew the fastening of the hinges for free opening of the compartment with the inverter (this is the protruding lower part at the screen cover).
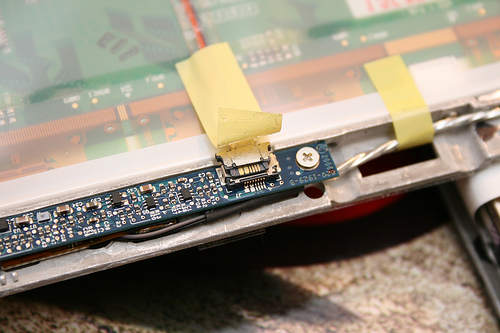
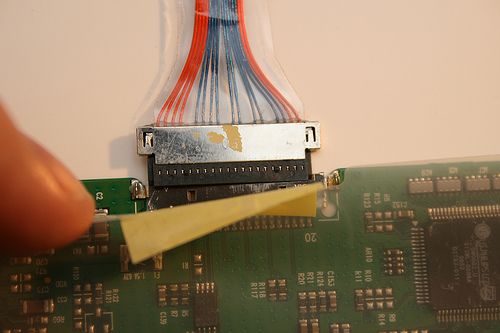
On the back of the screen are glued two plumes, wide - to the matrix, narrow to the camera. Disconnect them and peel off the tape. Both cables are disconnected without secrets, just a screwdriver at the edges helps to pull the plug out of the socket.
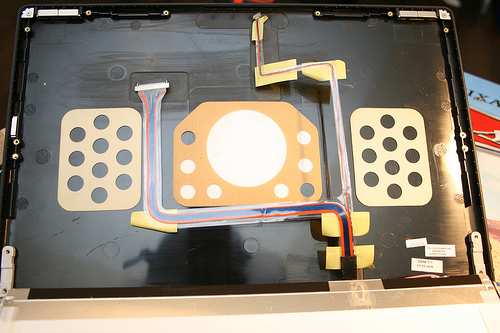
Turn off the screen mounting frame (on which the antenna):

Loops leave, take the screen:
Next, I advise you to go to the bathroom :) Before turning on the shower there, for a few minutes, let's get rid of most of the dust in this way. Here is everything that could be useful to me:
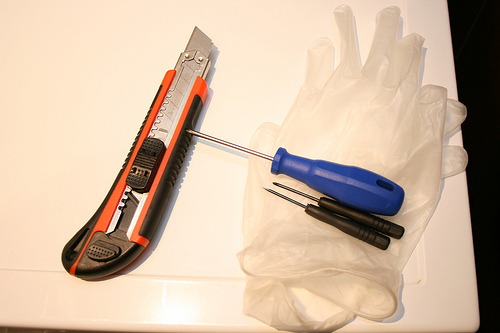
Knife - if you have a screen with a glued frame.
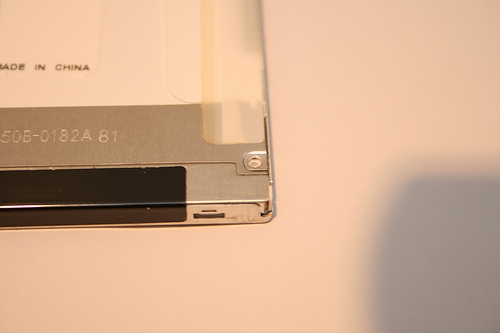
On my screen there were only 2 bolts:
The rest of the fasteners on the snap and tape. Remove the tape, snap off the latches:

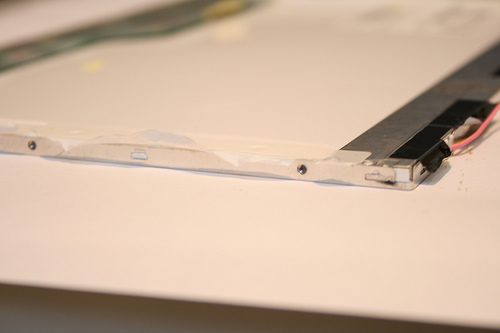
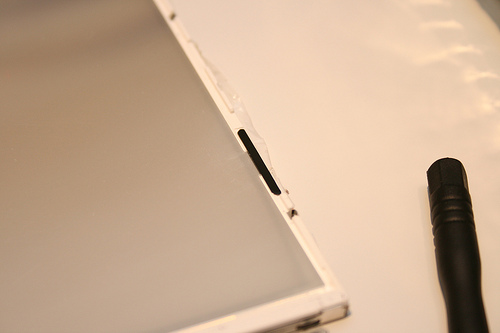
After the frame is disconnected, the matrix itself must be removed (dark, strong enough, with a wide printed circuit board connected). Caution! A board with a controller is connected to it, in fact there is nothing fragile there, but any damage to wide tires will result in horizontal or vertical “broken” bands on the screen.
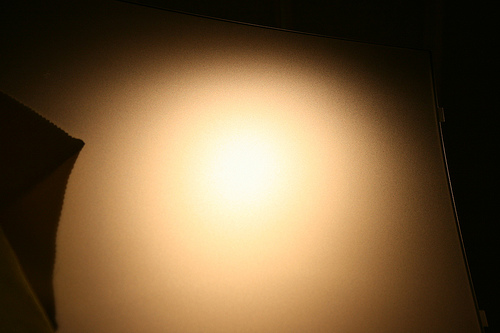
The first traces of the liquid became noticeable, I tried to choose the angle at which is most noticeable:

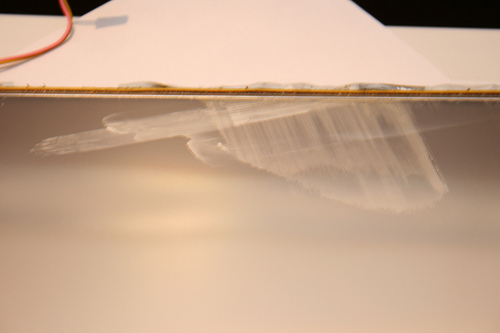
These are the marks on the glued films that scatter light, and this is on the matrix itself (the inner side):

It is easiest to clean it, it is glass :) xxxxxxx, and wipe, and then the main advice, FICTION. The coolest thing to clean everything is MICROFIBER. It is worth a penny in any household store.

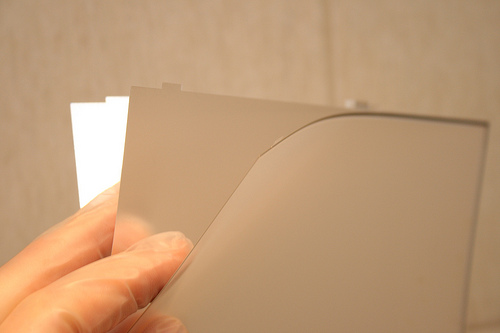
We go further. Films are usually 3, stacked sandwich. Usually they have valve-keys, for unambiguous orientation during installation, it remains to remember only the order of the films :) You really try.
The valves are fixed with stickers:

And here are the films:

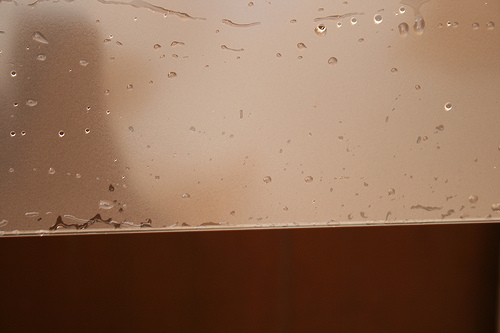
Here you can see how these two are glued together with liquid residues:

Do not peel off, you can damage even more, just take and put all the water. Let it soak :)
I remind, films 3!
While being soaked, I will tell you how these 3 films differ. Two of them are very similar and have a small "notch" at an angle, the films differ in precisely different angles of inclination of this notch. It is necessary to rub these films only in the direction of this notch, otherwise they are scratched. The direction is easy to determine when you first microfiber, it goes in the direction of the notches well :) On the other hand, both films are glossy.
The third film is matte, let's call it that, in fact, all three films have a special notch shape in the form of prisms, as in a reflector, for better light scattering.
Matte it on both sides. Wash it easier than others.
Here is my option:

It is clearly visible where there was a liquid before, water lingers on this place.
Mine! I washed with soap, after that the water evenly flowed from the entire surface of the film.
After the films were soaked, most of what happened was gone. Cleaning up to the ideal is not at all necessary, the whole school was precisely in the glued layers, because of which, in places of gluing, the light passed without scattering and was brighter than the rest of the screen area. Films need to be washed and dried.
Dried between two A4 sheets. (13.3 "matrix).
From the use of water usually on all films are stains and spots of different sizes. Here is my recipe for how to quickly and easily get rid of them. With a matte film, everything is simple, we take a napkin (I have a nonwoven fabric) and wipe with it exactly the entire film (with a damp cloth). Then fiber in tomzhe direction and ready.
With films with an angular notch - we wipe with a napkin in these directions and then with fiber. The water on them dries out quite slowly, so that wiping the entire film with a napkin - the moisture is not even beginning to evaporate and it can be washed off with fiber evenly.
On the light and on the glare, I checked the purity of the rub:
Now collect back. blow off the dust particles and put the film, glue the back clamps:
We put the frame, snap, pop, and so on. Connect the inverter and cables:
At such an angle and illumination, there are traces of the active use of a laptop, of wear on the outer, glanded surface of the matrix.
Test run (you can simply short the first couple of contacts in the keyboard connector, you are not necessarily afraid to short the rest - this is a pofik):

Under the fan loop there are a couple of contacts labeled PWR - you can short them to start.
TADAM !!!
Absolute absence of traces and any uneven illumination! I apologize for the lack of pictures "TO", but it was just awful.
If it was just water - it would have evaporated over time, leaving no traces, but with alcohol and other liquids this focus does not go away.
Now I think of a way to disassemble the keyboard on the subject of restoring a pair of tracks to the magic buttons Power and Left :) It is not collapsible, sealed on 100,500 plastic rivets.
I wanted to take a picture of what it looked like before the operation, but I forgot. In the process of cleaning, the whole scale of the tragedy will be seen, I will say only that about 20% of the screen (lower central part) glowed with cheerful white spots and at different angles they were of different shapes (different layers of films stuck together differently).
This is just an example, I had one and a half times less and in different layers-directions.
')
I looked on Youtube and found a couple of videos that I had enough for a decisive start, here they are:
- it took only a few seconds to see (3:15) to confirm my theoretical knowledge of the screen device :)
- and then just look:
How to disassemble the cover and get the matrix will tell us iFixit . I will only add that it is not necessary after removing the top cover of the laptop itself (the one where the keyboard is) to disassemble everything else (superdrive, speakers, cables). It is enough just to unscrew the fastening of the hinges for free opening of the compartment with the inverter (this is the protruding lower part at the screen cover).
On the back of the screen are glued two plumes, wide - to the matrix, narrow to the camera. Disconnect them and peel off the tape. Both cables are disconnected without secrets, just a screwdriver at the edges helps to pull the plug out of the socket.
Turn off the screen mounting frame (on which the antenna):
Loops leave, take the screen:
Next, I advise you to go to the bathroom :) Before turning on the shower there, for a few minutes, let's get rid of most of the dust in this way. Here is everything that could be useful to me:
Knife - if you have a screen with a glued frame.
On my screen there were only 2 bolts:
The rest of the fasteners on the snap and tape. Remove the tape, snap off the latches:
After the frame is disconnected, the matrix itself must be removed (dark, strong enough, with a wide printed circuit board connected). Caution! A board with a controller is connected to it, in fact there is nothing fragile there, but any damage to wide tires will result in horizontal or vertical “broken” bands on the screen.
The first traces of the liquid became noticeable, I tried to choose the angle at which is most noticeable:
These are the marks on the glued films that scatter light, and this is on the matrix itself (the inner side):
It is easiest to clean it, it is glass :) xxxxxxx, and wipe, and then the main advice, FICTION. The coolest thing to clean everything is MICROFIBER. It is worth a penny in any household store.
We go further. Films are usually 3, stacked sandwich. Usually they have valve-keys, for unambiguous orientation during installation, it remains to remember only the order of the films :) You really try.
The valves are fixed with stickers:
And here are the films:
Here you can see how these two are glued together with liquid residues:
Do not peel off, you can damage even more, just take and put all the water. Let it soak :)
I remind, films 3!
While being soaked, I will tell you how these 3 films differ. Two of them are very similar and have a small "notch" at an angle, the films differ in precisely different angles of inclination of this notch. It is necessary to rub these films only in the direction of this notch, otherwise they are scratched. The direction is easy to determine when you first microfiber, it goes in the direction of the notches well :) On the other hand, both films are glossy.
The third film is matte, let's call it that, in fact, all three films have a special notch shape in the form of prisms, as in a reflector, for better light scattering.
Matte it on both sides. Wash it easier than others.
Here is my option:
It is clearly visible where there was a liquid before, water lingers on this place.
Mine! I washed with soap, after that the water evenly flowed from the entire surface of the film.
After the films were soaked, most of what happened was gone. Cleaning up to the ideal is not at all necessary, the whole school was precisely in the glued layers, because of which, in places of gluing, the light passed without scattering and was brighter than the rest of the screen area. Films need to be washed and dried.
Dried between two A4 sheets. (13.3 "matrix).
From the use of water usually on all films are stains and spots of different sizes. Here is my recipe for how to quickly and easily get rid of them. With a matte film, everything is simple, we take a napkin (I have a nonwoven fabric) and wipe with it exactly the entire film (with a damp cloth). Then fiber in tomzhe direction and ready.
With films with an angular notch - we wipe with a napkin in these directions and then with fiber. The water on them dries out quite slowly, so that wiping the entire film with a napkin - the moisture is not even beginning to evaporate and it can be washed off with fiber evenly.
On the light and on the glare, I checked the purity of the rub:
Now collect back. blow off the dust particles and put the film, glue the back clamps:
We put the frame, snap, pop, and so on. Connect the inverter and cables:
At such an angle and illumination, there are traces of the active use of a laptop, of wear on the outer, glanded surface of the matrix.
Test run (you can simply short the first couple of contacts in the keyboard connector, you are not necessarily afraid to short the rest - this is a pofik):
Under the fan loop there are a couple of contacts labeled PWR - you can short them to start.
TADAM !!!
Absolute absence of traces and any uneven illumination! I apologize for the lack of pictures "TO", but it was just awful.
If it was just water - it would have evaporated over time, leaving no traces, but with alcohol and other liquids this focus does not go away.
Now I think of a way to disassemble the keyboard on the subject of restoring a pair of tracks to the magic buttons Power and Left :) It is not collapsible, sealed on 100,500 plastic rivets.
Source: https://habr.com/ru/post/62807/
All Articles