Mail Server on Zimbra Collaboration Suite

Not so long ago, I began to develop a project for switching my office to free (not necessarily free) software. In this project, one of the most important part was the rejection of the mail host and the transition to your mail server based on open source software.
I plan to implement this part of my project this summer. But I began to prepare for it now. It was necessary to find a serious alternative to Exchenge and Outlook. The choice focused on the "Zimbra Collaboration Suite".
')
Benefits:
- Has your email client Zimbra. Which allows users to share calendar, workflow, mail contacts, etc. There are versions for MacOs, Windows, Linux.
- It has a powerful plugin system. The so-called Zimlet. Plug-ins are developed officially, as well as by the users themselves. You can implement anything.
- Web version of the client. You can climb to the mail anywhere in the world from any browser.
- Integration with Active Directory.
- Antivirus \ antispam protection right out of the box.
Actually in this article I will describe the installation of the Zimbra Collaboration Suite based on Debian. The article will be ported from my personal blog, so don't blame it on the quality.
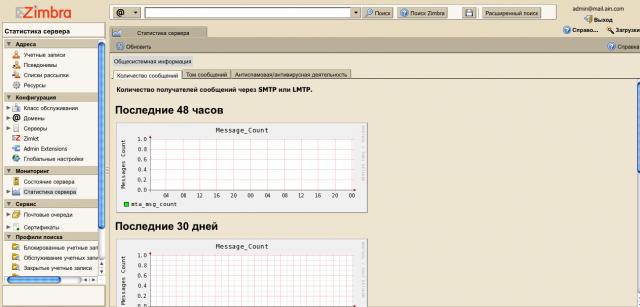
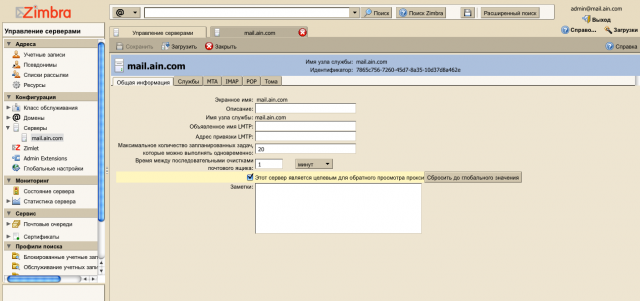
Screenshots below.
Zimbra - Full mail server (as well as the client). Which provides administrators and their end-users with innovative features that can solve the difficulties faced by organizations using today's communications infrastructure. The main advantages include: compatibility with Windows, Mac, GNU \ Linux; scalability; flexible management; Russian language; common mail components for corporate work; web client, etc.
* Familiarize yourself with the Zimbra server features for admin
* Familiarize yourself with the Zimbra server features for the mail user
In this article I will tell and show you how to set up a full-fledged mail server for the company.
It is assumed that the initial installation / configuration of Debian was performed. I chose Debian etch 4.0 r6 (Lenny doesn't support ZIMBRA in this stable version). standard installation without graphical shell, network settings, update repositories were made and ssh server was installed for convenience.
My settings:
Server name - mail
Domain Name - adsl.ru
Hostname - mail.adsl.ru
Ip address of the server - (I put on the external, here I bring an approximate ip) 172.16.251.130
To begin, assign the hostname to the ip server. rule file hosts
vim / etc / hosts
127.0.0.1 localhost
172.16.251.130 mail.adsl.ru mail

# The following lines are desirable for IPv6 capable hosts
::1 ip6-localhost ip6-loopback
fe00::0 ip6-localnet
ff00::0 ip6-mcastprefix
ff02::1 ip6-allnodes
ff02::2 ip6-allrouters
ff02::3 ip6-allhosts
And we also rule our hostname on the correct one and then we must be overloaded (so that there are no conflicts):
vim / etc / hostname
mail.ads.rureboot
After reboot, check our hostname:
hostname -f
mail.adsl.ruNext, we rule the DNS resolv.conf file. Let me remind you that in your LAN (or on the Internet) there should be a DNS server where A and MX records are written to your server with Zimbra (it is also advisable to have a PTR record).
vim /etc/resolv.conf
nameserver 172.16.251.2Now remove the Exim packages. because several mail agents are useless to us, Zimbra has its own.
apt-get remove –purge exim4 exim4-base exim4-config exim4-daemon-light
After that, install additional necessary packages that may be needed to install the mailer:
apt-get install libc6-i686 sudo libidn11 curl fetchmail libgmp3c2 libexpat1 libgetopt-mixed-perl libxml2 libstdc ++ 6 libpcre3 libltdl3
We will now proceed directly to the installation of the Zimbra mail server. Because Zimbra is a back-up archive with a bunch of packages, create an install folder where we download this archive, unzip it and install it.
mkdir / install
cd / install
Go to the site Zimbra for downloading the latest version - www.zimbra.com/community/downloads.html
We find in the Dtbian platforms, copy the link to the archive and upload it on our server. At the end of the jump unzip archive.
wget h.yimg.com/lo/downloads/5.0.12_GA/zcs-5.0.12_GA_2789.DEBIAN4.0.20090126055528.tgz
tar xvfz zcs-5.0.12_GA_2789.DEBIAN4.0.20090126055528.tgz
We start the installation. Go to the unwrapped folder and run the installation script.
cd /install/zcs-5.0.12_GA_2789.DEBIAN4.0.20090126055528
./install.sh -l
Read the license agreement and press Enter. Zimbra will then check the installed additional software. And it will give something like:
Checking for prerequisites…
NPTL…FOUND
sudo…FOUND sudo-1.6.8p12-4
……………..
Prerequisite check complete.
Checking for standard system perl…
perl-5.8.8…FOUND standard system perl-5.8.8
Now the installer will ask which packages to install:
Install zimbra-ldap [Y] Y
Install zimbra-logger [Y] Y
Install zimbra-mta [Y] Y
Install zimbra-snmp [Y] Y
Install zimbra-store [Y] Y
Install zimbra-apache [Y] Y
Install zimbra-spell [Y] Y
Install zimbra-proxy [N] N

The system will be modified. Continue? [N] Y
The installation has begun. It will take some time.
After installation, the so-called main menu appears:
Main menu

1) Common Configuration:
2) zimbra-ldap: Enabled
3) zimbra-store: Enabled
+Create Admin User: yes
+Admin user to create: admin@mail.adsl.ru
******* +Admin Password UNSET
+Enable automated spam training: yes
…………………………
x) Expand menu
q) Quit
Address unconfigured (**) items (? – help)
As you can see you are shown the menu where the default settings are displayed. If you wish, you can change them. I am only interested in the password for the root here, change it to my own. Click the number 3 presses Enter and enter the submenu.
Store configuration

1) Status: Enabled
2) Create Admin User: yes
3) Admin user to create: admin@server1.example.com
** 4) Admin Password UNSET
5) Enable automated spam training: yes
6) Spam training user: spam.m0bqyoayc@mail.adsl.ru
………………………..
17) Use spell check server: yes
18) Spell server URL: mail.adsl.ru:7780/aspell.php

Select, or 'r' for previous menu [r]
Click the number 4 and Enter. Enter a new password + Enter. Press Enter. And back to the main menu.
Main menu

1) Common Configuration:
2) zimbra-ldap: Enabled
3) zimbra-store: Enabled
4) zimbra-mta: Enabled
5) zimbra-snmp: Enabled
6) zimbra-logger: Enabled
7) zimbra-spell: Enabled
8) Default Class of Service Configuration:
r) Start servers after configuration yes
s) Save config to file
x) Expand menu
q) Quit

*** CONFIGURATION COMPLETE – press 'a' to apply
Select from menu, or press 'a' to apply config (? – help)
Now you need to confirm the configuration. Enter the letter a and click on Enter.
After that, the system will ask us a few questions. The standard answer is Enter. At the end, click on Y.
Save configuration data to a file? [Yes] Enter
Save config in file: [/opt/zimbra/config.5422]
Saving config in /opt/zimbra/config.5422…done.
The system will be modified – continue? [No] Y
Next, the installer will configure the server. It takes time. During this, you'll see the following:
Operations logged to /tmp/zmsetup.02062008-135354.log
Setting local config values…done.
Setting up CA…done.
Creating SSL certificate…done.
Initializing ldap…done.
Setting replication password…done.
Setting Postfix password…done.
Setting amavis password…done.
Deploying CA to /opt/zimbra/conf/ca …done.
Creating server entry for mail.adsl.ru…done.
Setting spell check URL…done.
Setting service ports on mail.adsl.com…done.
Adding server1.example.com to zimbraMailHostPool in default COS…done.
Installing skins…
hotrod
…………………………….
Initializing mta config…done.
Configuring SNMP…done.
Setting services on mail.adsl.ru…done.
Setting up zimbra crontab…done.
Setting up syslog.conf…done.
At the end, the installer will ask you if you want to register the server? This is not a mandatory procedure. I politely refuse typing the letter N. (If you want to register, press Enter). Next, the system will be initialized:
Starting servers…done.
Checking for deprecated zimlets…done.
Installing zimlets…
com_zimbra_date
…………………..
com_zimbra_email
done.
Initializing Documents…done.
Restarting mailboxd…done.

Moving /tmp/zmsetup.02062008-135354.log to /opt/zimbra/log
Well, in principle all. Hit Enter to exit the installer.
If you chose the standard Zimbra installation, then you will have the following ports to work with the server:
Web mail access: 80
Secure access to webmail: 443
IMAP server port: 143
IMAP server SSL port: 993
POP server port: 110
POP server SSL port: 995
Server management console: serverhost : 7780 / aspell.php
Now we will check whether all Zimbra services have started. To do this, we enter the console using the Zimbra account and enter the verification command:
su - zimbra
zmcontrol status
The server will respond:
Host mail.adsl.ru
antispam Running
antivirus Running
ldap Running
logger Running
mailbox Running
mta Running
snmp Running
spell Running
stats Running
If one or more services have not been started, then enter the command:
zmcontrol start
Exit Zimbra account:
exit
Well that's all. With the installation sorted out. Now all server settings will come through the Web interface.
Enter the management console (admin login, your password) - mail.adsl.ru : 7071 / zimbraAdmin /
Actually I propose to get acquainted with the interface and settings. I think even the most knowledgeable person will deal with them. By the way, the web client for mail is available at mail.adsl.ru

Well, what is the result?
And in the end, I plan to introduce Zimbra in the summer.
The only negative using Zimbra is that it demanding server resources in principle. Because for example, the Web interface ... (it is written in AJAX), if 100 users use it at the same time, the usual Pentium4 will not cope here naturally. ;)
Source: https://habr.com/ru/post/60377/
All Articles