We change the cracked screen in the laptop
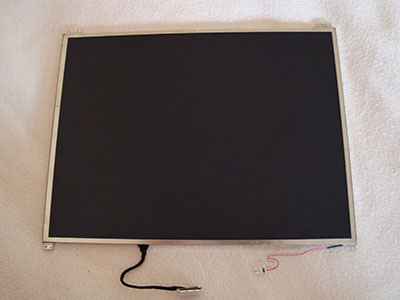
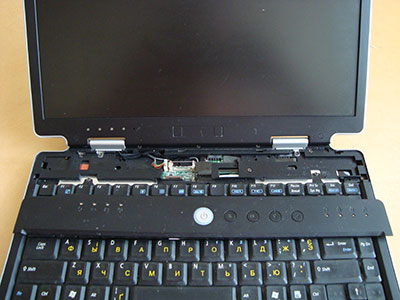
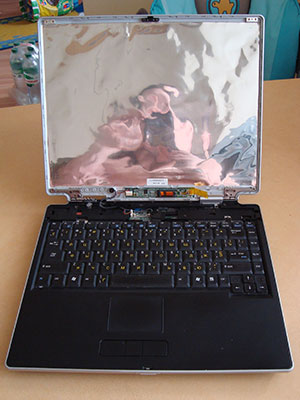
The child, during the game, broke the screen of the laptop ASUS M3000Np . It looked like this:
')
In principle, the laptop is quite old and could be replaced entirely, but now they do not make laptops with 4x3 screens, and even in lightweight and durable metal-graphite cases. Therefore, it was decided to look for a replacement screen.
Running through the sites that sell spare parts, I realized that the laptop screens of the old sample - this is a big shortage! Found only 2 places where they sold the screens 1024x768 with a diagonal of 14.1 inches. Not only was the price 2-3 times more than on similar widescreen screens, compatibility with the ASUS M3 series laptop was not 100% guaranteed.
Without hesitation, I went to eBay.com and found a 2 used laptop. One in working condition, at auction from $ 150 and one dismantled, but with a working screen, in the usual sale for $ 55. I unfortunately lost the auction, so I had to take an "incomplete".
Delivery to a friend in America cost $ 25, and he sent me to Kiev for $ 42. That is, for $ 122 I got a full set of spare parts for a laptop ASUS M3 . Only the hard drive, CD / DVD drive and Wi-Fi card were missing. Everything else is there, even the battery is working. Not bad, considering that one LCD panel costs at least $ 120, without delivery.
Here is what I received in the mail:

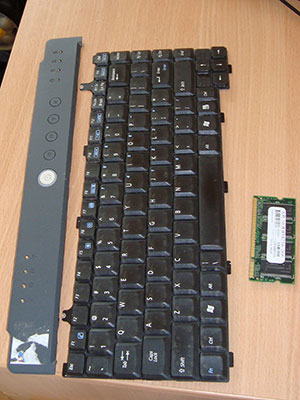
Surprisingly, the outside of the laptop was not black, but silver. I have not even seen such. Slowly began to disassemble the laptop:
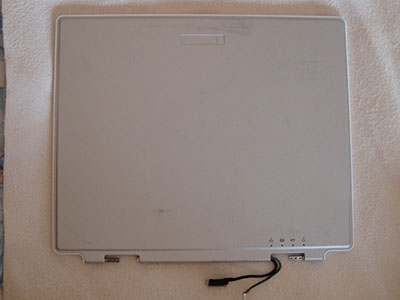
When I bought a donor laptop, I thought that it would be enough to transfer the lid of the laptop assembly. But there is another case: the color does not match, and the cover is scratched decently. So it was decided to disassemble to the end :)
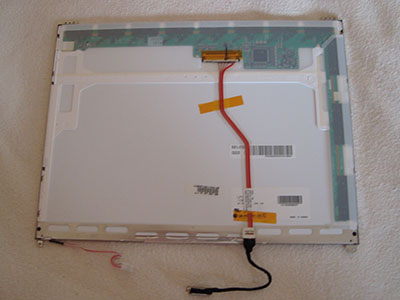
As a result of simple operations, using a screwdriver, got a "bare" LCD panel for replacement.
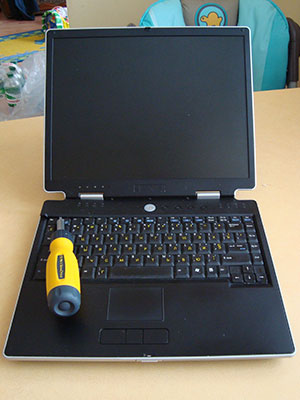
It's time to take on the main laptop. Then I decided to work at the table, as it is necessary to do everything carefully and not to lose various small parts, screws, caps, etc.
Notebook disassembly is another Quest game. Every laptop maker is "perverted" as soon as it can. That screws will hide in inaccessible places, for example under the keyboard. That cunning latch will apply, which is simply not realistic to find. Then in general, everything will be planted on glue, because the repair is not provided :)
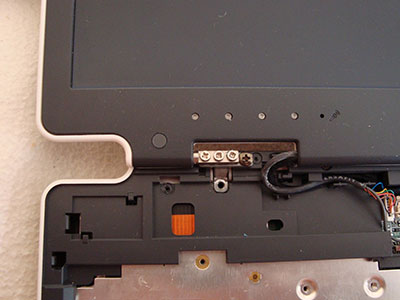
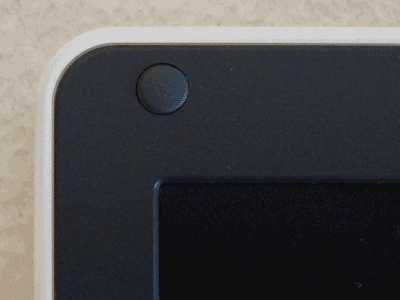
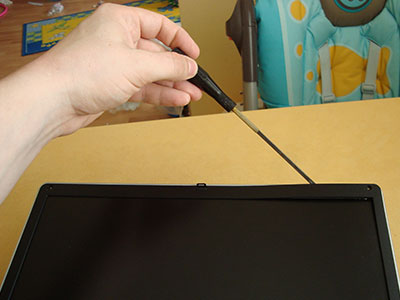
In the laptop ASUS M3, too, there is such a secret - this is the top panel with the power button! To remove this part, you must first pry off the cover in the area of the Esc and F1 buttons with a screwdriver.
And then, with effort, move the entire panel to the left, so that it is free from the latches.
So what do you think? I once had an hour to solve this problem :)
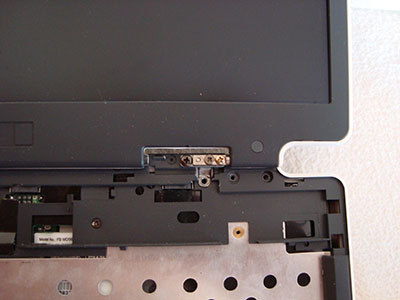
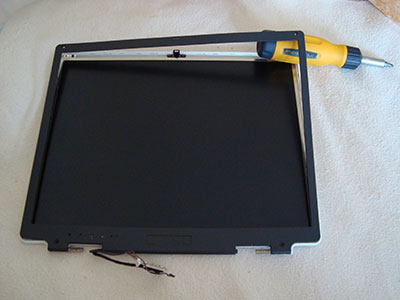
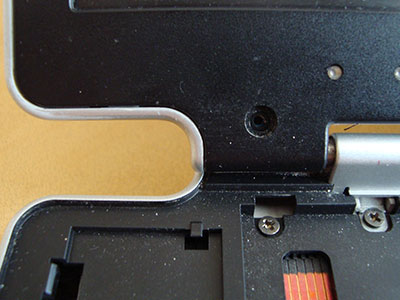
The screen frame in the ASUS M3Np laptop is fixed with 4 screws under the rubber caps. The two top covers are convex, they are shock absorbers for the closure, so removing them is easy. But the lower caps are made flush, to take them out you need a thin and sharp object. I used a needle from a syringe.

Also, the screen frame is held by a variety of latches-locks. It is necessary to pry the edge with a flat screwdriver and gradually loosen all latches along the entire perimeter. The frame is rather “tender”, so you don’t need to hurry, otherwise you can easily break it.

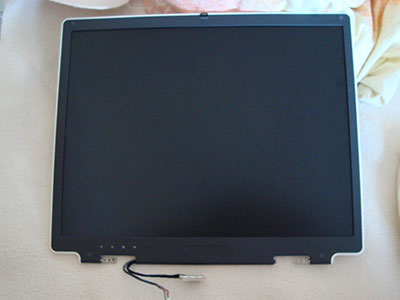
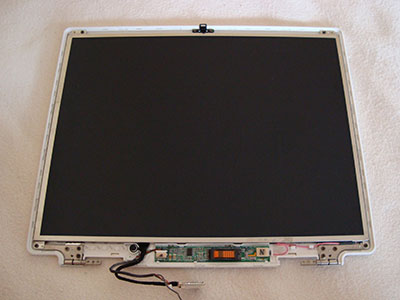
When the frame is removed, then remove the screen panel is very simple. It is necessary to disconnect the connectors from the motherboard and from the backlight lamp inverter (the board is directly under the screen).
And then unscrew the 4 screws in the corners, and carefully remove the screen panel towards you.
We bring the "new" screen, extracted from the donor laptop, and compare its connectors and labeling with the "native". Screen panels are made in different countries (one in Korea is different in the Philippines), but the dimensions and connectors are absolutely identical. I also compared the markings of the backlight lamp inverters - they are the same. If the boards are different, the screen must be rearranged along with the inverter.

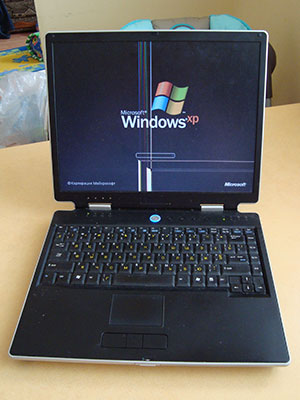
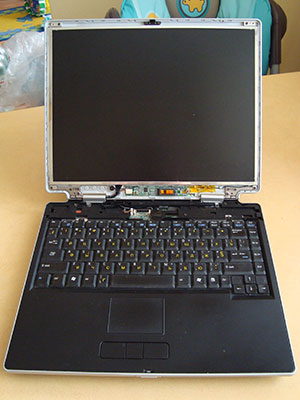
Install the new screen and connect all the connectors. At this point, the laptop is desirable to turn on and check the performance of all elements. And then you never know, it will not be very interesting to disassemble the new one :)

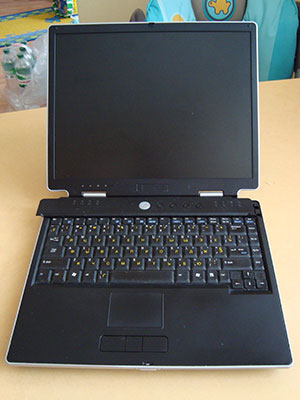
It seems that everything works, so we finally collect the laptop. We try not to leave "extra details" :)

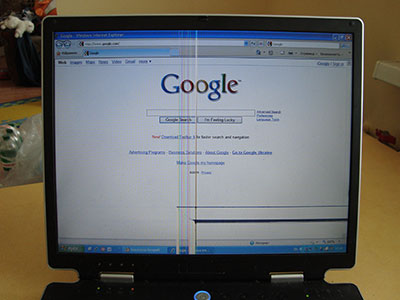
Repair is over, everyone is happy. You can wash :)
So it's not such a difficult task to replace the screen in a ASUS M-3 laptop . Cope even a housewife.
')
In principle, the laptop is quite old and could be replaced entirely, but now they do not make laptops with 4x3 screens, and even in lightweight and durable metal-graphite cases. Therefore, it was decided to look for a replacement screen.
Running through the sites that sell spare parts, I realized that the laptop screens of the old sample - this is a big shortage! Found only 2 places where they sold the screens 1024x768 with a diagonal of 14.1 inches. Not only was the price 2-3 times more than on similar widescreen screens, compatibility with the ASUS M3 series laptop was not 100% guaranteed.
Without hesitation, I went to eBay.com and found a 2 used laptop. One in working condition, at auction from $ 150 and one dismantled, but with a working screen, in the usual sale for $ 55. I unfortunately lost the auction, so I had to take an "incomplete".
Delivery to a friend in America cost $ 25, and he sent me to Kiev for $ 42. That is, for $ 122 I got a full set of spare parts for a laptop ASUS M3 . Only the hard drive, CD / DVD drive and Wi-Fi card were missing. Everything else is there, even the battery is working. Not bad, considering that one LCD panel costs at least $ 120, without delivery.
Here is what I received in the mail:
Surprisingly, the outside of the laptop was not black, but silver. I have not even seen such. Slowly began to disassemble the laptop:
When I bought a donor laptop, I thought that it would be enough to transfer the lid of the laptop assembly. But there is another case: the color does not match, and the cover is scratched decently. So it was decided to disassemble to the end :)
As a result of simple operations, using a screwdriver, got a "bare" LCD panel for replacement.
It's time to take on the main laptop. Then I decided to work at the table, as it is necessary to do everything carefully and not to lose various small parts, screws, caps, etc.
Notebook disassembly is another Quest game. Every laptop maker is "perverted" as soon as it can. That screws will hide in inaccessible places, for example under the keyboard. That cunning latch will apply, which is simply not realistic to find. Then in general, everything will be planted on glue, because the repair is not provided :)
In the laptop ASUS M3, too, there is such a secret - this is the top panel with the power button! To remove this part, you must first pry off the cover in the area of the Esc and F1 buttons with a screwdriver.
And then, with effort, move the entire panel to the left, so that it is free from the latches.
So what do you think? I once had an hour to solve this problem :)
The screen frame in the ASUS M3Np laptop is fixed with 4 screws under the rubber caps. The two top covers are convex, they are shock absorbers for the closure, so removing them is easy. But the lower caps are made flush, to take them out you need a thin and sharp object. I used a needle from a syringe.
Also, the screen frame is held by a variety of latches-locks. It is necessary to pry the edge with a flat screwdriver and gradually loosen all latches along the entire perimeter. The frame is rather “tender”, so you don’t need to hurry, otherwise you can easily break it.
When the frame is removed, then remove the screen panel is very simple. It is necessary to disconnect the connectors from the motherboard and from the backlight lamp inverter (the board is directly under the screen).
And then unscrew the 4 screws in the corners, and carefully remove the screen panel towards you.
We bring the "new" screen, extracted from the donor laptop, and compare its connectors and labeling with the "native". Screen panels are made in different countries (one in Korea is different in the Philippines), but the dimensions and connectors are absolutely identical. I also compared the markings of the backlight lamp inverters - they are the same. If the boards are different, the screen must be rearranged along with the inverter.
Install the new screen and connect all the connectors. At this point, the laptop is desirable to turn on and check the performance of all elements. And then you never know, it will not be very interesting to disassemble the new one :)
It seems that everything works, so we finally collect the laptop. We try not to leave "extra details" :)
Repair is over, everyone is happy. You can wash :)
So it's not such a difficult task to replace the screen in a ASUS M-3 laptop . Cope even a housewife.
Source: https://habr.com/ru/post/57673/
All Articles