Install Web Optimizer
Web Optimizer (Web Optimizer) is an application that automates all client optimization actions for an arbitrary site. At the moment it exists as a separate application (which you need to install on the site yourself). PHP Speedy was used as a base for Web Optimizer (which also exists as a supplement for Wordpress, Joomla and Drupal).
Let's take a look at how to install Web Optimizer.

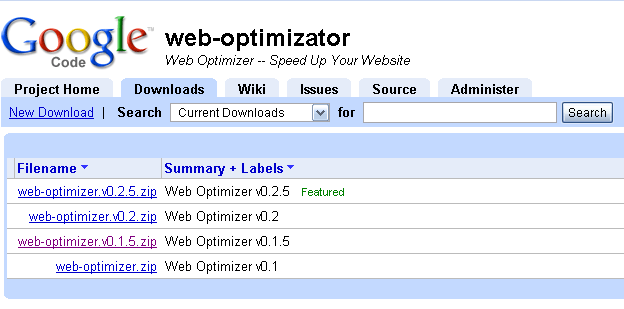
Web Optimizer comes in the form of a ZIP archive, which is posted on code.google.com . Download the latest stable (Featured) version in the root of the site. If the site has SSH access, then you can simply use
')
Then, the resulting archive will need to be unpacked to the root to make the
If there is only FTP access to the site, we first upload it to a local disk, then unpack it, and then (for example, via FAR) copy it to the root of the site.
After all the necessary files are on the site, then you need to set write permissions for at least the
Go to the browser at
And we see the welcome screen from Web Optimizer. If you don’t see it, then you should double-check where the Web Optimizer was copied, and go to that folder.

In this step, we need to set the user and password under which the application settings will be available. The login / password is saved in the configuration file as an md5-hash, so there are no security problems (well, except that the attacker can somehow rewrite
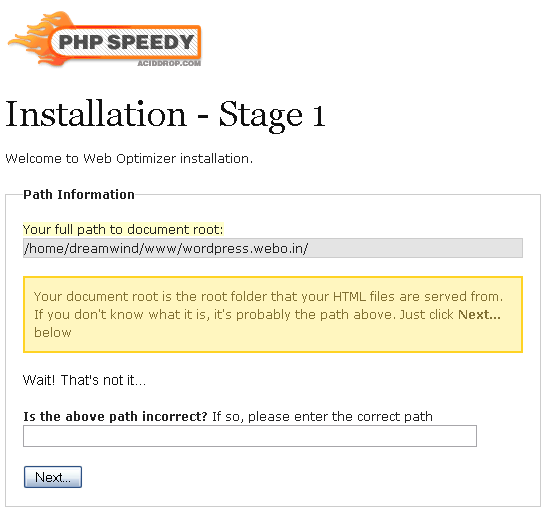
Here we need to specify the physical directory in which the site is located on the server. This is necessary to calculate all the paths to the files. If the directory is different from the automatically calculated one, then it should be set manually.


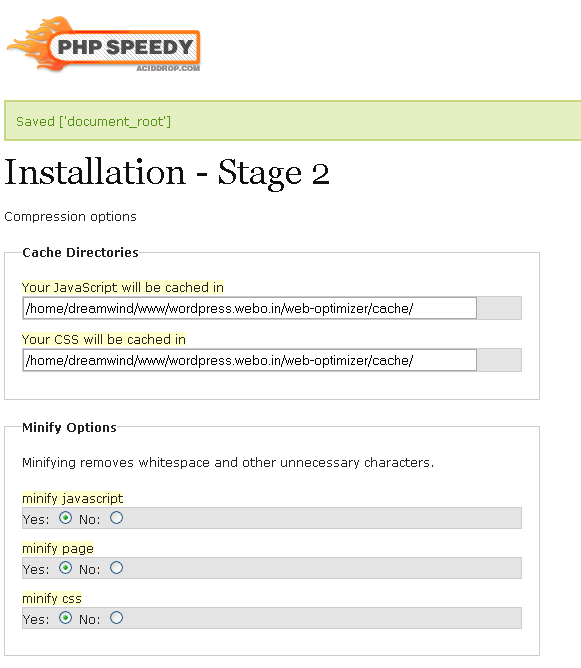
This is where the most interesting begins: we need to set the application settings (they are all saved in the
We select all the necessary settings (the optimal configuration is selected by default) and proceed further.

If the
and the second - at the very end:
The first line includes the Web Optimizer itself, and the second displays the prepared content of the page. If
It is recommended to immediately go to the site to generate the original files in the cache. Problems (and errors) are also possible when the application is running: it is still very raw, and many places are simply not debugged. Therefore, it is better to install Web Optimizer on a test host first and test its performance. In the near future, a full-fledged test page will be prepared.

If site security is very critical, then after installation you can remove write permissions for the
At the moment, the application is quite young and not without a certain number of errors. However, the entire source code is laid out in the public domain . If you have the strength or desire to participate in the development of the project (or port it to other platforms / languages) - please write in the comments. In any case, if you just install the application on your website and write about the problems that have arisen (if there are any), this will already be a very big help.
Let's take a look at how to install Web Optimizer.
Step 1: archive download

Web Optimizer comes in the form of a ZIP archive, which is posted on code.google.com . Download the latest stable (Featured) version in the root of the site. If the site has SSH access, then you can simply use
wget :')
wget http://web-optimizator.googlecode.com/files/web-optimizer.v0.2.5.zip
Then, the resulting archive will need to be unpacked to the root to make the
web-optimizer folder.If there is only FTP access to the site, we first upload it to a local disk, then unpack it, and then (for example, via FAR) copy it to the root of the site.
After all the necessary files are on the site, then you need to set write permissions for at least the
web-optimizer/config.php and the web-optimizer/cache folder for the user running the server. Otherwise, simply settings and cached versions of compressed files cannot be saved.Step 2: Configure Access
Go to the browser at
http: // your_site / web-optimizer /
And we see the welcome screen from Web Optimizer. If you don’t see it, then you should double-check where the Web Optimizer was copied, and go to that folder.

In this step, we need to set the user and password under which the application settings will be available. The login / password is saved in the configuration file as an md5-hash, so there are no security problems (well, except that the attacker can somehow rewrite
config.php itself and replace the hashes in it with the ones he needs).Step 3: Root Directory
Here we need to specify the physical directory in which the site is located on the server. This is necessary to calculate all the paths to the files. If the directory is different from the automatically calculated one, then it should be set manually.

Step 4: Configure the Application

This is where the most interesting begins: we need to set the application settings (they are all saved in the
config.php , then it can be changed manually). Briefly about the settings:- The cache directories are located by default in the
cachefolder above, it is not recommended to change (especially if you specify them outside the site tree - then the cached files simply will not load). This includes minimized and merged JavaScript and CSS files and images obtained from CSS Sprites. - Minify removes all unnecessary characters from CSS and JS files . CSS using CSS Sprites is minimized through CSS Tidy, otherwise by an internal algorithm. JavaScript - via JSMin. HTML - using an internal algorithm. When minimizing the CSS files are combined into one (even with different
mediaparameters) It is planned to add support for YUI Compressor and Packer. - GZIP is responsible for
gzipfile compression. If.htaccessused, then all compression settings (and client caching) are located in it. Otherwise, all compression is done using PHP. Expiresin the distant future ensures that being loaded once static files will be requested from the server only when it is modified (the cache is reset at the level of checking the date the file was changed, but only works for CSS and JavaScript files).- CSS Sprites automatically creates a set of CSS Sprites from source background images in CSS files (more on the mechanism for generating CSS Sprites ). There is a setting for creating full-color images in JPEG format (smaller in size, but problems with transparency are possible). New images replace old equivalents in the resulting CSS file.
data:URIreplaces all the background images in the file with theirdata:URI, adding rules for IE6- / 7. It is worth careful to use with a large amount of CSS Sprites - the final file can be quite significant.htaccessallows you to write down the conditions ofgzipcompression and file caching in a.htaccessfile in order to transfer caching and archiving work from PHP to Apache. If necessary, the rules can also be transferred tohttpd.conf. When connecting.htaccessApache is analyzed for connected modules and the available modules are automatically selected, if any module was selected in the configuration but not available, the related rules will not be written.- Clearing the caching directory will automatically “clean up” old versions of files in the server cache. If the site uses different sets of source files in the
head, then the option must be disabled, otherwise the files in the cache will be constantly updated. - The back link is placed on the Web Optimizer project site.
- If it is possible to write the root
index.phpfile, theauto_rewriteoption will appear (starting from version 0.2.5). If it is enabled, all the necessary instructions are automatically added to the file.
We select all the necessary settings (the optimal configuration is selected by default) and proceed further.
Step 5: Activate

If the
auto_rewrite option was enabled in the previous step and index.php is available for writing, it will be updated itself. Otherwise, you will need to open the main file of the used CMS and add two lines there. One to the very beginning of the file (of course, like PHP code): (require ('root_directory_ on_server / web-optimizer / web.optimizer.php') and the second - at the very end:
$ web_optimizer-> finish ();
The first line includes the Web Optimizer itself, and the second displays the prepared content of the page. If
index.php could not be updated, then both lines will be displayed on the screen, you can copy them and add them yourself.Step 6: check
It is recommended to immediately go to the site to generate the original files in the cache. Problems (and errors) are also possible when the application is running: it is still very raw, and many places are simply not debugged. Therefore, it is better to install Web Optimizer on a test host first and test its performance. In the near future, a full-fledged test page will be prepared.

Step 7: Additional Security
If site security is very critical, then after installation you can remove write permissions for the
web-optimizer/config.php and delete the install.php file. After that, outside the Web Optimizer will not be configured.At the moment, the application is quite young and not without a certain number of errors. However, the entire source code is laid out in the public domain . If you have the strength or desire to participate in the development of the project (or port it to other platforms / languages) - please write in the comments. In any case, if you just install the application on your website and write about the problems that have arisen (if there are any), this will already be a very big help.
Source: https://habr.com/ru/post/55031/
All Articles