Installing and configuring SVN, Apache, Trac for Windows. Part 1 - SVN
Content
- Preparing for installation (see below)
- Installation:
- Install Subversion (see below)
- Install TortoiseSVN (see below)
- Install Apache
- Connecting SVN to Apache
- Setting up SVN Authorization on the way
- Install Python
- Install Trac
- Configure Apache to work with Trac
Preparing to install
You will need
- Apache web server 2.0.63
- version control system Subversion 1.5.2 (SVN)
- Windows SVN client TortoiseSVN 1.5.3
- project management and error tracking system Trac 0.11.1
- Subversion 1.5.2 ~ CollabNet Subversion Command-Line Client v1.6.12 (for Windows) (registration required)
- TortoiseSVN 1.5.3 ~ TortoiseSVN-1.6
- Apache 2.0.63 ~ apache_2.0.63-win32-x86-openssl-0.9.7m.msi
- Python 2.5 ~ python-2.5.msi
- Python SetupTools ~ setuptools-0.6c7.win32-py2.5.exe
- mod_python 3.3.1 ~ mod_python-3.3.1.win32-py2.5-Apache2.0.exe
- SQLite 2.4.0 ~ pysqlite-2.4.0.win32-py2.5.exe
- SVN 1.5.2 Python Bindings ~ svn-python-1.5.2.win32-py2.5.exe
- Genshi 0.5.1 ~ Genshi-0.5.1.win32-py2.5.exe
- Trac 0.11.1 ~ Trac-0.11.1.win32.exe
Installation
')
Install Subversion
- we start Setup-Subversion-1.5.2.en-us.msi
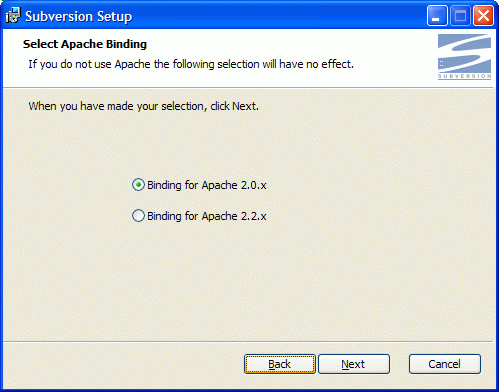
- choose Binding for Apache 2.0.x

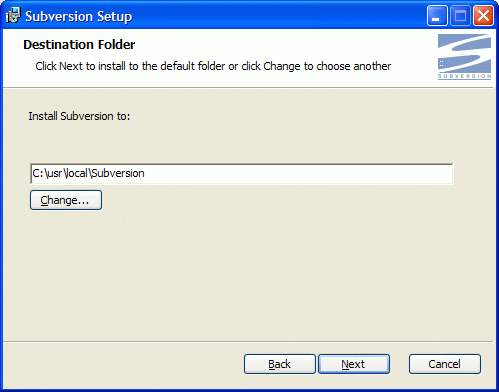
- specify the installation directory
C: \ usr \ local \ Subversion

- wait until the end of the installation.
Install the TortoiseSVN client
- Launch TortoiseSVN-1.5.3.13783-win32-svn-1.5.2.msi
- during the installation process, leave all the values as they are
- wait until the end of the installation and restart the computer.
We create storage
I prefer to store data on another logical drive, and even better on another hardware disk. In this case, all the storages are stored in the D: \ repos \ directory- create a directory D: \ repos \
- go to the created directory and create two subdirectories:
- store1
- store2
- let's make two storages
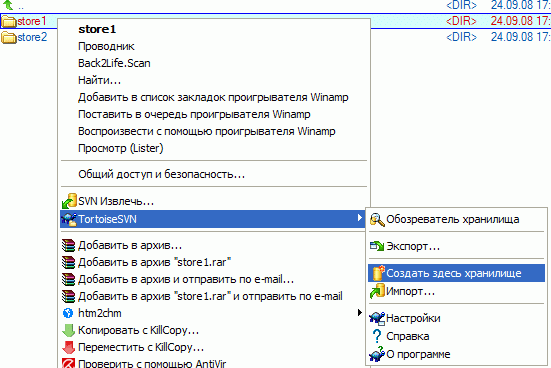
- right-click on store1 , in the menu select TotrtoiseSVN -> Create vault here

- repeat the same steps for store2
- now you have two SVN store1 and store2 storages
- right-click on store1 , in the menu select TotrtoiseSVN -> Create vault here
Next to: Part 2 - Apache and SVN ...
Source: https://habr.com/ru/post/53547/
All Articles