Photographing text with Gimp
Here I will offer several options for solving this problem. The main problem of photographs is the unevenness of the page illumination, when the brightness in the center is greater and less at the edges or something like that. It is also often necessary to increase the contrast of the text in comparison with the page. With the usual correction of Levels, some parts of the image are illuminated, and some, on the contrary, are too dark. All methods more or less solve these problems.
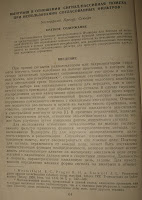
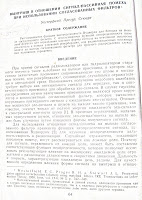
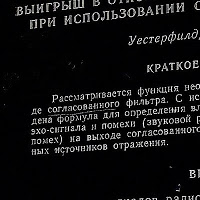
As a material for processing, I took this page (After cutting off all unnecessary):
The English names of the instruments are given in brackets, as well as the settings used in this case.


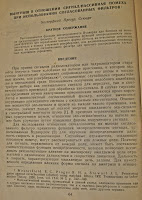
convert ./1_original.jpg -colorspace gray \ (+ clone -blur 10x65535 \) -compose subtract -composite -threshold 50% ./im4.jpg

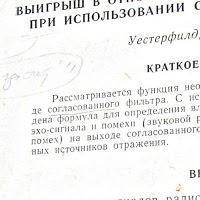
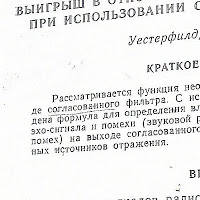
As a material for processing, I took this page (After cutting off all unnecessary):
The English names of the instruments are given in brackets, as well as the settings used in this case.
The method of dividing layers
- Create a new layer with a copy of the image.
- Blur a new Gaussian layer to a relative uniformity, when the text leaves almost no traces, but the brightness difference in the corners and center is noticeable.
(Filters -> Blur -> Gaussian blur: Blur radius - 100) - Set the mode of this layer to division (Layers window: Mode - Divide)
- Layer down (Layers -> merge)
Edge Detection Method
- Blur the background in gauss. Pick up the delta so that the text does not erode, I think you should not set the Blur radius for more than 10. (Filters -> Blur -> Selective Gaussian blur: Delta - 19; Radius - 15)
- Select edges with a custom Laplace method (Filters -> Edge-detect -> Edge ...: Algorithm: Laplace; Amount: 2)
- Invert the color of the picture if you want.
Long method with separate brightness correction
- Blur the background according to Gauss. Pick up the delta so that the text does not erode, I think you should not set the Blur radius for more than 10. (Filters -> Blur -> Selective Gaussian blur: Delta - 19; Radius - 15)
- Create a new layer with a copy of the image.
- Blur a new Gaussian layer to relative uniformity, when the text leaves almost no traces, but the brightness difference in the corners and center is noticeable (Filters -> Blur -> Gaussian blur: Blur radius - 100) (Filters -> Blur -> Gaussian blur: Blur radius - 100)
- Assign the mode of this layer to Brightness and set the density to 50% (Layers window: Mode - Value; Opacity: 50)
- Layer down (Layers -> merge)
- Process the picture: Color -> Auto -> Stretch HSV
Relative readability can be achieved with the help of the package ImageMagic
(Nothing to do with GIMP, just an alternative)convert ./1_original.jpg -colorspace gray \ (+ clone -blur 10x65535 \) -compose subtract -composite -threshold 50% ./im4.jpg
Automation
Murkt figured out Python-Fu and wrote a script that can automate all this. We write the following to the console (Filters -> Python-Fu -> Console): from gimpfu import *
def textify_divide (img):
ly2 = img.active_layer.copy ()
img.add_layer (ly2)
pdb.plug_in_gauss_rle (img, ly2, 100, 1, 1)
ly2.mode = DIVIDE_MODE
img.flatten ()
def textify_edges (img, radius = 10, max_delta = 25, amount = 2):
ly = pdb.gimp_image_get_active_layer (img)
pdb.plug_in_sel_gauss (img, ly, radius, max_delta)
pdb.plug_in_edge (img, ly, amount, 1, 5)
pdb.gimp_invert (ly)
Now it is possible to process all open images from the same console using the command:[textify_edges (x) for x in gimp.image_list ()]You can also try to use other features of Python-Fu, such as opening files, etc.:
 image = pdb.file_jpeg_load (filename, raw_filename)
 image = pdb.file_png_load (filename, raw_filename)
')
Source: https://habr.com/ru/post/53341/
All Articles