Install RockBox on iPod Video
If you have heard the word RockBox, this note probably will not tell you anything new. Don't even bother to read it.
I caught an old ipod video of 60 gigs. Amarok, of course, picked him up and made it possible to read / write to his base. But not everyone has such a combine, but it happens that you come to visit a friend’s musician to take his new recordings to listen. And such formats as Ogg Vorbis and FLAC player does not play. As a result, it was decided to install a third-party firmware. It's about rockbox .
First, let's take a look at the list of supported devices on the main page. Here is a list of them:
A page dedicated to Rockbox on iPod Video is located here . We proceed immediately to the installation instructions .
Installation options for two. Automatic and manual. The advantages of each are obvious. For automatic - easy to install, for manual - the ability to install the latest firmware version and components. To begin, choose the first option.
')
For automatic installation, what kind of special utility and run, after connecting the player to the computer. You may need administrator rights (I haven’t installed the bootloader without it).
Next, you need to specify the program, what is our version of the player. Most likely she will determine everything herself. But you may have to explain it to her all by yourself. In this case, you only need to specify the model of the player and the path where it was connected (in windows - the drive letter, in other OS - the path where it is mounted). At the same time, you will see the following settings window:
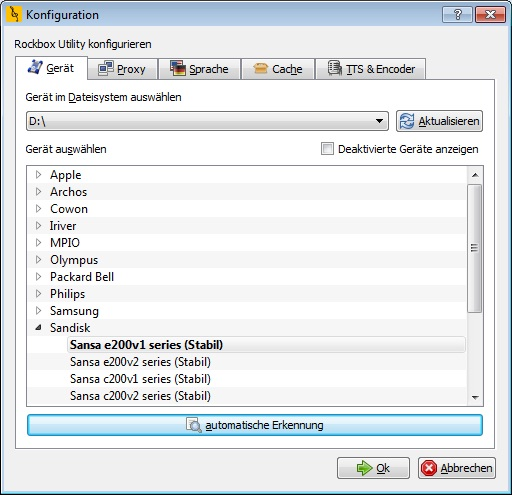
On the other tabs, you will see some more options that you may need. For example, proxy settings. Then we again have several options:
For simplicity, select the first option and click on the button.
Then the program itself downloads the bootloader, installs it on the player, repeats the same for firmware, fonts, add-ons and themes. Unfortunately, the site is undergoing a rebuilding of themes and they are not automatically downloaded. We are waiting for a couple of minutes (well, who has what channel), overload the player and ...
And that's not all! It is necessary to configure something else in the player itself. First, the encoding for tags. We climb in Settiings-> Genral Settings-> Display-> Default codepage and expose what you need. If you are a windows user, then cp1251 will most likely suit you. On the way through the menu you can change the language to Russian.
Secondly, you need to create a database. Go to the Database menu and the player itself will offer to scan the disc. If for some reason this did not happen or you want to re-create the database (for example, if you decide to use a different encoding), go to Settings-> General Settings-> Database-> Initialize now.
Now let's briefly say what it gave us (full list of features here ):
And finally, a bunch of pictures:


I caught an old ipod video of 60 gigs. Amarok, of course, picked him up and made it possible to read / write to his base. But not everyone has such a combine, but it happens that you come to visit a friend’s musician to take his new recordings to listen. And such formats as Ogg Vorbis and FLAC player does not play. As a result, it was decided to install a third-party firmware. It's about rockbox .
First, let's take a look at the list of supported devices on the main page. Here is a list of them:
- Apple: 1 to 5.5 generations of iPod, iPod Mini and 1st generation iPod Nano (Shuffle, 2/3/4 Nano, Classic or Touch not supported)
- Archos: Jukebox 5000, 6000, Studio, Recorder, FM Recorder, Recorder V2 and Ondio
- Cowon: iAudio X5, X5V, X5L, M5, M5L, M3 and M3L
- iriver: H100, H300 and H10 series
- Olympus: M: Robe 100
- SanDisk: Sansa c200, e200 and e200R series (v2 models are not supported)
- Toshiba: Gigabeat X and F series (but not the S series)
A page dedicated to Rockbox on iPod Video is located here . We proceed immediately to the installation instructions .
Installation options for two. Automatic and manual. The advantages of each are obvious. For automatic - easy to install, for manual - the ability to install the latest firmware version and components. To begin, choose the first option.
')
For automatic installation, what kind of special utility and run, after connecting the player to the computer. You may need administrator rights (I haven’t installed the bootloader without it).
Next, you need to specify the program, what is our version of the player. Most likely she will determine everything herself. But you may have to explain it to her all by yourself. In this case, you only need to specify the model of the player and the path where it was connected (in windows - the drive letter, in other OS - the path where it is mounted). At the same time, you will see the following settings window:
On the other tabs, you will see some more options that you may need. For example, proxy settings. Then we again have several options:
- You can click the magic button “Complete Installation”, and the player will install a stable firmware version, bootloader and all add-ons.
- Click the “Small Installation” button, and only the boot loader and firmware will be installed.
- Go to another tab and click on a bunch of other buttons. In this case, we will have the opportunity to choose the version of the firmware that we will install (there are only three options - stable, archived and current).
For simplicity, select the first option and click on the button.
Then the program itself downloads the bootloader, installs it on the player, repeats the same for firmware, fonts, add-ons and themes. Unfortunately, the site is undergoing a rebuilding of themes and they are not automatically downloaded. We are waiting for a couple of minutes (well, who has what channel), overload the player and ...
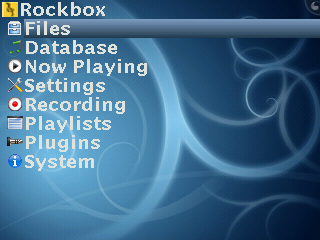
And that's not all! It is necessary to configure something else in the player itself. First, the encoding for tags. We climb in Settiings-> Genral Settings-> Display-> Default codepage and expose what you need. If you are a windows user, then cp1251 will most likely suit you. On the way through the menu you can change the language to Russian.
Secondly, you need to create a database. Go to the Database menu and the player itself will offer to scan the disc. If for some reason this did not happen or you want to re-create the database (for example, if you decide to use a different encoding), go to Settings-> General Settings-> Database-> Initialize now.
Now let's briefly say what it gave us (full list of features here ):
- Support for more file formats ( list )
- Custom themes ( tutorial ), with different fonts and icons.
- Reproduction of files simply copied to a flash drive without using third-party programs (like iTunes)
- A bunch of useful plugins (for example, a metronome, an md5 counter for sums, or a calendar)
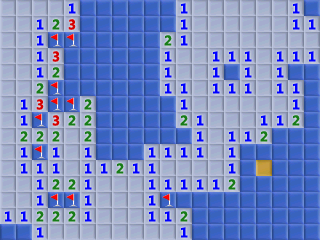
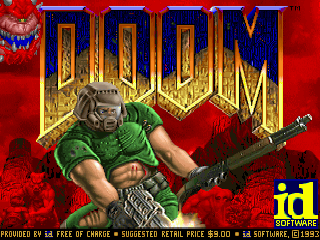
- Games and other joys (for example, doom, sapper, splash matrix)
And finally, a bunch of pictures:
Source: https://habr.com/ru/post/48950/
All Articles