IronPython as an engine for macros in .NET applications
I suspect that many of you wondered how you can add macro support to a .NET application so that you can extend the program's capabilities without recompiling it and give third-party developers the ability to easily and easily access the API of your application? The article describes how to use IronPython, the implementation of the Python language on the .NET platform, as the basis for macros execution.
To begin with, it should be determined - what we will mean by the word “macro” is a script that, without recompiling the project, would allow access to a specific API. Those. pull values from the form, modify them - and all this in run-time mode, without modifying the application.
The first option that comes to mind is to create your own interpreter for a simple script-language. The second is the dynamic compilation of some .NET language (the same C #) - with dynamic loading of assemblies and execution via Reflection. And the third is the use of interpreted .NET languages (DLR) - IronPython or IronRuby.
To create your own language + interpreter to it with the possibility of .NET interoperability is not a trivial task, we will leave it for enthusiasts.
Dynamic compilation is too cumbersome and drags the use of Reflection. However, this method is not without advantages - the written macro is compiled once and later can be used many times - as a full-fledged .NET assembly. So - the finalist - method number three - using existing DLR languages. As such a language, choose IronPython (accept this as a fact :). The current IPy version is 2.0, you can take it at codeplex.com/IronPython
')
We proceed directly to the coding.
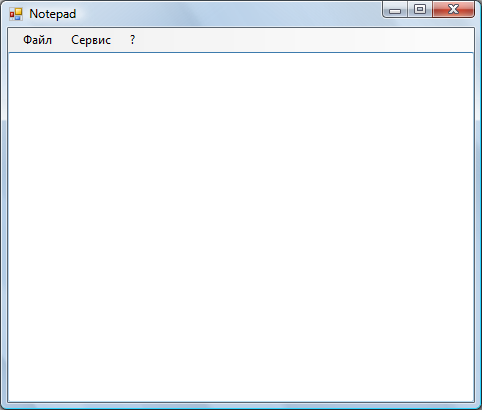
To begin with, consider the interface of the test application "Notepad".

In the "Service" menu and place the item "Macros". For example, consider the simplest version of the formation of a list of macros - in the directory with the program, create a folder “Macroses” files from this folder will become menu items.
MacrosToolStripMenuItem - a successor class from ToolStripMenuItem that differs only in the MacrosFileName property
To begin with, we will create a macro that will view the text in the textBox and find all e-mail addresses of the form “vpupkin@mail.ru”. In the Macroses folder, create the SaveEmail.py file, launch the application - and see that the SaveEmail item appears in the Macros menu.
Now the key point itself is the execution of the IPy script and its access to the interface. Add to the project a link to the assembly IronPython.dll. And create a class MacroRunner - executing script.
The key point is to connect to the current build IPY runtime to access the form. When the assembly is connected, in the IPy script it will be possible to use the Notepad namespace classes. You can also add other necessary assemblies via LoadAssebmly - such as System.Windows.Forms - to work with forms.
The class is ready, now we modify the click handler on the Macros submenu items
Here it is necessary to note the following point - to transfer the form from which the macro is actually called to the IPy script, the static CurrentForm field is used. In the script, the form will be available as Notepad.MacroRunner.CurrentForm. Ideally, the script, of course, should not have full access to the interface of the form — but should only use the provided API — and be limited to them. But now we will not bother with this - and just make the textBox open (Modifier = Public). Well, except for the text field, let the script access the Tools menu item (Modifier = Public).
The work with the form is completed, we collect the project and open the SaveEmail.py file - now we work only with macros.
So, the first macro is SaveEmail.py:
Because the assembly is connected to the runtime - then the namespace is available Notepad - in which the application classes are declared. Right now, you need a static method of the MacroRunner class - to get access to the active form (once again I’ll make a reservation - that it would be more correct to provide not direct access, but through an intermediary class - that will restrict access to a specific API). Well, then everything is simple - we get the text, with regular expression we pull out the email - and save them to a file in the current directory.
You can start the application, enter arbitrary text containing the email - and make sure that after the macro has completed - the file emails.txt has appeared in the folder with the executable program.
Now another example of what a macro can do is a bit more interesting than the previous one. So, create the UIModifier.py file in the Macroses folder. As the name suggests, the macro will change the interface elements of the application. Specifically, it will add a new item to the Tools menu. In order to work with WinForms controls, you need to connect the System.Windows.Forms assembly to the IPy runtime. This can be done at the time of launching the script from the application - add another call to LoadAssembly. But we decided - no recompilations, let IronPython manage on its own. Well, there is strength :). To connect the assembly, use the AddReference method of the clr class.
Everything is simple - we get the current form, connect the System.Windows.Forms assembly and import everything from the System.Windows.Forms namespace - it will be useful.
pyHello - a simple event handler - when you click on the created menu item - a message will be displayed.
Run the application, run the macro. Look at the Service menu item:


When you click on the “Python with Regated!” Menu item, a standard MessageBox will appear - in fact, it was achieved.
Thank you all for your attention :)
To begin with, it should be determined - what we will mean by the word “macro” is a script that, without recompiling the project, would allow access to a specific API. Those. pull values from the form, modify them - and all this in run-time mode, without modifying the application.
The first option that comes to mind is to create your own interpreter for a simple script-language. The second is the dynamic compilation of some .NET language (the same C #) - with dynamic loading of assemblies and execution via Reflection. And the third is the use of interpreted .NET languages (DLR) - IronPython or IronRuby.
To create your own language + interpreter to it with the possibility of .NET interoperability is not a trivial task, we will leave it for enthusiasts.
Dynamic compilation is too cumbersome and drags the use of Reflection. However, this method is not without advantages - the written macro is compiled once and later can be used many times - as a full-fledged .NET assembly. So - the finalist - method number three - using existing DLR languages. As such a language, choose IronPython (accept this as a fact :). The current IPy version is 2.0, you can take it at codeplex.com/IronPython
')
We proceed directly to the coding.
To begin with, consider the interface of the test application "Notepad".

In the "Service" menu and place the item "Macros". For example, consider the simplest version of the formation of a list of macros - in the directory with the program, create a folder “Macroses” files from this folder will become menu items.
private void Main_Load( object sender, EventArgs e)
{
MacrosToolStripMenuItem itm = null ;
string [] files = Directory .GetFiles( @".\Macroses" );
foreach ( string file in files)
{
itm = new MacrosToolStripMenuItem(Path.GetFileNameWithoutExtension(file)) { MacrosFileName = file };
itm.Click += new EventHandler(macroToolStripMenuItem_Click);
ToolStripMenuItem.DropDownItems.Add(itm);
}
}

internal class MacrosToolStripMenuItem : ToolStripMenuItem
{
public MacrosToolStripMenuItem( string FileName) : base (FileName) { }
public string MacrosFileName { get ; set ; }
}


* This source code was highlighted with Source Code Highlighter .
MacrosToolStripMenuItem - a successor class from ToolStripMenuItem that differs only in the MacrosFileName property
To begin with, we will create a macro that will view the text in the textBox and find all e-mail addresses of the form “vpupkin@mail.ru”. In the Macroses folder, create the SaveEmail.py file, launch the application - and see that the SaveEmail item appears in the Macros menu.
Now the key point itself is the execution of the IPy script and its access to the interface. Add to the project a link to the assembly IronPython.dll. And create a class MacroRunner - executing script.
public class MacroRunner
{
public static Form CurrentForm;

public string FileName { get ; set ; }

public MacroRunner() { }

public void Execute()
{
// Python-
IronPython.Hosting.PythonEngine pyEngine = new IronPython.Hosting.PythonEngine();
// - , ..
// ,
pyEngine.LoadAssembly(System.Reflection. Assembly .GetExecutingAssembly());

try
{
pyEngine.ExecuteFile(FileName);
}
catch (Exception exc)
{
MessageBox.Show(exc.Message);
}
}
}


* This source code was highlighted with Source Code Highlighter .
The key point is to connect to the current build IPY runtime to access the form. When the assembly is connected, in the IPy script it will be possible to use the Notepad namespace classes. You can also add other necessary assemblies via LoadAssebmly - such as System.Windows.Forms - to work with forms.
The class is ready, now we modify the click handler on the Macros submenu items
protected void macroToolStripMenuItem_Click( object sender, EventArgs e)
{
MacrosToolStripMenuItem item = sender as MacrosToolStripMenuItem;

MacroRunner runner = new MacroRunner() { FileName = item.MacrosFileName };
MacroRunner.CurrentForm = this ;
runner.Execute();
}

* This source code was highlighted with Source Code Highlighter .
Here it is necessary to note the following point - to transfer the form from which the macro is actually called to the IPy script, the static CurrentForm field is used. In the script, the form will be available as Notepad.MacroRunner.CurrentForm. Ideally, the script, of course, should not have full access to the interface of the form — but should only use the provided API — and be limited to them. But now we will not bother with this - and just make the textBox open (Modifier = Public). Well, except for the text field, let the script access the Tools menu item (Modifier = Public).
The work with the form is completed, we collect the project and open the SaveEmail.py file - now we work only with macros.
So, the first macro is SaveEmail.py:
from Notepad import *
import re

text = MacroRunner.CurrentForm.textBox.Text
links = re.findall( "\w*@\w*\.\w{2,4}" , text)
file = open( "emails.txt" , "w" )
file.write( "\n" .join(links))
file.close()

* This source code was highlighted with Source Code Highlighter .
Because the assembly is connected to the runtime - then the namespace is available Notepad - in which the application classes are declared. Right now, you need a static method of the MacroRunner class - to get access to the active form (once again I’ll make a reservation - that it would be more correct to provide not direct access, but through an intermediary class - that will restrict access to a specific API). Well, then everything is simple - we get the text, with regular expression we pull out the email - and save them to a file in the current directory.
You can start the application, enter arbitrary text containing the email - and make sure that after the macro has completed - the file emails.txt has appeared in the folder with the executable program.
Now another example of what a macro can do is a bit more interesting than the previous one. So, create the UIModifier.py file in the Macroses folder. As the name suggests, the macro will change the interface elements of the application. Specifically, it will add a new item to the Tools menu. In order to work with WinForms controls, you need to connect the System.Windows.Forms assembly to the IPy runtime. This can be done at the time of launching the script from the application - add another call to LoadAssembly. But we decided - no recompilations, let IronPython manage on its own. Well, there is strength :). To connect the assembly, use the AddReference method of the clr class.
from Notepad import *
main = MacroRunner.CurrentForm

import clr
clr.AddReference( "System.Windows.Forms" )
from System.Windows.Forms import *

def pyHello(s,e):
MessageBox.Show( "Hello from IPy!" )

item = ToolStripMenuItem()
item.Name = "pybtn"
item.Text = "Python created!"
item.Click += pyHello

main.ToolStripMenuItem.DropDownItems.Add(item)


* This source code was highlighted with Source Code Highlighter .
Everything is simple - we get the current form, connect the System.Windows.Forms assembly and import everything from the System.Windows.Forms namespace - it will be useful.
pyHello - a simple event handler - when you click on the created menu item - a message will be displayed.
Run the application, run the macro. Look at the Service menu item:

When you click on the “Python with Regated!” Menu item, a standard MessageBox will appear - in fact, it was achieved.
Thank you all for your attention :)
Source: https://habr.com/ru/post/48832/
All Articles