How to recognize pictures and texts on your phone using ML Kit
Two years ago, Sundar Pichai, the head of Google, said that the company from mobile-first becomes AI-first and focuses on machine learning. A year later, the Machine Learning Kit was released - a set of tools with which you can effectively use ML on iOS and Android.
They say a lot about the ML Kit in the USA, but there is almost no information in Russian. And since we use it for some tasks in Yandex.Money, I decided to share my experience and show with examples how to use it to do interesting things.
My name is Yura. Last year I have been working in the Yandex.Money team on a mobile wallet. We’ll talk about machine learning in mobile.
Note Editorial staff: this post is a retelling of the report by Yuri Chechetkin “From mobile first to AI first” from the Yandex.Money metap Android Paranoid .
What is the ML Kit?
This is Google’s mobile SDK that makes it easy to use machine learning on Android and iOS devices. It is not necessary to be an expert in ML or in artificial intelligence, because in a few lines of code you can implement very complex things. Moreover, it is not necessary to know how neural networks or model optimization work.
What can the ML Kit do?
The basic features are quite wide. For example, you can recognize text, faces, find and track objects, create labels for images and your own classification models, scan barcodes and QR tags.
We already used QR code recognition in the Yandex.Money application.
There is also a ML Kit
- Landmark recognition;
- Definition of the language in which the text is written;
- Translation of texts on the device;
- Quick reply to a letter or message.
In addition to a huge number of methods out of the box, there is support for custom models, which practically gives unlimited possibilities - for example, you can colorize black and white photographs and make them color.
It is important that you do not need to use any services, API or backend for this. Everything can be done directly on the device, so we don’t load user traffic, don’t get a bunch of network errors, we don’t have to process a bunch of cases, for example, lack of Internet, loss of connection, and so on. Moreover, on the device it works much faster than through a network.

Text recognising
Task: given a photograph, you need to get the text circled in a rectangle.
We start with the dependency in Gradle. It is enough to connect one dependency, and we are ready to work.
dependencies { // ... implementation'com.google.firebase:firebase-ml-vision:20.0.0' } It is worth specifying metadata that says that the model will be downloaded to the device while downloading the application from the Play Market. If you do not do this and access the API without a model, we will get an error, and the model will have to be downloaded in the background. If you need to use several models, it is advisable to specify them separated by commas. In our example, we use the OCR model, and the name of the rest can be found in the documentation .
<application ...> ... <meta-data android:name="com.google.firebase.ml.vision.DEPENDENCIES" android:value="ocr" /> <!-- To use multiple models: android:value="ocr,model2,model3" --> </application> After the project configuration, you need to set the input values. ML Kit works with the FirebaseVisionImage type, we have five methods, the signature of which I wrote out below. They convert the usual types of Android and Java into the types of ML Kit, with which it is convenient to work with.
fun fromMediaImage(image: Image, rotation: Int): FirebaseVisionImage fun fromBitmap(bitmap: Bitmap): FirebaseVisionImage fun fromFilePath(context: Context, uri: Uri): FirebaseVisionImage fun fromByteBuffer( byteBuffer: ByteBuffer, metadata: FirebaseVisionImageMetadata ): FirebaseVisionImage fun fromByteArray( bytes: ByteArray, metadata: FirebaseVisionImageMetadata ): FirebaseVisionImage Pay attention to the last two - they work with an array of bytes and with a byte buffer, and we need to specify metadata so that ML Kit understands how to handle it all. Metadata, in fact, describes the format, in this case, the width and height, the default format, IMAGE_FORMAT_NV21 and rotation.
val metadata = FirebaseVisionImageMetadata.Builder() .setWidth(480) .setHeight(360) .setFormat(FirebaseVisionImageMetadata.IMAGE_FORMAT_NV21) .setRotation(rotation) .build() val image = FirebaseVisionImage.fromByteBuffer(buffer, metadata) When the input data is collected, create a detector that will recognize the text.
There are two types of detectors, on the device and in the cloud, they are created literally in one line. It is worth noting that the detector on the device only works with English. The cloud detector supports more than 20 languages; they must be specified in the special setLanguageHints method.
// onDevice val detector = FirebaseVision.getInstance().getOnDeviceTextRecognizer() // onCloud with options val options = FirebaseVisionCloudTextRecognizerOptions.Builder() .setLanguageHints(arrayOf("en", "ru")) .build() val detector = FirebaseVision.getInstance().getCloudTextRecognizer(options) The number of supported languages is more than 20, they are all on the official website. In our example, only English and Russian.
After you have input and a detector, just call the processImage method on this detector. We get the result in the form of a task, on which we hang two callbacks - for success and for error. The standard exception comes to an error, and the type of FirebaseVisionText comes to success from onSuccessListener.
val result: Task<FirebaseVisionText> = detector.processImage(image) .addOnSuccessListener { result: FirebaseVisionText -> // Task completed successfully // ... } .addOnFailureListener { exception: Exception -> // Task failed with an exception // ... } How to work with type FirebaseVisionText?
It consists of text blocks (TextBlock), those in turn consist of lines (Line), and lines of elements (Element). They are nested in each other.
Moreover, each of these classes has five methods that return different data about the object. A rectangle is the area where the text is located, confidence is the accuracy of the recognized text, corner points are the corner points clockwise, starting from the upper left corner, the recognized languages and the text itself.
FirebaseVisionText contains a list of FirebaseVisionText.TextBlock which contains a list of FirebaseVisionText.Line which is composed of a list of FirebaseVisionText.Element. fun getBoundingBox(): Rect // axis-aligned bounding rectangle of the detected text fun getConfidence(): Float // confidence of the recognized text fun getCornerPoints(): Array<Point> // four corner points in clockwise direction fun getRecognizedLanguages(): List<RecognizedLanguage> // a list of recognized languages fun getText(): String //recognized text as a string What is it for?
We can recognize both the entire text in the picture and its individual paragraphs, pieces, lines or just words. And as an example, we can iterate over, at each stage take a text, take the borders of this text, and draw. Very comfortably.
We plan to use this tool in our application for recognizing bank cards, the inscriptions on which are located non-standard. Not all card recognition libraries work well, and for custom cards the ML Kit would be very useful. Since there is not much text, it is very easy to process in this way.
Recognition of objects in the photo
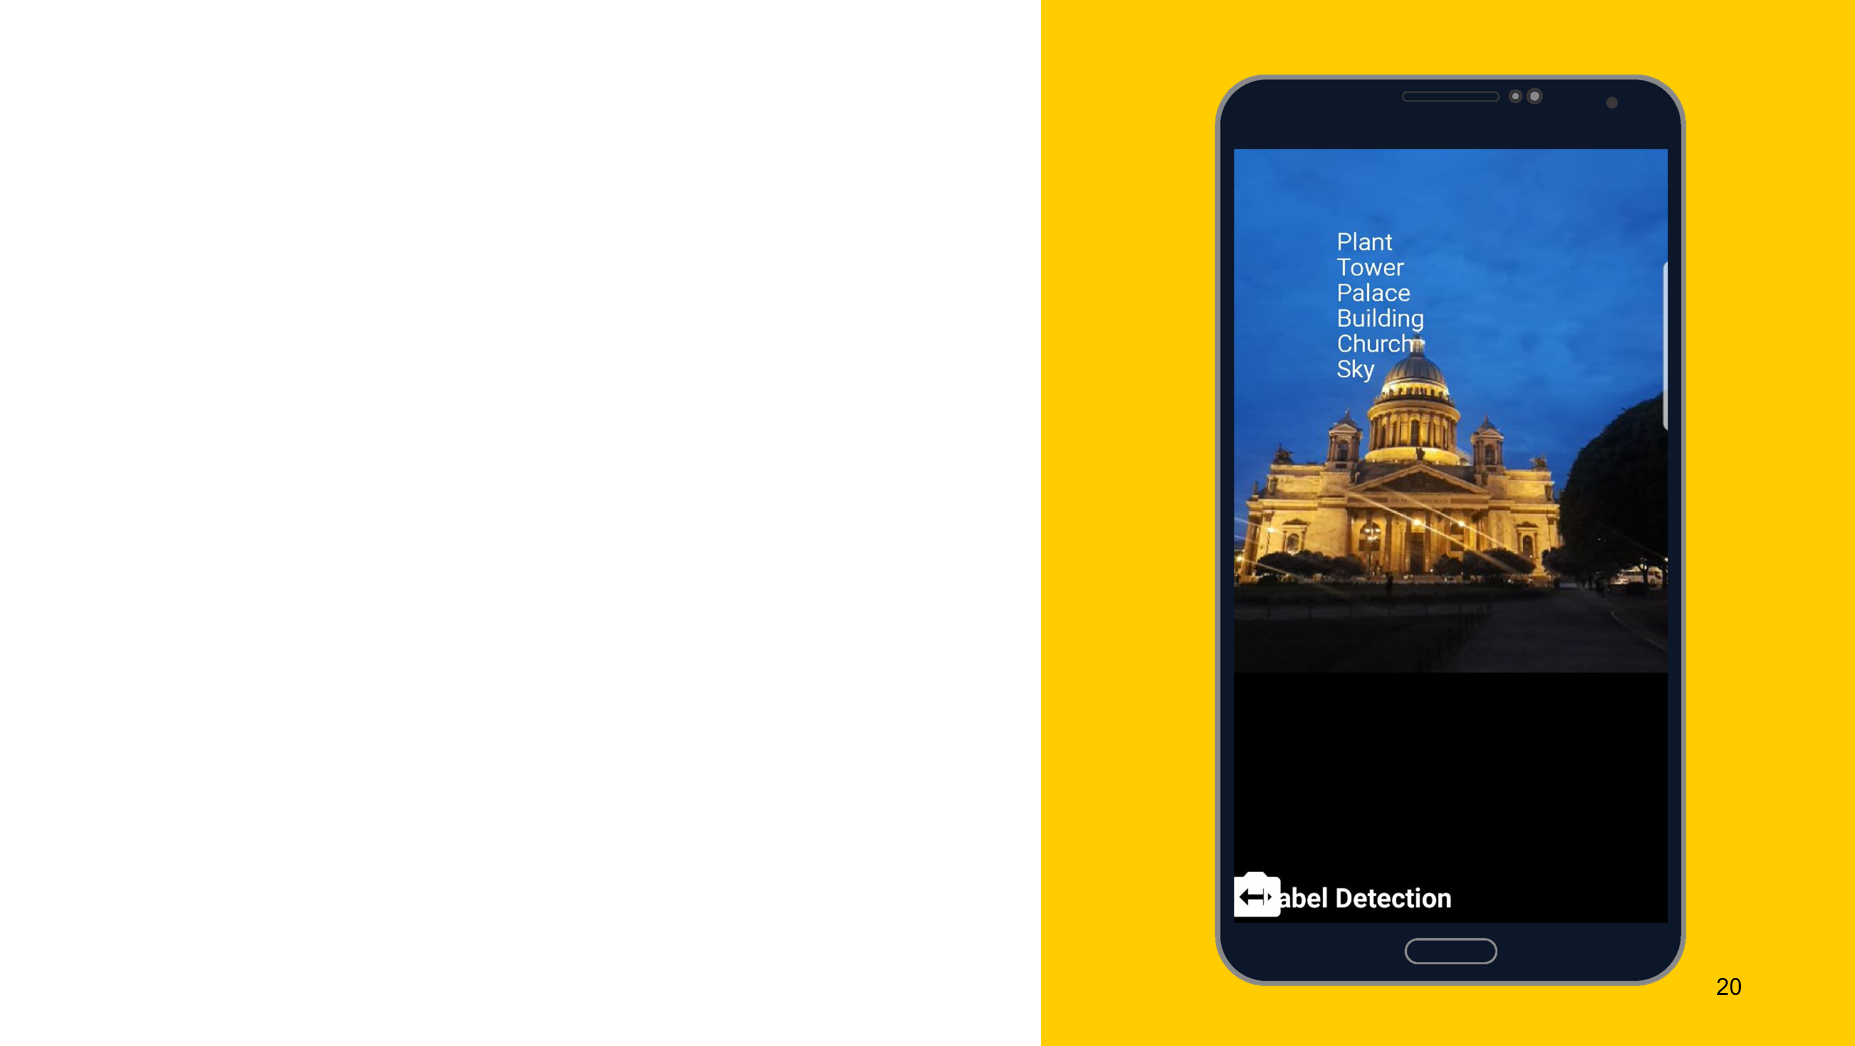
Using the following tool as an example, I would like to show that the principle of operation is approximately the same. In this case, recognition of what is depicted on the object. We also create two detectors, one on the device, the other on the cloud, we can specify the minimum accuracy as parameters. The default is 0.5, indicated 0.7, and ready to go. We also get the result in the form of FirebaseImageLabel, this is a list of labels, each of which contains ID, description and accuracy.
// onDevice val detector: FirebaseVisionImageLabeler = FirebaseVision .getInstance() .getOnDeviceImageLabeler() // onCloud with minimum confidence val options = FirebaseVisionCloudImageLabelerOptions.Builder() .setConfidenceThreshold(0.7f) .build() val detector: FirebaseVisionImageLabeler = FirebaseVision .getInstance() .getCloudImageLabeler(options) Harold hiding happiness

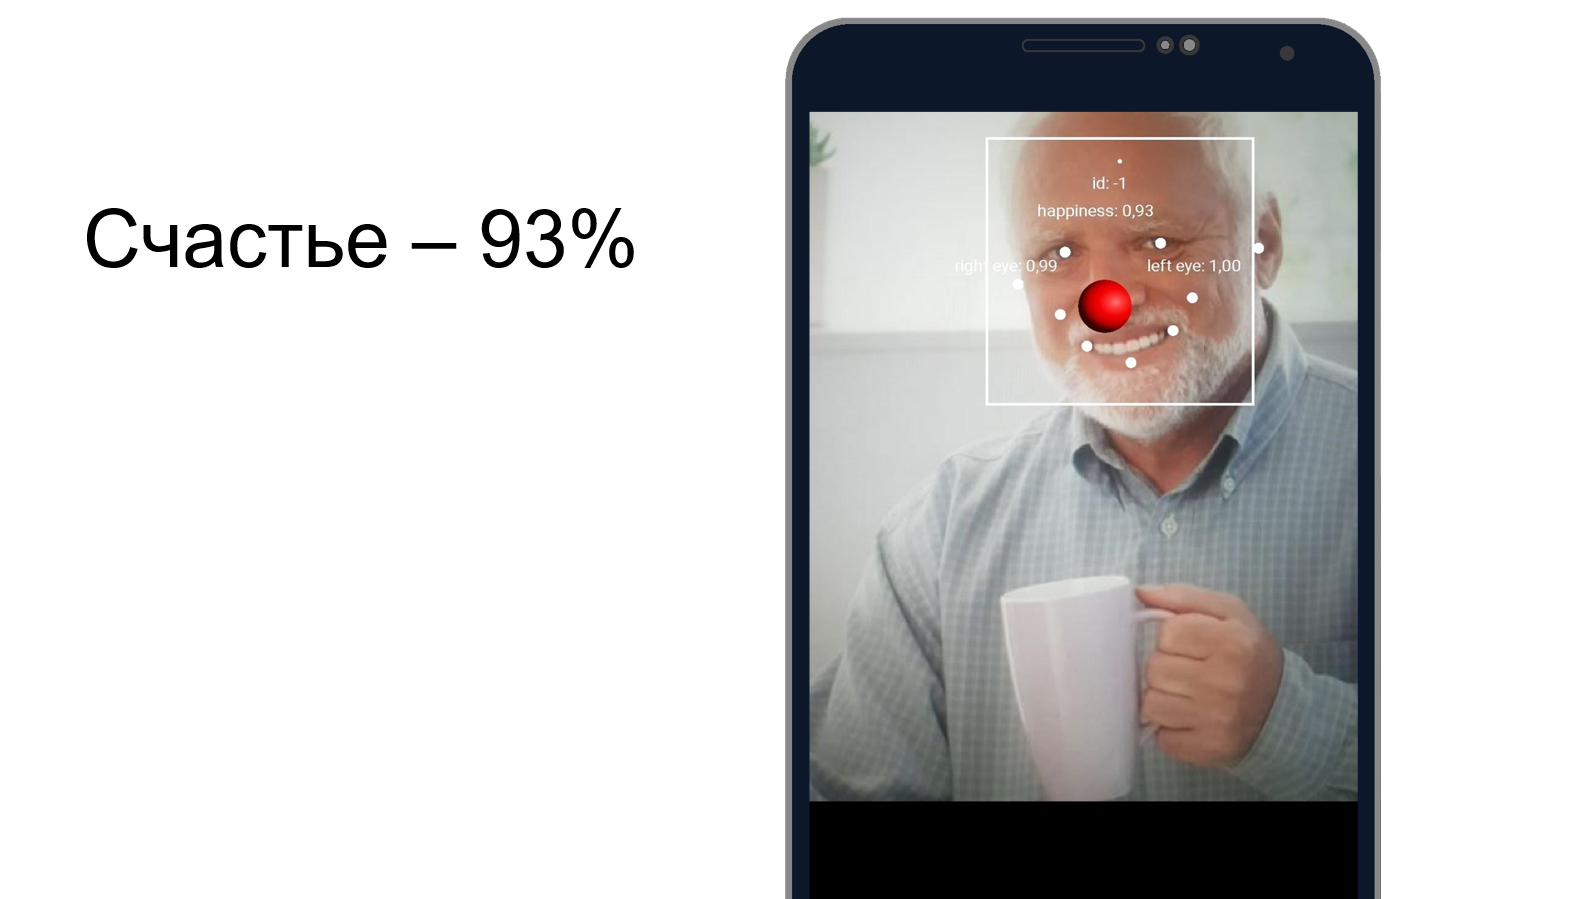
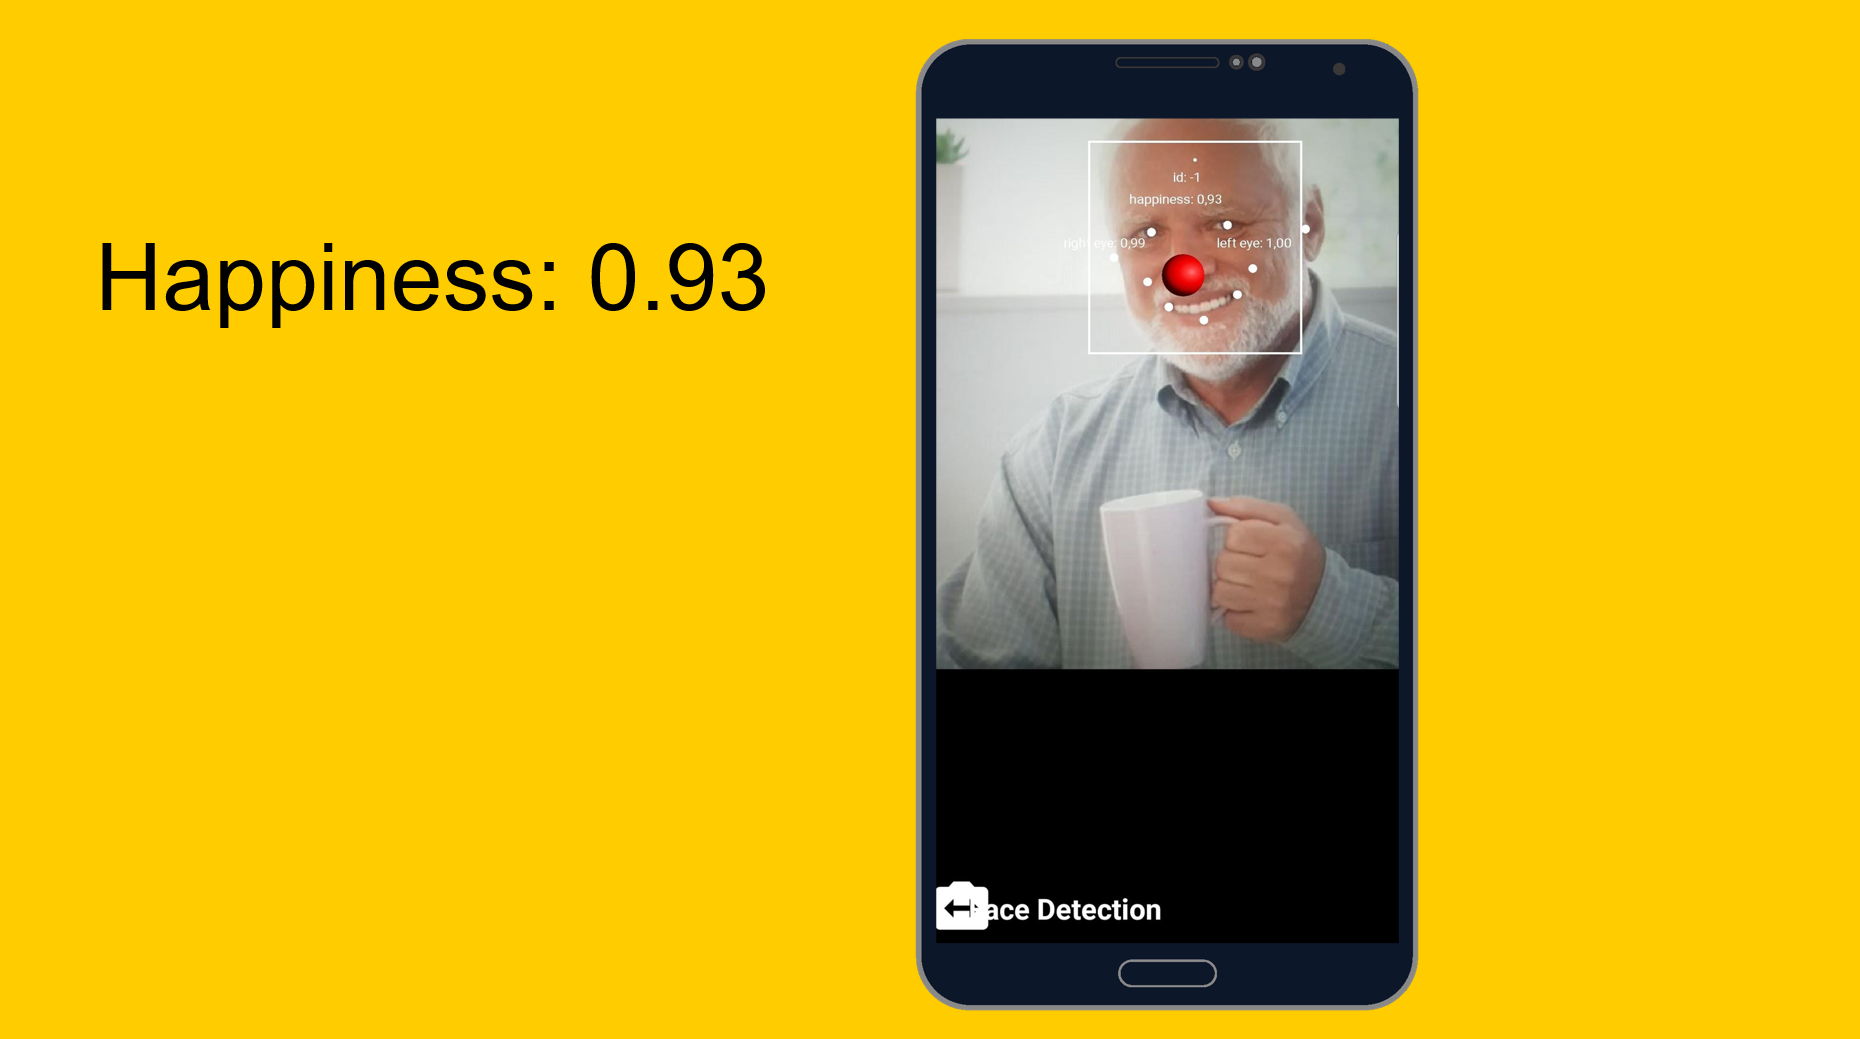
You can try to understand how well Harold hides the pain and whether he is happy at the same time. We use a face recognition tool, which, in addition to recognizing facial features, can tell how happy a person is. As it turned out, Harold is 93% happy. Or he hides the pain very well.
From easy to easy, but a little more complicated. Custom models.
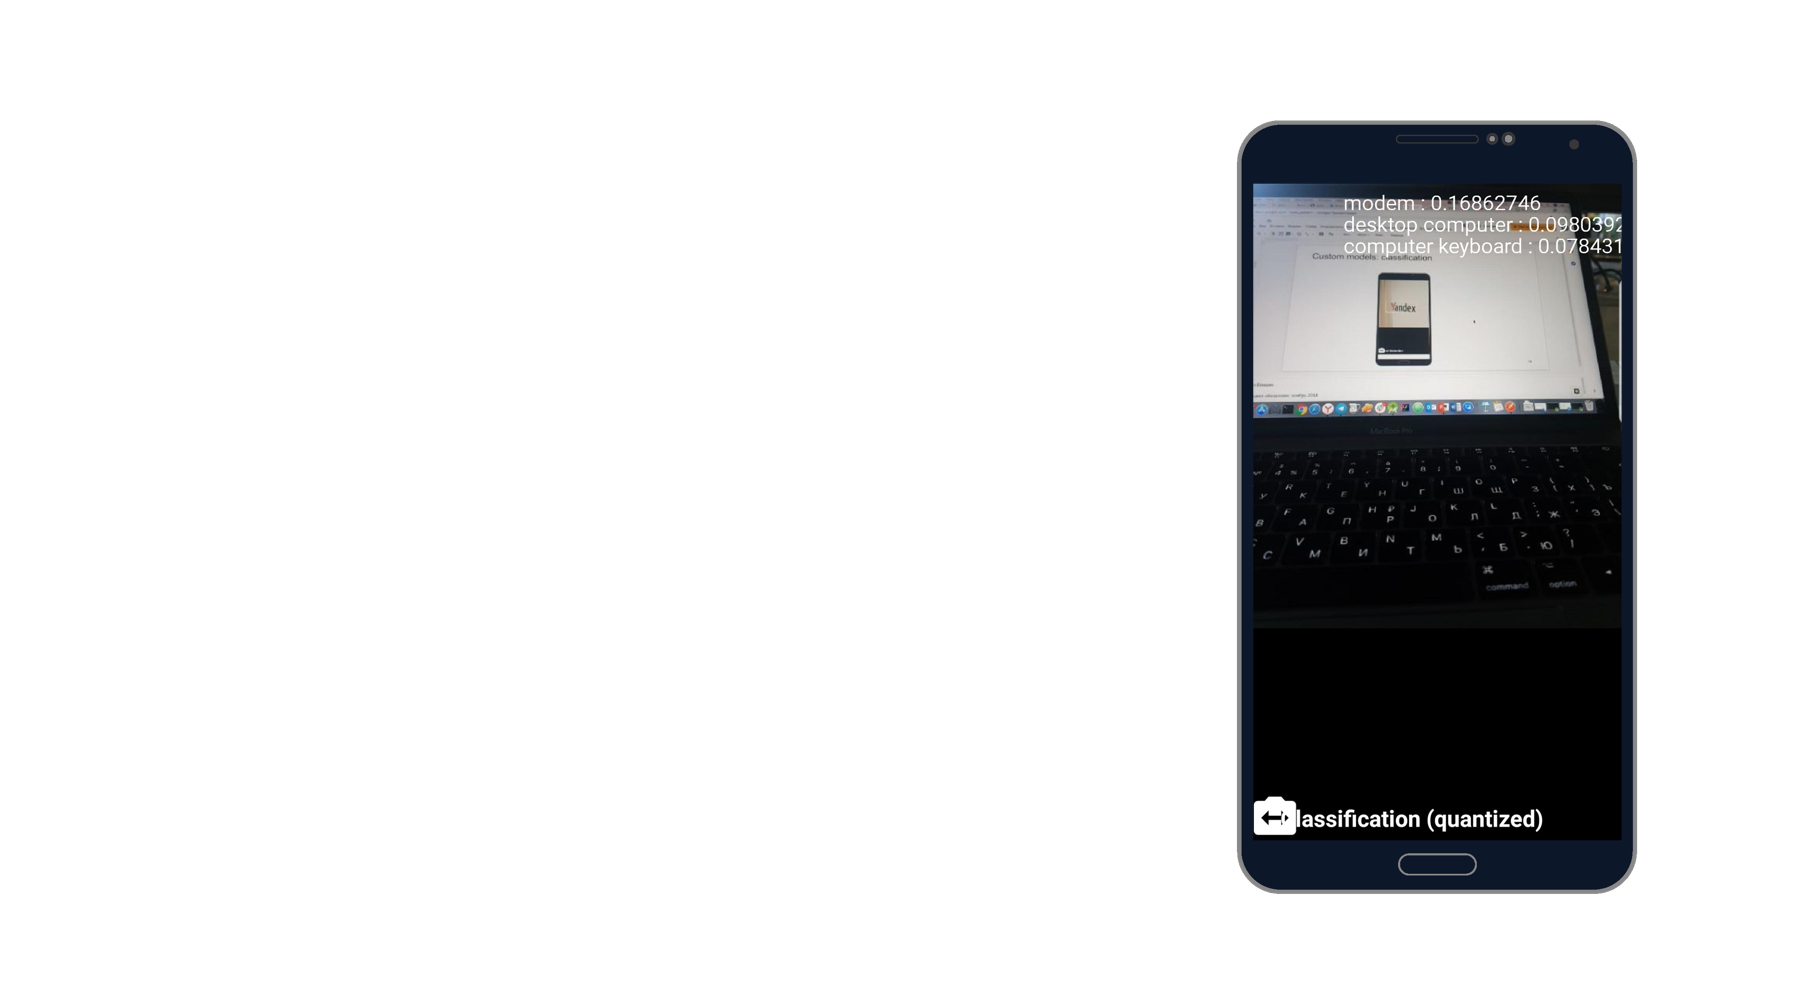
Task: classification of what is shown in the photo.
I took a picture of the laptop and recognized the modem, desktop computer and keyboard. Sounds like the truth. There are a thousand classifiers, and he takes three of them that best describe this photo.
When working with custom models, we can also work with them both on the device and through the cloud.
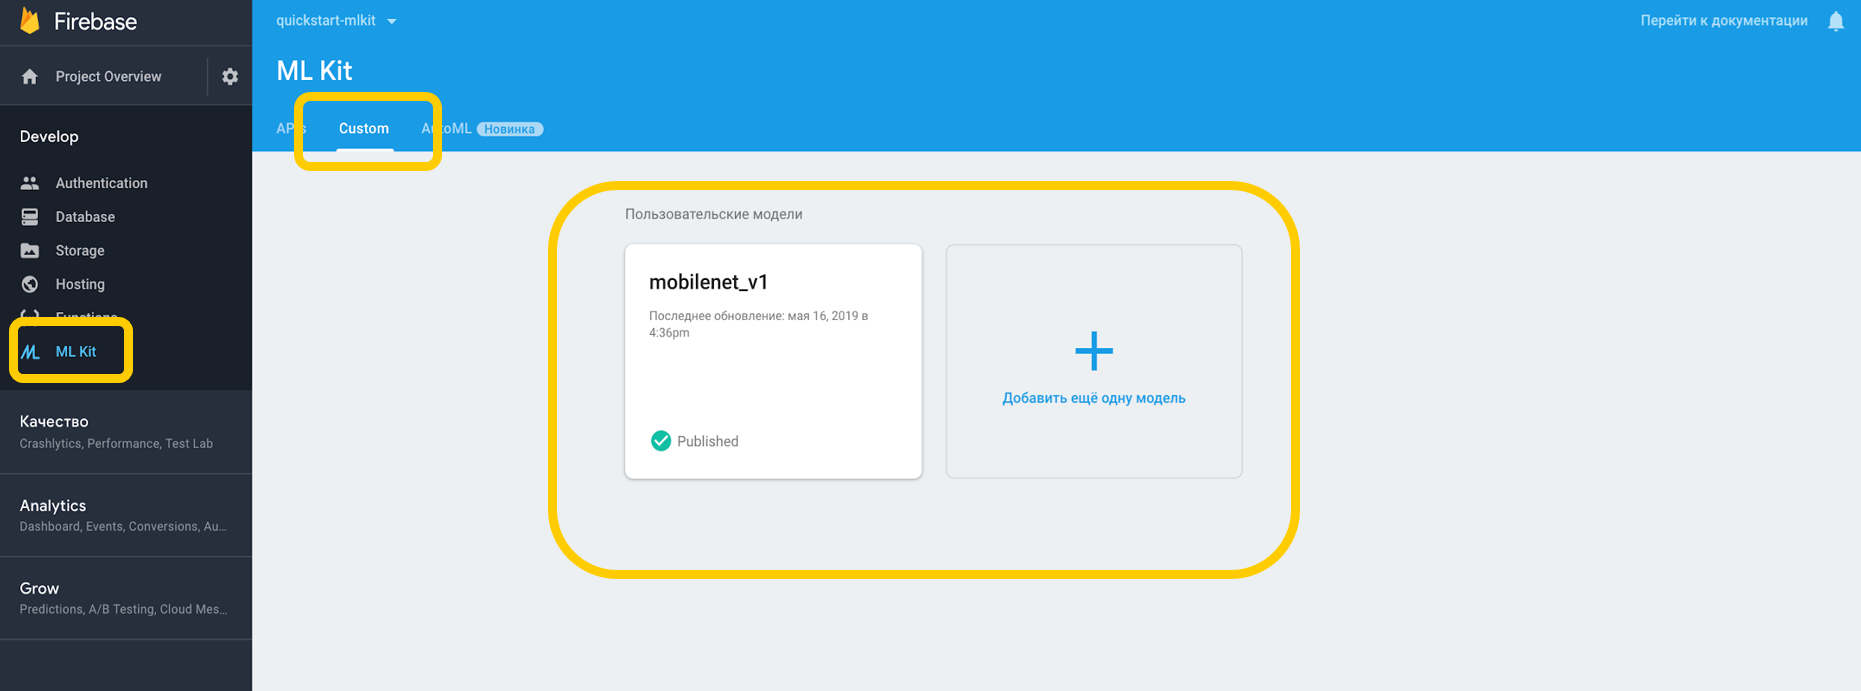
If we work through the cloud, you need to go to the Firebase Console, to the ML Kit tab, and to tap custom, where we can load our model into TensorFlow Lite, because ML Kit works with models with this resolution. If we use it on a device, we can simply put the model in any part of the project as an asset.
We point out the dependence on the interpreter, which can work with custom models, and do not forget about the permission to work with the Internet.
<uses-permission android:name="android.permission.INTERNET" /> dependencies { // ... implementation 'com.google.firebase:firebase-ml-model-interpreter:19.0.0' } For those models that are on the device, you must indicate in Gradle that the model should not be compressed, because it can be distorted.
android { // ... aaptOptions { noCompress "tflite" // Your model's file extension: "tflite" } } When we have configured everything in our environment, we must set special conditions, which include, for example, the use of Wi-Fi, also with Android N require charging and require device idle are available - these conditions indicate that the phone is charging or is in standby mode.
var conditionsBuilder: FirebaseModelDownloadConditions.Builder = FirebaseModelDownloadConditions.Builder().requireWifi() if (Build.VERSION.SDK_INT >= Build.VERSION_CODES.N) { // Enable advanced conditions on Android Nougat and newer. conditionsBuilder = conditionsBuilder .requireCharging() .requireDeviceIdle() } val conditions: FirebaseModelDownloadConditions = conditionsBuilder.build() When we create a remote model, we set the initialization and update conditions, as well as the flag whether our model should be updated. The model name should match the one we specified in the Firebase console. When we created the remote model, we must register it in the Firebase Model Manager.
val cloudSource: FirebaseRemoteModel = FirebaseRemoteModel.Builder("my_cloud_model") .enableModelUpdates(true) .setInitialDownloadConditions(conditions) .setUpdatesDownloadConditions(conditions) .build() FirebaseModelManager.getInstance().registerRemoteModel(cloudSource) We do the same steps for the local model, specify its name, the path to the model, and register it in the Firebase Model Manager.
val localSource: FirebaseLocalModel = FirebaseLocalModel.Builder("my_local_model") .setAssetFilePath("my_model.tflite") .build() FirebaseModelManager.getInstance().registerLocalModel(localSource) After that, you need to create such options where we specify the names of our models, install the remote model, install the local model and create an interpreter with these options. We can specify either a remote model, or only a local one, and the interpreter will himself understand which one to work with.
val options: FirebaseModelOptions = FirebaseModelOptions.Builder() .setRemoteModelName("my_cloud_model") .setLocalModelName("my_local_model") .build() val interpreter = FirebaseModelInterpreter.getInstance(options) ML Kit does not know anything about the format of input and output data of custom models, so you need to specify them.
Input data is a multidimensional array, where 1 is the number of images, 224x224 is the resolution, and 3 is a three-channel RGB image. Well, the data type is bytes.
val input = intArrayOf(1, 224, 224, 3) //one 224x224 three-channel (RGB) image val output = intArrayOf(1, 1000) val inputOutputOptions = FirebaseModelInputOutputOptions.Builder() .setInputFormat(0, FirebaseModelDataType.BYTE, input) .setOutputFormat(0, FirebaseModelDataType.BYTE, output) .build() The output values are 1000 classifiers. We set the format of the input and output values in bytes with the specified multidimensional arrays. In addition to bytes, float, long, int are also available.
Now we set the input values. We take Bitmap, compress it to 224 by 224, convert it to ByteBuffer and create input values using FirebaseModelInput using a special builder.
val bitmap = Bitmap.createScaledBitmap(yourInputImage, 224, 224, true) val imgData = convertBitmapToByteBuffer(bitmap) val inputs: FirebaseModelInputs = FirebaseModelInputs.Builder() .add(imageData) .build() And now, when there is an interpreter, the format of the input and output values and the input values themselves, we can execute the request using the run method. We transfer all of the above as parameters, and as a result we get FirebaseModelOutput, which inside contains a generic of the type we specified. In this case, it was a Byte array, after which we can start processing. This is exactly the thousand classifiers that we requested, and we display, for example, the top 3 most suitable.
interpreter.run(inputs, inputOutputOptions) .addOnSuccessListener { result: FirebaseModelOutputs -> val labelProbArray = result.getOutput<Array<ByteArray>>(0) //handle labelProbArray } .addOnFailureListener( object : OnFailureListener { override fun onFailure(e: Exception) { // Task failed with an exception } }) One day implementation
Everything is quite easy to implement, and recognition of objects with built-in tools can be realized in just one day. The tool is available on iOS and Android, in addition, you can use the same TensorFlow model for both platforms.
In addition, there are tons of methods available out of the box that can cover many cases. Most APIs are available on the device, that is, recognition will work even without the Internet.
And most importantly - support for custom models that can be used as you like for any task.
useful links
ML Kit Documentation
Github ML Kit Demo Project
Machine Learning for mobile with Firebase (Google I / O'19)
Machine Learning SDK for mobile developers (Google I / O'18)
Creating a credit card scanner using Firebase ML Kit (Medium.com)
')
Source: https://habr.com/ru/post/461867/
All Articles