Airtest IDE - a new way in testing automation of mobile games?
Today I want to tell you about a fairly new open-source tool for automated testing called Airtest . In the future I will make a few more articles with a detailed story about the individual elements of this toolkit and how to work with them, and now I have the goal of introducing you to it and giving a general idea of it.
AirTest IDE was developed by NetEase and is designed for "hard-to-automate" applications, such as, for example, games. Actually they are the main focus of the developers, although this does not stop using AirTest for any other applications.
AirTest IDE runs on Windows, MacOS X and Linux and contains 2 frameworks: AirTest and Poco. This development was presented by Xin Liu at the Android Game Developer Summit 2018 . Python 2.7 and Python 3.3+ are used to write tests. Such important things as support for running tests immediately on a large number of devices, open source code and free application, as well as easy written tests - these are the advantages that are highlighted by developers. The application can be used on both Windows and MacOS and allows you to automate applications from the following OS: Windows, iOS, Android.
The AirTest Project on GitHub contains 4 projects: Airtest , Poco , iOS-Tangent , multi-device-runner .
It is also worth mentioning that NetEase provides its physical device farm for automated testing called AirLab .
Briefly about frameworks.
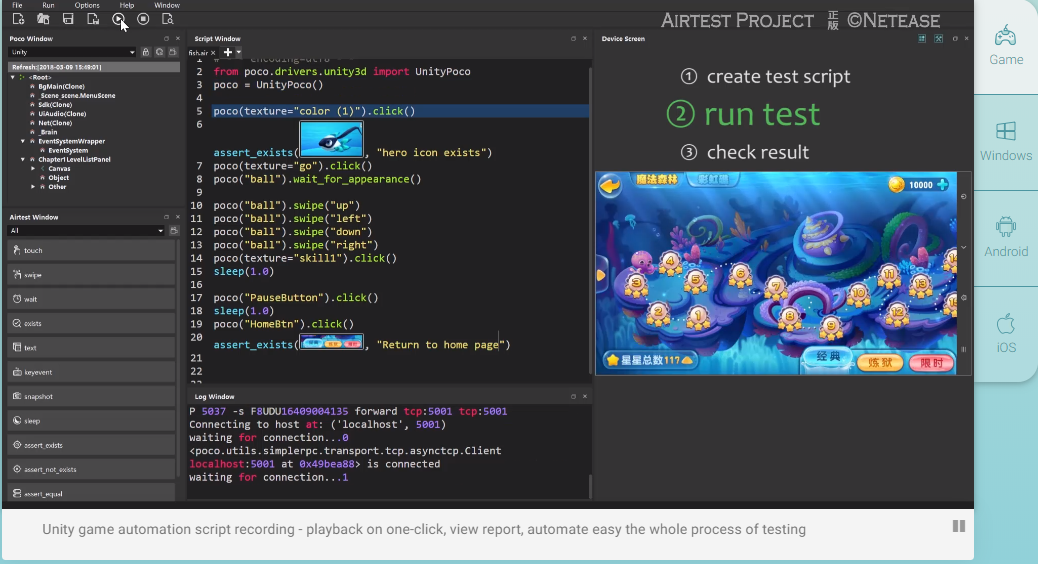
Airtest is an image recognition cross-platform framework for mobile games and applications based on image thersholding . AirTest IDE allows you to interact with the application using the following commands:
touch, wait, swipe, exists, text, keyevent, snapshot, sleep, assert_exists, assert_not_exists, assert_equal, assert_not_equal. I will talk about the features and parameters of the commands in a separate article devoted to a more detailed study of AirTest and Poco frames. Now it’s worth mentioning that the keyevent command is responsible for “pressing the physical buttons” of the device, such as Home, Power, Menu, Back. When using most commands, the user is prompted to highlight a part of the screen of the working device, a screenshot of which will be used for the corresponding command (touch, swipe, assert, etc.).
The advantages of Airtest that I can highlight after work:
- Fast and clear code writing. Everything is done, in practice, in automatic mode, you only need to choose the necessary parameters, adjust the timings and be careful with the choice of image.
- Accurate definition of the picture that is used in the code on the active working device. Plus, the report indicates the percentage of coincidence (comparison) of the image used in the code and the image from the screen of the working device.
- Speaking of reports. After each launch, you can create a report using the keyboard shortcut Ctrl \ Cmd + L. A convenient report provides information such as: types of assert, their results, and also each test step is highlighted in a separate sub-section with information about where AirTest clicked, where it expected a picture, percentage of matching pictures, etc.
- Once you have written the code, you can use it on any device.
- Multithreading: connect multiple test devices and run them in parallel.
Cons of Airtest, which I can highlight after work:
- If in the process there are elements that visually look the same, for example sliders, buttons, etc., then with a high probability AirTest will not understand which control you want to use. This will be indicated in the corresponding error. But this minus is easily dispensed with the help of the second framework (Poco), which will be discussed below.
- Comparison of images (from the code and the actual ones on the screen) occurs in black and white. It is worth considering if you are important, for example, the visual appearance of the character (his color, different clothes, etc.). If the characters are visually different, but they are displayed on the screen in the same way (same poses, etc.), then the check will most likely succeed. The image recognition options have an “rgb” checkmark that you can use, but it doesn't work very well if you have a small image.
- You cannot “freeze” the screen while using the application to accurately take the screenshots you need. From time to time you need to "catch" the frame you need.
- Because application in open beta, you may encounter various annoying errors or inaccuracies, for example, such as the inability to resize a window with a built-in application on Windows. Authors are now updating the AirTest IDE once every few months, and I hope that such oversights will be fixed soon.
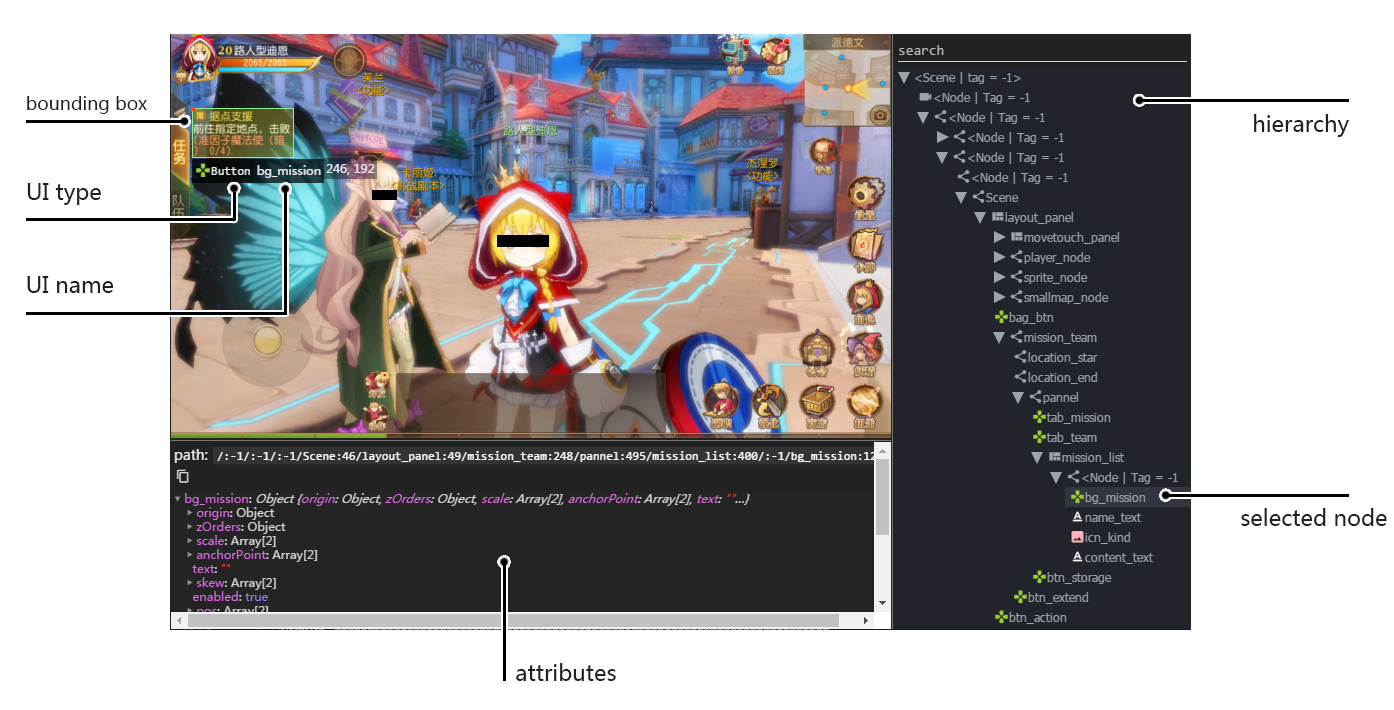
Poco is a universal framework for automating the user interface (UI), which provides powerful APIs independent of the (game) engine. Those, in turn, retrieve the hierarchy of the UI elements at runtime. Thanks to this, the user can "reach" the entire element hierarchy on the current page in a few clicks to the element he needs, etc. Also, this framework allows you to “freeze” the current screen for writing code based on the hierarchy of elements of the current window. Poco is designed to help AirTest understand what kind of UI element the tests are talking about, but no one bothers you writing all the tests using only this framework.
All tests are written in Python. Command implementations can be found in the corresponding APIs: airtest.core.api module , airtest.core.android package , airtest.core.ios package , airtest.core.win package
Poco advantages that I can highlight after work:
- There is support for a number of important game engines, including Unity3D, cocos2dx-js, cocos2dx-lua, NetEase internal engines, as well as support for native Android / iOS applications. If you want to use an engine that is not on the list of "supported" ones, then you can write your own by following the appropriate instructions . In the official documentation there is a mention of the Unreal Engine, but so far, everything is limited to the phrase "Coming soon".
- The hierarchy of UI elements on the screen returns in real time.
- Quick start and run on tests.
- As in AirTest, I wrote the code once - use it everywhere. Python 2.7 and 3.3+ support
- It is possible to connect any external libraries to your project
- Judging by the documentation, there is support for GPS, accelerometer and gyro sensors, as well as support for portrait and landscape display modes.
Poco cons that I can highlight after work:
- During the work on Windows 7 I did not find fundamental problems. which would interfere with full-fledged work, but they, at the moment, are when working with Windows 10. The main thing is incorrect movement of objects (swipe command) in some cases. For example, I indicate the object to be moved and the coordinates of the second object, which is the final point. In these rare cases, Poco misses the final location, but the reports show the correct displacement data (vector) and the step is considered successful.
- When you select some elements with large layouts (layout), the selection may overlap the Poco Assistant window and you will not be able to select other elements until the selection is removed from the current one. To remove the selection, you can use the keyboard shortcut Alt + F4
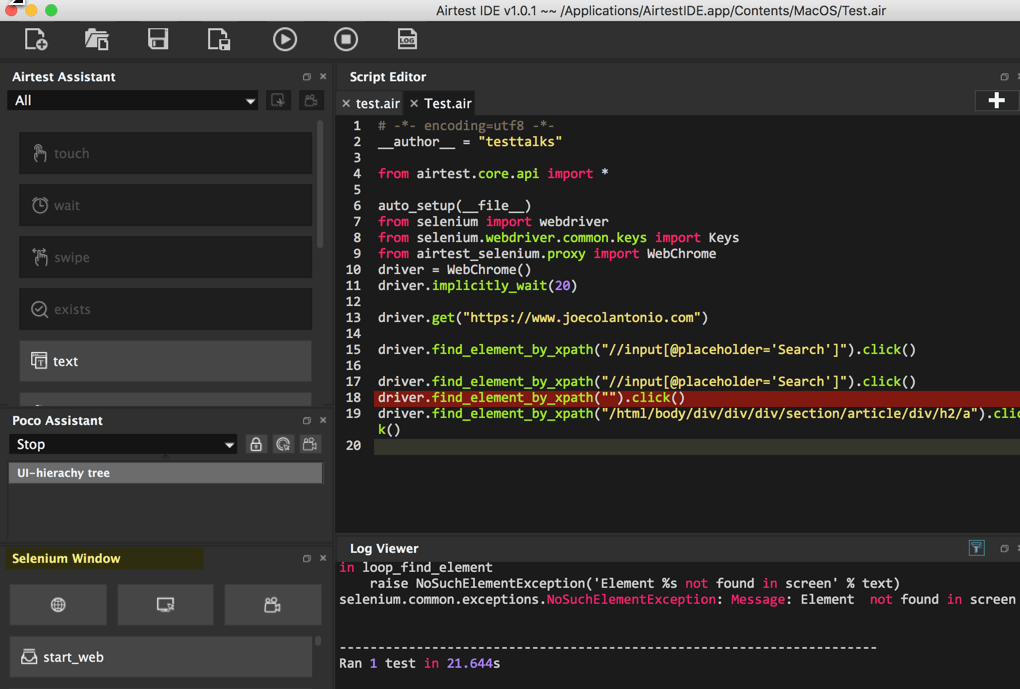
To complete the picture, it is worth mentioning that Airtest IDE has its own Selenium plug-in , with which you can automate your web project, but using only a Chrome browser. The rest, at the moment, are not supported. Personally, I have not worked with him yet, so I can’t say about his work, but it was impossible to miss him in this brief description.
As a result, I would say that AirTest IDE is a very promising development that is designed to automate the UI in games, but, at the moment, is not suitable for testing the game process as such. If you have a lot of UI elements and / or many devices to check and you do not want to spend a lot of man-hours, then this IDE may well become your lifesaver. To start writing simple tests, you do not need deep knowledge in automation and programming, just have a basic understanding of working with Python. Of course, this way you will not go far and you will have to learn this programming language, but to start and understand how realistically this program suits you, it’s enough for your eyes. The only thing that is frustrating now is various annoying errors associated with, for example, the inability to resize a window with a working device (Windows application) after embedding it, overlapping a large selected object of the main program interface, etc., but it’s quite possible come to terms, especially considering the fact that the application is in Beta stage.
')
Source: https://habr.com/ru/post/461773/
All Articles