Split Controller without these your storyboards
Previously, they made a separate xib for iPad support. To unify the layout, in 2014 Apple introduced Auto Layout and Size Classes, and for adaptive navigation UISplitViewController .
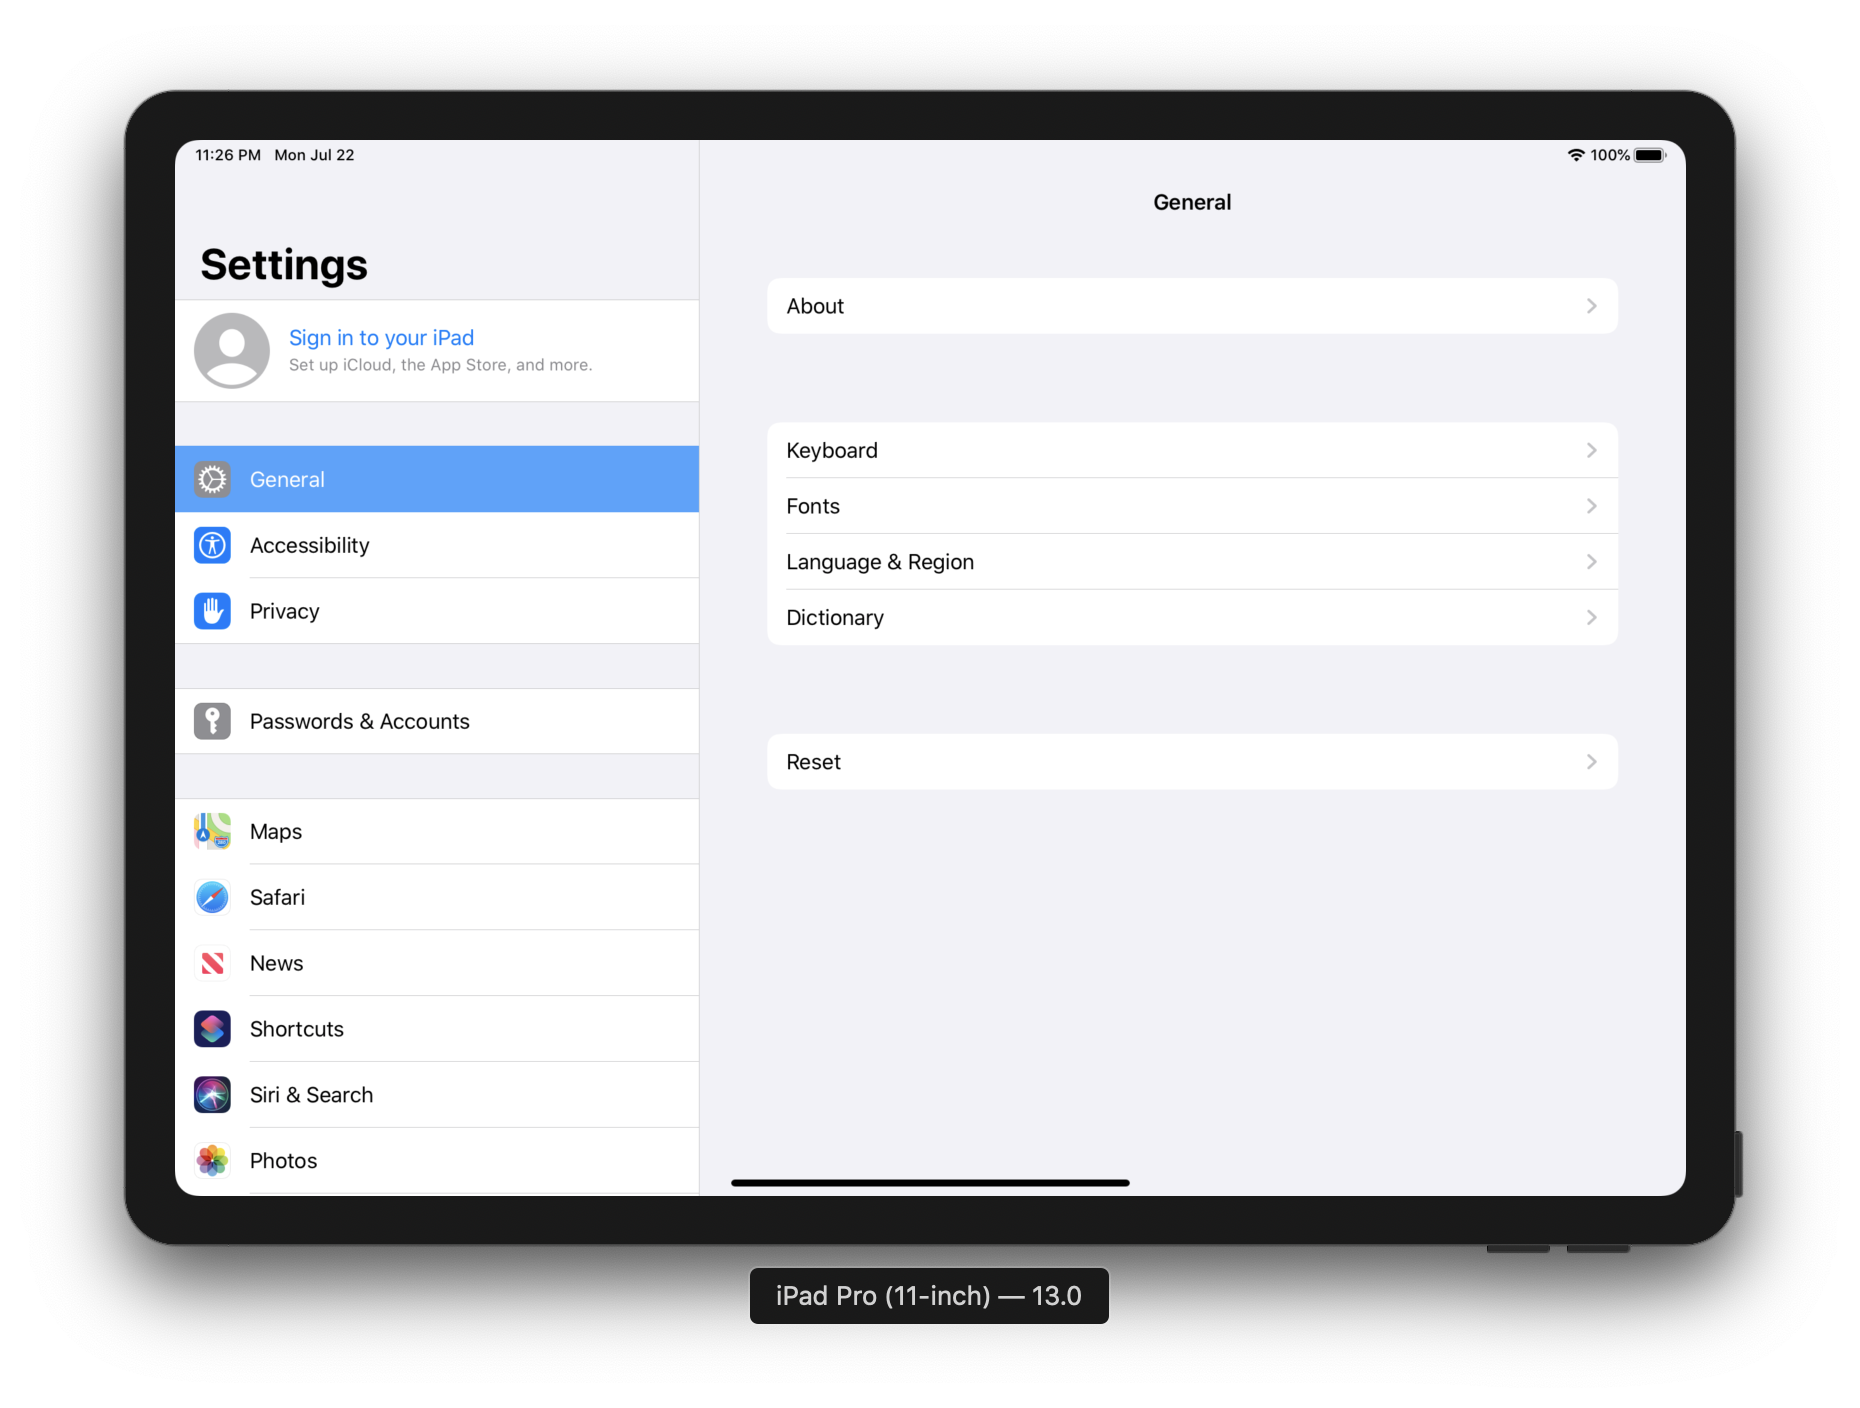
A split controller is a container that places two controllers side by side. On the left there will be a navigation controller (not about the Navigation Controller), on the right corresponding to the choice in the navigation. In short, as in Settings.
Let's UISplitViewController how to configure the UISplitViewController and its behavior on the screens.
Defining controllers
Denote the left (navigation) and right controllers. For both, set the header:
class MasterController: UITableViewController { override func viewDidLoad() { super.viewDidLoad() self.navigationItem.title = "Master" self.navigationController?.navigationBar.prefersLargeTitles = true } } class DetailController: UIViewController { override func viewDidLoad() { super.viewDidLoad() self.navigationItem.title = "Detail" self.navigationController?.navigationBar.prefersLargeTitles = true } } A split controller is a container for two controllers. As I wrote before the kat, on the left is the navigation-main controller, on the right corresponding to the choice in the navigation, or detailed (Detail Controller). Remember Master and Detail, words will be found in documentation and protocols.
Add Split
Let's go to AppDelegate, in the didFinishLaunchingWithOptions method create a new window, initialize the Split controller and two others, set it to Split:
let masterController = MasterController() let masterNavigationController = UINavigationController(rootViewController: masterController) let detailController = DetailController() let detailNavigationController = UINavigationController(rootViewController: detailController) let splitViewController = UISplitViewController() splitViewController.viewControllers = [masterNavigationController, detailNavigationController] self.window = UIWindow(frame: UIScreen.main.bounds) self.window!.rootViewController = splitViewController self.window!.makeKeyAndVisible() Run the simulator. Portrait and landscape orientations respectively:

In the port orientation, the Master controller is not visible. Swipe to the left to make it appear. It is configured using modes, we will analyze them further.
Navigation
Add cells to the master controller. Let me remind you that a Master controller is a table wrapped in a UINavigationController.
class MasterController: UITableViewController { override func viewDidLoad() { self.tableView = UITableView(frame: .zero, style: .insetGrouped) super.viewDidLoad() self.tableView.register(UITableViewCell.self, forCellReuseIdentifier: "id") self.navigationItem.title = "Master" self.navigationController?.navigationBar.prefersLargeTitles = true } override func numberOfSections(in tableView: UITableView) -> Int { return 2 } override func tableView(_ tableView: UITableView, numberOfRowsInSection section: Int) -> Int { return 4 } override func tableView(_ tableView: UITableView, cellForRowAt indexPath: IndexPath) -> UITableViewCell { let cell = tableView.dequeueReusableCell(withIdentifier: "id")! cell.textLabel?.text = "\(indexPath)" return cell } } And if you don’t know how, then here .
In iOS 13, a new .insetGrouped table style appeared , I installed it. The style is available starting with Xcode 11.
Run the project:
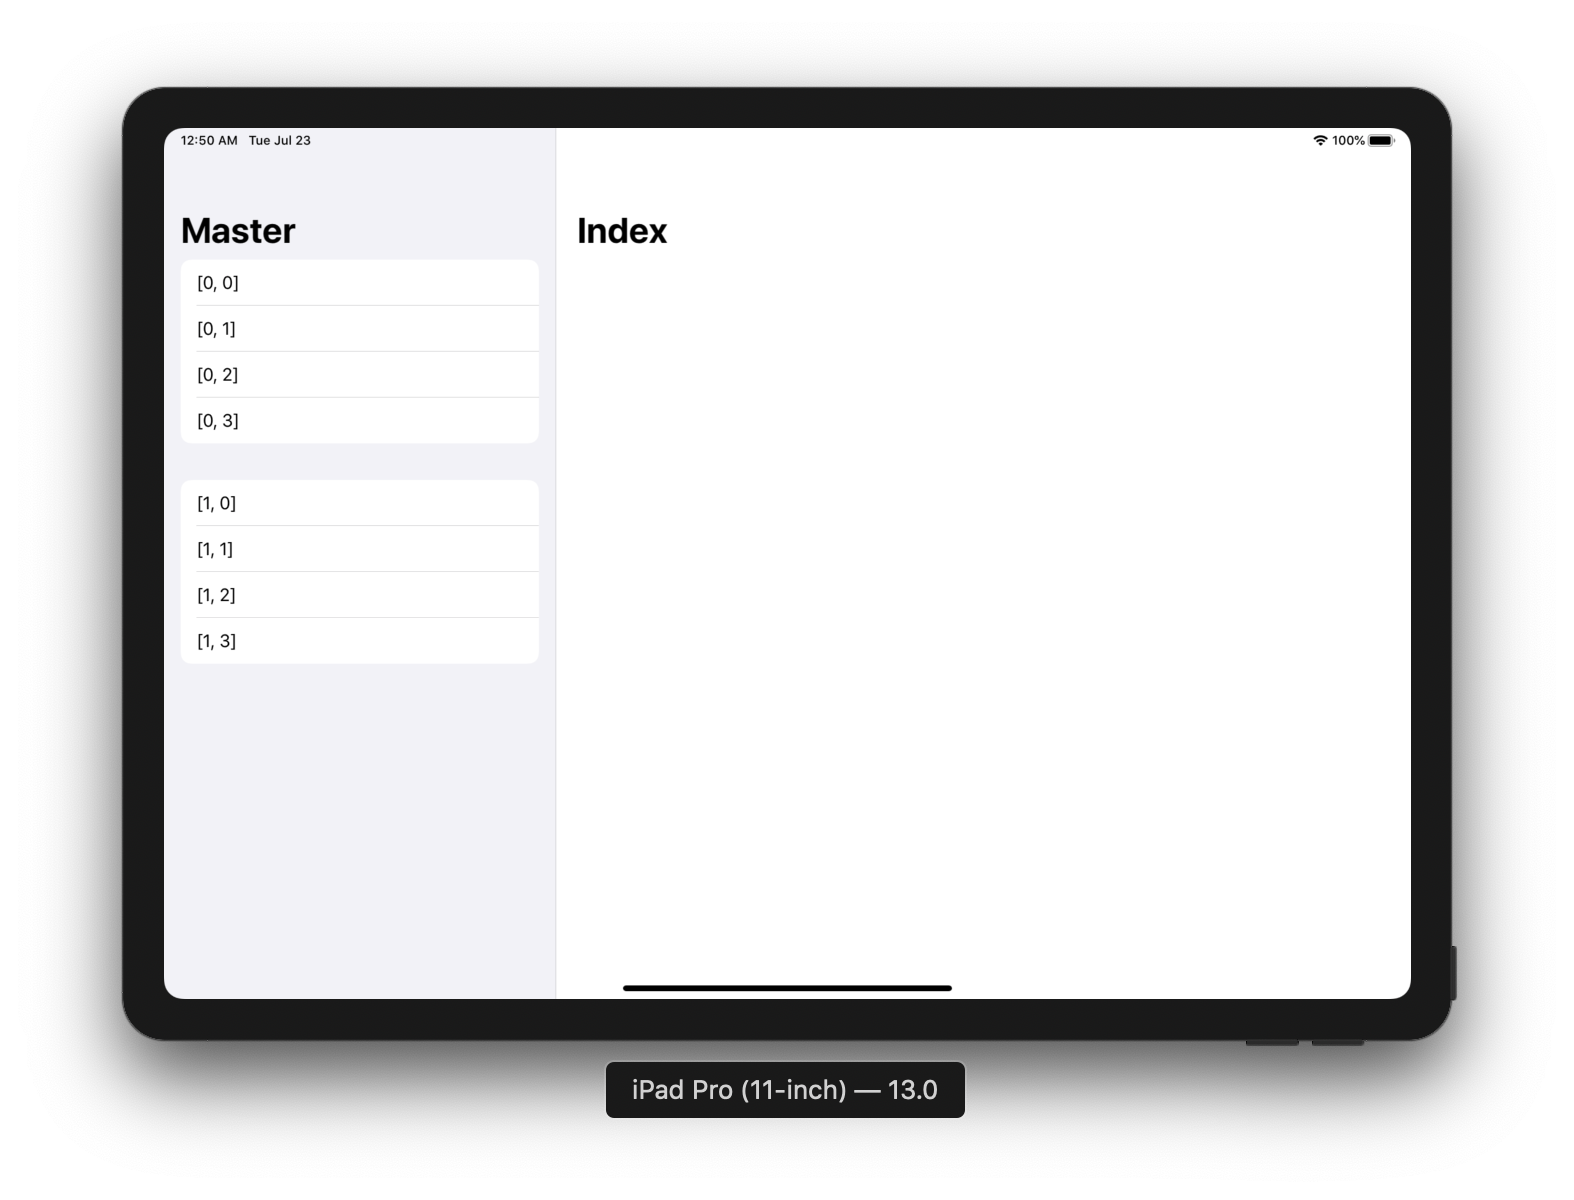
By clicking on the cell, we will show a detailed controller. How the "detailed controllers" cut the rumor , I hope in the comments tell me the translation better. The code looks like this:
override func tableView(_ tableView: UITableView, didSelectRowAt indexPath: IndexPath) { let controller = DetailController() controller.navigationTitle = "\(indexPath)" self.showDetailViewController(UINavigationController(rootViewController: controller), sender: nil) } Remember about naming master / detailed controllers? Here is an example of using Detail in the showDetailViewController method.
Attentive will notice that the controller does not have navigationTitle . Update the class of the Detail controller:
class DetailController: UIViewController { var navigationTitle: String = "Detail" override func viewDidLoad() { super.viewDidLoad() self.navigationItem.title = navigationTitle self.view.backgroundColor = .white } } Run the project and click on the cell:

IPhones
The navigation is adaptive, which means that everything is ready. Almost. Select an iPhone and run:
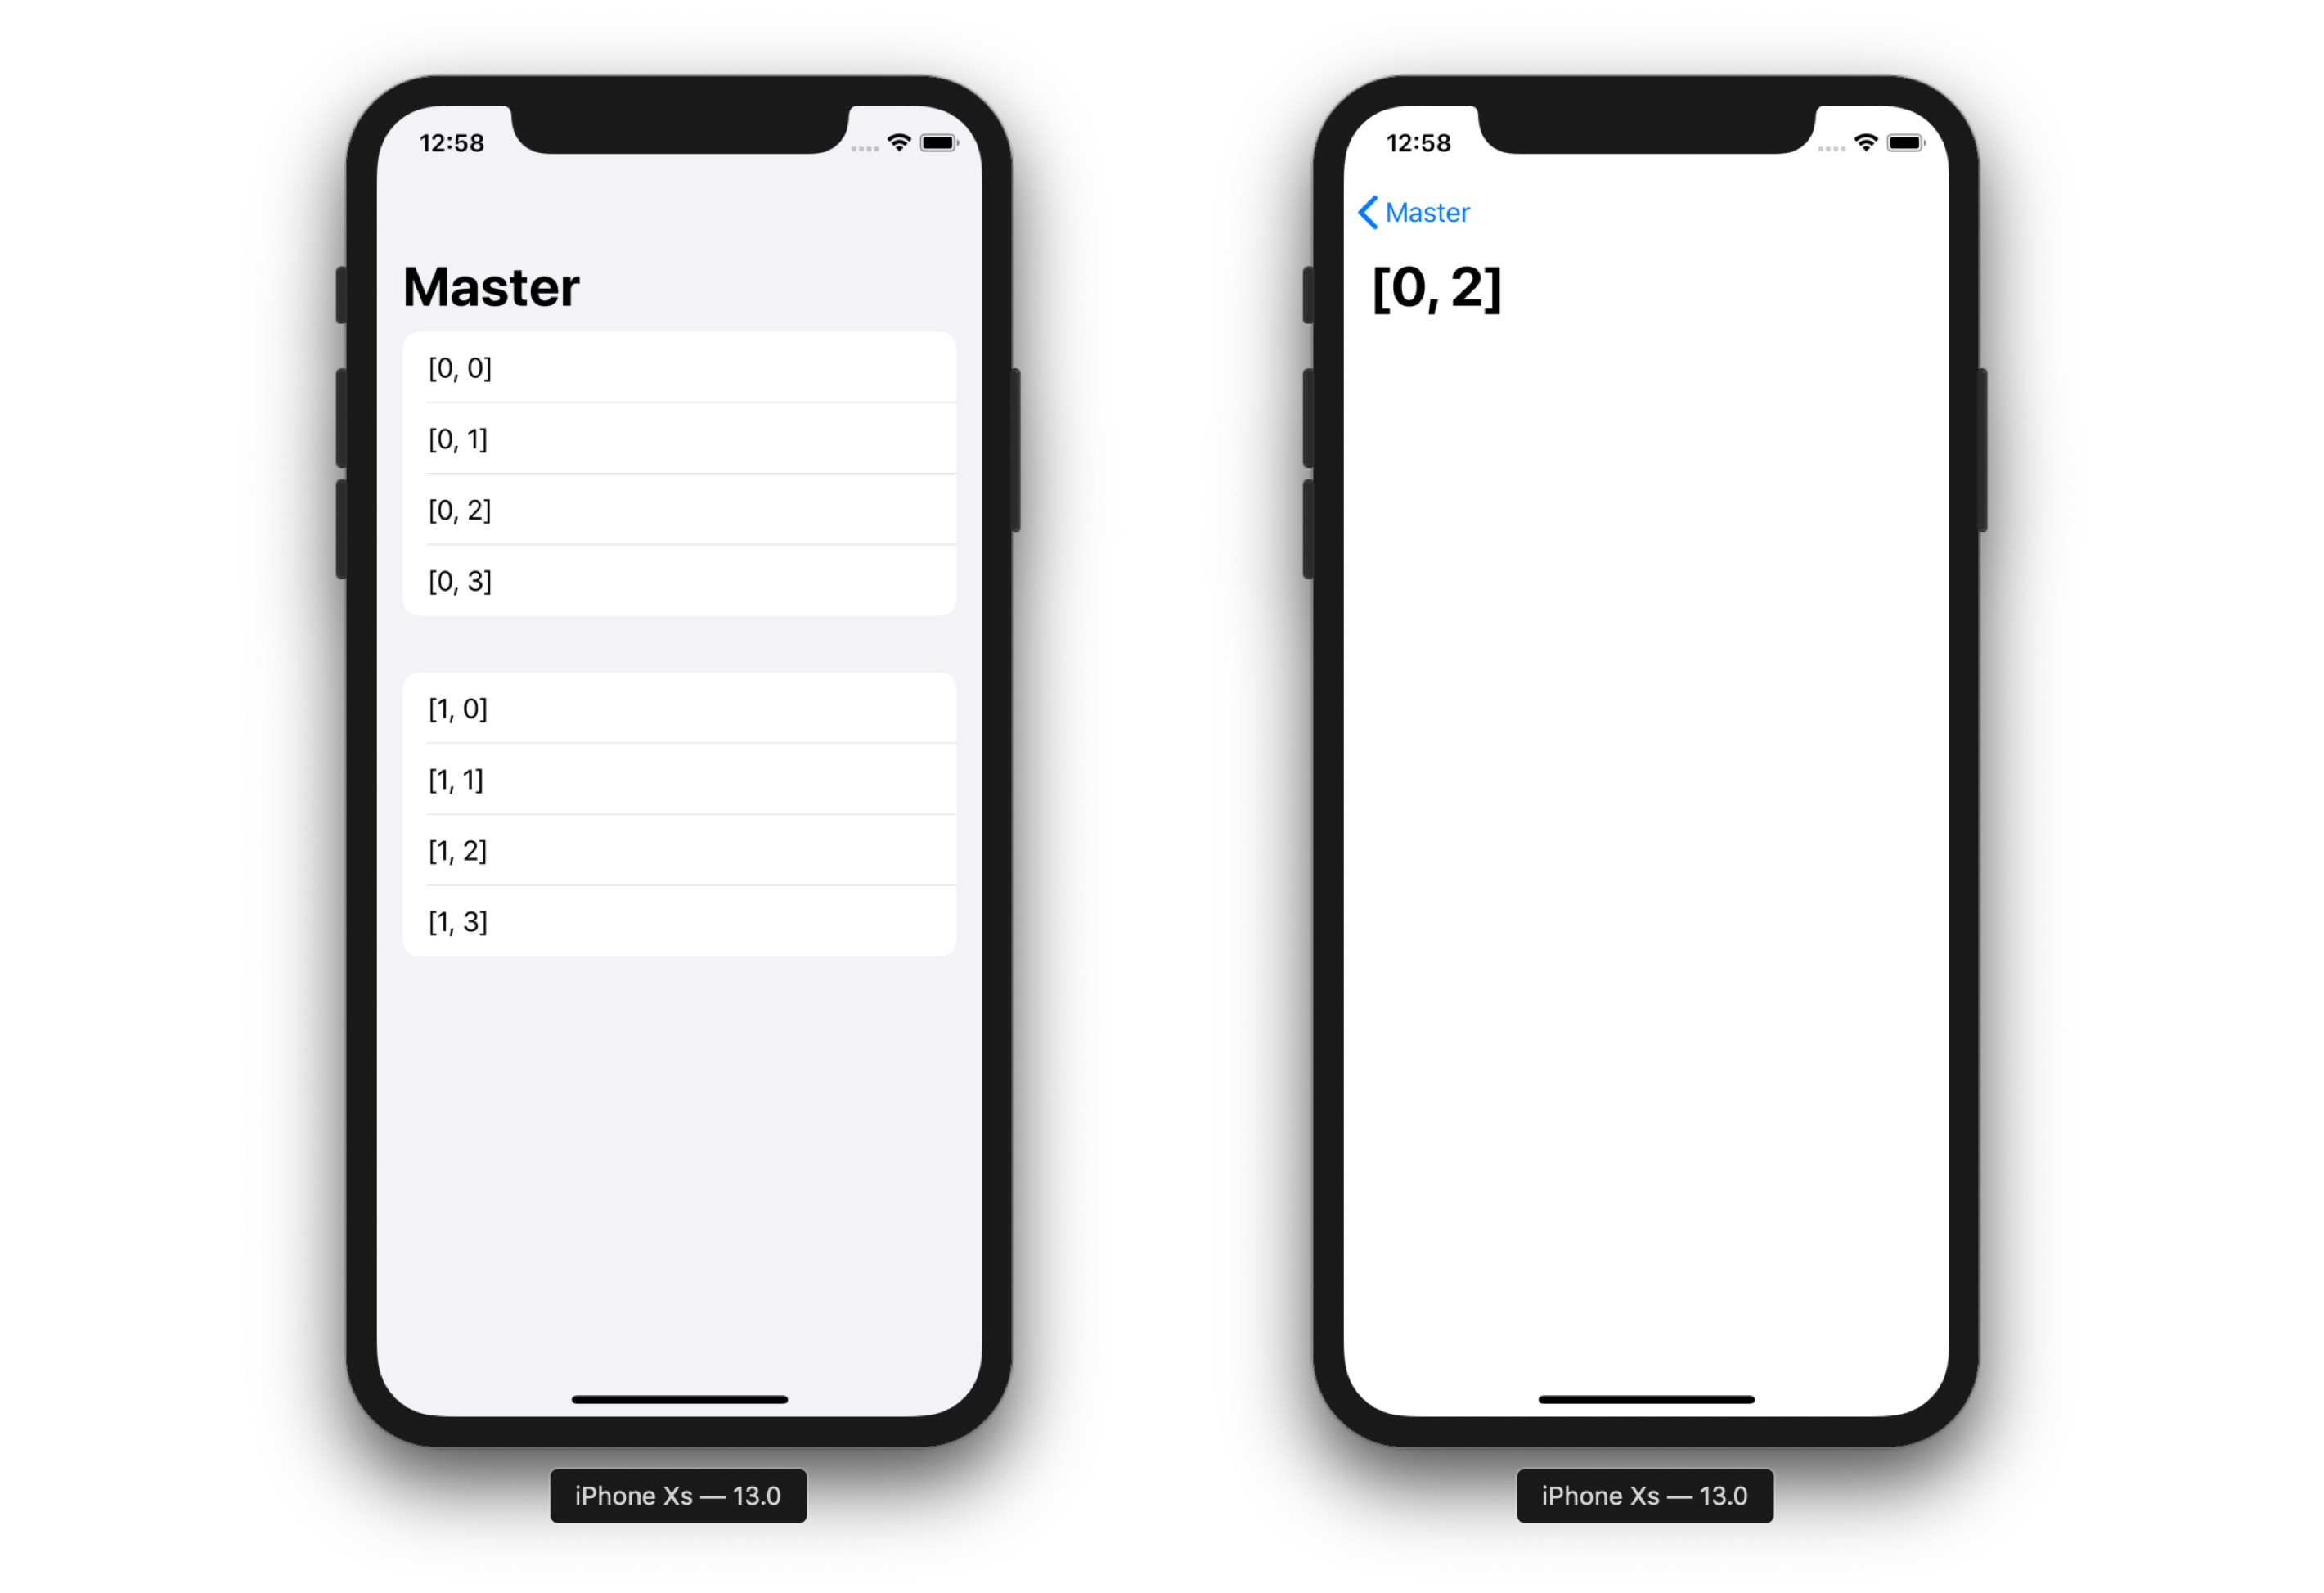
Works like a regular Navigation controller. it universality adaptability - depending on the free space, the Split controller places the main and detailed controllers.
Not the Master controller, but Detail was the first to open on the iPhone. The transition from displaying two controllers to one similar situation is configured by the delegate UISplitViewControllerDelegate . The return value determines whether to show the Master controller, or Detail:
extension AppDelegate: UISplitViewControllerDelegate { func splitViewController(_ splitViewController: UISplitViewController, collapseSecondary secondaryViewController: UIViewController, onto primaryViewController: UIViewController) -> Bool { return true } } This method does not always have to return true. Example: when changing orientation to a compact and already open Detail controller, you may need to leave Detail on the screen. Plan this behavior.

Landscape for iPhone
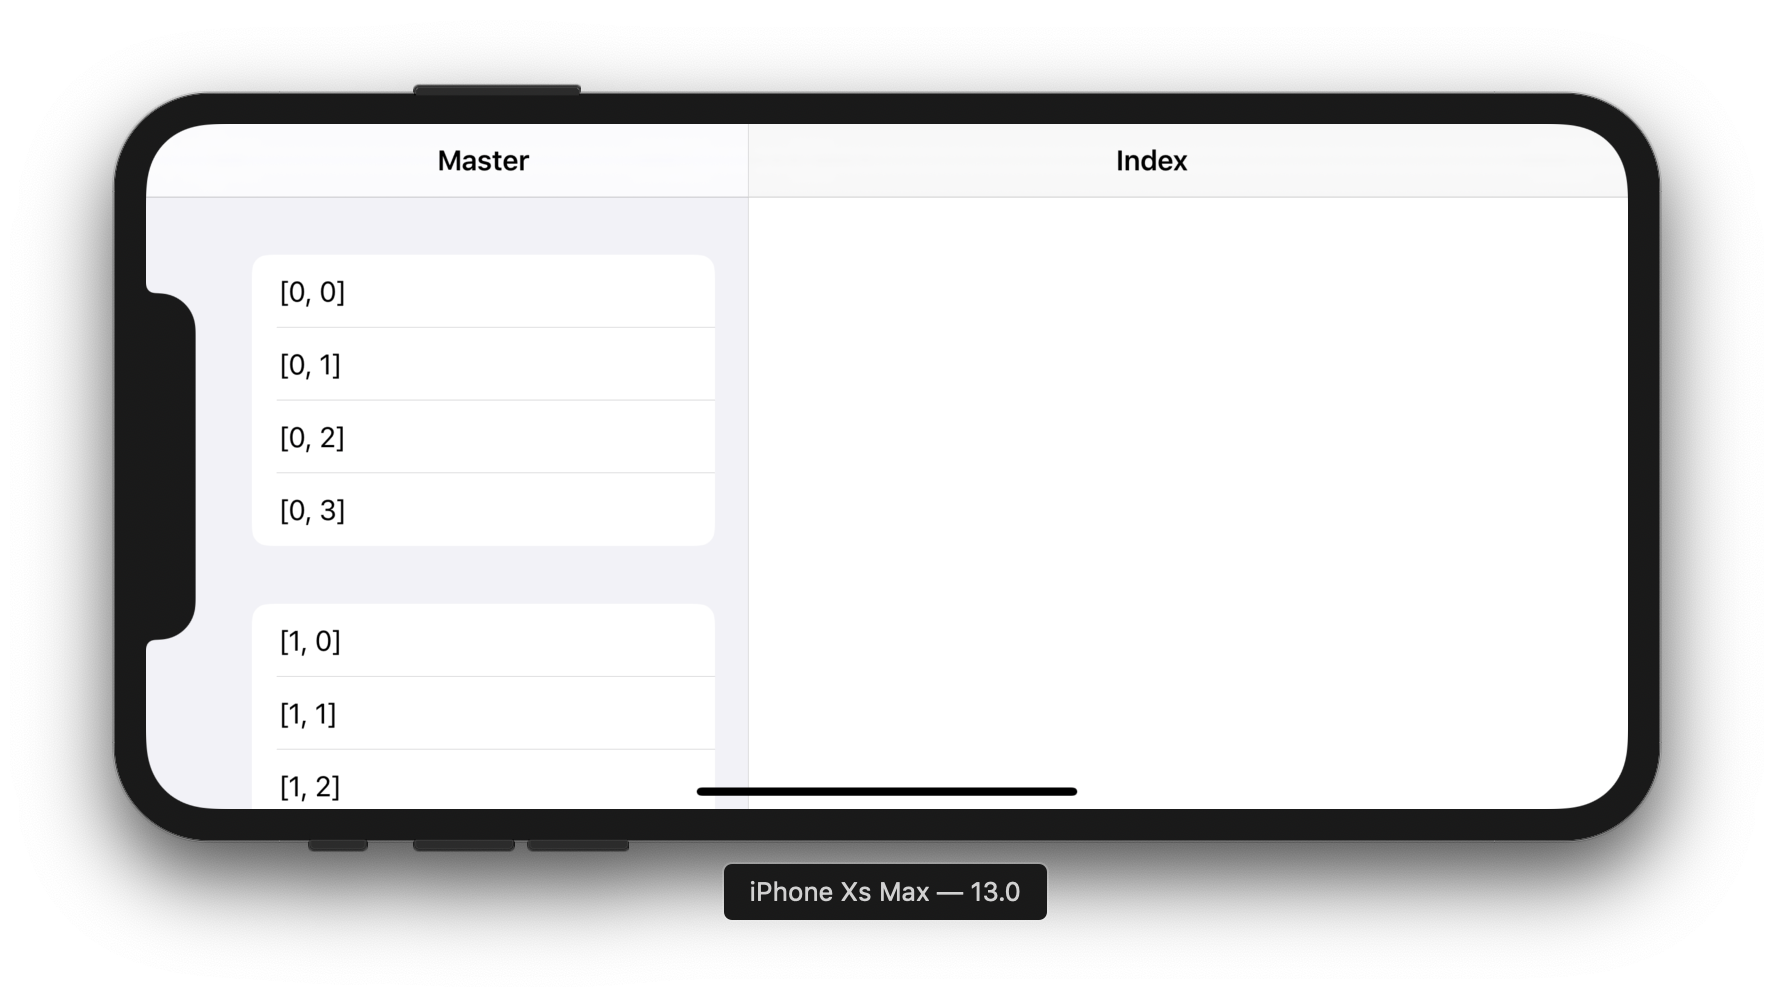
Landscape orientation for iPhones works without Split by default. This is corrected by the display mode for the Split controller:
splitViewController.preferredDisplayMode = UISplitViewController.DisplayMode.allVisible We set the preferred display mode, namely to show the Master-Detail pair whenever possible. The ability determines the API, it is impossible to configure.
In portrait orientation will remain the same. But in the landscape (only for Xs Max and 8+):
If the conditions for the Split controller change in the SDK, your project will implement them by default.
Dimensions
Can be customized. This is done by the aspect ratio:
splitViewController.preferredPrimaryColumnWidthFraction = 0.5 splitViewController.maximumPrimaryColumnWidth = 2000 Master and Detail will be the same size. Be sure to set maximumPrimaryColumnWidth . Optionally, you can set the minimum width. I won’t add a screenshot, and there are so many ipads for the tutorial)
Hiding Master
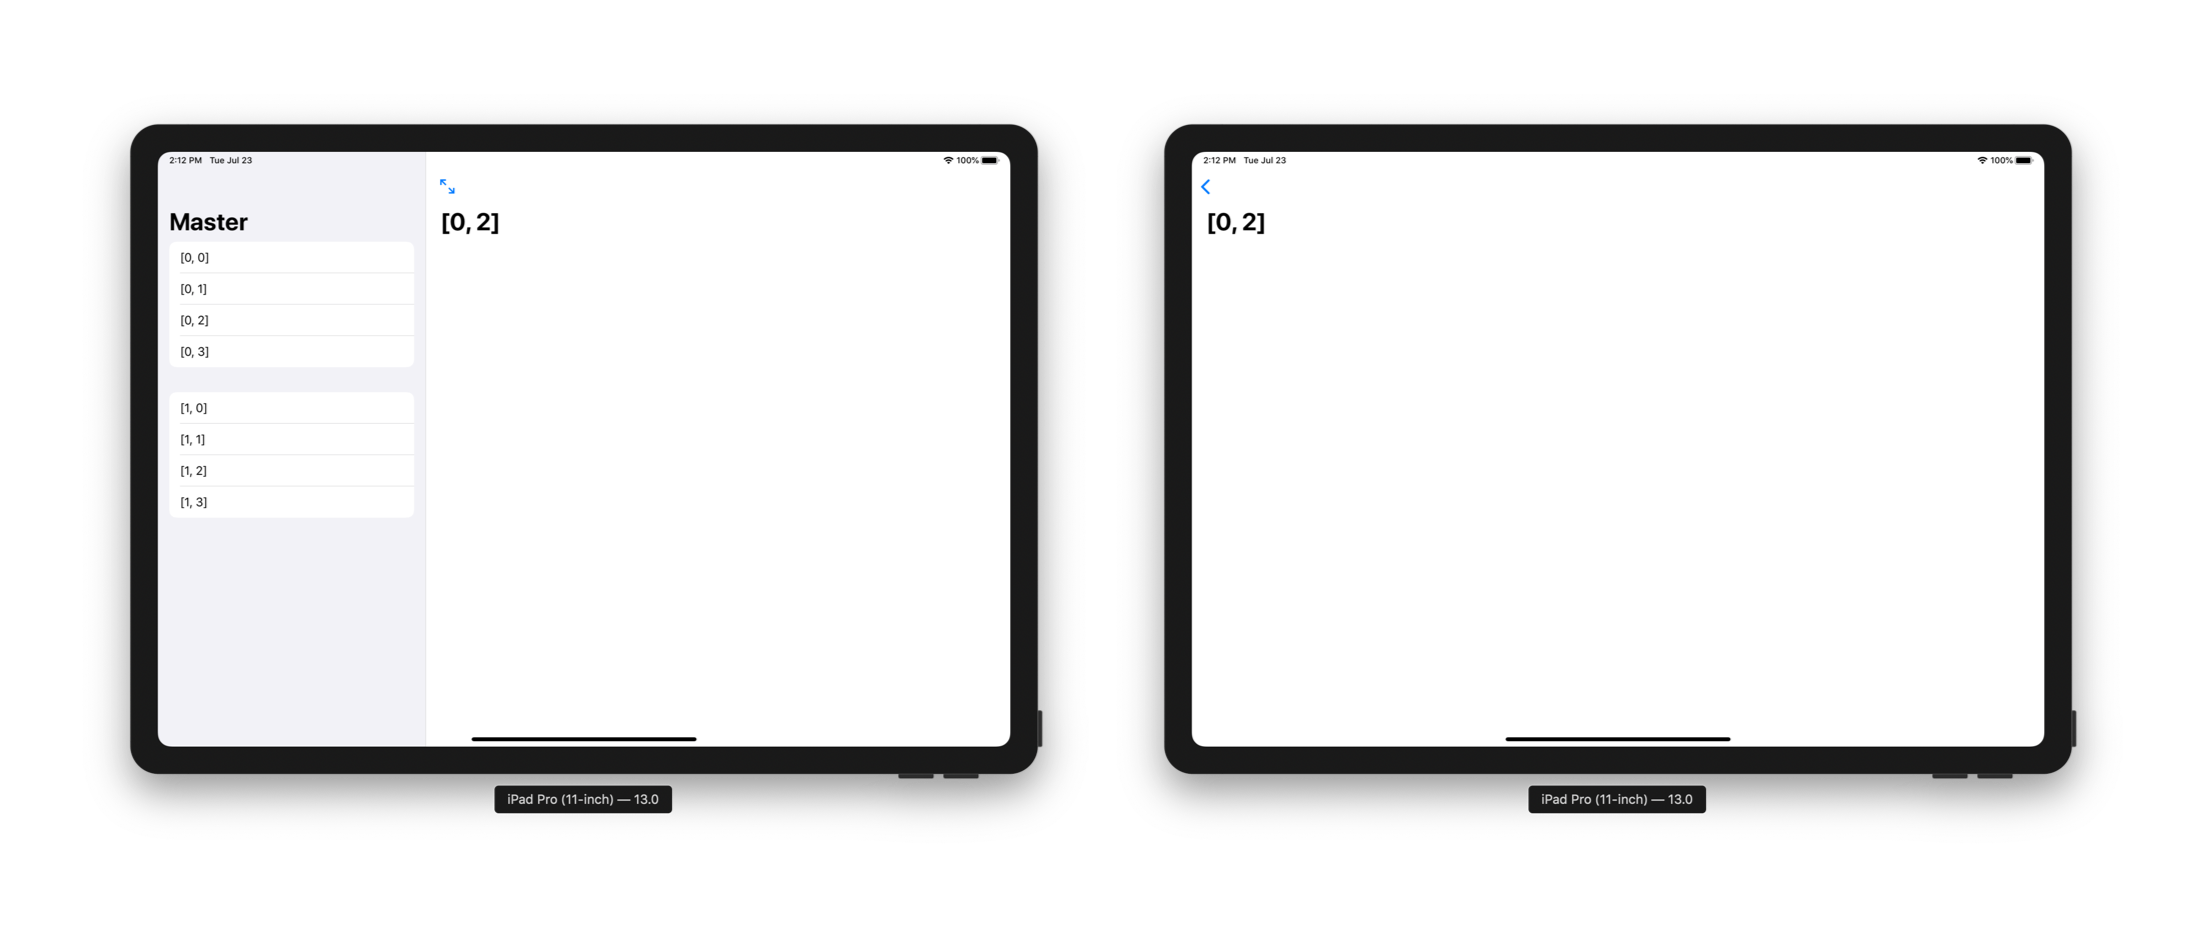
Add a button that opens Detail in full screen. Split controller must be in .allVisible mode. Paste the code for the Detail controller in viewDidLoad :
if let splitController = self.splitViewController{ if let navController = splitController.viewControllers.last as? UINavigationController { navController.topViewController?.navigationItem.leftBarButtonItem = splitController.displayModeButtonItem } } It’s difficult to describe the behavior, and the gif is the size of a Moscow budget. Therefore, the screenshot:
Or I have a video on Twitter .
Guidelines
AutoLayout places the elements, the Split controller determines the navigation. Apple strongly recommends using a static master controller . For the sake of experiment, I made a navigation controller on the left, by clicking on a cell I pushed controllers (instead of updating the Detail controller). It looks weird.
In general, restrict navigation to one side of a split view. Placing navigation in both panes of a split view makes it hard for people to stay oriented and discern the relationship between the two panes.
Highlight the active selection in the master controller. Although the contents of the Detail controller may vary, it should always match the selection on the Master. This will help people control the relationship between controllers. To control the controllers - a pun of some kind.
No need to use Split everywhere. But if your application has strong navigation, and the root controller is Tab or Navigation, Split is most likely useful. If you have a single-screen translator application, you do not need Split.
For seekers
Link to documentation , link to guidelines .
If you prefer watching the video, check out the tutorial:
')
Source: https://habr.com/ru/post/460965/
All Articles