The robot that will go for your smile. We make a cheap cart for studying ROS. Part 1, iron
Having started to study ROS (Robotic operation system), at first you are amazed how “everything is difficult”, on the amount of information about topics, nodes, actions, head spin. And, the first desire is to return to the management of the robot in the good old scripts. But no. Every adult man should collect something smaller for a man that would drive, blink, squeak. ROS was chosen as the platform, since it is still the next step in the development of robots in the world of soulless arduino. It is proposed to assemble a ROS “cart”, which will be not only cheap, but also functional: it will be able to travel along the line on the floor, with your cat, with your body :) The first steps will be:
The second thing that strikes when studying ROS is the cost of platforms on the market. The turtlebot burger set ( as one of the affordable ones ) costs $ 549 ($ 34,500). Everything else is even more expensive. Here you can argue that the lion's share of the price is lidar, a device for determining the position of the robot in space. Which itself stands under 15k p. However, all other components are also not cheap.
Let's calculate how much our “cart” will cost us:
')
Total: 8000 p.
The price is also high, but much cheaper than turtlebot. If desired, the typewriter can be printed on a 3d printer or take a piece of plywood. Then there will be only DC motors to take. The battery for raspberry can also be replaced with a cheaper analog, as long as it gives out 5V 3A.
We collect
The project was based on a previously existing project - www.rosbots.com/build_it , but with significant modifications. In addition, the basic project, judging by the information from the site, was abandoned, so you have to bring everything to mind.
The beginning of the assembly and fasteners of motors is similar to the above instructions:
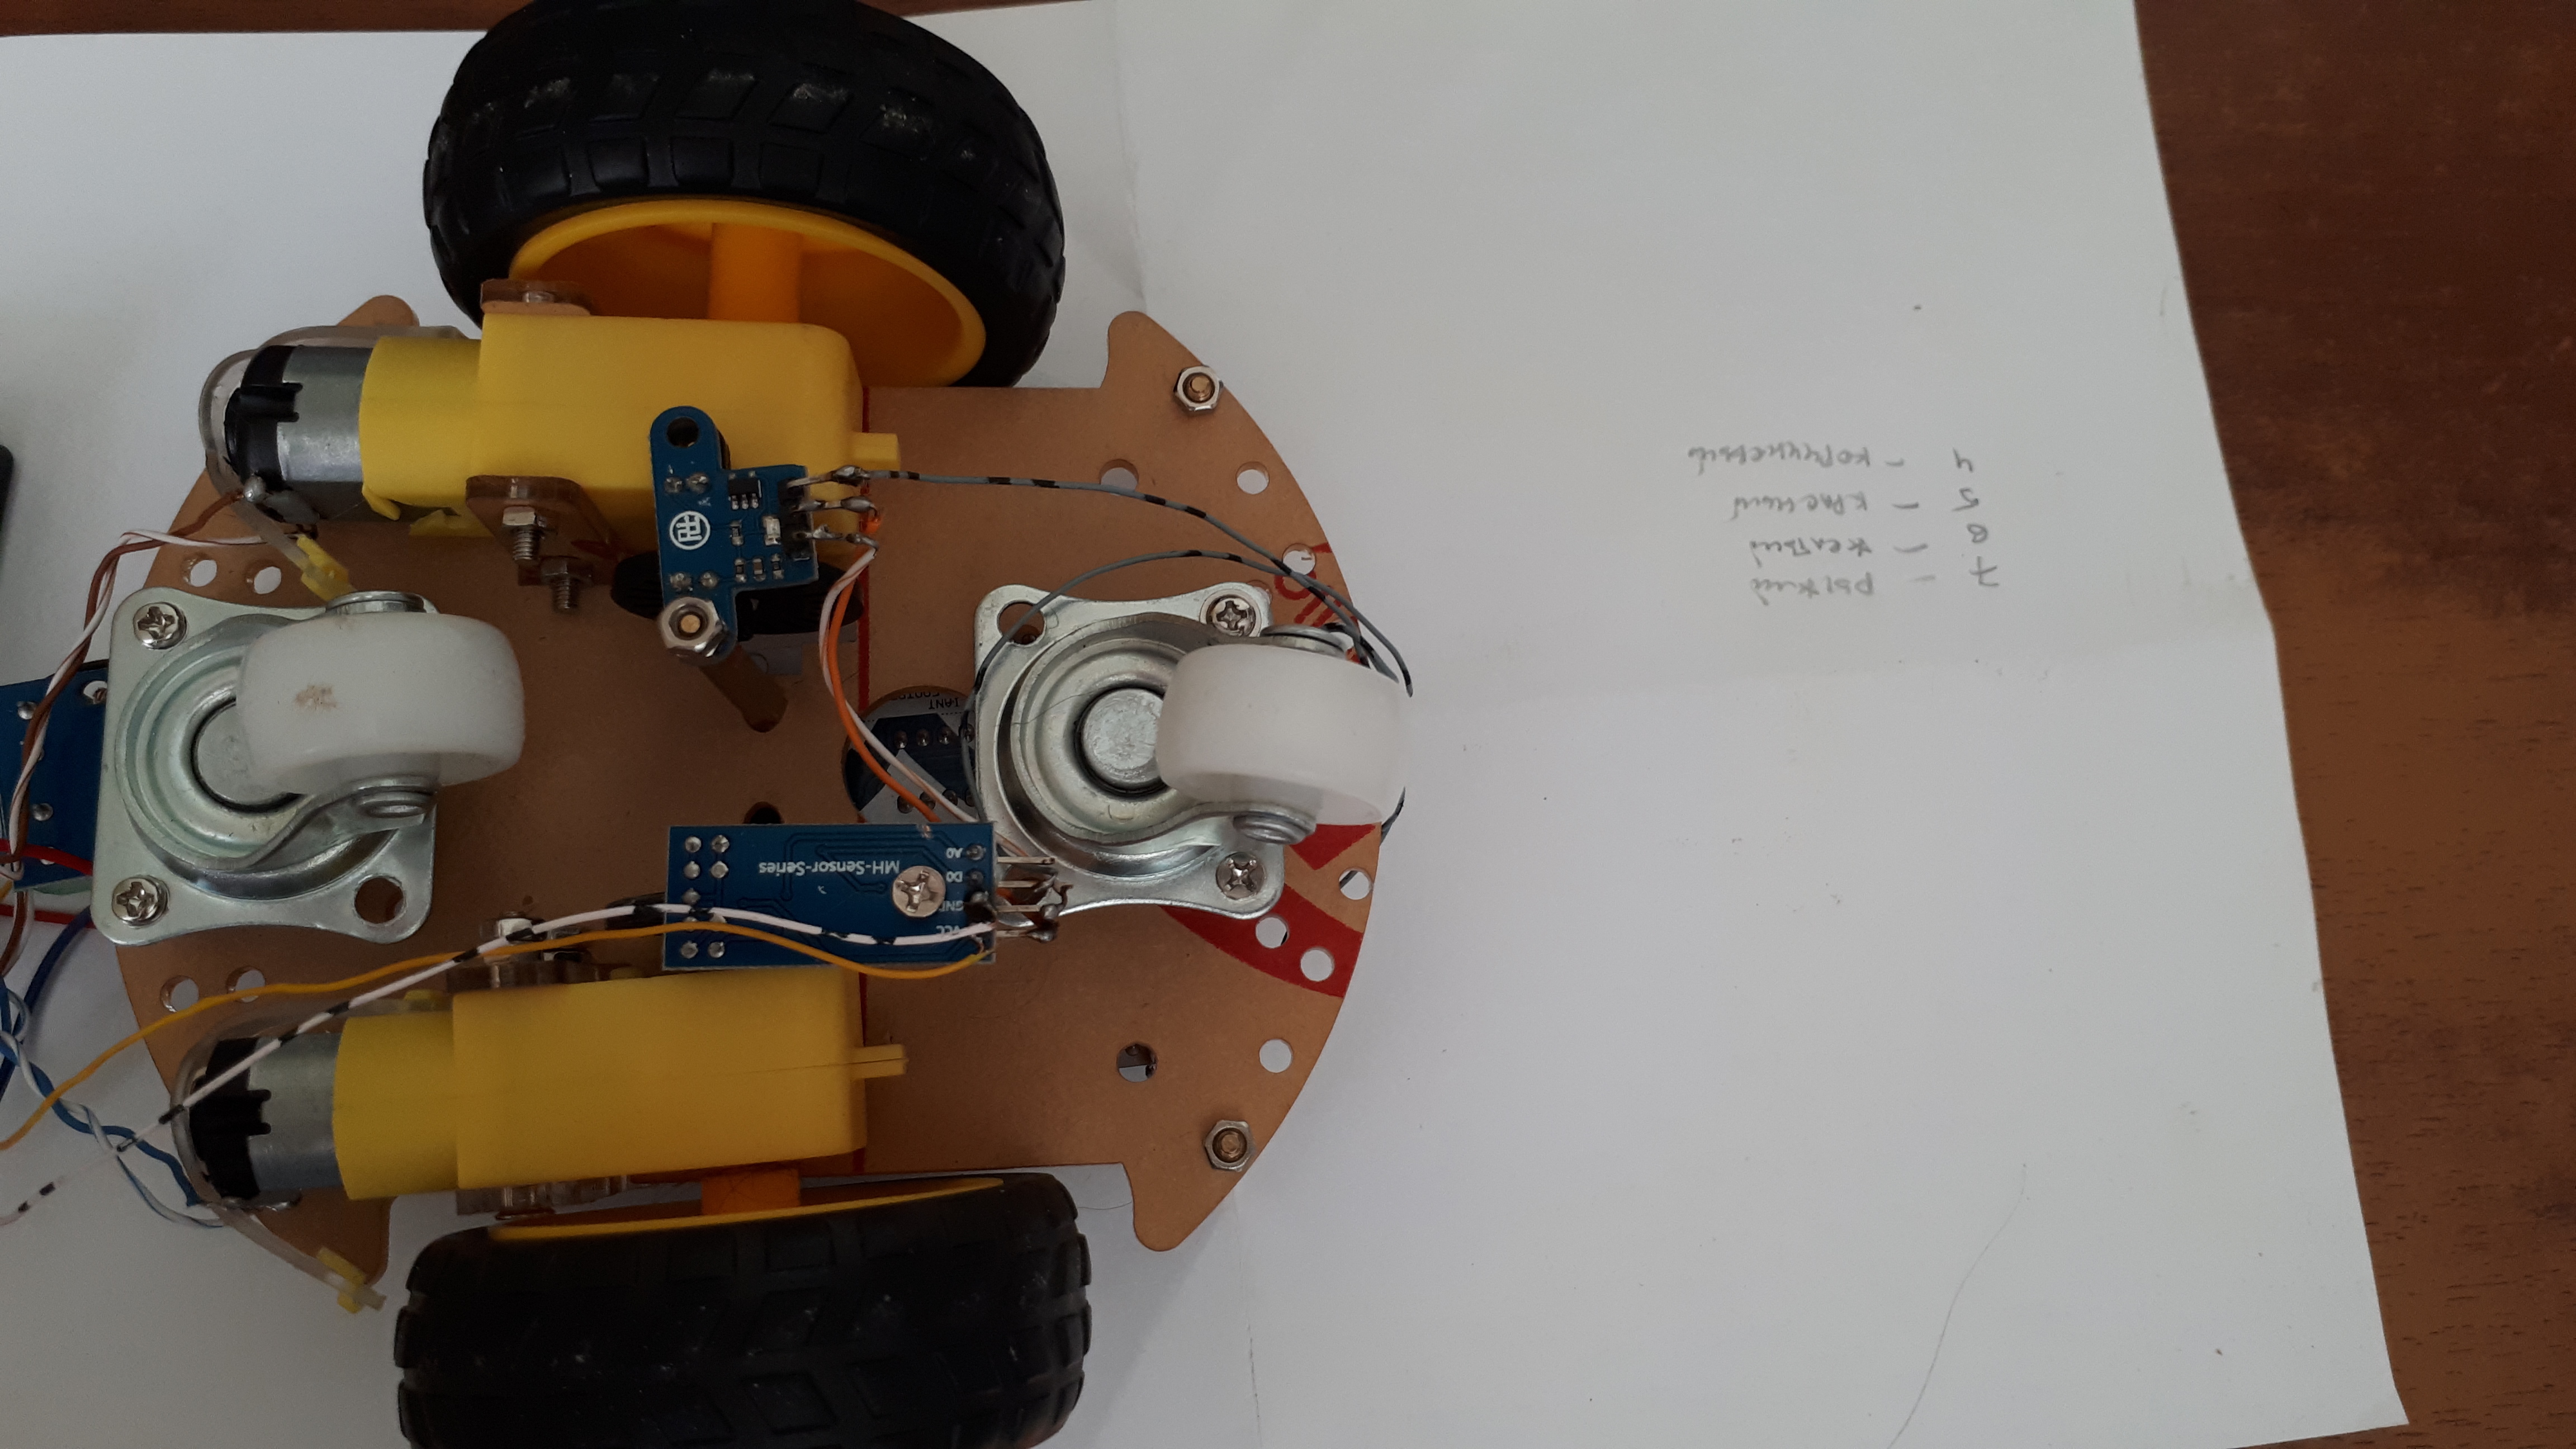
Here you need to pay attention to the encoders, which are mounted in such a way that they "covered" the discs with slots, dressed for motors:
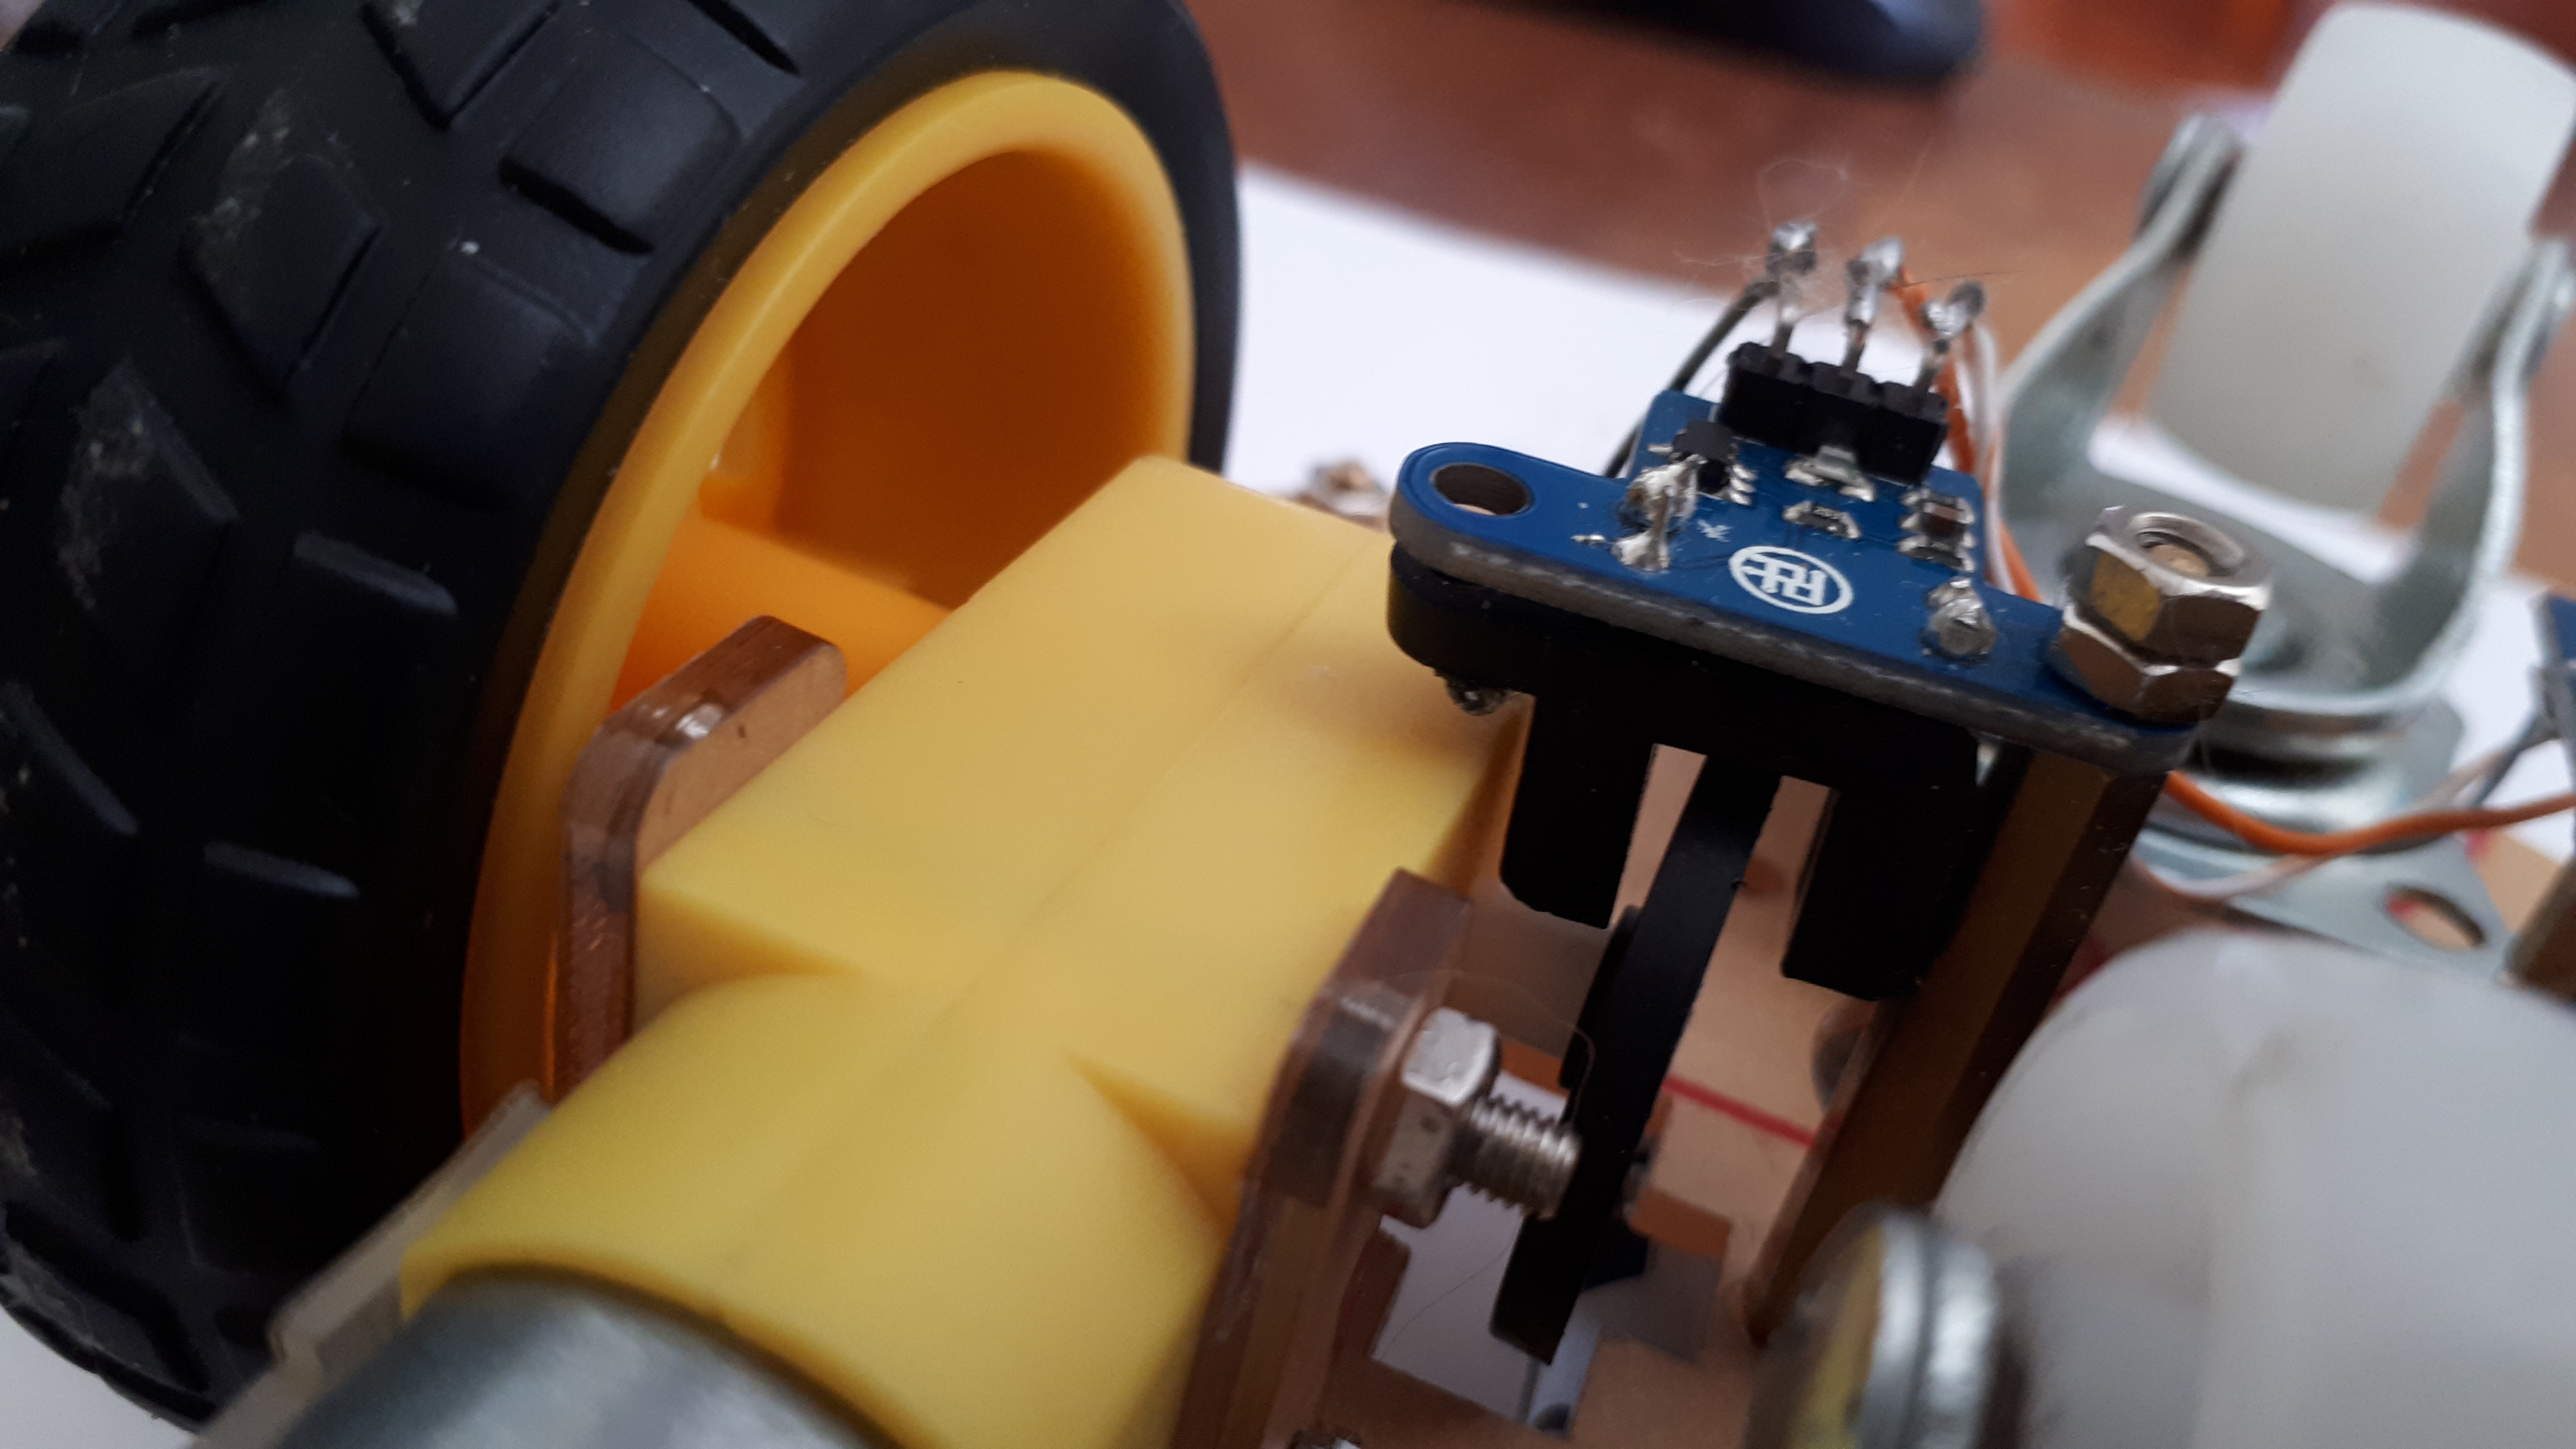
* In general, encoders are not very useful and you can not mount them. Optical encoders allow you to determine the distance traveled, but unfortunately, do not allow to determine the direction of movement.
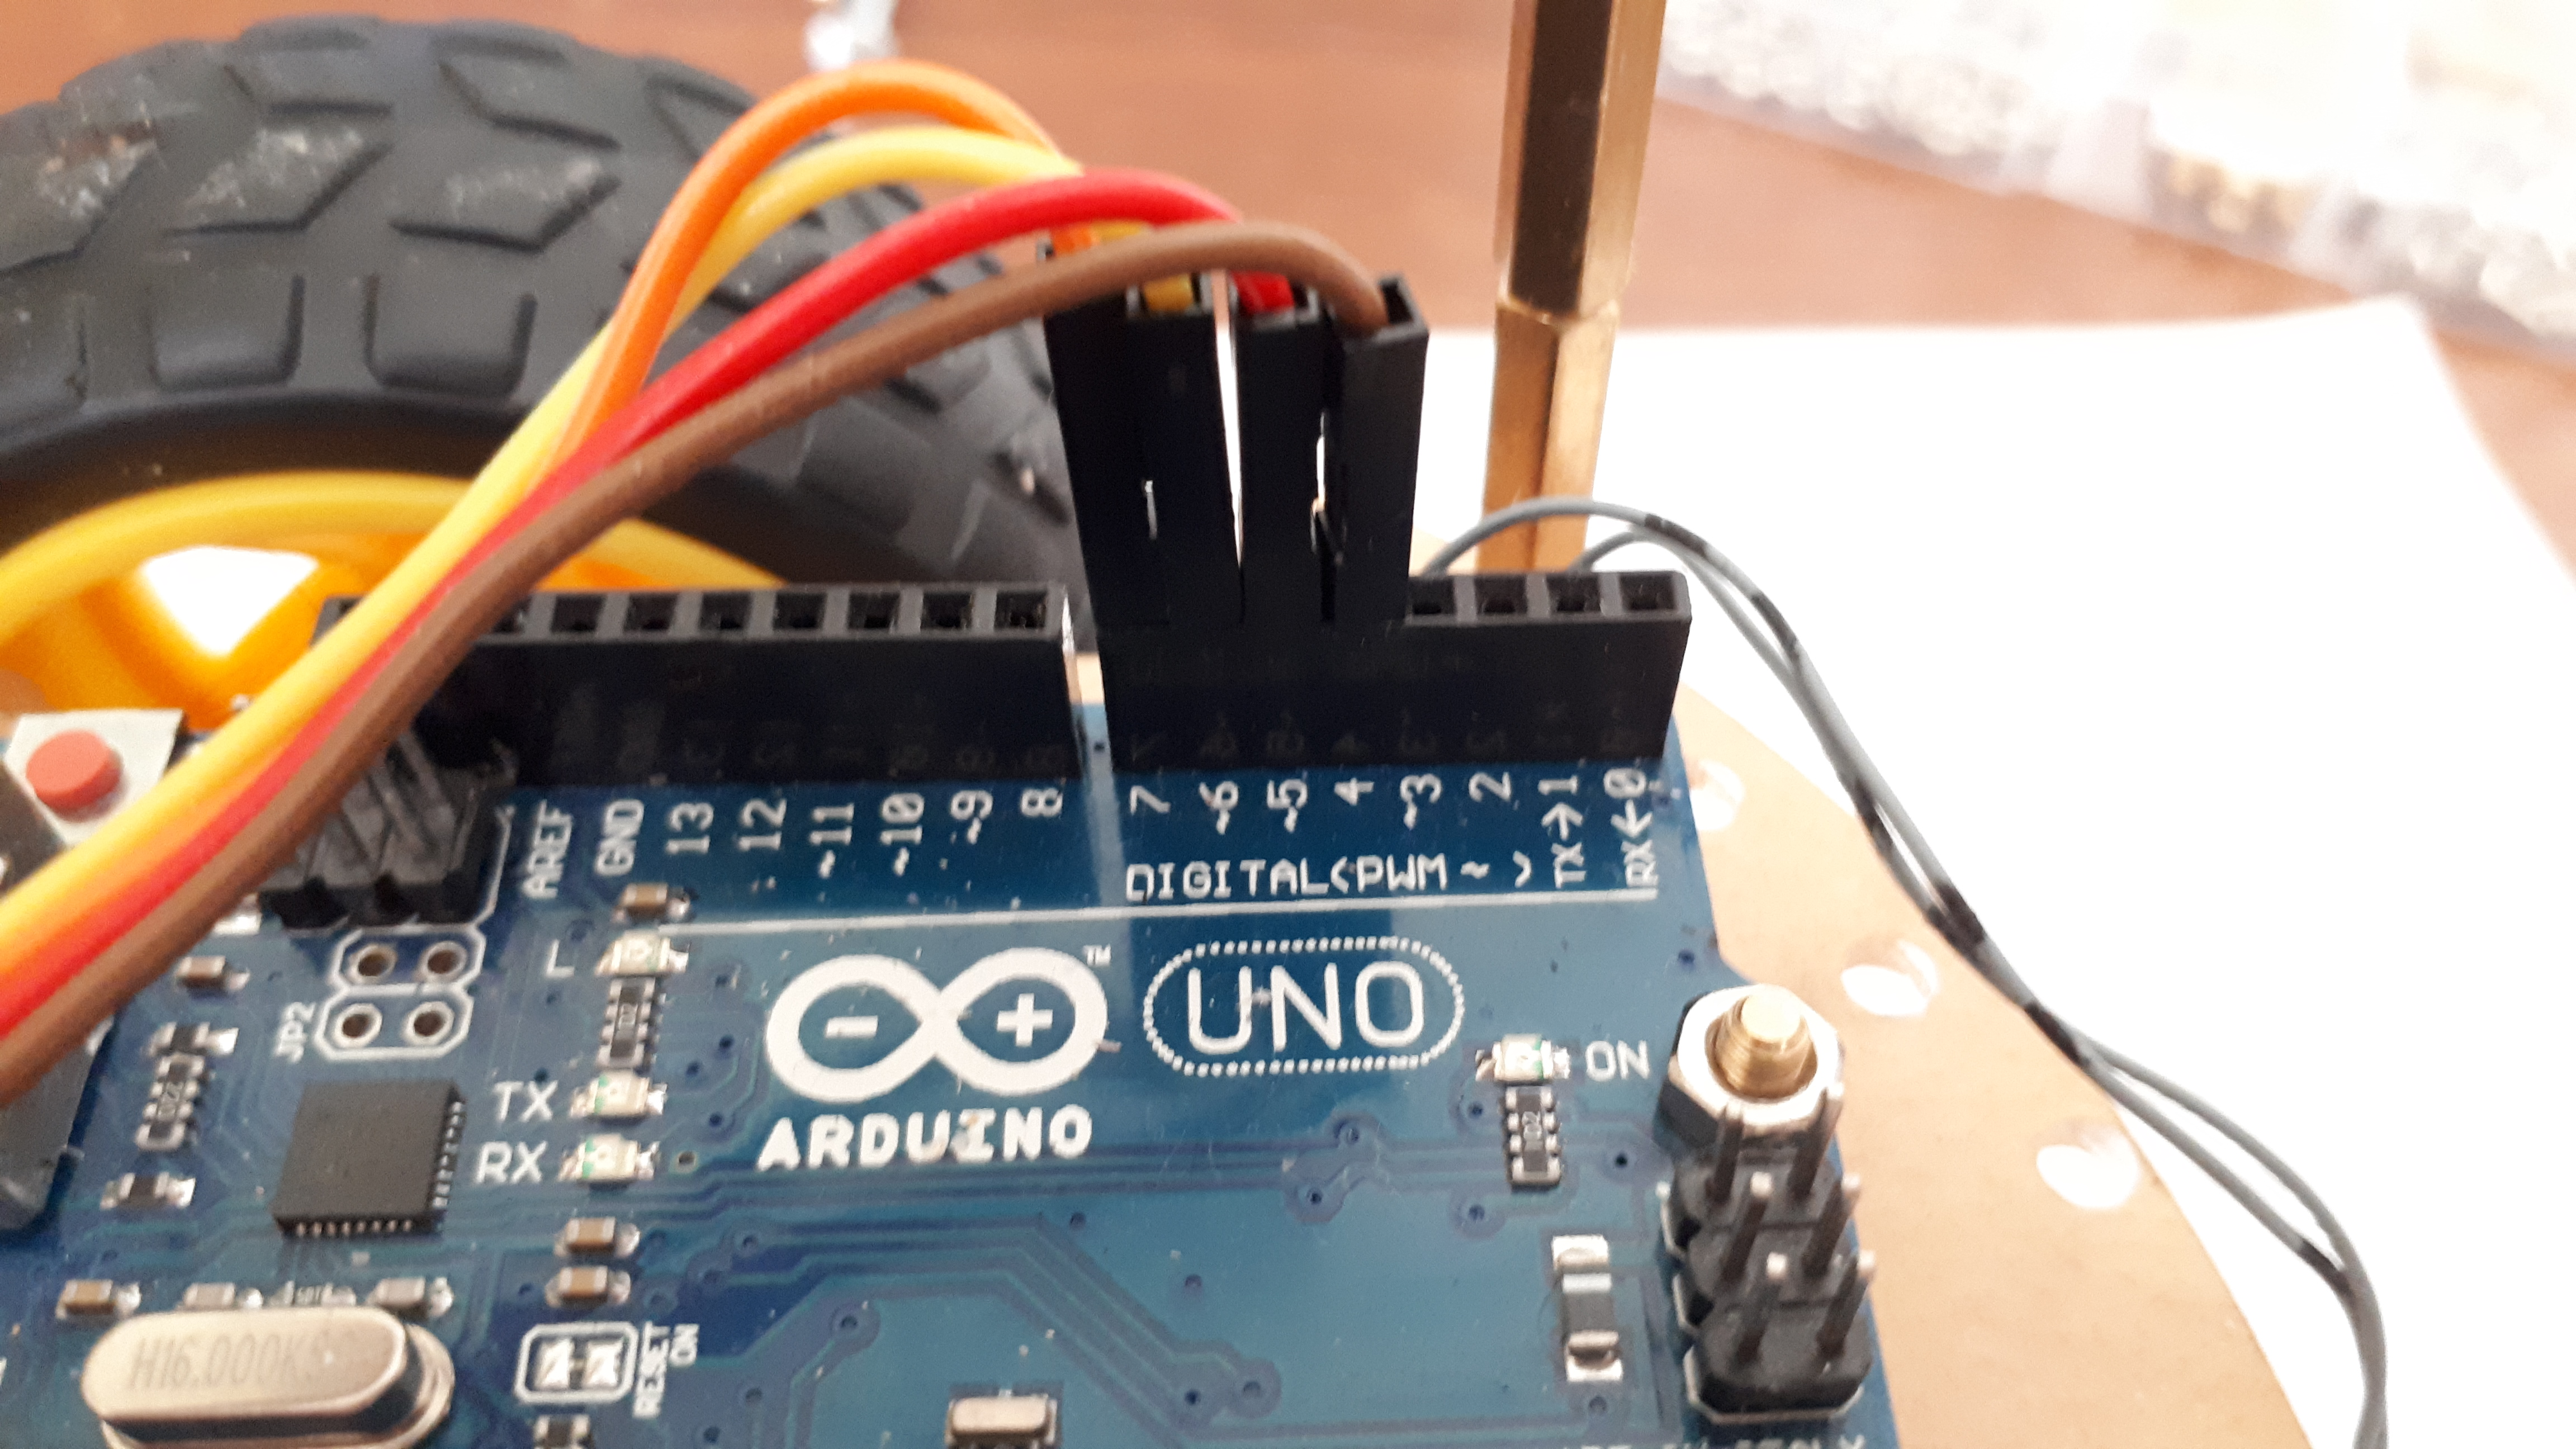
After installation of the engines and encoders (optional), we connect the wires with the Arduino uno, the engine driver, the battery compartment of 2 18650 batteries. The connection scheme is similar to that posted on the basic project website with one exception:

5V for encoders can be taken with arduino (VCC from Right speed sensor and Left speed sensor on 5V arduino).
We fix arduino and the driver of the engine, food for draver:

Noodles closer:
Engine Driver. On the terminals of green - a pair of wires from the engines:

Arduino will not be powered by batteries, it will be further connected via usb to raspberry.
Here will be the battery compartment, raspberry pi, the camera on the details of the Soviet designer:
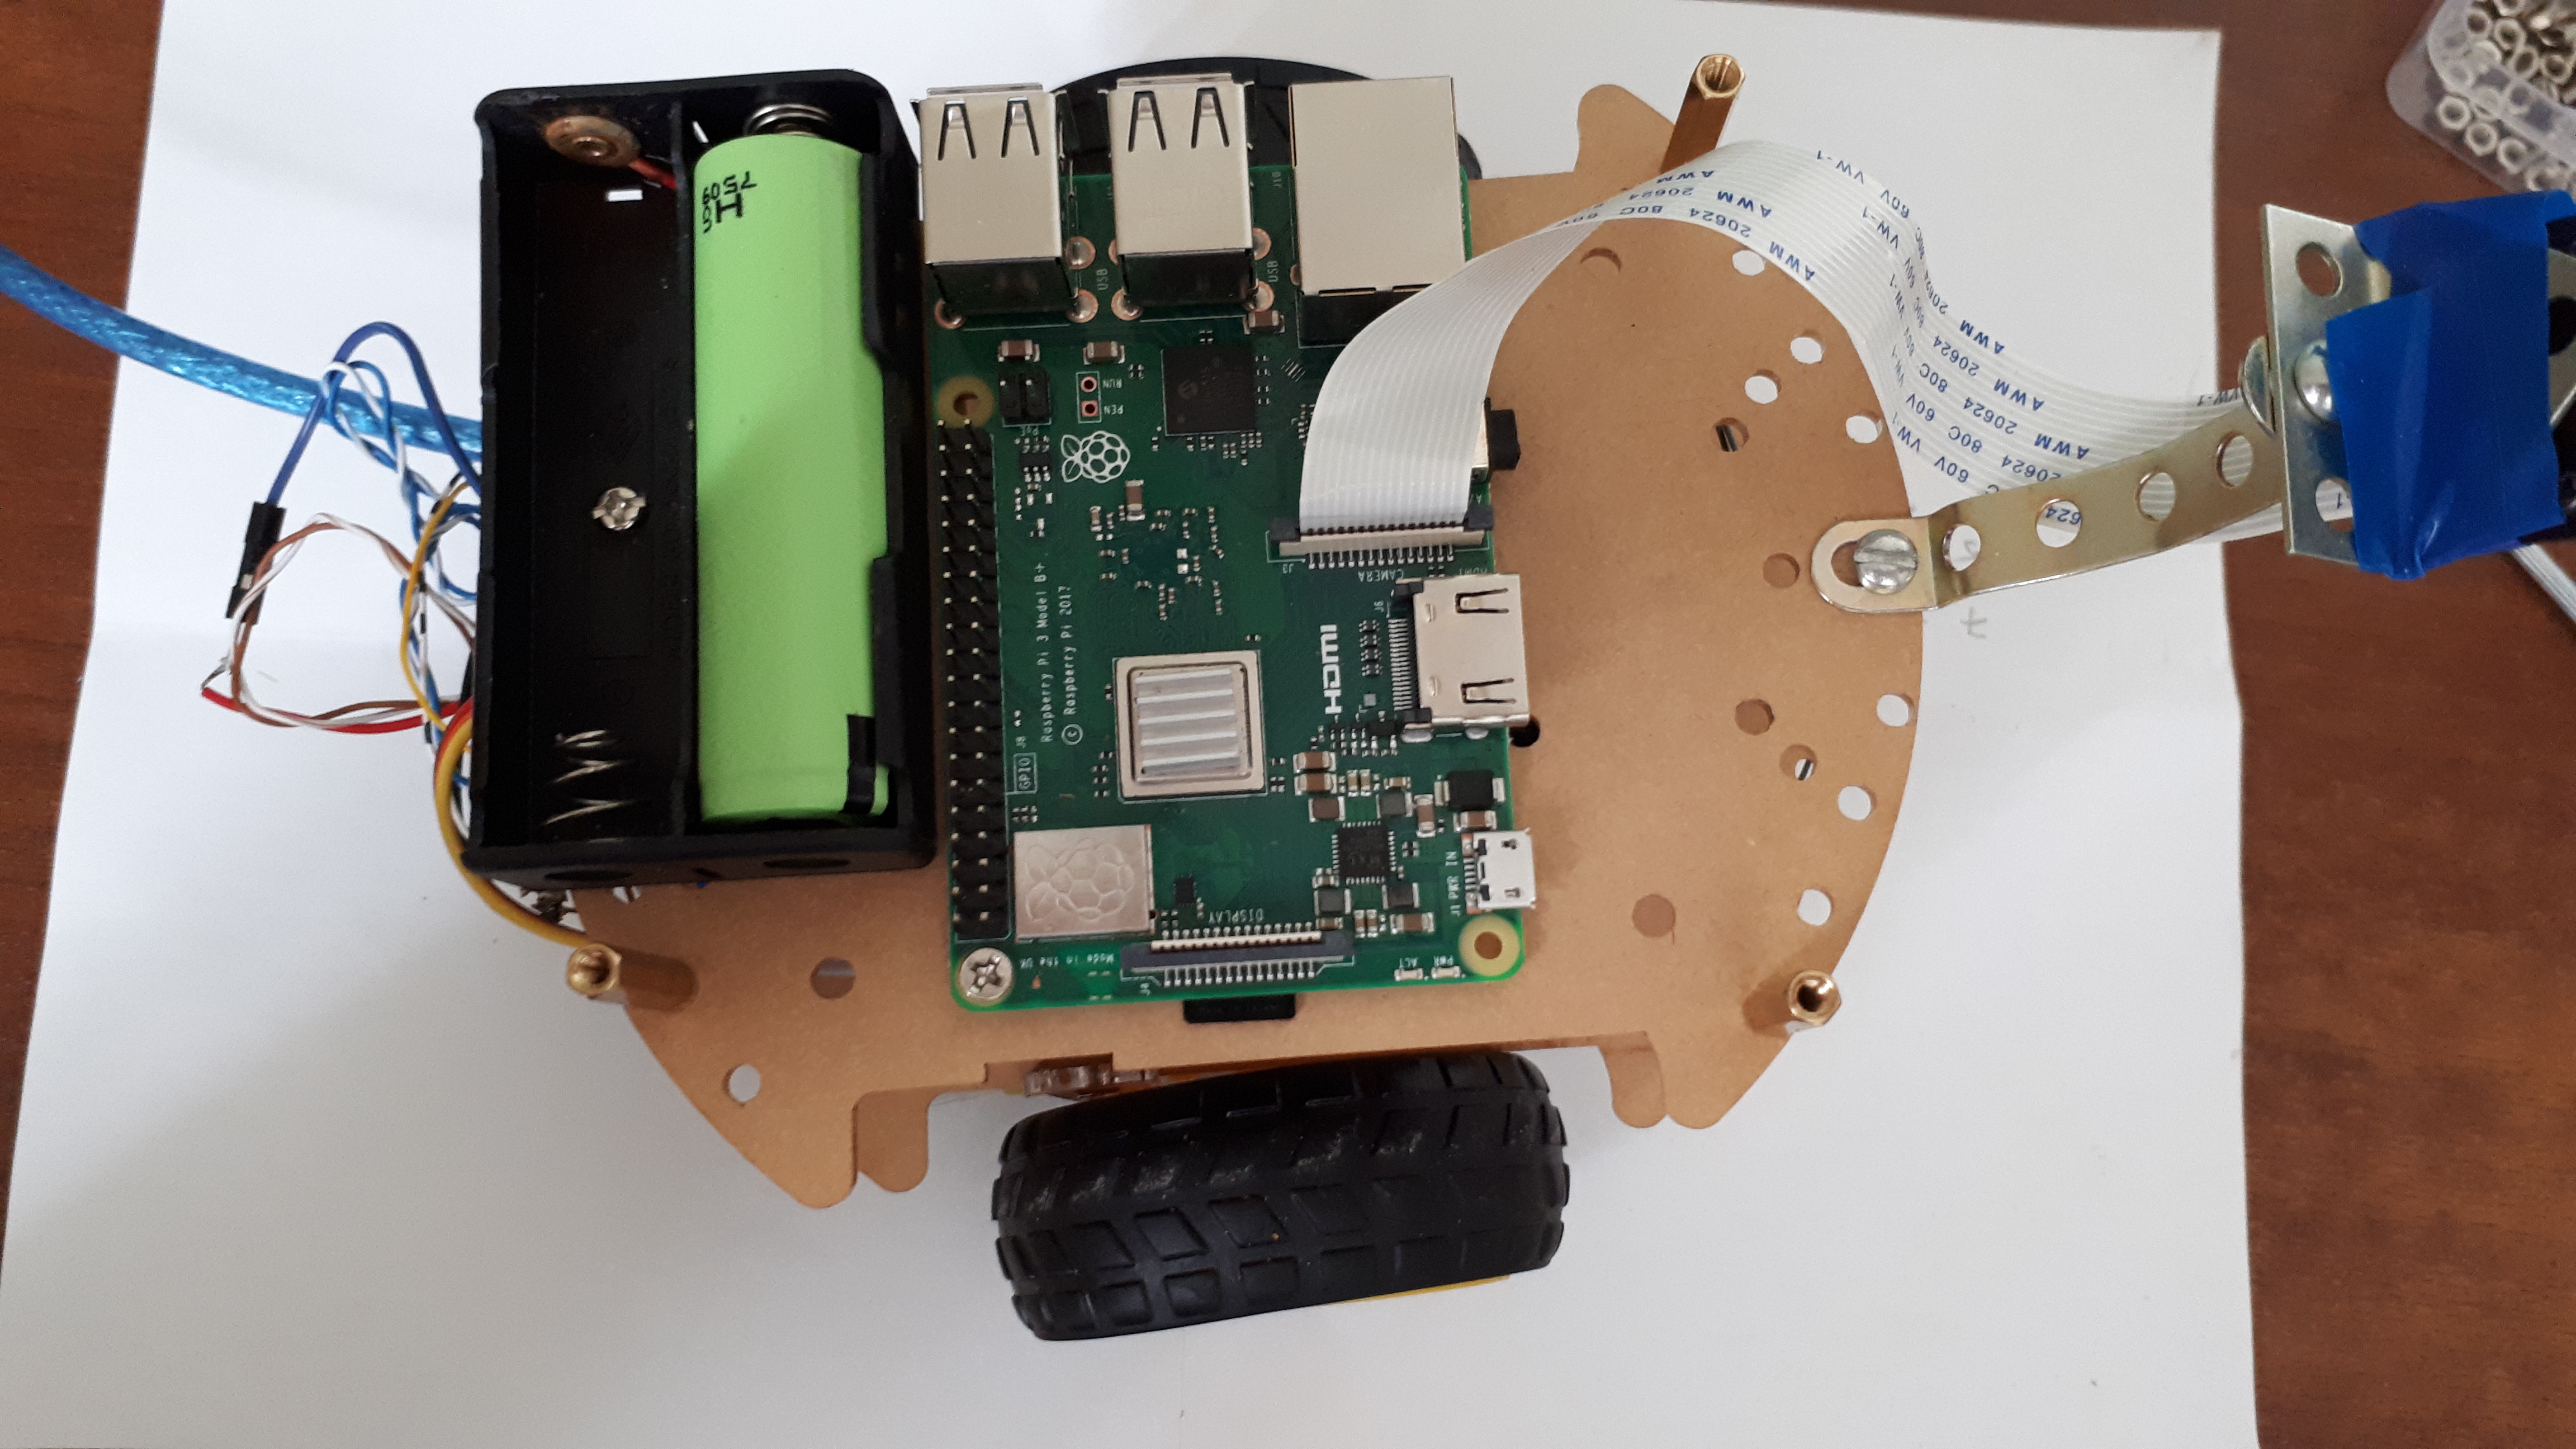
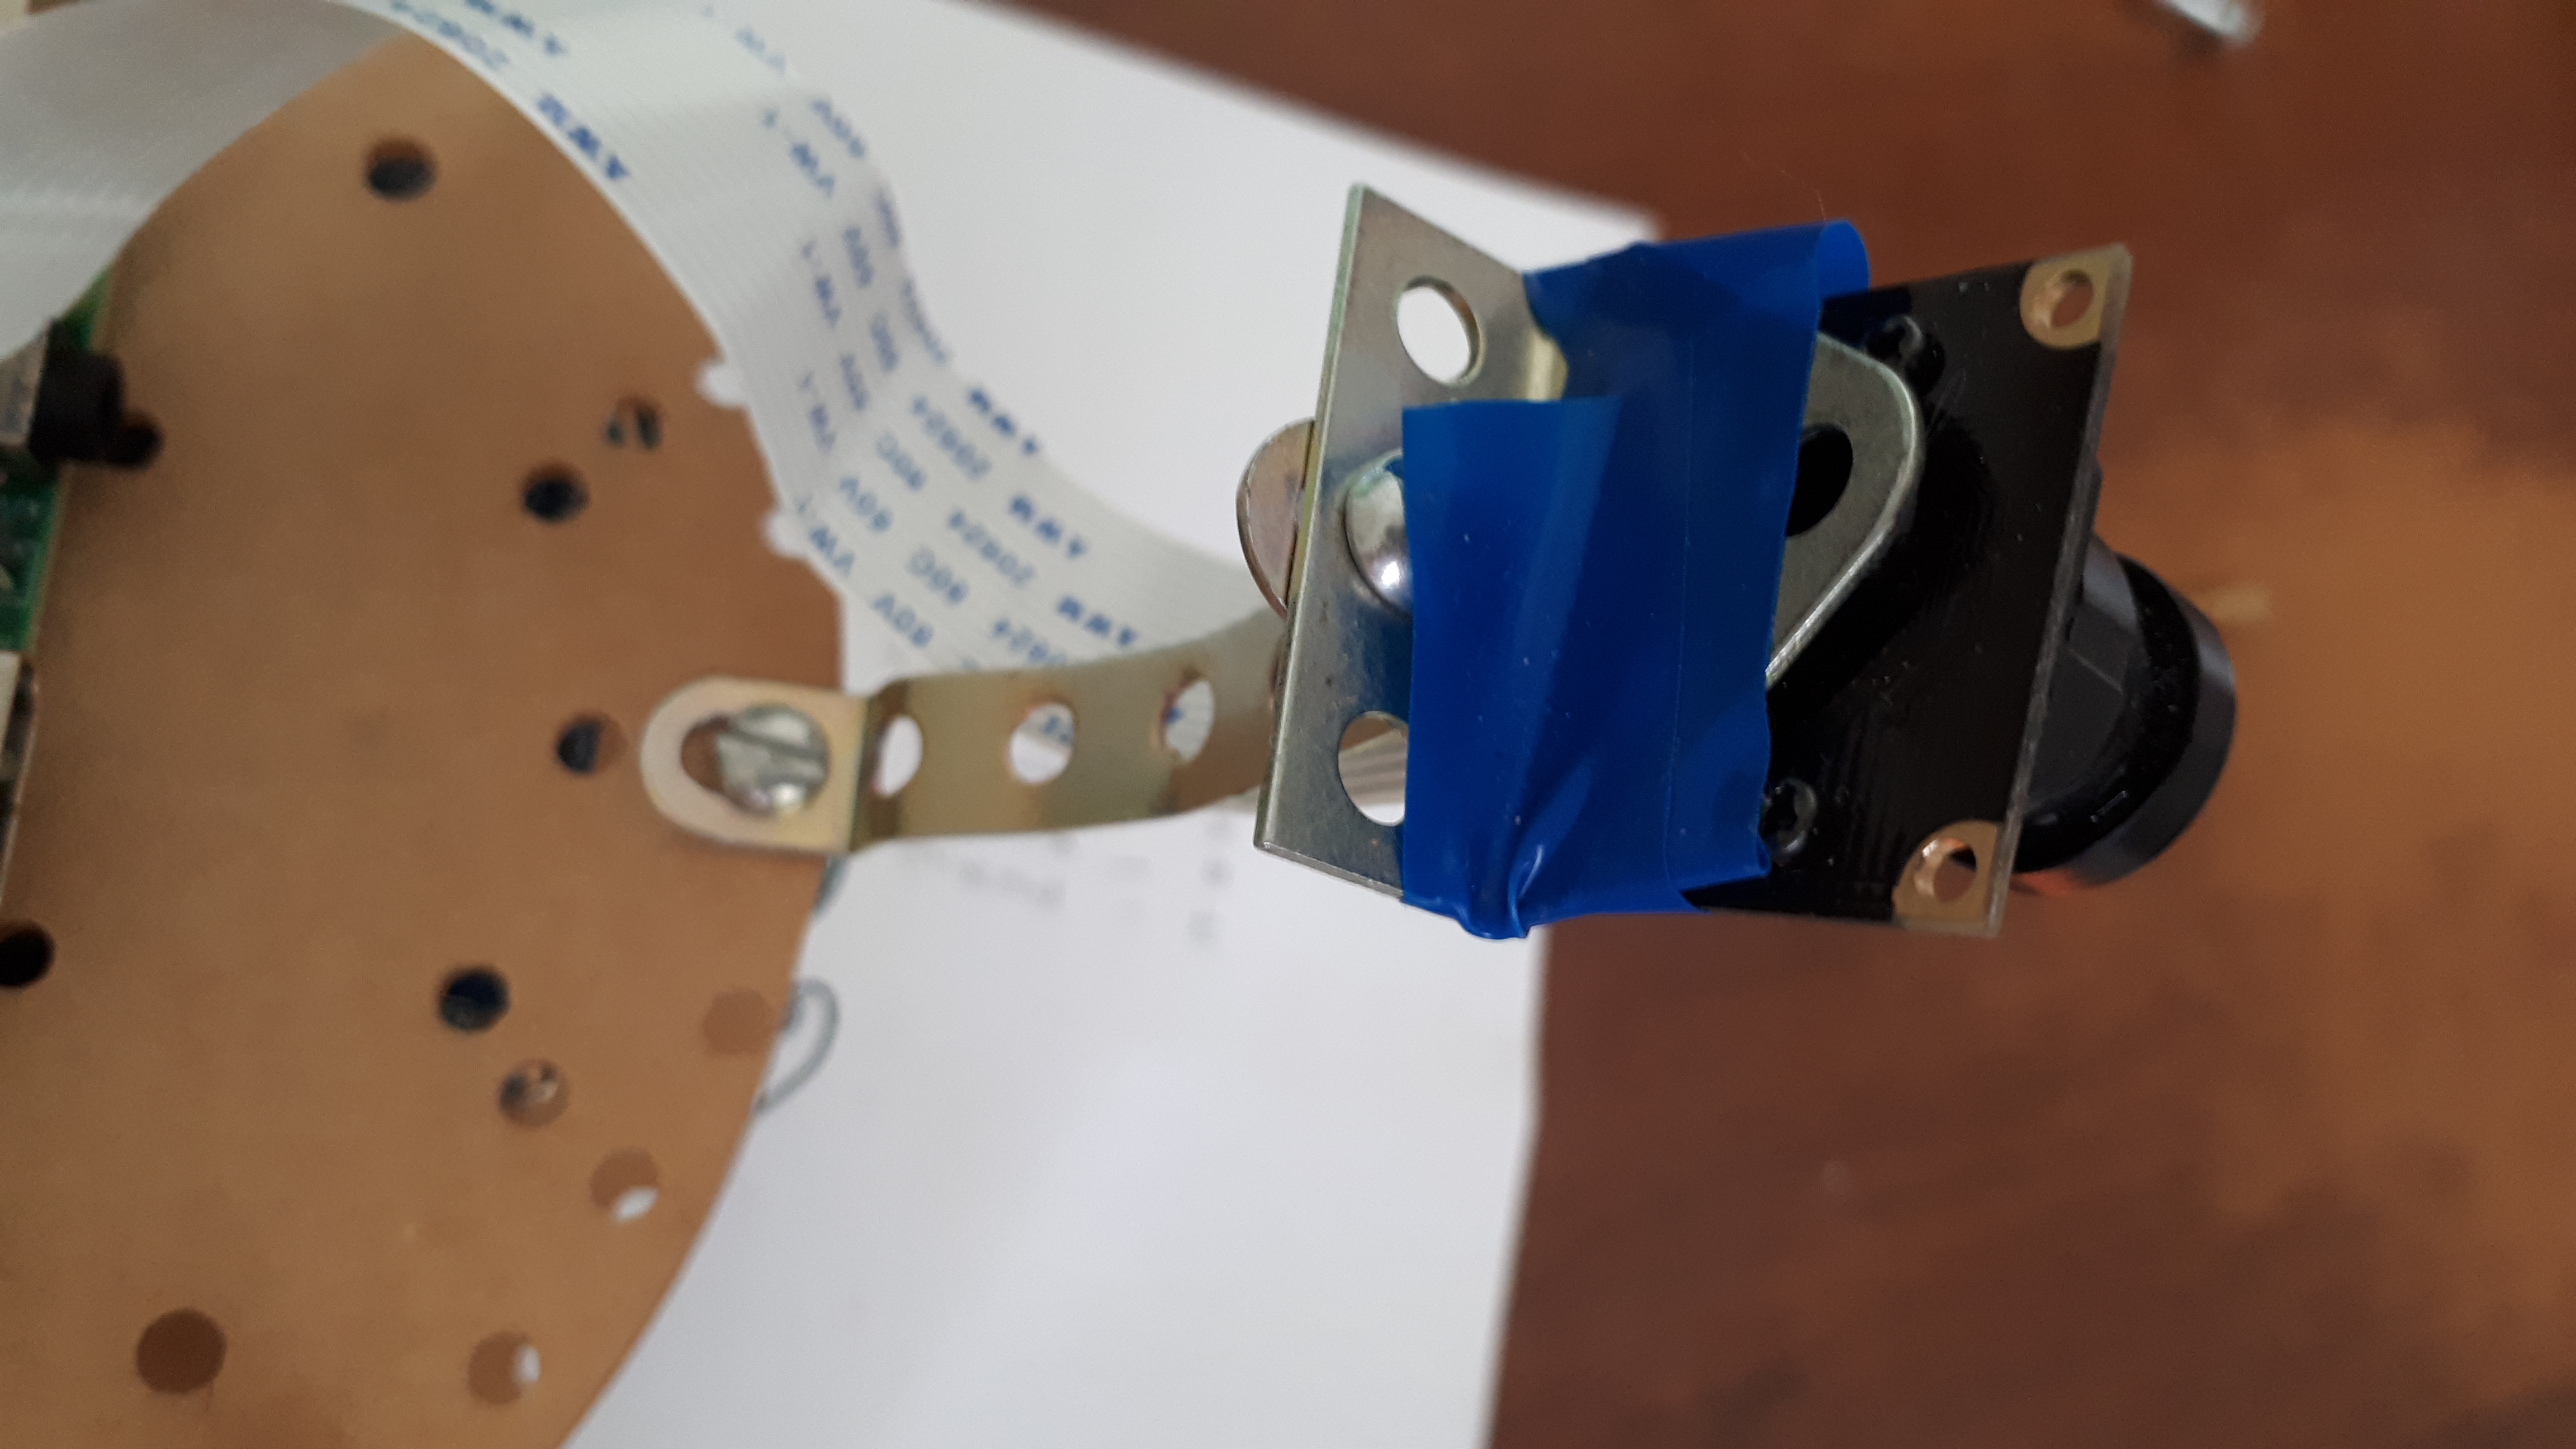
Don't forget to properly plug the camera cable into the raspberry:

Soviet designer in action:
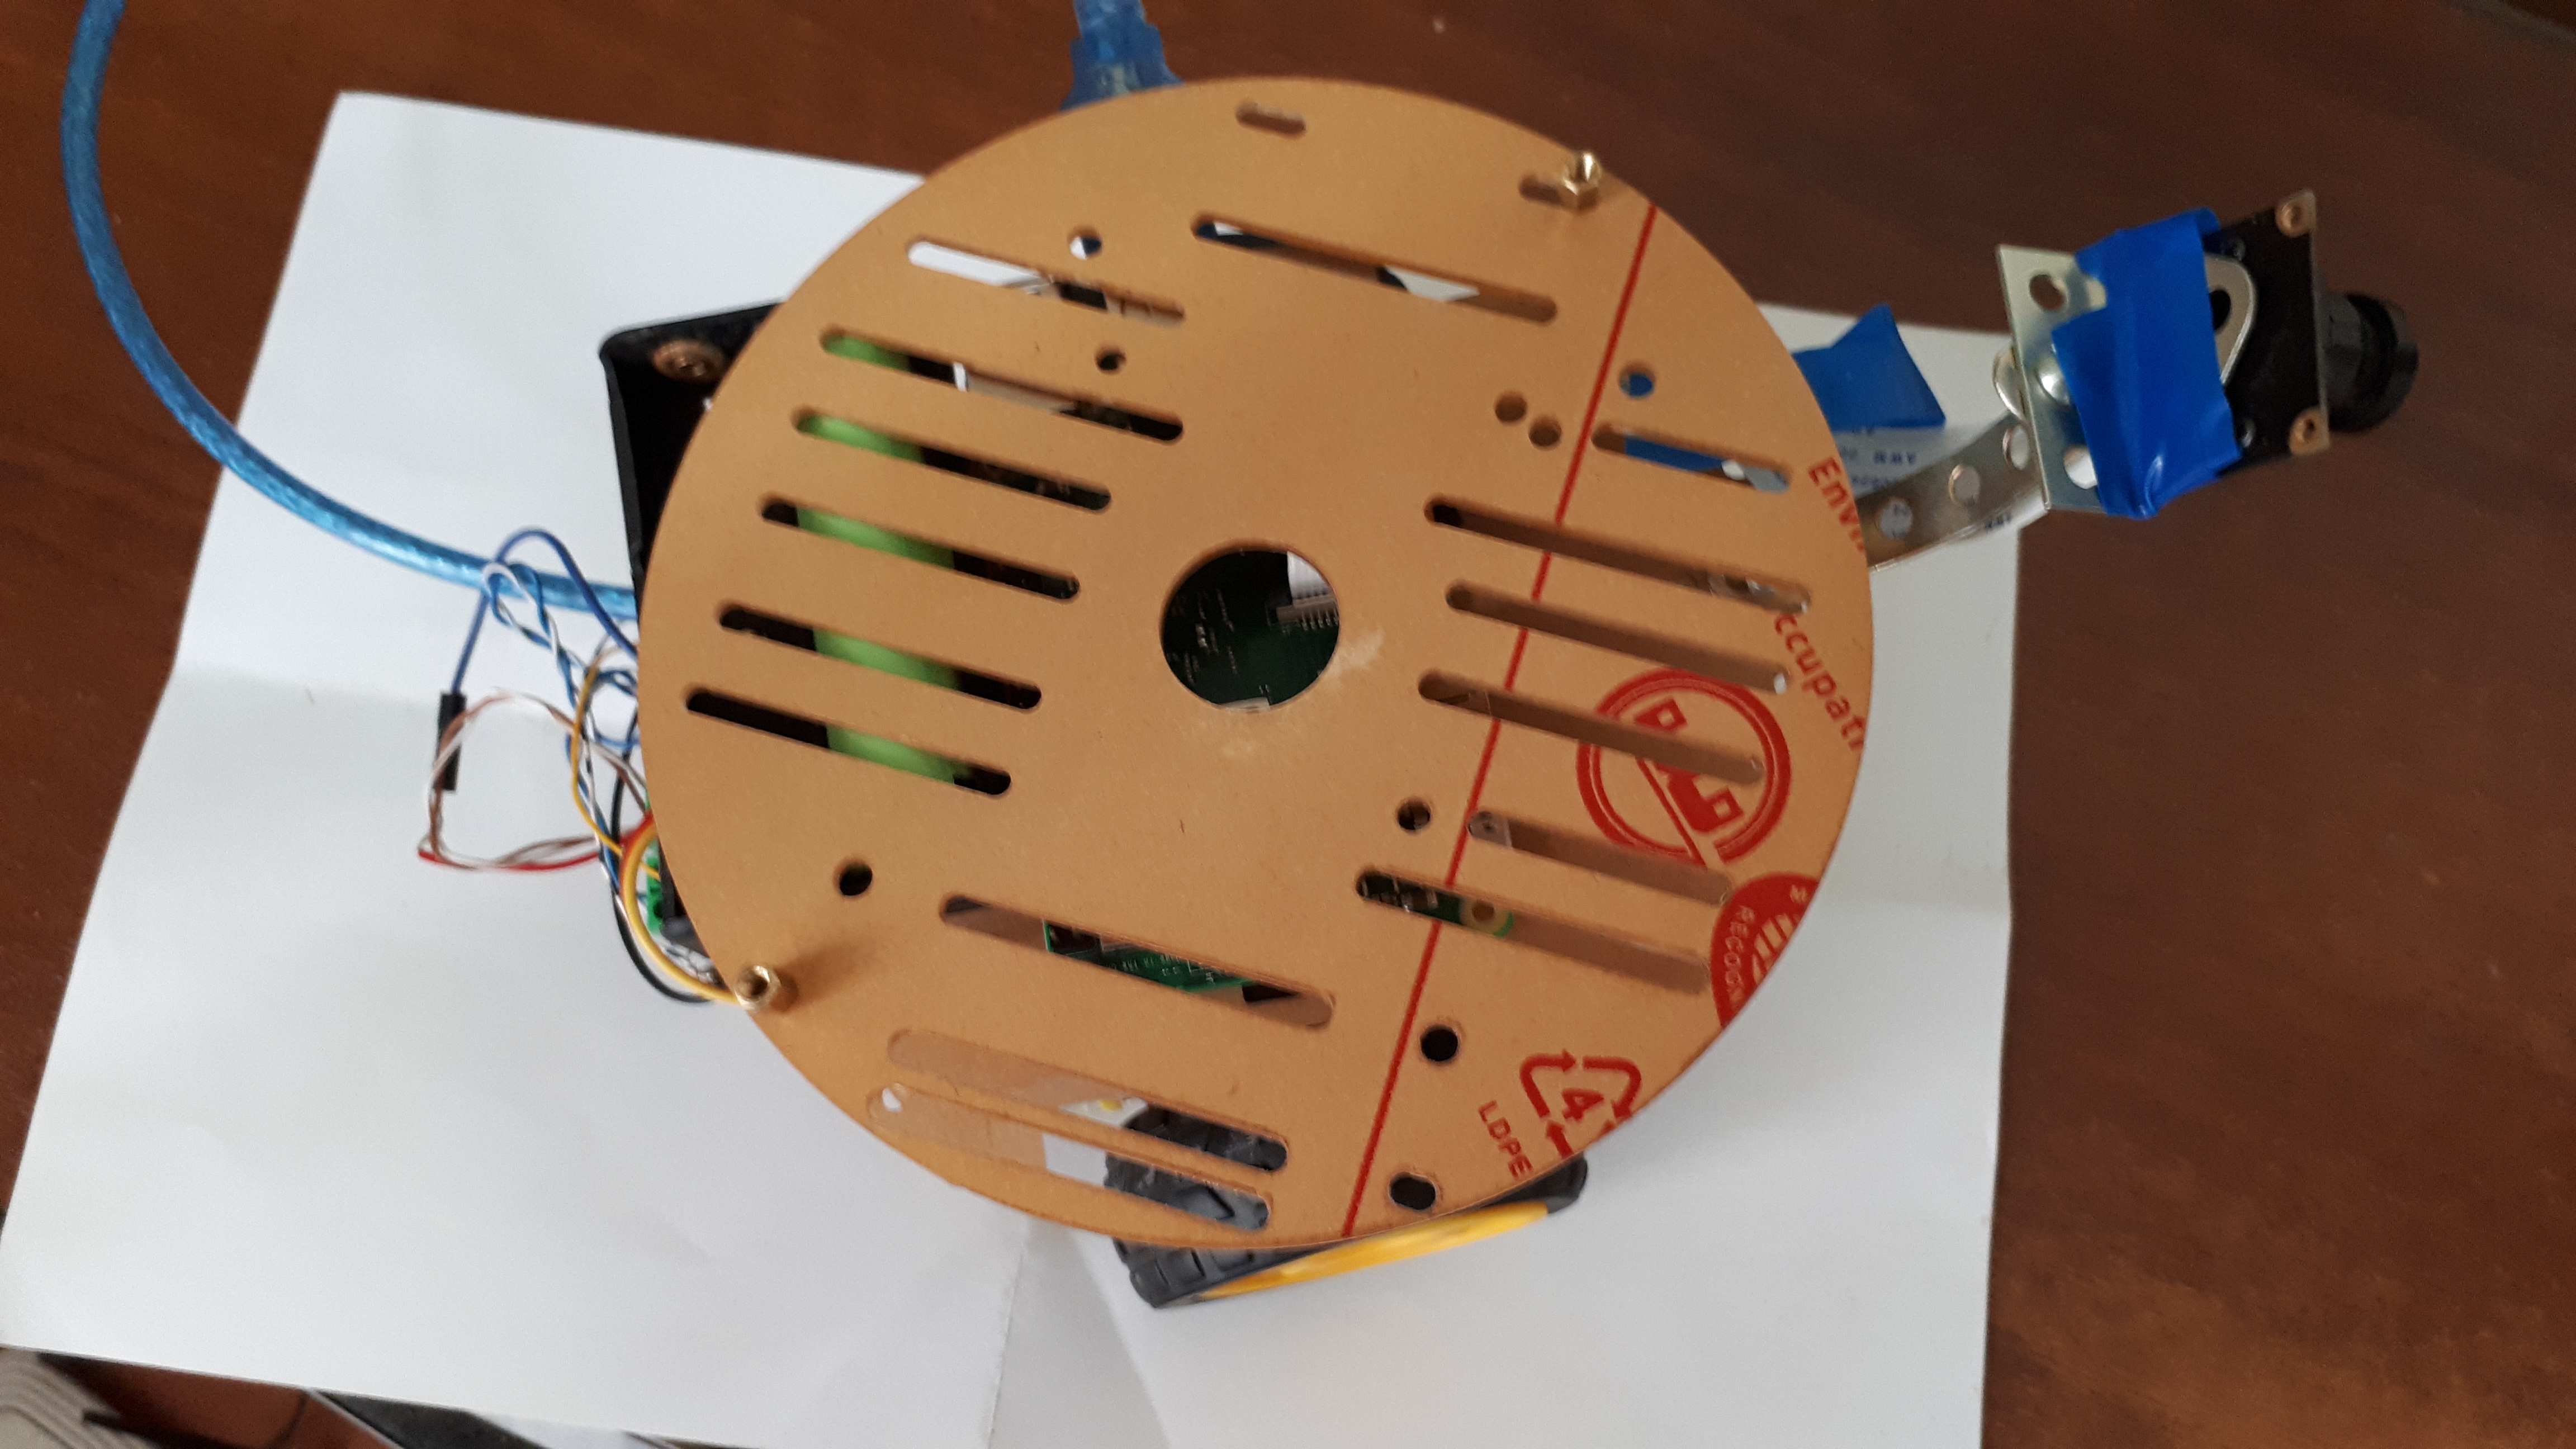
Close the burger, the third layer "carts" .
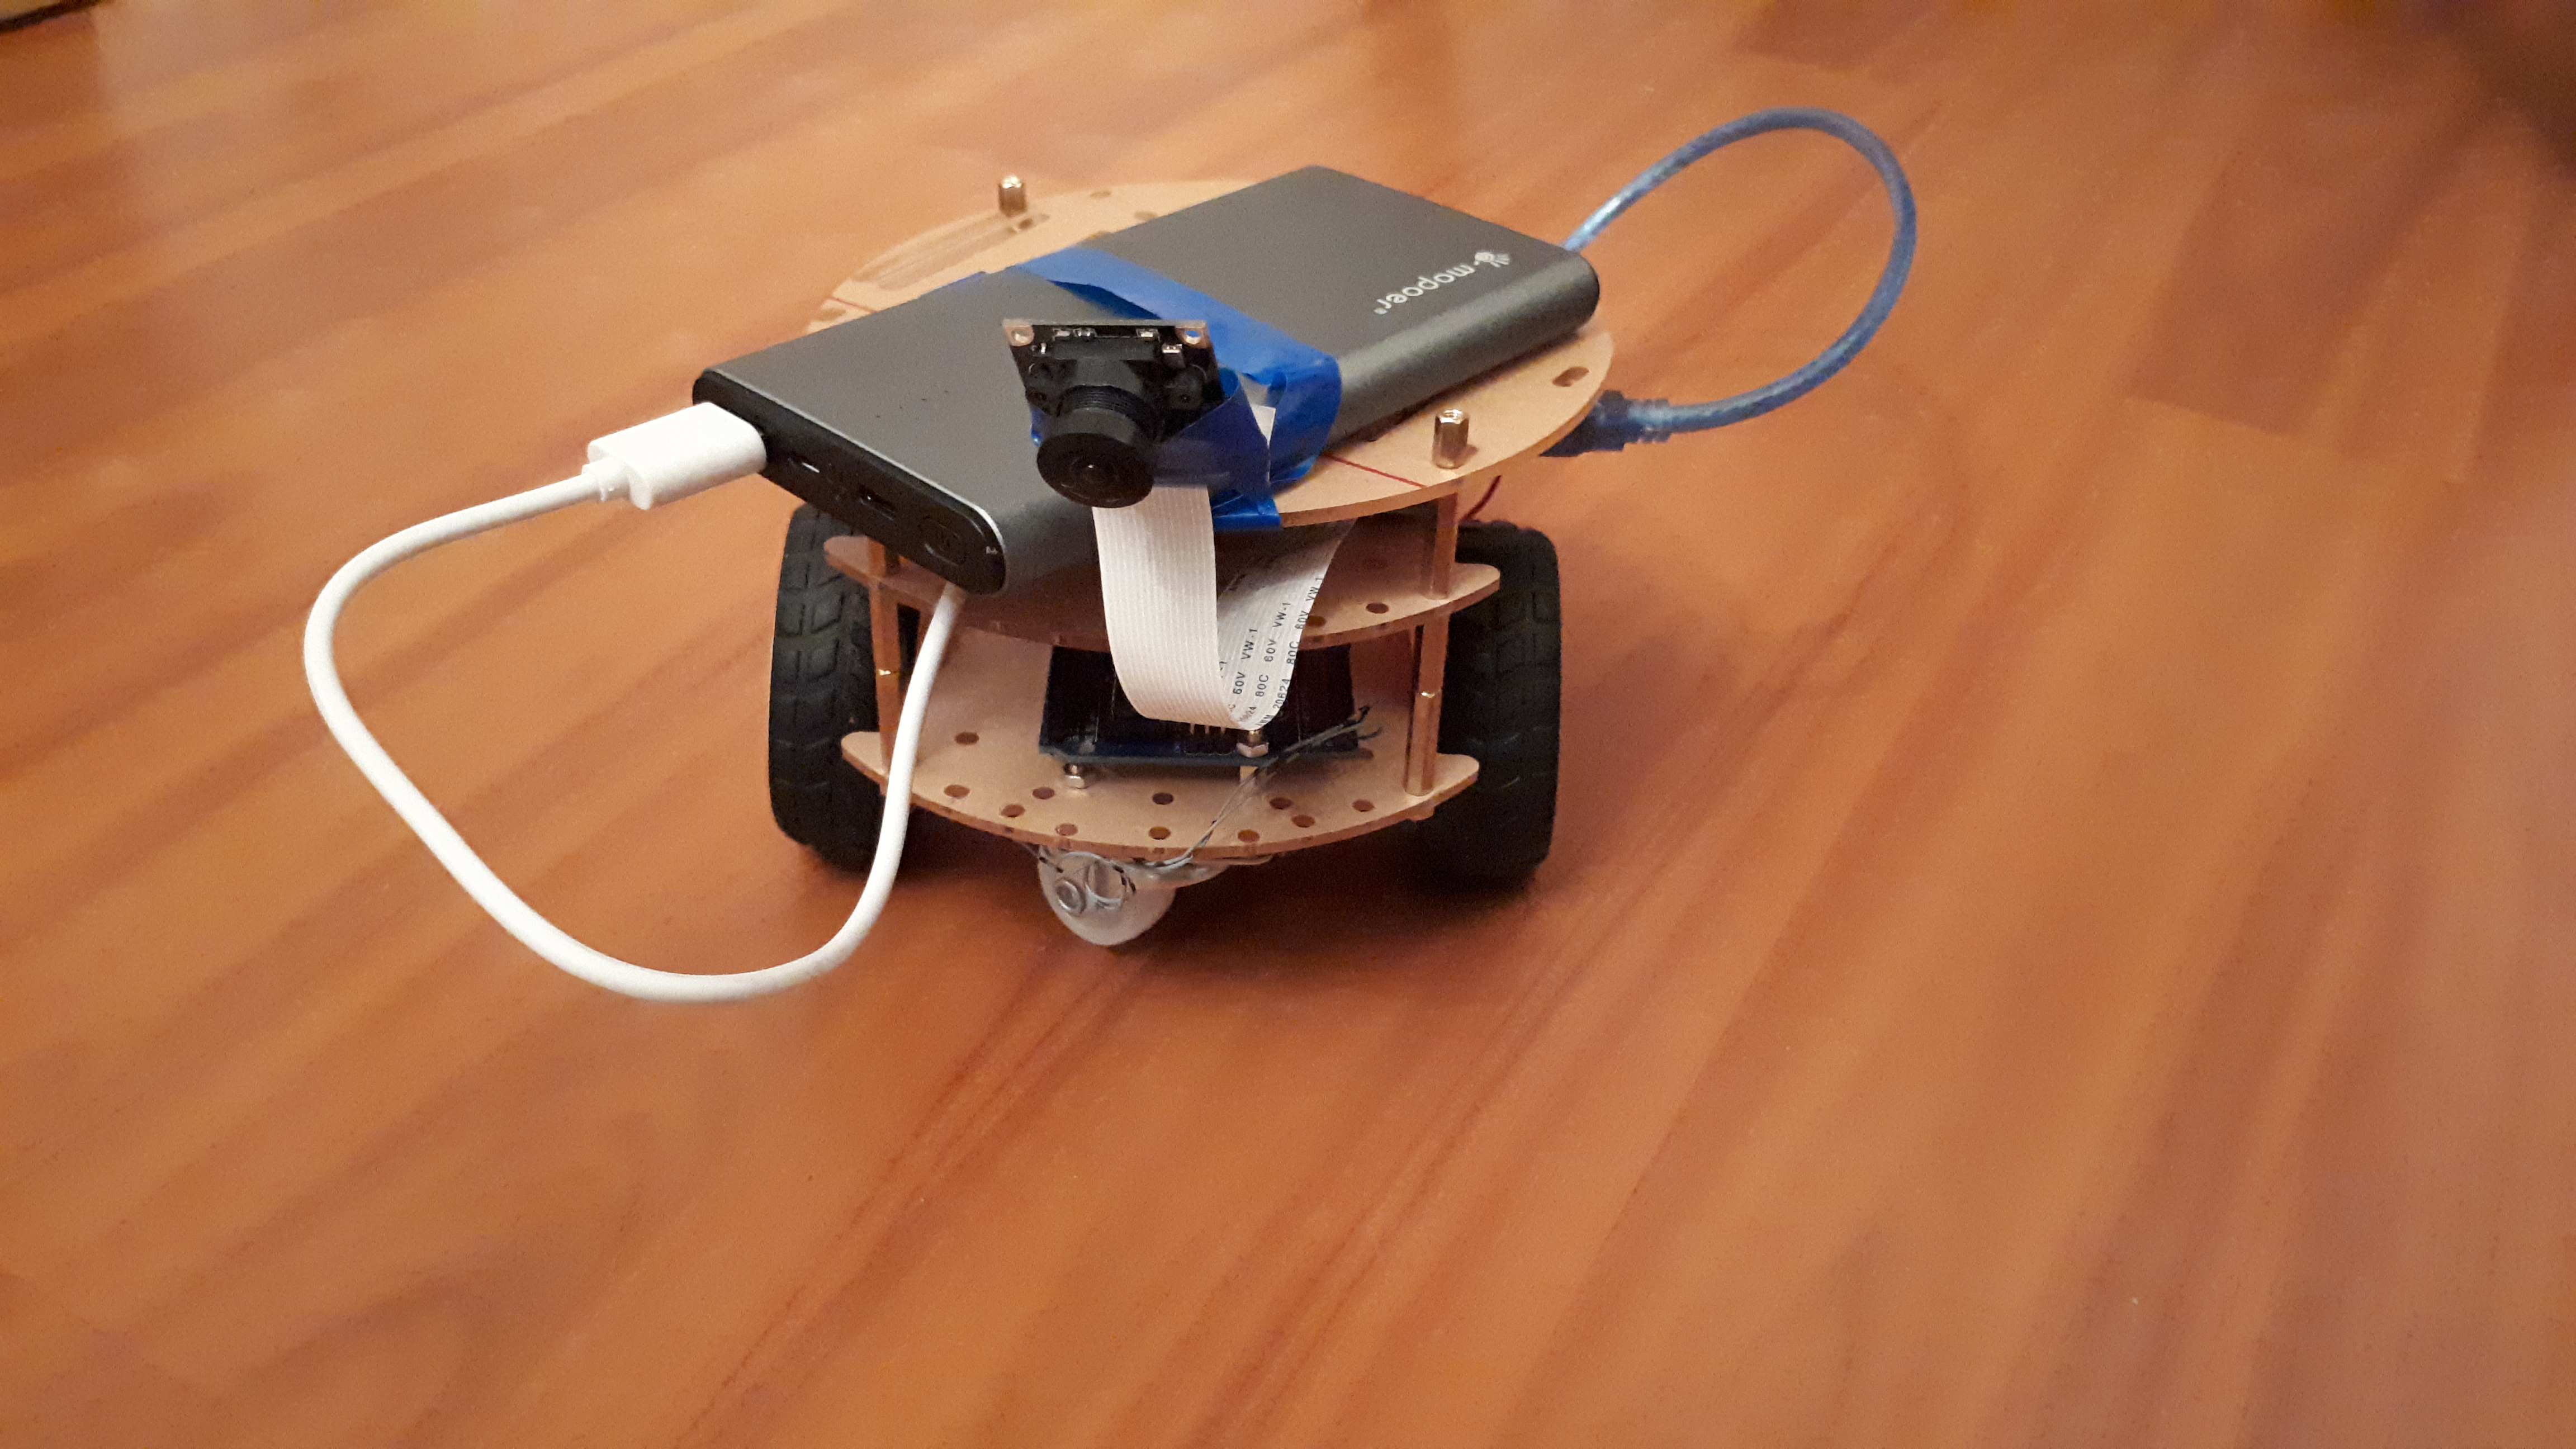
There will be a powerbank ride for raspberry:

* A little about powerbank:

That's it, the car is ready!
In the following posts we will talk directly about ROS, lines, body, cats and smiles.
Tips and merciless criticism is welcome!
Some more lyrics
The second thing that strikes when studying ROS is the cost of platforms on the market. The turtlebot burger set ( as one of the affordable ones ) costs $ 549 ($ 34,500). Everything else is even more expensive. Here you can argue that the lion's share of the price is lidar, a device for determining the position of the robot in space. Which itself stands under 15k p. However, all other components are also not cheap.
Let's calculate how much our “cart” will cost us:
')
- raspberry pi 3b + - 2500 r.
- sd card 10 cat - 600 p.
- arduino uno - 200 p.
- 2 cars - 600x2 = 1200 p.
- 2 batteries 18650 - 400 p.
- holder for acc. - 130 r.
- battery for raspberry - 1500 r
- additional set of nuts, bolts - 280 p.
- * 2 optical encoders - 60 p.
- camera for raspberry pi (better fish-eye) - 800 p.
- engine driver - 30 p.
- Soviet designer (where do without him) - 300 rubles.
Total: 8000 p.
The price is also high, but much cheaper than turtlebot. If desired, the typewriter can be printed on a 3d printer or take a piece of plywood. Then there will be only DC motors to take. The battery for raspberry can also be replaced with a cheaper analog, as long as it gives out 5V 3A.
We collect
The project was based on a previously existing project - www.rosbots.com/build_it , but with significant modifications. In addition, the basic project, judging by the information from the site, was abandoned, so you have to bring everything to mind.
The beginning of the assembly and fasteners of motors is similar to the above instructions:
Here you need to pay attention to the encoders, which are mounted in such a way that they "covered" the discs with slots, dressed for motors:
* In general, encoders are not very useful and you can not mount them. Optical encoders allow you to determine the distance traveled, but unfortunately, do not allow to determine the direction of movement.
After installation of the engines and encoders (optional), we connect the wires with the Arduino uno, the engine driver, the battery compartment of 2 18650 batteries. The connection scheme is similar to that posted on the basic project website with one exception:
5V for encoders can be taken with arduino (VCC from Right speed sensor and Left speed sensor on 5V arduino).
We fix arduino and the driver of the engine, food for draver:
Noodles closer:
Engine Driver. On the terminals of green - a pair of wires from the engines:
Arduino will not be powered by batteries, it will be further connected via usb to raspberry.
We put the second layer of the machine
Here will be the battery compartment, raspberry pi, the camera on the details of the Soviet designer:
Don't forget to properly plug the camera cable into the raspberry:
Soviet designer in action:
Close the burger, the third layer "carts" .
There will be a powerbank ride for raspberry:
* A little about powerbank:
That's it, the car is ready!
In the following posts we will talk directly about ROS, lines, body, cats and smiles.
Tips and merciless criticism is welcome!
Source: https://habr.com/ru/post/460755/
All Articles