Arduino and keyboard (full guide)
Hello, residents of Habr! Today I decided to make a full guide on keyboards for Arduino.
Attention! The article is focused primarily on beginners!
In many projects, it becomes necessary to create user input capabilities. If you need to implement a large number of buttons (relatively), then connecting them separately becomes both long and irrational. For this purpose, it is better to choose some kind of keyboard, but as with any choice, it must be approached consciously. What are the types of keyboards and how to interact with them?
Globally, all modules of this type can be divided into two broad categories: matrix and analog .
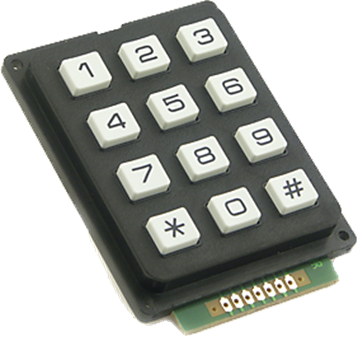
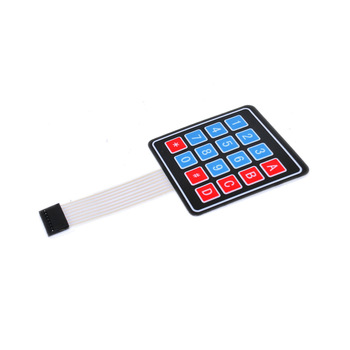
The easiest, cheapest and most popular type of keyboards. It is relatively simple to manufacture and fills most of the arduino module market. Most often looks like this:
')
You can understand how this keyboard works by studying the following scheme:

To understand which button was pressed, you need to give a signal to the first four contacts of the module and watch which signal comes back from the second. But you should not be afraid of the fact that you will have to write the processing algorithms for eight pins manually - the ready-made library “keypad.h” will help us in this, thanks to which we will not have to reinvent the wheel.
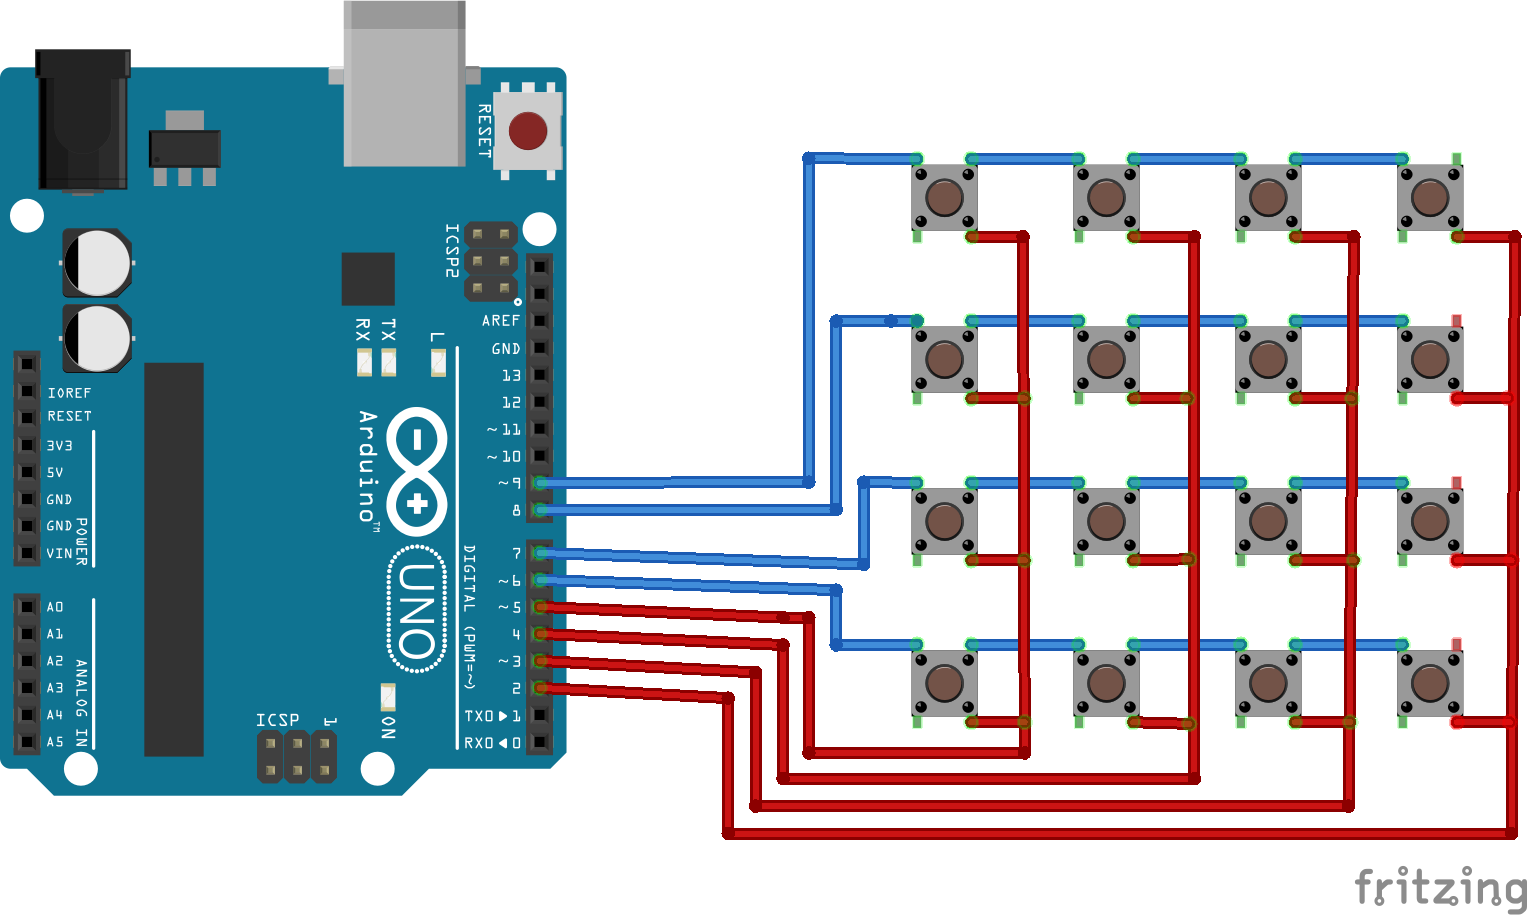
In this article I will use the following connection diagram:
You probably have a question: “Why did I decide to use pins from the second to the ninth, skipping zero and first?” - the fact is that some modules use them as RX and TX channels for receiving and transmitting data, respectively. For example, bluetooth module. Therefore, taking into account the possible addition of the project to other modules, it was decided to leave these connection pins free.
To begin with, in order to be able to use the library to connect keyboards in the code, you need to install it on your device. This can be done as follows: in the Arduino IDE itself, click Sketch -> Connect Library -> Manage Libraries ... or use the hotkey combination "Ctrl + Shift + I". In the search we drive in "keypad.h" (without parentheses) and click "Install".
After installation, we start writing the sketch:
In analog keyboards, resistors are used to change the voltage level, and the signal goes through one channel, which is connected to the actual pin on the board. How everything is arranged can be understood by looking at the following scheme:
The connection is very simple, but may change depending on the specific keyboard. In this article I will consider an example of using this Chinese analog keyboard with Ali.
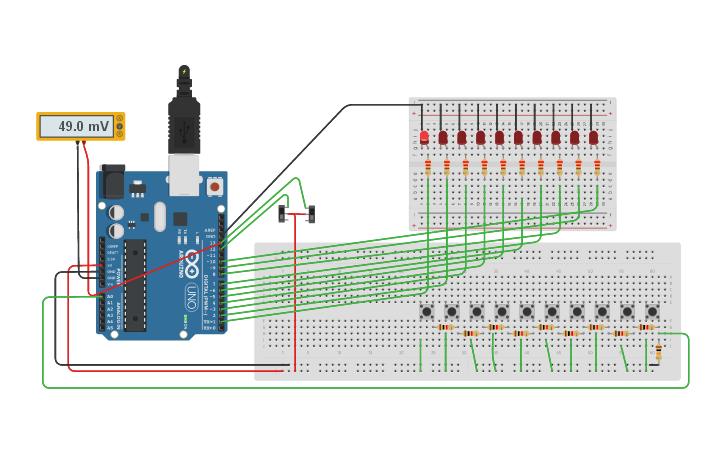
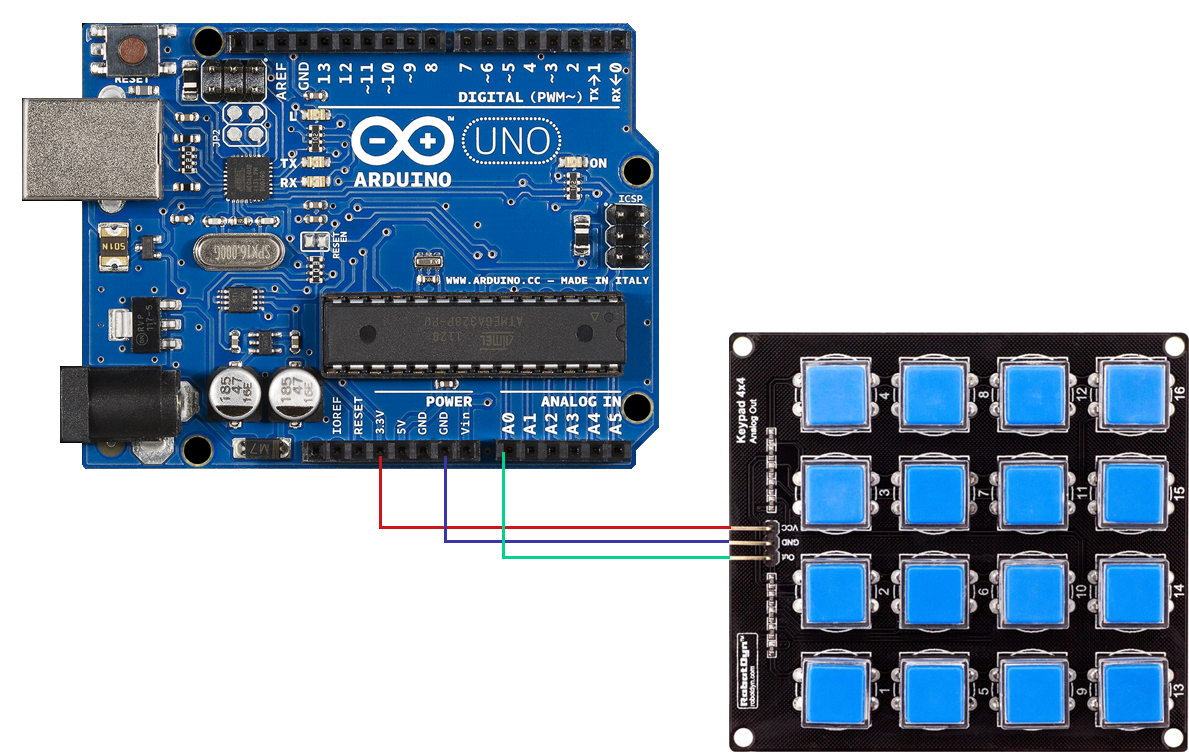
So: we connect the analog output of the keyboard to any analog pin on the board, connect the VCC contact on the board with 3.3V (do not look at the inscription on the keyboard itself, which says 5V is an error), and GND on the board with GND on the module. You can use the following scheme:
There is no need to use third-party libraries, because everything is very simple and clear. This is actually the code itself that reads the pressed button and displays its number, from 1 to 16 (from left to right, from top to bottom) or 0, if nothing is pressed, to the port monitor.
Personally, I recommend using analog keyboards, as they are often better quality ones and it is easier to connect them. The main thing is to pay attention to the table of the values of the pressed buttons, which the manufacturer provides or, if not, you can make these measurements yourself by outputting the values from the analog port to the port monitor, so that you can use them in code. But the choice is always yours: use the standard cheap option or overpay for the sake of significant advantages in some situations.
I have it all. Leave your questions in the comments, write your opinion and meet on the open spaces of Habr!
Attention! The article is focused primarily on beginners!
In many projects, it becomes necessary to create user input capabilities. If you need to implement a large number of buttons (relatively), then connecting them separately becomes both long and irrational. For this purpose, it is better to choose some kind of keyboard, but as with any choice, it must be approached consciously. What are the types of keyboards and how to interact with them?
Globally, all modules of this type can be divided into two broad categories: matrix and analog .
Matrix keyboards
The easiest, cheapest and most popular type of keyboards. It is relatively simple to manufacture and fills most of the arduino module market. Most often looks like this:
')
Principle of operation
You can understand how this keyboard works by studying the following scheme:
To understand which button was pressed, you need to give a signal to the first four contacts of the module and watch which signal comes back from the second. But you should not be afraid of the fact that you will have to write the processing algorithms for eight pins manually - the ready-made library “keypad.h” will help us in this, thanks to which we will not have to reinvent the wheel.
Connection to the board
Connecting the module itself
In this article I will use the following connection diagram:
You probably have a question: “Why did I decide to use pins from the second to the ninth, skipping zero and first?” - the fact is that some modules use them as RX and TX channels for receiving and transmitting data, respectively. For example, bluetooth module. Therefore, taking into account the possible addition of the project to other modules, it was decided to leave these connection pins free.
Writing a sketch
To begin with, in order to be able to use the library to connect keyboards in the code, you need to install it on your device. This can be done as follows: in the Arduino IDE itself, click Sketch -> Connect Library -> Manage Libraries ... or use the hotkey combination "Ctrl + Shift + I". In the search we drive in "keypad.h" (without parentheses) and click "Install".
After installation, we start writing the sketch:
#include <Keypad.h> // const byte ROWS = 4; // const byte COLS = 4; // char hexaKeys[ROWS][COLS] = {// , , {'1','4','7','*'}, {'2','5','8','0'}, {'3','6','9','#'}, {'A','B','C','D'} }; byte rowPins[ROWS] = {5, 4, 3, 2}; // byte colPins[COLS] = {9, 8, 7, 6}; // // : Keypad customKeypad = Keypad( makeKeymap(hexaKeys), rowPins, colPins, ROWS, COLS); void setup(){ Serial.begin(9600);// } void loop(){ char customKey = customKeypad.getKey();// if (customKey){// - Serial.println(customKey);// } } Advantages and disadvantages
Minuses
- Too many pins to connect to work. This is a big problem, if you are not creating a calculator or combination lock, but a larger project, in which you still need to use a huge number of different modules - perhaps they simply do not have enough pins.
- The quality of the module is too low: no one guarantees you a constant, stable signal. The original keyboards are not made at a very high level, and if you even made an order on Aliexpress, then most likely you will have to fix the jambs of Chinese engineers with a soldering iron to achieve stable operation.
- An additional library is used, which will also occupy the memory of the microcontroller, which it does not have very much. If you are writing a big project with a lot of functions and calculations, you need to read data from the keyboard manually or use an analog keyboard for each byte in the account.
pros
- Low price
- Easy to find on sale
Analog Keyboards
Principle of operation
In analog keyboards, resistors are used to change the voltage level, and the signal goes through one channel, which is connected to the actual pin on the board. How everything is arranged can be understood by looking at the following scheme:
Connection to the board
The connection is very simple, but may change depending on the specific keyboard. In this article I will consider an example of using this Chinese analog keyboard with Ali.
So: we connect the analog output of the keyboard to any analog pin on the board, connect the VCC contact on the board with 3.3V (do not look at the inscription on the keyboard itself, which says 5V is an error), and GND on the board with GND on the module. You can use the following scheme:
Sketch writing
There is no need to use third-party libraries, because everything is very simple and clear. This is actually the code itself that reads the pressed button and displays its number, from 1 to 16 (from left to right, from top to bottom) or 0, if nothing is pressed, to the port monitor.
unsigned const short int KEYPAD_PIN = 0;// void setup() { Serial.begin(9600); analogReadResolution(10);// 0...1023 } void loop() { Serial.println(getPressedKeypadButton());// } short int getPressedKeypadButton(){// keypad`a // 1 16 0 const int OCCURACY = 5;// int sensorValue = analogRead(KEYPAD_PIN);// int keys[] = {1016, 937, 860, 794, 683, 641, 604, 571, 509, 485, 464, 444, 407, 328, 275, 236};// (0-15, 0=1, 1=2 ..) if(sensorValue > -OCCURACY && sensorValue < OCCURACY){return 0;}// , 0 for(short int i = 0; i < 16; i++){// if(sensorValue > (keys[i] - OCCURACY) && sensorValue < (keys[i] + OCCURACY)){ return i+1;// , .. 0 , 0 } } } Advantages and disadvantages
pros
- Very simple connection
- It takes only one pin
- Saves the memory you do not spend under the library
- Provides stable operation (provided that you will not press more than one button at a time)
Minuses
- It is more expensive than matrix keyboards
- Most likely the only way to purchase will order from China and delivery will take some time.
Results
Personally, I recommend using analog keyboards, as they are often better quality ones and it is easier to connect them. The main thing is to pay attention to the table of the values of the pressed buttons, which the manufacturer provides or, if not, you can make these measurements yourself by outputting the values from the analog port to the port monitor, so that you can use them in code. But the choice is always yours: use the standard cheap option or overpay for the sake of significant advantages in some situations.
I have it all. Leave your questions in the comments, write your opinion and meet on the open spaces of Habr!
Source: https://habr.com/ru/post/460409/
All Articles