Creating an Xcode Project Template

Now iOS developers have a lot of tools to automate routine actions. In Surf we use Generamba, Fastlane, SwiftGen, SwiftLint, Jenkins. And constantly looking for ways to automate something else. And if earlier we spent 1-2 days on initializing a new project, now it takes no more than 4 hours.
What you need to start developing a large project?
1. Create a repository.
- Configure access rights;
- Set notifications in the developers chat.
2. Create a project.
- Create a folder structure;
- Add various support files like all your favorite extensions;
- Customize CI / CD;
- Add various linters and generators (Generamba / SwiftLint / SwiftGen);
- Tighten dependencies;
- ...
After 1-2 days of work, you can begin to fully develop.
Obviously, most of these steps can be automated. Of the possible options on hand were:
- XcodeGen;
- Templates Xcode projects;
- Basic Xcode project.
')
Xcodegen
+ Allows you to generate .xcodeproj on the fly using the configuration file, with which adds the ability to get rid of conflicts in the project file.
- Used in conjunction with other scripts, as it works only with the project file, without affecting the rest of the files.
Xcode Project Templates
+ You can generate .xcodeproj with all settings, as well as any other additional files.
- There is no full-fledged official documentation and description of templates in xml.
Basic Xcode project
+ Quickly set up and immediately with all the necessary files and dependencies.
- Redo for a specific project for a long time. And you can accidentally skip a step and shoot yourself in the foot.
As a result, we stopped at using Xcode projects, this allowed us to optimize the process and reduce the time to create a project. The basic Xcode project seemed too crutchy, and the flexibility that custom scripts introduce is not needed for now.
Xcode Project Templates
As I wrote above, using Xcode templates, you can create iOS / macOS / tvOS / watchOS / Cross-platform projects and add any files and settings. The problem is that Apple does not provide any documentation for this. All that is - a couple of small tutorials and examples of different enthusiasts, I used this wiki here.
What is out of the box
IOS application templates are here:
/Applications/Xcode.app/Contents/Developer/Platforms/iPhoneOS.platform/Developer/Library/Xcode/Templates/Project Templates/iOS/and for MacOS applications here:
/Applications/Xcode.app/Contents/Developer/Library/Xcode/Templates/Project Templates/Mac/Project templates are represented by regular .plist files. Here is what the familiar Single View Application looks like.
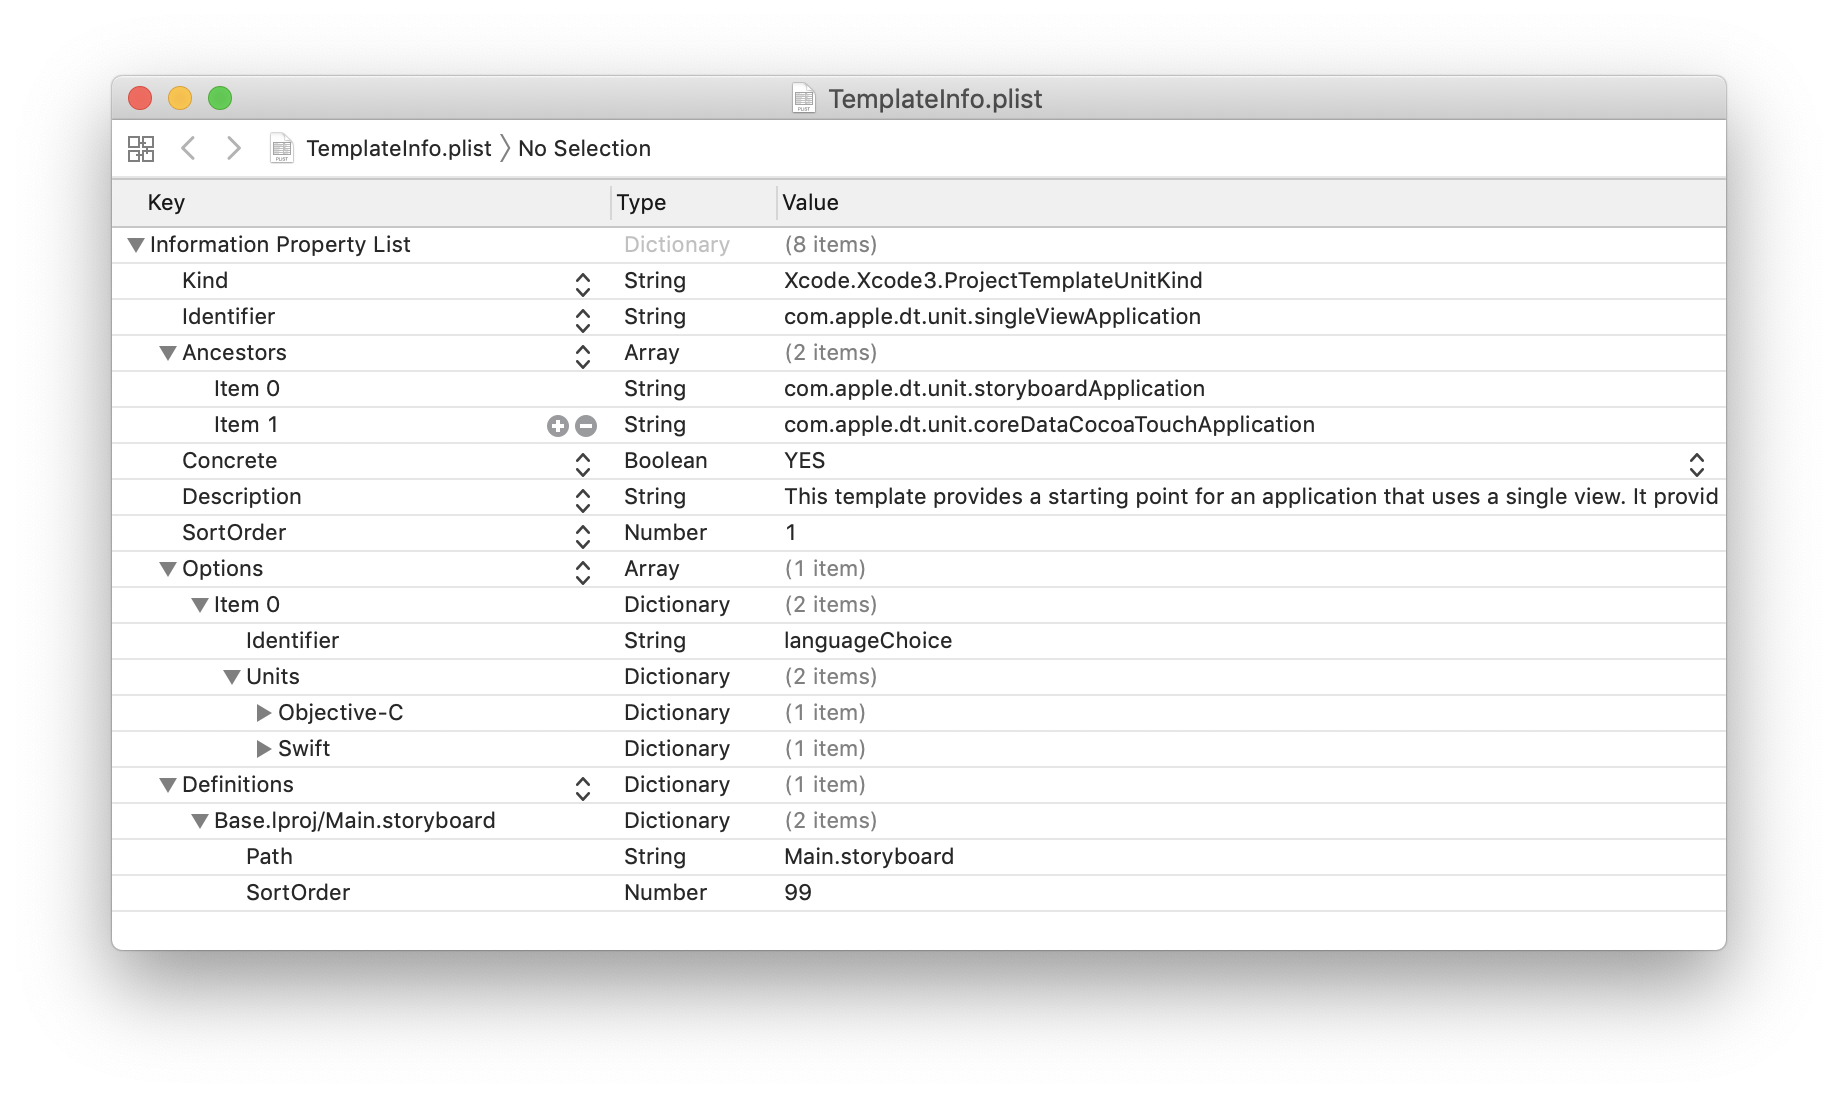
Each template has a unique name - “Identifier”, templates from Apple have a com.apple.dt.unit prefix.
Ancestors are the parents of the current template. Templates support multiple inheritance, that is, Single View Application inherits properties from the Storyboard Application and Core Data Cocoa Touch Application.
This is how the Single View Application Hierarchy looks like.

Create your template
Custom templates are best added to the local library ~ / Library / Developer / Xcode / Templates, so we will not lose them when updating Xcode. If there is no such directory, create it.
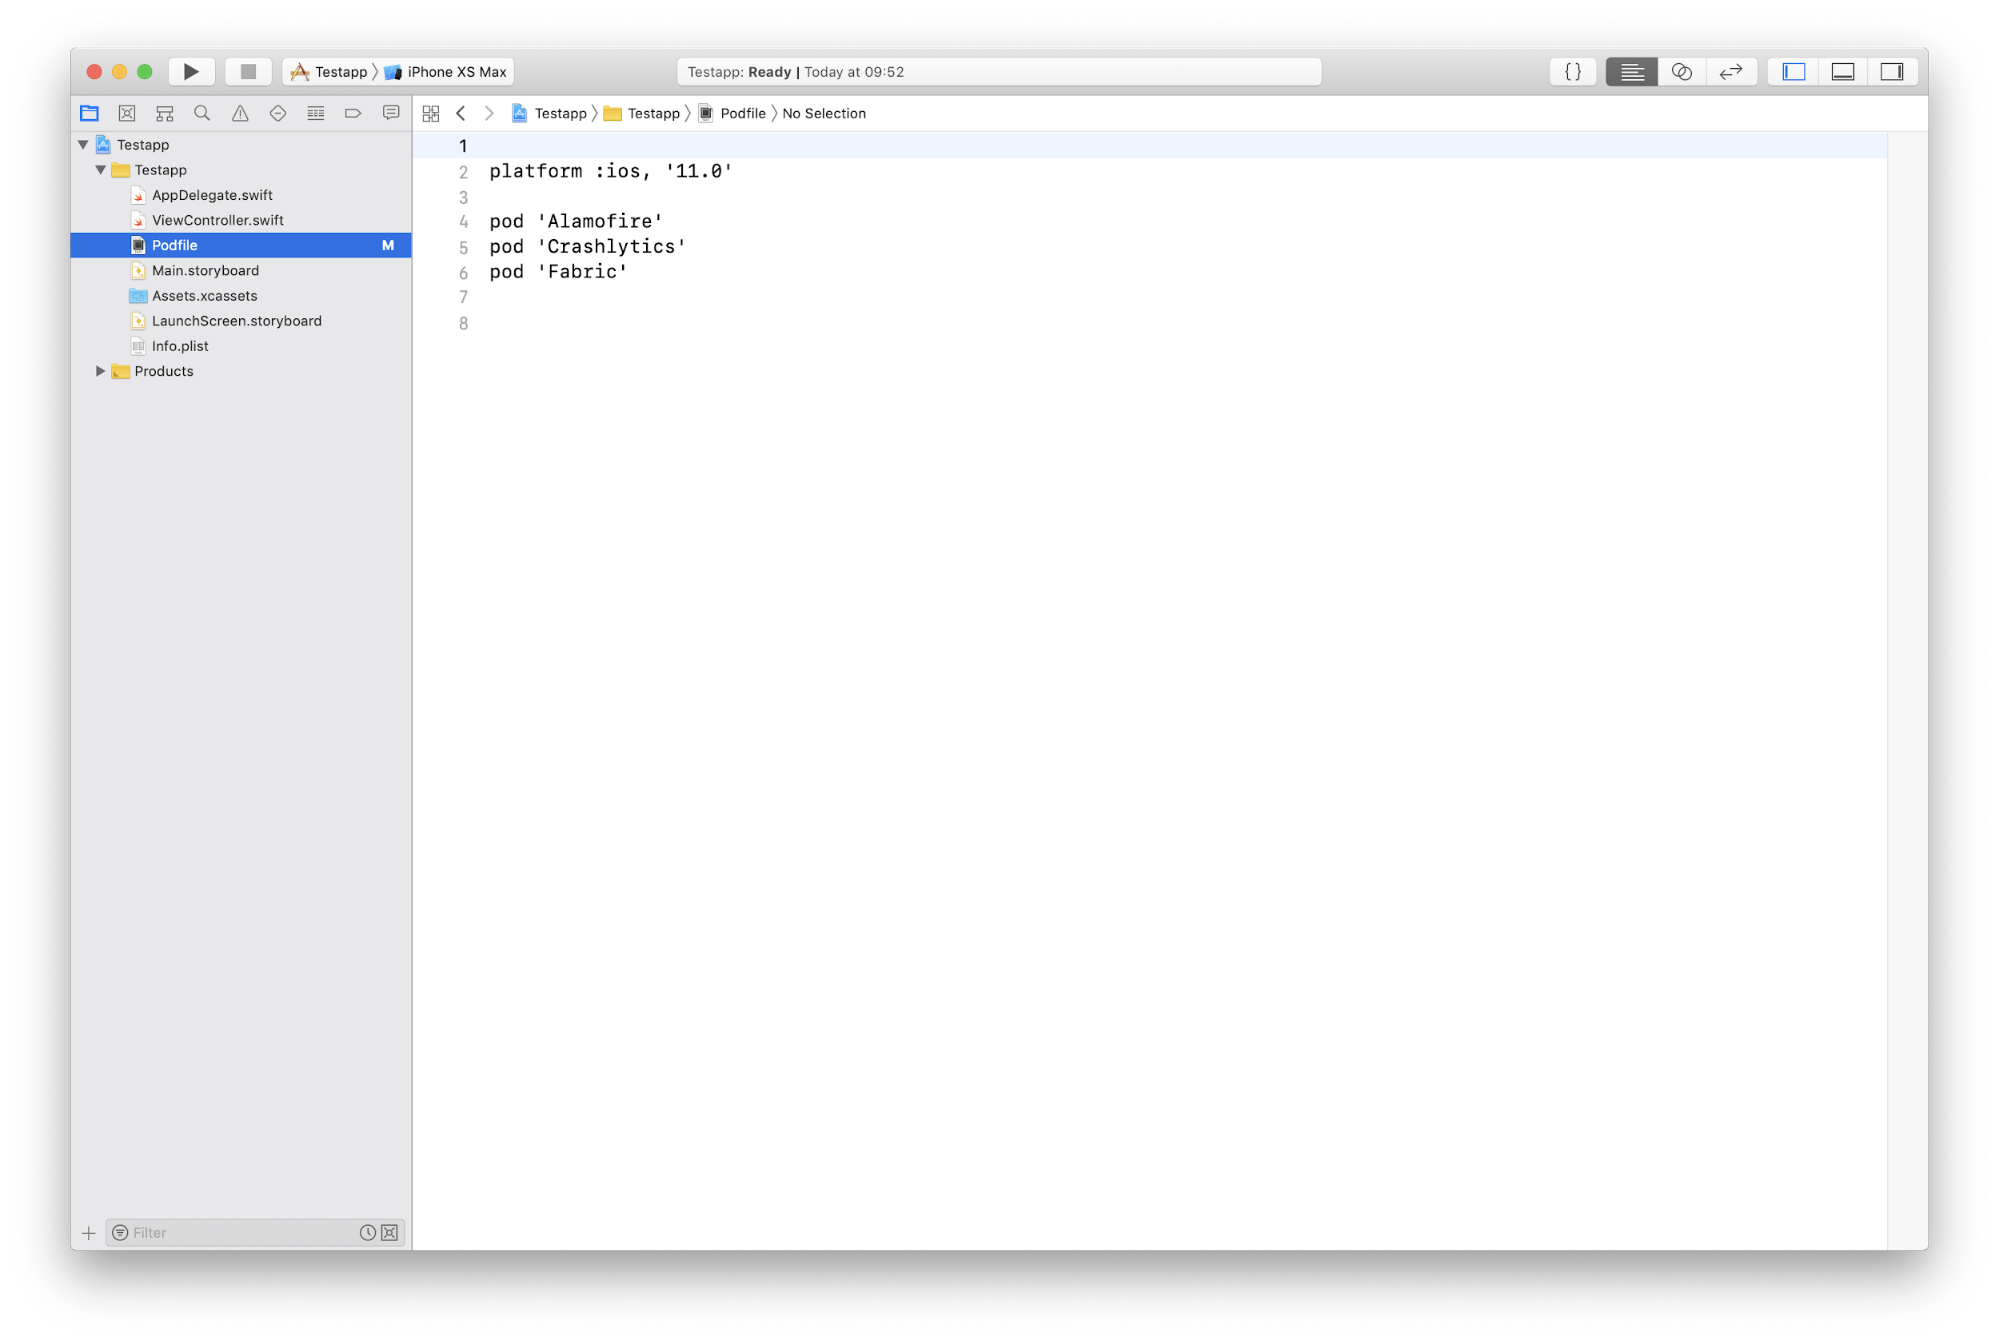
I prepared a small template that will add to our project Podfile with pre-defined dependencies.
<?xml version="1.0" encoding="UTF-8"?> <!DOCTYPE plist PUBLIC "-//Apple//DTD PLIST 1.0//EN" "http://www.apple.com/DTDs/PropertyList-1.0.dtd"> <plist version="1.0"> <dict> <key>Kind</key> <string>Xcode.Xcode3.ProjectTemplateUnitKind</string> <key>Identifier</key> <string>ru.surfstudio.dt.unit.customTemplate</string> <key>Ancestors</key> <array> <string>com.apple.dt.unit.singleViewApplication</string> </array> <key>Concrete</key> <true/> <key>Description</key> <string></string> <key>Definitions</key> <dict> <key>../Podfile</key> <string>platform :ios, '11.0' pod 'Alamofire' pod 'Crashlytics' pod 'Fabric' </string> </dict> <key>Nodes</key> <array> <string>../Podfile</string> </array> </dict> </plist> Here we have created the Definitions section, which will contain variables and files that can be added to the project. There and added a key Podfile. The key indicates the file that we are creating or editing. After the key, set the string that will be written to this file. Instead of writing the lines manually, we refer to the files from the directory with the template and take them from there.
Now let's take this code and put it in a file called TemplateInfo.plist in the folder CustomTemplate.xctemplate from the templates directory.
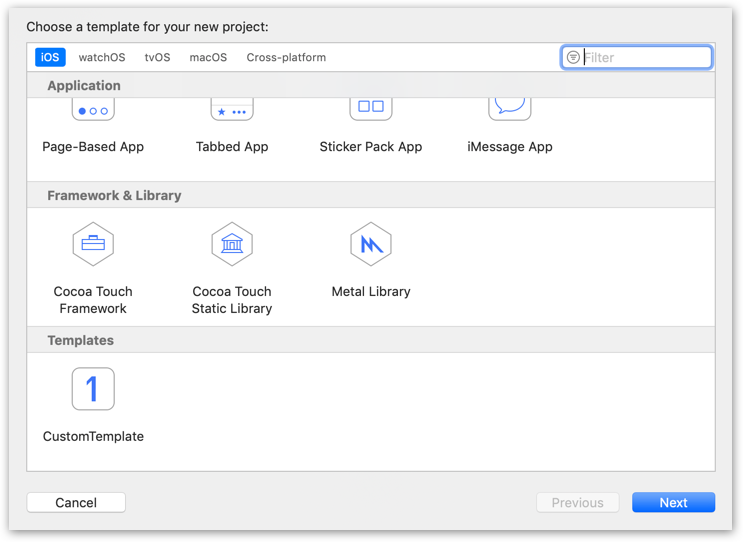
Let's see what we did. If everything went according to plan, then when creating a project in Xcode (File-> New-> Project (⇧⌘N)) we will see a new section Templates and in it our new template “CustomTemplate”.
Choose it and create a project. After creation, the Prodfile will be added, as we need.
We pump the template
Let's add the Readme generation for our project. Now we will try to add it immediately with the file, and not to describe it inside the template.
So, add the README.md file inside our CustomTemplate.xctemplate and there it is:
# ___PROJECTNAME___ Description of my project In order for our template to be able to add a file to the Nodes section, you need to add:
<string>../README.md</string> Also, inside the Definitions section add:
<key>../README.md</key> <dict> <key>Path</key> <string>README.md</string> </dict> <?xml version="1.0" encoding="UTF-8"?> <!DOCTYPE plist PUBLIC "-//Apple//DTD PLIST 1.0//EN" "http://www.apple.com/DTDs/PropertyList-1.0.dtd"> <plist version="1.0"> <dict> <key>Kind</key> <string>Xcode.Xcode3.ProjectTemplateUnitKind</string> <key>Identifier</key> <string>ru.surfstudio.dt.unit.customTemplate</string> <key>Ancestors</key> <array> <string>com.apple.dt.unit.singleViewApplication</string> </array> <key>Concrete</key> <true/> <key>Description</key> <string></string> <key>Definitions</key> <dict> <key>../Podfile</key> <string> platform :ios, '11.0' pod 'Alamofire' pod 'Crashlytics' pod 'Fabric' </string> <key>../README.md</key> <dict> <key>Path</key> <string>README.md</string> </dict> </dict> <key>Nodes</key> <array> <string>../Podfile</string> <string>../README.md</string> </array> </dict> </plist> Let's check what came out of it.
Let's try to create a project again using our CustomTemplate, and in the end we will see that the Readme has been added to the project:
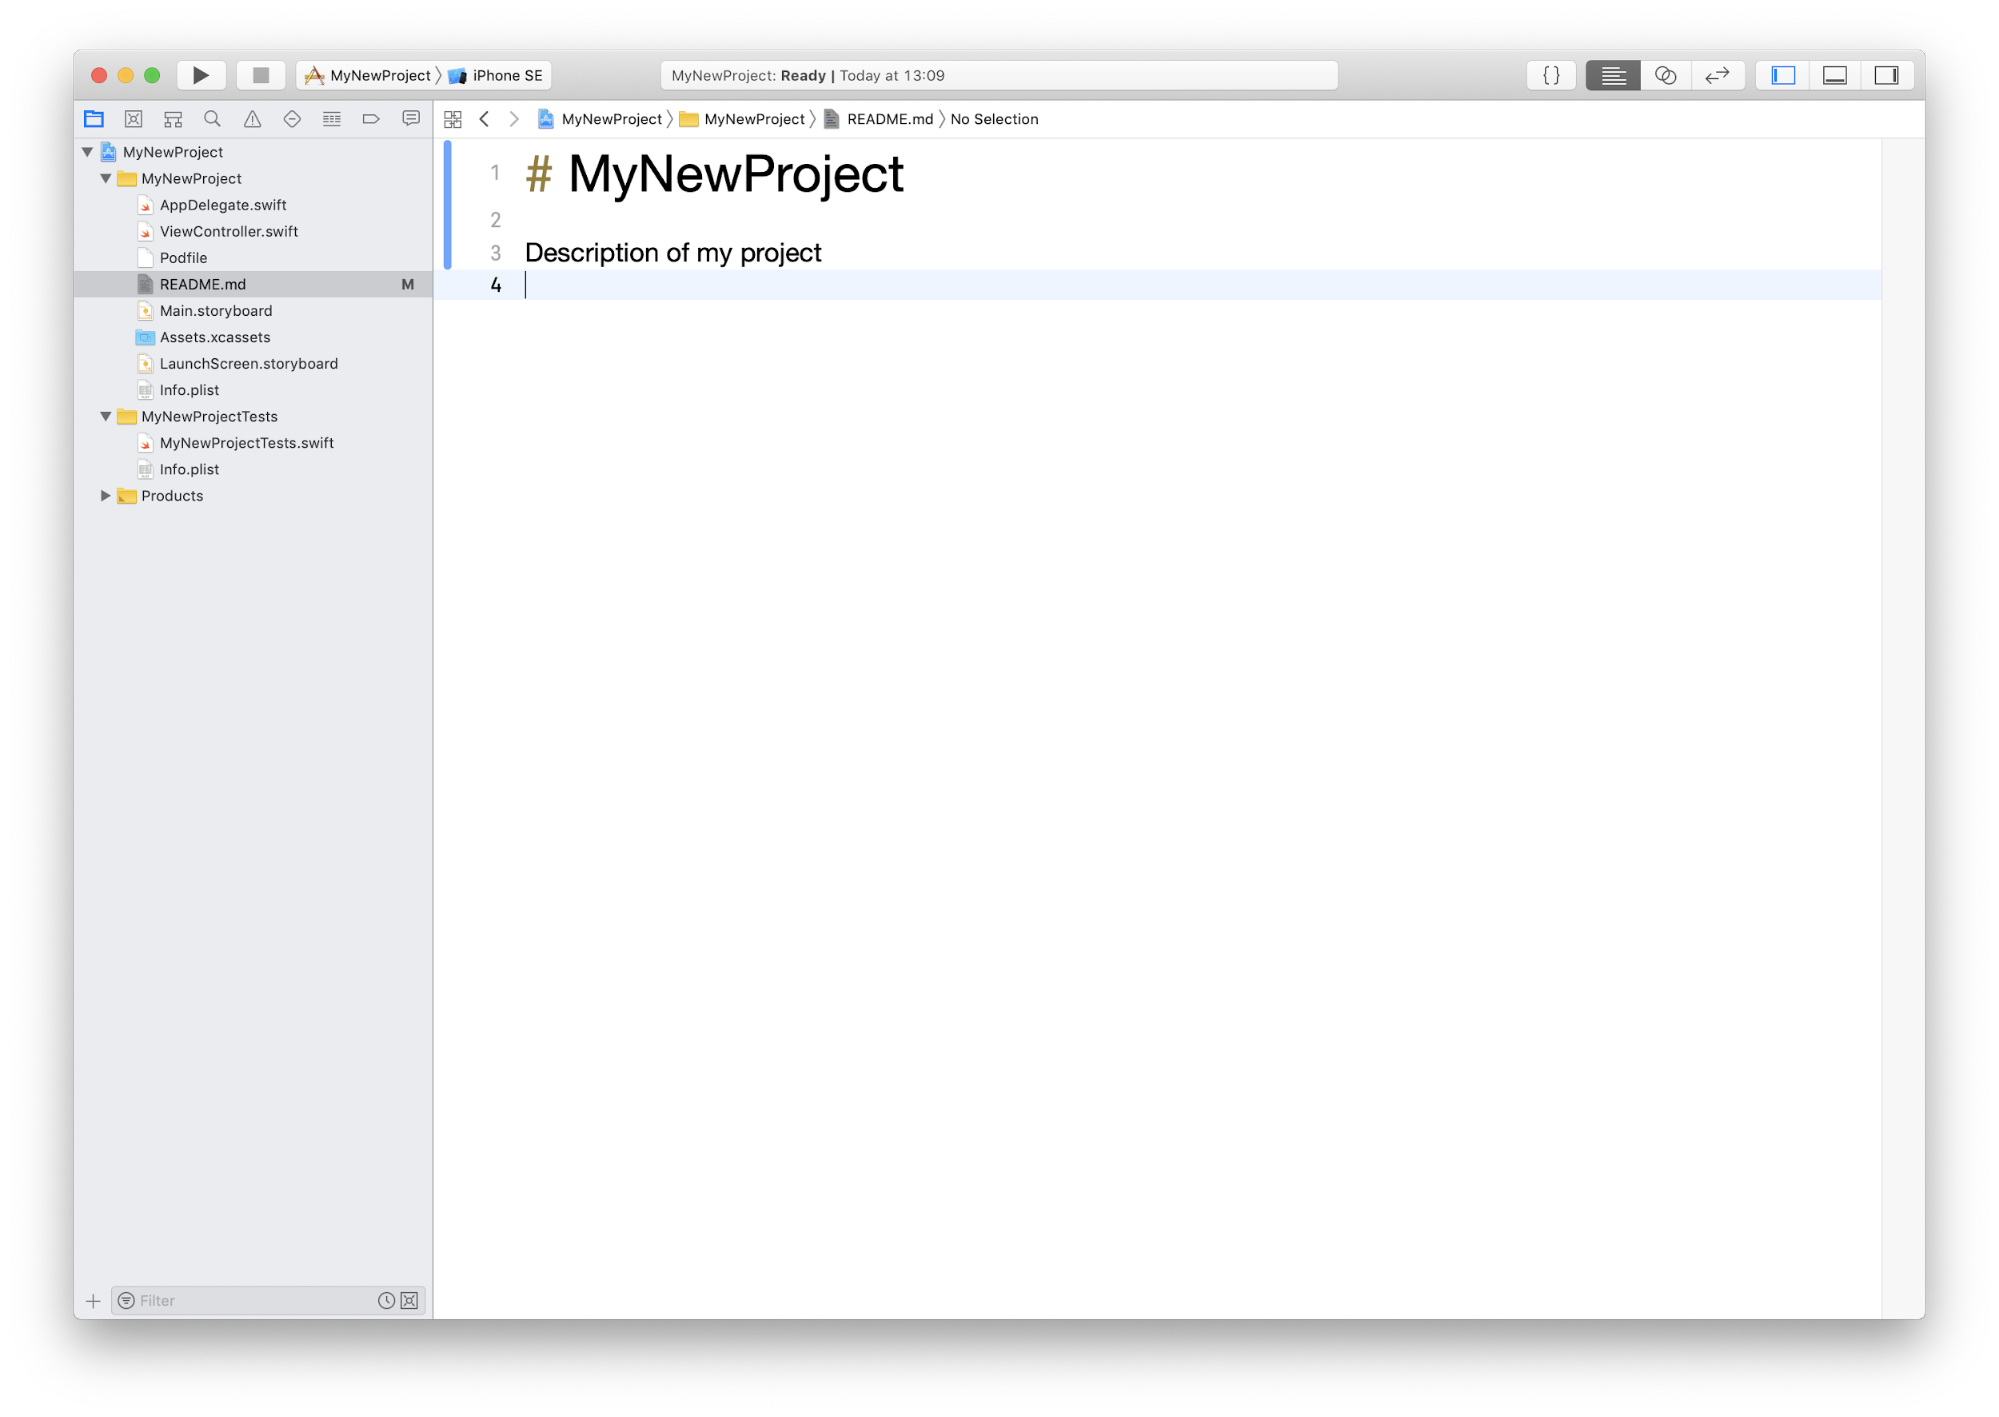
The attentive ones noticed that we added ___PROJECTNAME___ to the header in README.md, and not “MyNewProject”. ___PROJECTNAME___ is a predefined constant that can be used for your needs.
For example, in order to generate a header for a file with a code, as Xcode usually does for us, use the following template:
// // ___FILENAME___ // ___PACKAGENAME___ // // Created by ___FULLUSERNAME___ on ___DATE___. //___COPYRIGHT___ // More information about available constants is here .
Conclusion
Today we learned how to create simple project templates. Now we have a template that can add Podfile and README files to our project.
If you want to follow in our footsteps and reduce the time to create a project, I recommend:
1. Choose the right solution.
In addition to Xcode templates, there are others: XcodeGen or the base project. In any case, before choosing a tool, examine the pros and cons and select the appropriate one.
2. Describe in detail the steps necessary to create a model project. Projects are not initiated very often, so you can forget some steps.
3. Try to automate the steps from point # 2.
For example, a part of them is transferred to Xcode template, and a part to scripts for a call after creating a project.
Useful information: overview article on templates and docks on templates
Source: https://habr.com/ru/post/460265/
All Articles