Mini photo studio at home
One fine evening, many people involved in photography have a desire to try themselves in different directions of shooting, but they stumble upon numerous obstacles that this desire can discourage.
Today I want to tell you about how to create a mini photo studio at home for shooting small objects, which is required for stock photography and advertising.

As a result of a search on the Internet, I found several ways to create such a table for photographing. Having a little imagination, I went to the store with drawings from various articles and incomprehensible my comments.
')
Climbing the entire Obi store, I found all the components having spent no more than 800 rubles on them and went to create the design at home. Only it is necessary to take into account that in the metro with tubes of 3 m you will not be allowed in, I cut them into meter sections on the spot.
From the imported pipes we will need to cut:
The main components of the frame is required to glue to stiffen the structure. You can glue with any glue that is, I took the old "Super Glue" and smeared both parts of the knot before connecting.
After the preparation of the main units proceed to the assembly of the entire structure. Connections must withstand various objects on the tubes, but it is desirable to pre-check everything for strength.
After assembling the structure, a sheet of drawing paper is placed on the central part in a bend so that the object is on a white background when shooting. You also need to set the lighting scheme that you come up with; you can use the classic one: 2 lights on the front, 1 on the background lighting, 1 from the bottom to highlight the background under the object.
If you want to use your flash for additional lighting, which is desirable to do, you will need to assemble a mini softbox from scrap materials or a diffuser. When using such devices, the light from the flash will be much softer and the reflections on objects will be more expressive.


Plug without soft box

Soft box plug
Lenses

Birch bark snowman
Good pictures!
Today I want to tell you about how to create a mini photo studio at home for shooting small objects, which is required for stock photography and advertising.
As a result of a search on the Internet, I found several ways to create such a table for photographing. Having a little imagination, I went to the store with drawings from various articles and incomprehensible my comments.
')
To create such a miracle, we need:
| Pipe for wiring | 9 m |
| T-shaped connections | 8 pieces |
| 90 Degree Connections | 6 pieces |
| Whatman paper | 1 PC |
| Clothespin | 1-4 pieces |
| Fluorescent lamp | 1 PC |
| Cape white | 1 PC |
| Paper knife | 1 PC |
1. Step: Purchase the required materials.
Climbing the entire Obi store, I found all the components having spent no more than 800 rubles on them and went to create the design at home. Only it is necessary to take into account that in the metro with tubes of 3 m you will not be allowed in, I cut them into meter sections on the spot.
2. Step: Cutting Parts
From the imported pipes we will need to cut:
| tube 50 cm | 10 pieces |
| tube 25 cm | 4 things |
| tube 8 cm | 4 things |
| tube 80 cm | 2 pcs |
3. Step: Gluing basic knots
The main components of the frame is required to glue to stiffen the structure. You can glue with any glue that is, I took the old "Super Glue" and smeared both parts of the knot before connecting.
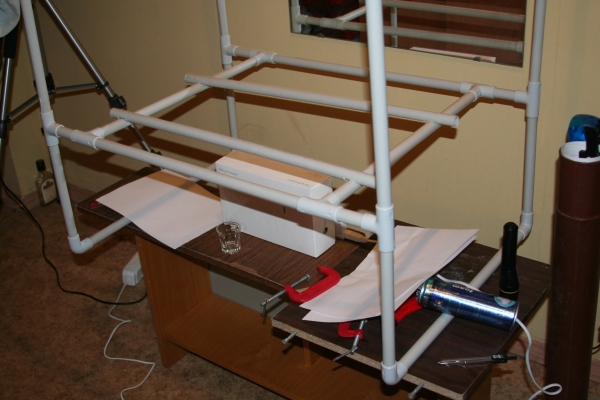
4. Step: Build the design
After the preparation of the main units proceed to the assembly of the entire structure. Connections must withstand various objects on the tubes, but it is desirable to pre-check everything for strength.
5. Step: Construction Design
After assembling the structure, a sheet of drawing paper is placed on the central part in a bend so that the object is on a white background when shooting. You also need to set the lighting scheme that you come up with; you can use the classic one: 2 lights on the front, 1 on the background lighting, 1 from the bottom to highlight the background under the object.
Supplement: Pulsed Lighting
If you want to use your flash for additional lighting, which is desirable to do, you will need to assemble a mini softbox from scrap materials or a diffuser. When using such devices, the light from the flash will be much softer and the reflections on objects will be more expressive.
Sample photos:
Plug without soft box
Soft box plug
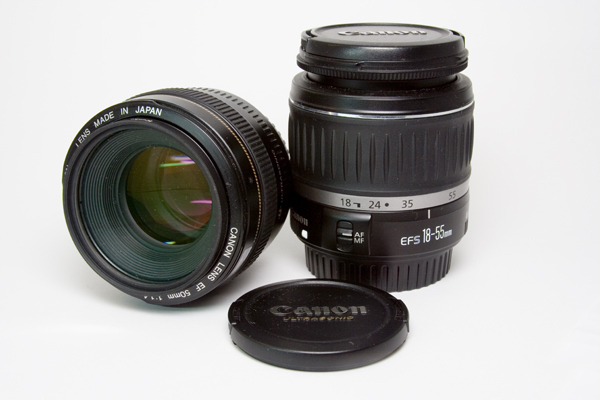
Lenses
Birch bark snowman
Good pictures!
Source: https://habr.com/ru/post/45863/
All Articles