TJBOT as an illustration of IBM Watson services
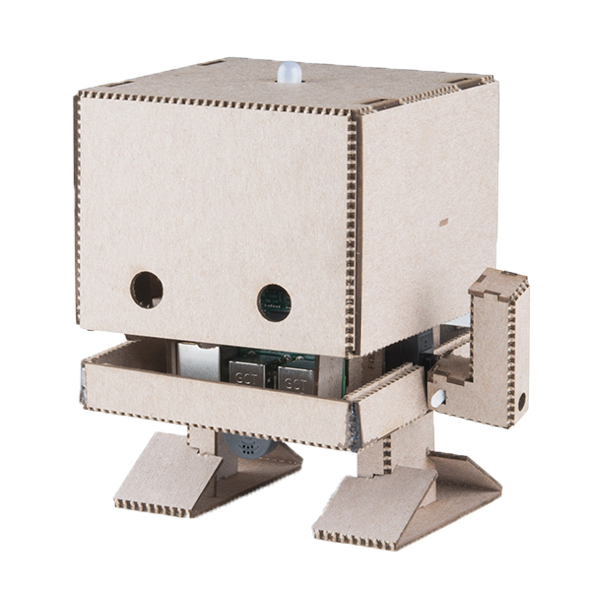
Hi, Habr! In the spring of 2019, the next Think Developers Workshop was held, where everyone could assemble a TJBota cardboard robot running IBM Watson Services. Under the cat there is a detailed instruction, from what and how to assemble such a robot, useful links and simple recipes that demonstrate some of the cognitive capabilities of Watson services, as well as a small announcement of two July seminars about Watson Services in the Moscow office of IBM.
IBM Watson services is a cognitive system that can process natural language, recognize patterns and learn. For convenient use of these services in any application there is an API.
TJBot is an open source project designed to help get access to Watson services. This is a robot that can be made by each of raspberry pi and ready-made artificial intelligence. You can revive TJBot using recipes.
')
Recipes are step-by-step instructions that help you connect TJBot to Watson services, such as Speech to Text, Visual Recognition, and Language Translator. Recipes are based on the Raspberry Pi.
Instructions for assembling the case can be found here .
Wiring diagram of the diode and servo to the board in the picture below.

The case is assembled “around” the board, so it is necessary to write the OS to the memory card in advance.
The easiest way to install NOOBS , but any other Linux will do. Before installing NOOBS, format the memory card, download the archive with the installation files and export them to a computer. Next, you need to transfer files from the NOOBS folder to the memory card. When you first start raspberry (with a pre-inserted memory card), the OS installation menu will open. Detailed instructions can be found here .
The first step is to install the packages:
Now download the ready-made recipes from the githab:
Go to the directory with the recipe:
This folder contains the config.js configuration file and the stt.js script file.
Install npm:
To use the Watson services, you need to do the following steps.
Go to this site .

Register and go to the directory. In the catalog we look for “speech to text”. Speech to text is a service used to translate speech to text. Access to the API can be found here .

Text to speech and Visual Recognition will also be needed when we work with image recognition. Click on speech to text, get on the page with a description of this component and plans for use.
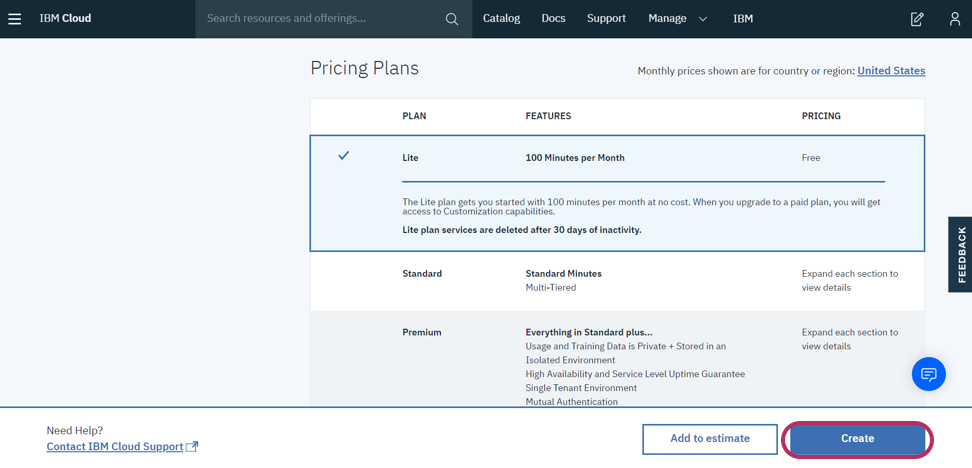
We have enough free plan. We click on create, then in the menu on the left we go to Service Credentials.

From here you need to copy the credentials and APIKEY and paste them into the config.js file.
Now, if we want to add another Watson service, in the configuration file we need to add a block with apikey and url wrapped in the following construction for each service:
Consider a file with an executable bot script stt.js. It has a ready-made diskoParty () function for testing bot operation and without using Watson services. This function makes the bot diode blink in different colors.
In the same script there is a function that allows you to switch the color of the diode using the speech of the developer.
Run the script:
Tell the bot “turn the light blue” to switch the diode color to blue, “turn the light on” to turn on the diode, or “turn the light off” to turn it off. Supported colors for recognition (while only English is supported): yellow, green, orange, purple, magenta, red, blue, aqua and white.
TjBot has a lot of basic functions. For example, to check the servo, you can use the tj.wave () function, which causes the bot to greet you with a flick of the handle. These functions with short descriptions can be found here .
Now consider the following script that uses both visual recognition and text to speech.
Text to speech is a service that converts typed text to speech using various voices, keys and languages. Its API can be found at the following link . Visual recognition service allows you to describe what is shown in the picture. He recognizes the faces of people with the definition of their approximate age and sex, food, dishes, objects and knows how to look for similar images. The API for this service can be found here . With the help of these services we will teach the bot to see and speak. Based on the image received from the camera, Watson services (visual recognition) will send us a json-tagged image as an answer, and text to speech will help voice them.
First of all, create credentials on cloud.ibm.com. Copy them and paste them into the config.js configuration file.
Next, edit the executable script stt.js. We find in it the following lines:
The hardware array contains the bot devices used. If we want to use a servo drive in the script, it will be necessary to sign into the “servo” array, if we need a camera, then we will add it to the “camera” array, to use the column, we will sign the “speaker”.
So, our script will use a column and a camera, respectively, we sign it into the hardware array.
From the basic functions of the tj-library, we need the functions tj.see () and tj.speak ().
The tj.see () function creates a photo (the object is saved in the tmp folder), sends it to the cloud with Watson services, analyzes the image and issues a json object consisting of tags - words describing the photo (you can choose different descriptions and confidence levels) and reliability percentage of these tags. We will display the content of the response of services in the console.
The tj.speak () function can turn text using Watson services into an audio file and then play it back. Also, if a person is found in a photo using the Watson services, TJBot will wave a pen.
This recipe shows how easy it is to use Watson services in your project. A brief description of these services and links to them have already been in this article . You can try all the Watson services for free.
Also, very soon in the Moscow office of IBM will be held seminars where you can get acquainted with other features of Watson services.
On July 9, 2019, the Unveil AI Blackbox with IBM Watson OpenScale workshop will be held on the new cloud-based product - Watson OpenScale. At this event you will be able to get acquainted with the principles of operation of neural networks, try to create and train a neural network and test it using the Watson AI OpenScale platform. At the event you must first register at this link .
On July 10, 2019, the seminar “Recognition of images and video in the IBM cloud” will take place. In this workshop, you can learn how to integrate artificial intelligence into your application using Watson Studio. A detailed description of the event and a link to register here .
IBM Watson services is a cognitive system that can process natural language, recognize patterns and learn. For convenient use of these services in any application there is an API.
TJBot is an open source project designed to help get access to Watson services. This is a robot that can be made by each of raspberry pi and ready-made artificial intelligence. You can revive TJBot using recipes.
')
Recipes are step-by-step instructions that help you connect TJBot to Watson services, such as Speech to Text, Visual Recognition, and Language Translator. Recipes are based on the Raspberry Pi.
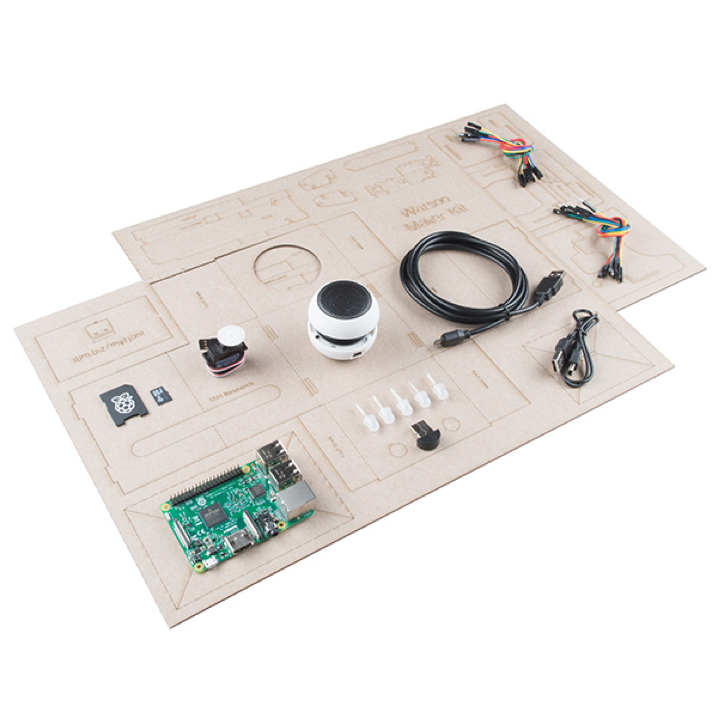
What is needed for TJBot
- Raspberry Pi 3 + SD card with pre-installed OS
- Usb microphone
- Bluetooth speaker or speaker with 3.5mm. audio jack
- Servo
- NeoPixel RGB LED (8mm)
- Wiring mom mom and dad mom
- Raspberry Pi Camera
- Power Supply
- Case (can be printed on a 3D printer or laser cut out of cardboard. The necessary layouts are here )
Instructions for assembling the case can be found here .
Wiring diagram of the diode and servo to the board in the picture below.
The case is assembled “around” the board, so it is necessary to write the OS to the memory card in advance.
The easiest way to install NOOBS , but any other Linux will do. Before installing NOOBS, format the memory card, download the archive with the installation files and export them to a computer. Next, you need to transfer files from the NOOBS folder to the memory card. When you first start raspberry (with a pre-inserted memory card), the OS installation menu will open. Detailed instructions can be found here .
Software preparations
The first step is to install the packages:
curl -sL http://ibm.biz/tjbot-bootstrap | sudo sh – Now download the ready-made recipes from the githab:
git clone https://github.com/ibmtjbot/tjbot.git Go to the directory with the recipe:
cd tjbot / recipes / speech_to_text This folder contains the config.js configuration file and the stt.js script file.
Install npm:
sudo apt-get install npm Connecting Watson services
To use the Watson services, you need to do the following steps.
Go to this site .
Register and go to the directory. In the catalog we look for “speech to text”. Speech to text is a service used to translate speech to text. Access to the API can be found here .
Text to speech and Visual Recognition will also be needed when we work with image recognition. Click on speech to text, get on the page with a description of this component and plans for use.
We have enough free plan. We click on create, then in the menu on the left we go to Service Credentials.
From here you need to copy the credentials and APIKEY and paste them into the config.js file.
// Create the credentials object for export exports.credentials = {}; // Watson Speech to Text // https://www.ibm.com/watson/services/speech-to-text/ exports.credentials.speech_to_text = { "apikey": "...", "iam_apikey_description": "...", "iam_apikey_name": "...", "iam_role_crn": "...", "iam_serviceid_crn": "...", "url": "https://gateway-lon.watsonplatform.net/speech-to-text/api" }; Now, if we want to add another Watson service, in the configuration file we need to add a block with apikey and url wrapped in the following construction for each service:
exports.credentials.[ text_to_speech/visual_recognition/speech_to_text ] = { … }; TjBota Revitalization
Consider a file with an executable bot script stt.js. It has a ready-made diskoParty () function for testing bot operation and without using Watson services. This function makes the bot diode blink in different colors.
function discoParty() { for (i = 0; i < 30; i++) { setTimeout(function() { var randIdx = Math.floor(Math.random() * tjColors.length); var randColor = tjColors[randIdx]; tj.shine(randColor); }, i * 250); } } discoParty(); In the same script there is a function that allows you to switch the color of the diode using the speech of the developer.
Run the script:
sudo node stt.js Tell the bot “turn the light blue” to switch the diode color to blue, “turn the light on” to turn on the diode, or “turn the light off” to turn it off. Supported colors for recognition (while only English is supported): yellow, green, orange, purple, magenta, red, blue, aqua and white.
TjBot has a lot of basic functions. For example, to check the servo, you can use the tj.wave () function, which causes the bot to greet you with a flick of the handle. These functions with short descriptions can be found here .
Now consider the following script that uses both visual recognition and text to speech.
Text to speech is a service that converts typed text to speech using various voices, keys and languages. Its API can be found at the following link . Visual recognition service allows you to describe what is shown in the picture. He recognizes the faces of people with the definition of their approximate age and sex, food, dishes, objects and knows how to look for similar images. The API for this service can be found here . With the help of these services we will teach the bot to see and speak. Based on the image received from the camera, Watson services (visual recognition) will send us a json-tagged image as an answer, and text to speech will help voice them.
First of all, create credentials on cloud.ibm.com. Copy them and paste them into the config.js configuration file.
Next, edit the executable script stt.js. We find in it the following lines:
// these are the hardware capabilities that our TJ needs for this recipe var hardware = ['led', 'microphone']; The hardware array contains the bot devices used. If we want to use a servo drive in the script, it will be necessary to sign into the “servo” array, if we need a camera, then we will add it to the “camera” array, to use the column, we will sign the “speaker”.
So, our script will use a column and a camera, respectively, we sign it into the hardware array.
// these are the hardware capabilities that our TJ needs for this recipe var hardware = ['led', 'servo', 'camera', 'speaker', 'microphone']; // set up TJBot's configuration var tjConfig = { log: { level: 'verbose' }, speak: { language: 'en-US', // see TJBot.prototype.languages.speak voice: undefined, // use a specific voice; if undefined, a voice is chosen based on robot.gender and speak.language speakerDeviceId: "plughw:0,0" // plugged-in USB card 1, device 0; see aplay -l for a list of playback devices }, listen: { microphoneDeviceId: "plughw:1,0", // plugged-in USB card 1, device 0; see arecord -l for a list of recording devices inactivityTimeout: -1, // -1 to never timeout or break the connection. Set this to a value in seconds eg 120 to end connection after 120 seconds of silence language: 'en-US' // see TJBot.prototype.languages.listen }, }; From the basic functions of the tj-library, we need the functions tj.see () and tj.speak ().
The tj.see () function creates a photo (the object is saved in the tmp folder), sends it to the cloud with Watson services, analyzes the image and issues a json object consisting of tags - words describing the photo (you can choose different descriptions and confidence levels) and reliability percentage of these tags. We will display the content of the response of services in the console.
The tj.speak () function can turn text using Watson services into an audio file and then play it back. Also, if a person is found in a photo using the Watson services, TJBot will wave a pen.
// instantiate our TJBot! var tj = new TJBot(hardware, tjConfig, credentials); tj.see().then(function(objects){ var tags = objects.map(function(object){ return object.class; }); if (tags.includes('person')){ tj.wave(); } console.log(tags); for(var i=0;i<tags.length;i++){ tj.speak(tags[i]); } }); This recipe shows how easy it is to use Watson services in your project. A brief description of these services and links to them have already been in this article . You can try all the Watson services for free.
Also, very soon in the Moscow office of IBM will be held seminars where you can get acquainted with other features of Watson services.
On July 9, 2019, the Unveil AI Blackbox with IBM Watson OpenScale workshop will be held on the new cloud-based product - Watson OpenScale. At this event you will be able to get acquainted with the principles of operation of neural networks, try to create and train a neural network and test it using the Watson AI OpenScale platform. At the event you must first register at this link .
On July 10, 2019, the seminar “Recognition of images and video in the IBM cloud” will take place. In this workshop, you can learn how to integrate artificial intelligence into your application using Watson Studio. A detailed description of the event and a link to register here .
Source: https://habr.com/ru/post/458374/
All Articles