Sublime Text 3 for website layout. Customize the appearance and installation of plug-ins. Beginner's Guide
Today I’ll tell you about the code editor that I use for website layout for many years. Fast, convenient and fully customizable Sublime Text 3 .

We will customize its appearance from scratch, as well as apply the plug-ins AutoFileName, BracketHighliter, ColorHighliter, Emmet, GotoCSSDeclaration and Tag, which will significantly help us in the layout of sites! Well, from words to deeds!
First of all, after installing Sublime Text 3, I customize the look of the program.
')
To display the panel, go to View - Side Bar - Show Open Files . In this panel, our projects will be displayed, that is, folders and files of our typesetting. For clarity, now add one of them. All you need to do there is to simply drag the project folder to our panel.

Next, I customize the color scheme of the program and the code, for clarity, I will open any file, for example, with HTML code. To do this, double click on the desired file. Now I turn Preferences - Color Scheme , a window opens with the established color solutions and when choosing one or another theme, the appearance of our code and the program itself will change.
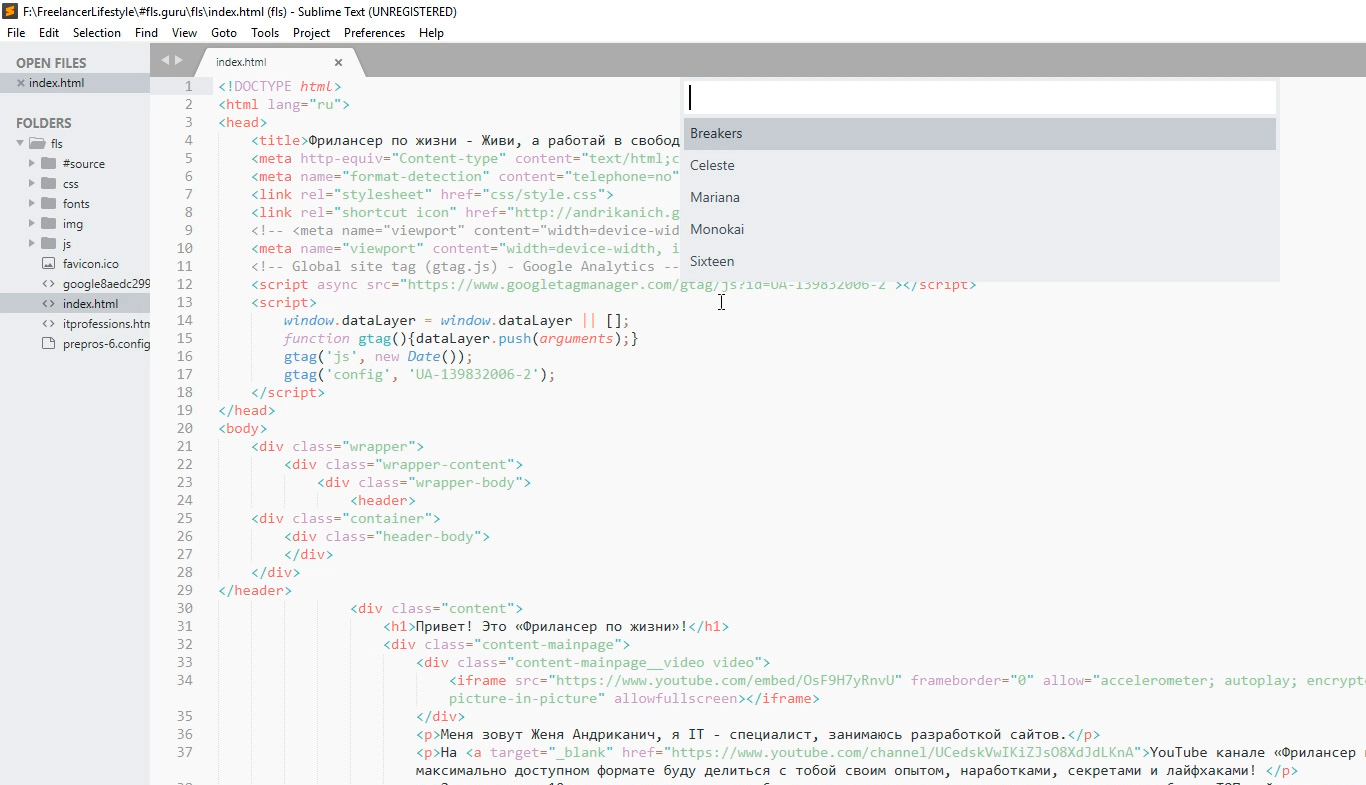
Personally, none of the preset options suit me, so I set up an additional color scheme. A huge number of them can be found and found on the site with additions to Sublime packagecontrol.io . I already know exactly what scheme I want to install, which I will do now.
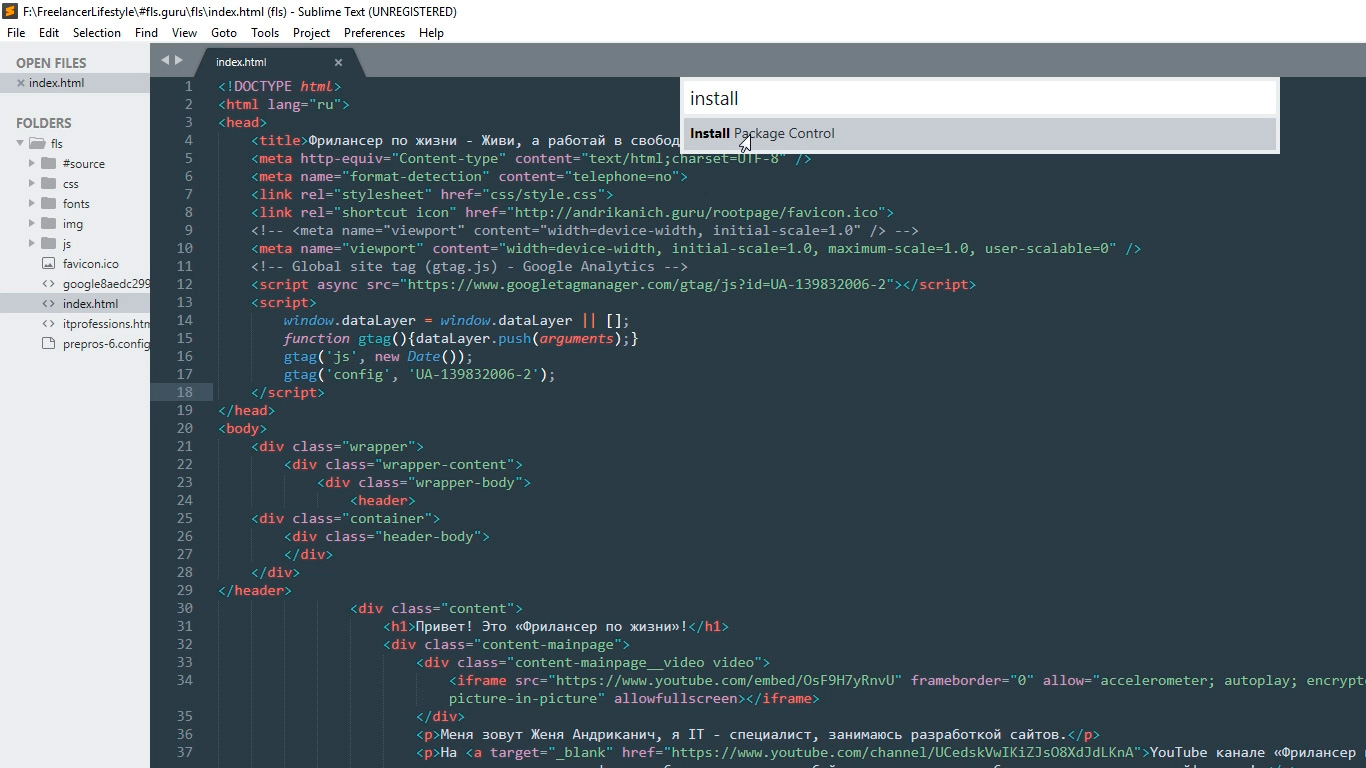
In order to install new color schemes, plug-ins and other add-ons, I need to install the installer of these add-ons first. It sounds difficult, but in reality everything is much simpler.
I go to the Tools menu - Command Palette , or press Ctrl + Shift + P. This window opens with a search, I enter install in the search field until I see the Install Package Control item, and click on it. After a few seconds, I receive a message that the Package Control has been successfully installed. Now I can proceed to install the desired color scheme.
To do this, I call Command Palette again by pressing Ctrl + Shift + P, I enter install again in the search field until I see the item Package Control: Install Package I click on it. After waiting a little, I see a window with a list of all available add-ons to Sublime. Well, almost everyone.
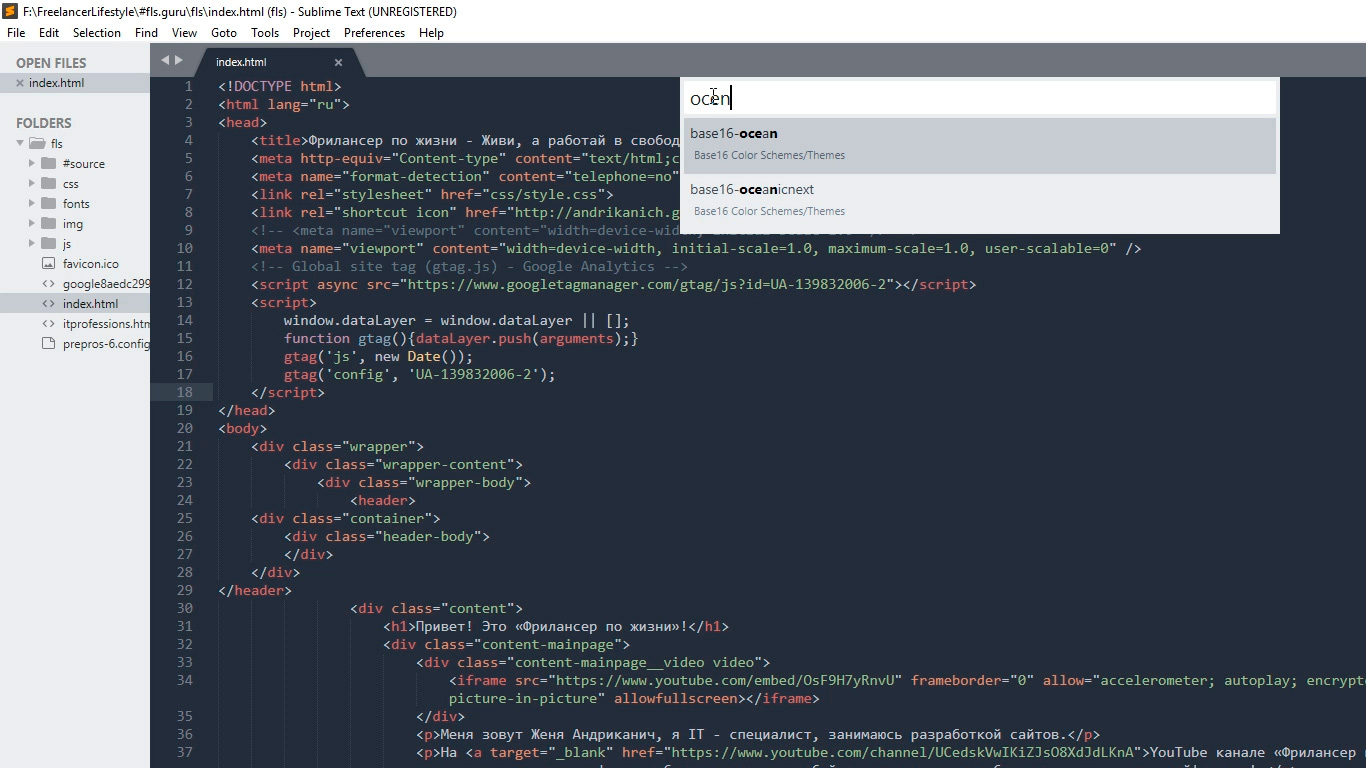
In the search field, I enter the name of the one I want to install, at the moment - this is the color scheme called Base16 Color Schemes, or rather, it is a whole package with many color schemes. I click on the item found and wait for installation. An indicator of the installation process can be seen on the bottom panel of the program. Having received a short message there that everything is set, I proceed to change the circuit. To do this, I open the already familiar menu item Preferences - Color Scheme and I see in the opened window a large number of different options. I'm interested in the scheme Ocean, I enter the name in the search, there are two of them here: one is more contrast than the other.
My favorite color scheme is set, of course you can choose any other.
I prefer the overall view of the program to be dark, so I turn Preferences - Theme , and switch to Adaptive.sublime-theme
The combination of colors is very important for working with the code, as it affects not only the perception, but also the fatigue and health of your eyes. So pick yourself a color scheme so that nothing in it strains you. And remember about the breaks in the work!
In addition, the following additional settings will help me to improve the code perception and comfort when working with it. Go to Preferences - Settings . This window opens divided into two parts. In the left part of the default settings, they can not be changed, but on the right side you can override these settings, each of the following must be separated by a comma. Here are the settings I use:
I will explain each setting.
It removes strange indentations in the program between the code and the side panel, which makes the overall picture more compact.
Sets the default font size. You can also quickly change the font size by working with the code, by holding the control and turning the mouse wheel.
If you suddenly change the size by accident, you can reset it by going to Preferences - Font - Reset
These lines are very useful for a beginner, because they visually connect the opening and closing elements, which significantly helps in orientation in the code.
Personally, I disable them (false) for two reasons. The first is that I am no longer a novice and I cope well without them, the second reason is the next setting.
Displays invisible tabs and spaces. That is, this is not a part of the code, but simply a markup for ease of operation. And so, if you include both draw_indent_guides and draw_white_space, you will get a gruel which personally strains me. What of this use and what is not - you decide.
The indentation line width when Tab is pressed. Personally, I like the 3rd size :)
For example, we worked worked, and then suddenly closed the program :) It happens that? I have it all the time, so this setting includes the “memory” of Sublime and the next time you open the program, all the latest files will open. And yes, the memory works after rebooting the computer.
Even more to improve the perception of the code and speed up the layout process will help us split the working window.
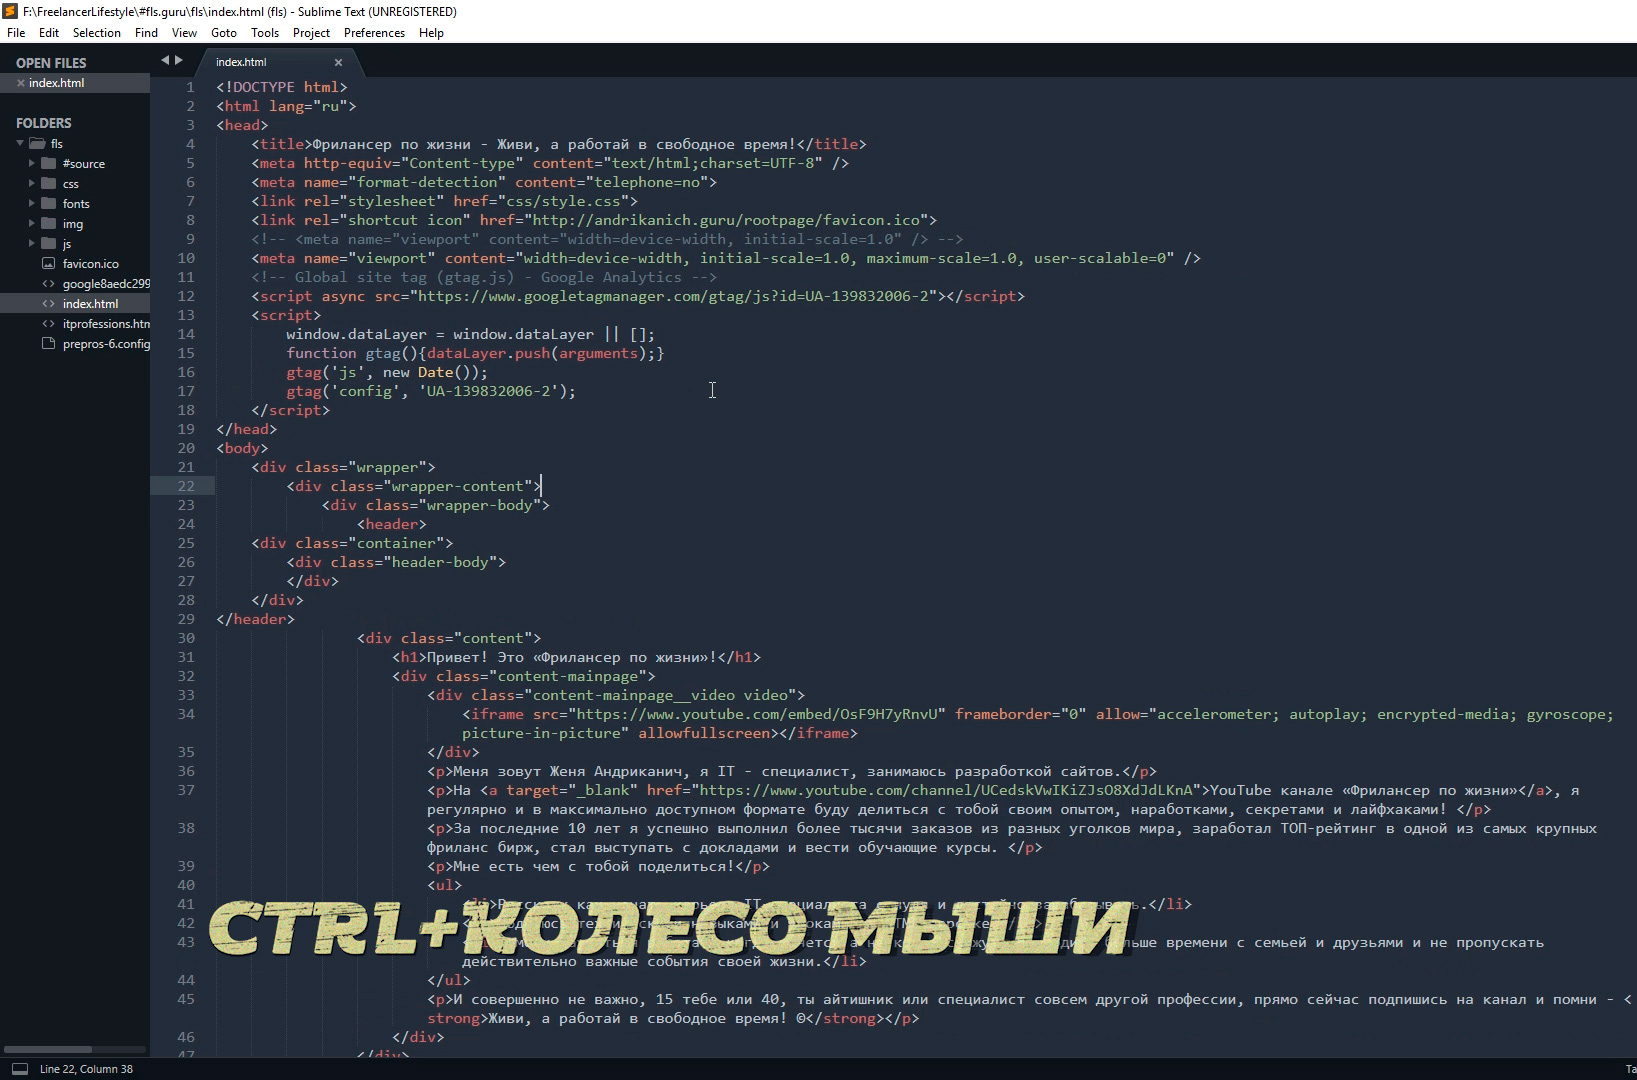
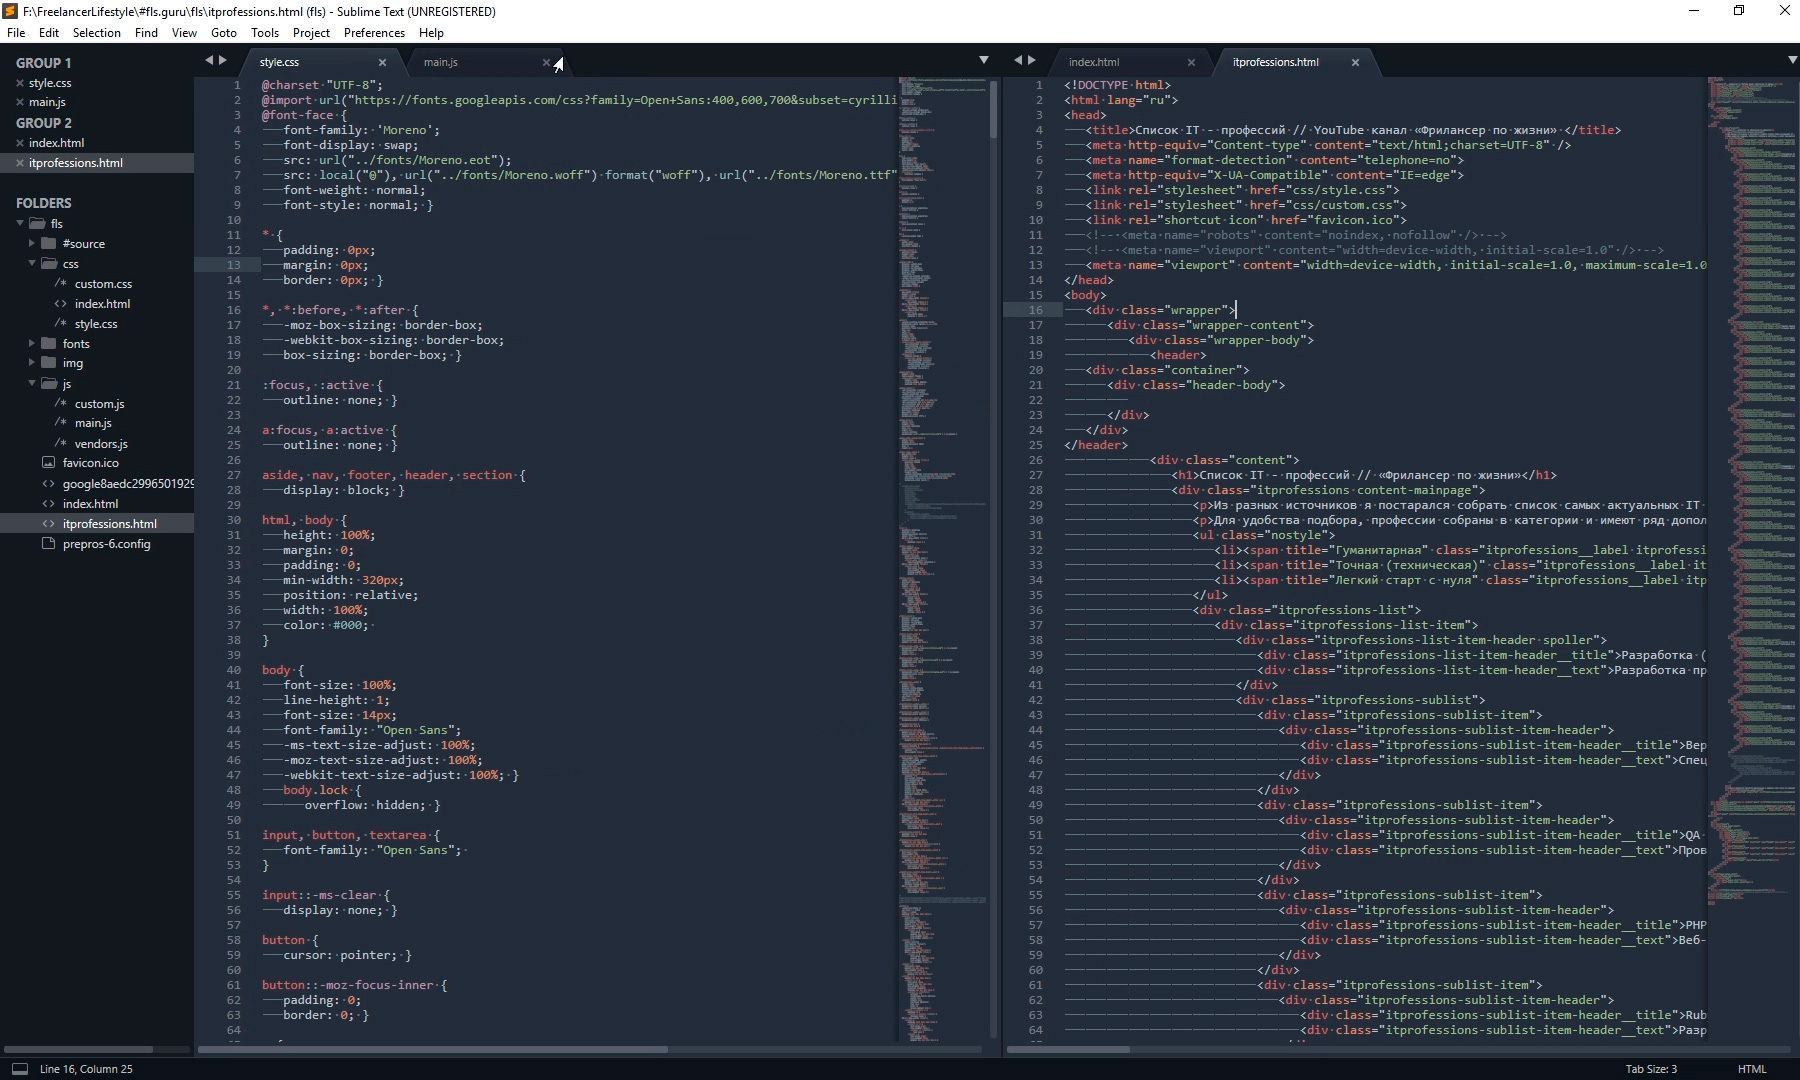
Since you almost always have to work with several different files, for example, index.html style.css and some js file, dividing a window with a code into sectors will be an added convenience. There are several options. Go to View - Layout and see what we have here.
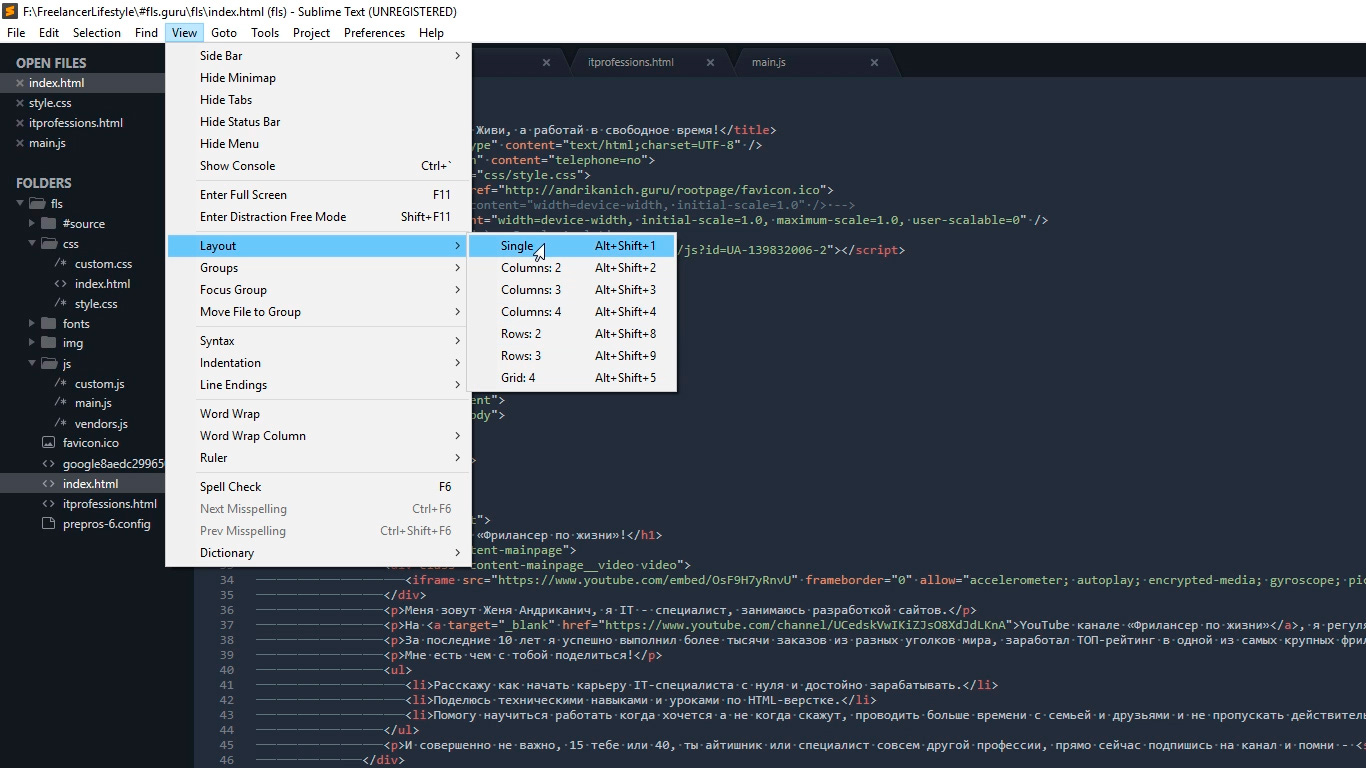
Accordingly, Single is a view without divisions as it is now, Columns: 2, 3, 4 is a vertical breakdown. For example, by clicking on Columns: 2, our screen with the code will be split in half, and we can move some of the files to an empty column, for example, CSS on the left, HTML and JS on the right, which makes the work more visual and fast.
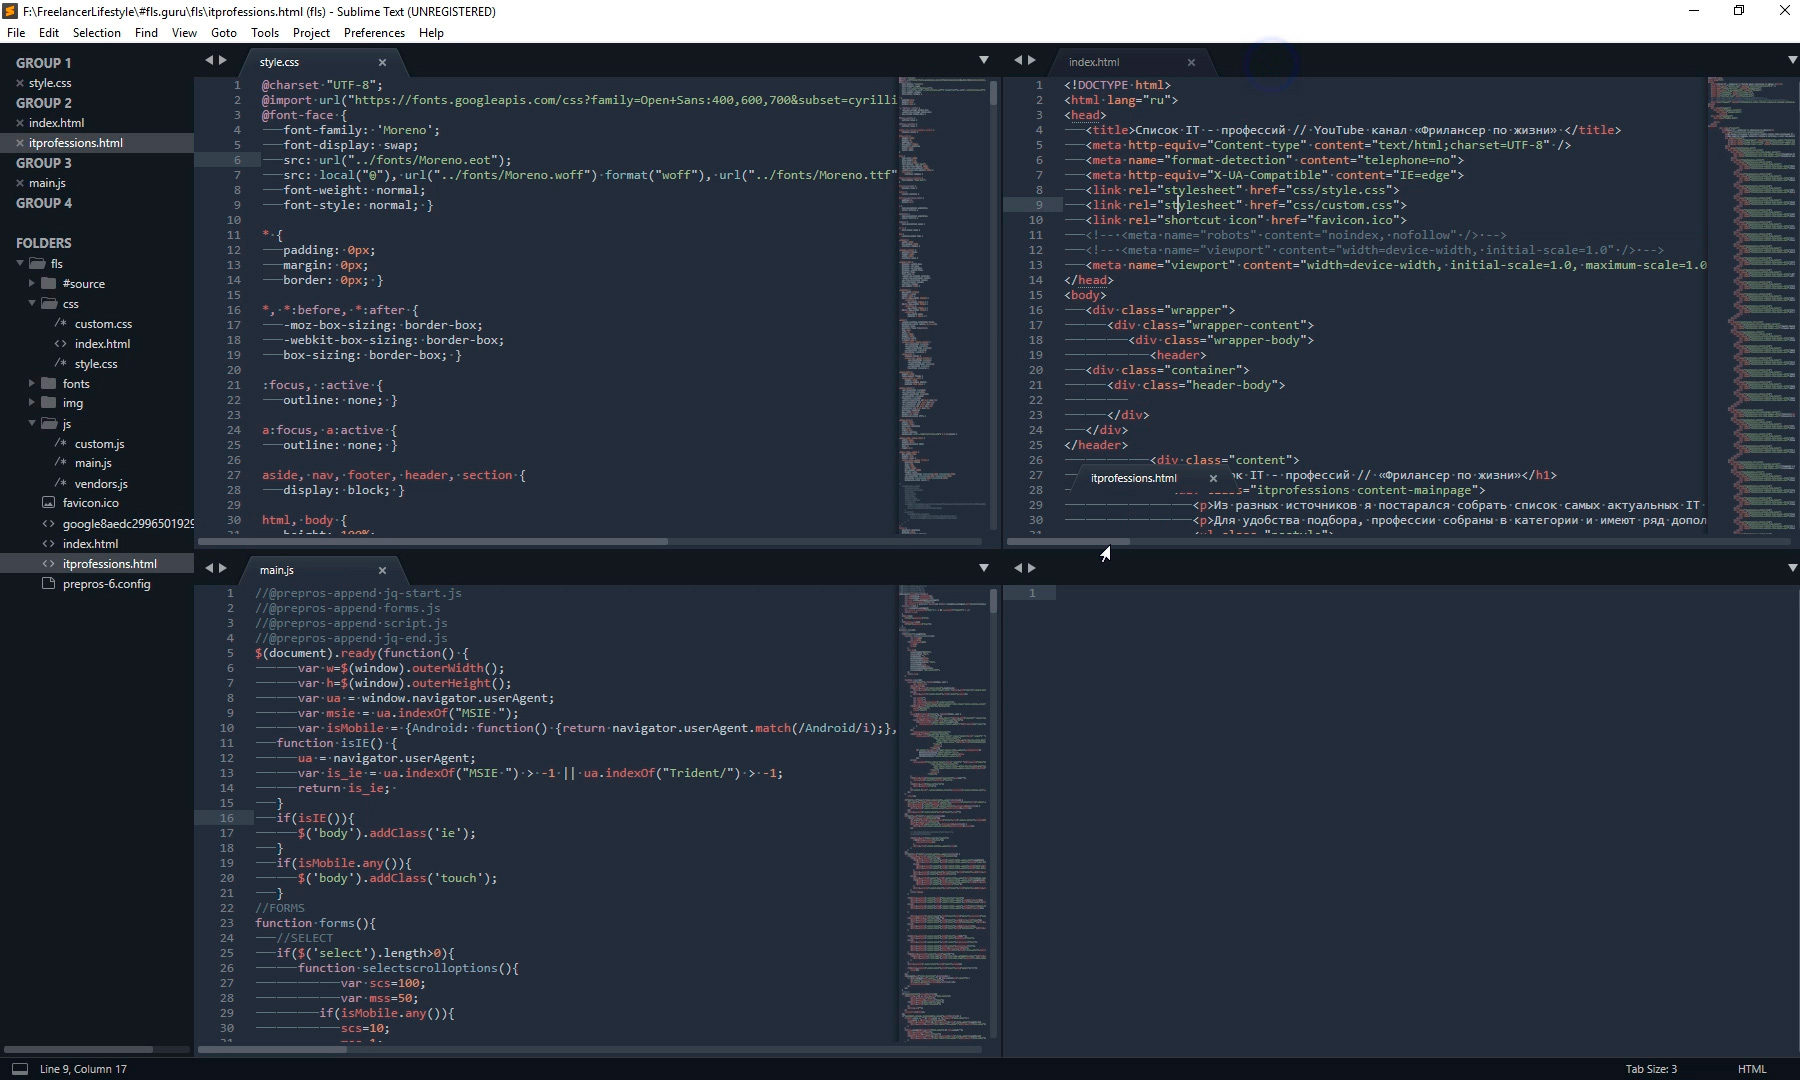
We also have options to split the screen horizontally: Rows: 2 and Rows: 3, for example, by clicking Rows: 3, we get three horizontal windows and you can drop the JS file into the third window. And the last option is Grid: 4 which divides the screen in half both horizontally and vertically. The result is four windows. Pay attention that it is possible to switch between modes using the hot keys Alt + Shift + the corresponding number .
So you have a wide selection to taste. I most often use one vertical division.
The final customization of the appearance will be the syntax highlighting setting. The word is terrible, but in reality everything is simple.
Syntax highlighting is a special coloring of the color of an element in the code. For example, in this color scheme in the HTML file the red tag is highlighted, the green is the name of the class, the white is the text, and so on. This makes code perception much clearer. Pay attention to the lower right corner of the program window, depending on how active the file is now active, CSS HTML JS and so on, the display of the code of this particular file is switched.
Why then do something if everything works fine? The fact is that in the initial package of Sublime syntax highlighting packages are installed not for all formats.
For example, in the future I plan to work with SCSS files, opening it I will see a solid sheet from the set of white characters. Not very comfortable, right?

So, in such cases, I additionally install the right package.
Open our usual Commodand Palette by going to Tools - Command Palette , or press Ctrl + Shift + P, type install , click Install Package Control and look for the SCSS add-on. Click on it, after installation we can switch our display to SCSS. Now everything looks prettier, isn't it?

Setting up the appearance of the editor is important, since we spend quite a long time writing code. This affects our fatigue, productivity, health, and just the mood.
The next thing we do is install a series of plug-ins and add-ons. There are a huge number of them, and I’ll tell you about the main ones that I actively use myself and which will speed up the entire layout process at times. Let's get started!
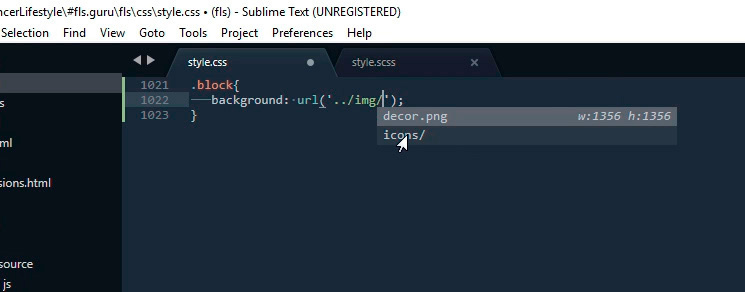
The fact is that during the layout process it is often necessary to connect various pictures. This plugin at times facilitates the connection process. Install it. Press Ctrl + Shift + P next Install Package Control looking for AutoFileName install. Let's try to connect the picture now. Immediately notice the appearance of a drop-down menu with a list of local files. Go to the desired folder with pictures and see here the file we need, as well as its size, which is also useful.
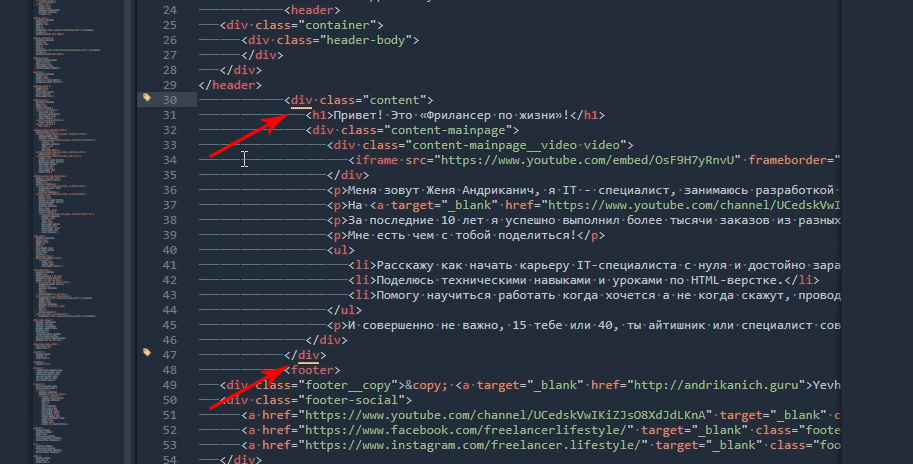
BracketHighliter can be translated as highlighting quotes. Install it. Press Ctrl + Shift + P , Install Package Control looking for BracketHighliter . Install. It even opens a separate file with a message about the successful installation. Now our code will highlight the starting and ending element, for example, the opening and closing tags, the starting and ending quotes, the opening and closing parenthesis. This helps a lot with code orientation.
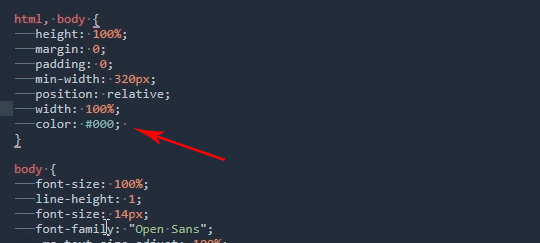
Pay attention to this code - it is a color code, but which one is not clear.
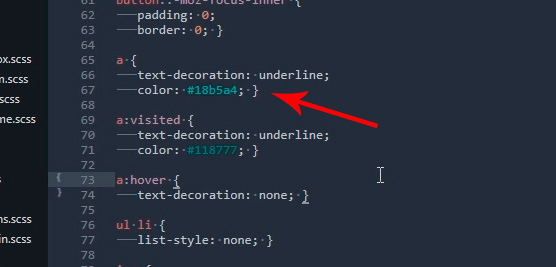
Let's install the plugin. Ctrl + Shift + P , Install Package Control looking for ColorHighliter . Again, a separate file opens with a message about the successful installation. And some error messages, ignore them. We look at our code with color, and now we see what color lies behind the alphanumeric code. The plugin itself can be further configured in the Tools - ColorHighliter menu, but for now we will not stop there. Everything is so much better.
Install on the established scheme. Ctrl + Shift + P , Install Package Control looking for Emmet . A separate file opens with a message asking you to restart the program to complete the installation. Close and open Sublime. Get the message that everything is set.
Go to the HTML file and try to write a div tag with the class .block , for this we now need to put an end , write " block " and press the Tab key. We'll get:
To make a more complex entry, for example, in the div tag with the class .block insert the span tag use the following entry:
Hit the Tab key and get:
Krutyak, really !?
But that's not all, we can create our own snippets, that is, templates / blanks.
To do this, go to Preferences - Package Settings - Emmet - Settings User . Here we write the following:
Now to trigger the entry:
it's enough to write bl and press Tab
From this it follows that the capabilities of Emmet are endless, and we can configure our snippets as you like and work very quickly. Detailed information about the capabilities of the plugin can be found at https://emmet.io
The plugin will help us with navigation in the code. Install exactly the same as the previous plugins. Next, assign hot keys to work with the plugin. For this, go to Preferences - Key Bindings , and write the following code
Where [" ctrl + 1 "] is the right keyboard shortcut. Save Cntr + S.
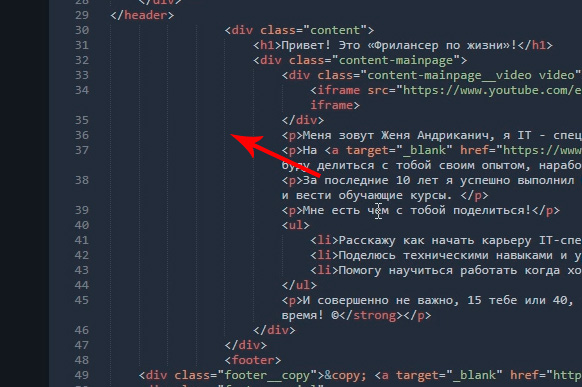
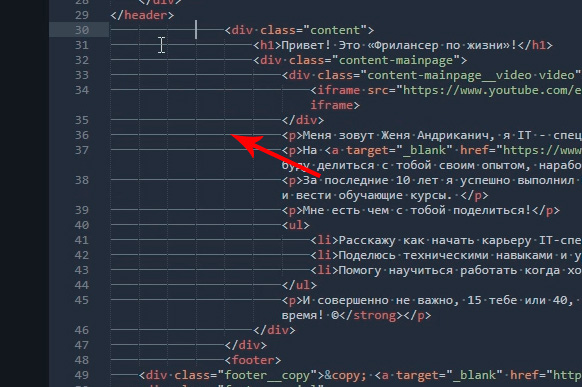
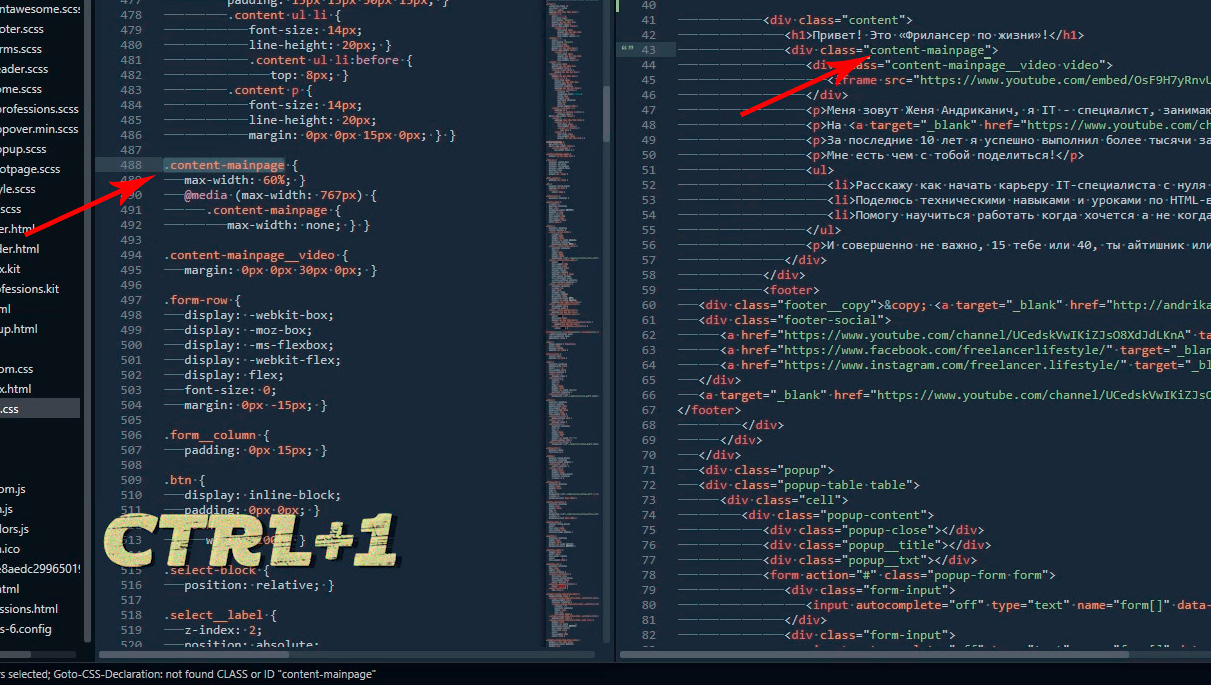
And this is how it works. We should have open CSS and HTML files. CSS is usually very large and it is quickly difficult to find something, but this is in the past. For example, we need to change the CSS for the content-mainpage class, click on it with the mouse and press ctrl + 1 . Voila, we are in the right place of the CSS file.
Well, for those who read up to this point I will show another plugin that is not so easy to install, but it is definitely worth it.
His name is Tag and we have to install it manually. By this link you can download the archive with the plugin. Next, unpack into a special program folder. For Windows 10, this is C: \ Users \ [Substitute your username] \ AppData \ Roaming \ Sublime Text 3 \ Packages. Next, close Sublime and open it again and add hot keys by opening Preferences - Key Bindings and adding the following:
Where ctrl + ` this is our shortcut.
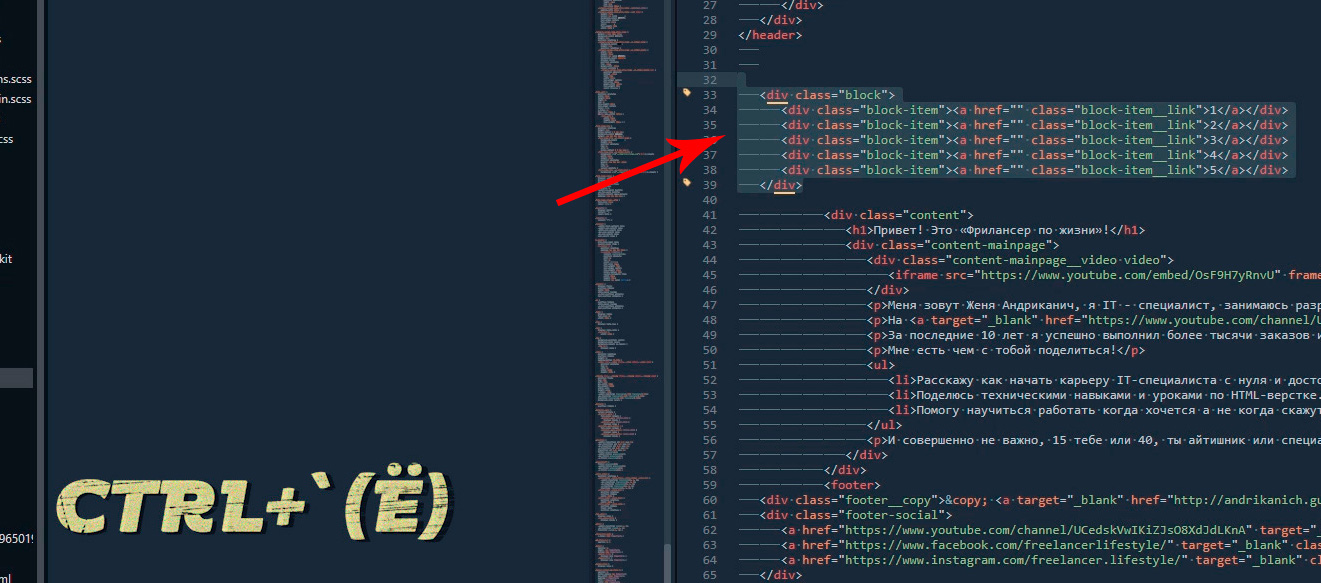
So, why did we go all this hard way? As a rule, in the process of writing, the code we work with HTML first, then we transfer the class names to CSS and work there already. So do this transfer manually davolno long. And here Tag plugin comes to our rescue. Now we just need to select the desired HTML code, press our keyboard shortcut ctrl + `
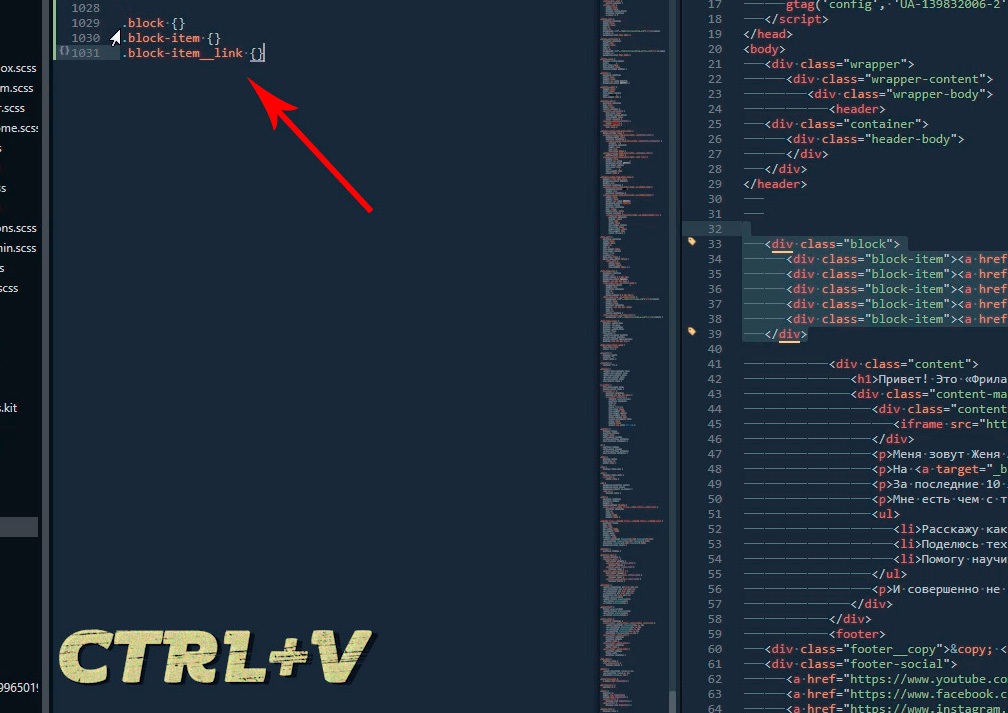
and then paste the result of copying into our CSS ctrl + v .
Based on the release of “ Sublime Text 3. Setup, installation, plug-ins ”, from the series “ Programs and tools for website layout ”, on YouTube channel “ Freelancer on Life ”.
We will customize its appearance from scratch, as well as apply the plug-ins AutoFileName, BracketHighliter, ColorHighliter, Emmet, GotoCSSDeclaration and Tag, which will significantly help us in the layout of sites! Well, from words to deeds!
Appearance of the program
First of all, after installing Sublime Text 3, I customize the look of the program.
')
Side panel
To display the panel, go to View - Side Bar - Show Open Files . In this panel, our projects will be displayed, that is, folders and files of our typesetting. For clarity, now add one of them. All you need to do there is to simply drag the project folder to our panel.
Color scheme
Next, I customize the color scheme of the program and the code, for clarity, I will open any file, for example, with HTML code. To do this, double click on the desired file. Now I turn Preferences - Color Scheme , a window opens with the established color solutions and when choosing one or another theme, the appearance of our code and the program itself will change.
Personally, none of the preset options suit me, so I set up an additional color scheme. A huge number of them can be found and found on the site with additions to Sublime packagecontrol.io . I already know exactly what scheme I want to install, which I will do now.
In order to install new color schemes, plug-ins and other add-ons, I need to install the installer of these add-ons first. It sounds difficult, but in reality everything is much simpler.
I go to the Tools menu - Command Palette , or press Ctrl + Shift + P. This window opens with a search, I enter install in the search field until I see the Install Package Control item, and click on it. After a few seconds, I receive a message that the Package Control has been successfully installed. Now I can proceed to install the desired color scheme.
To do this, I call Command Palette again by pressing Ctrl + Shift + P, I enter install again in the search field until I see the item Package Control: Install Package I click on it. After waiting a little, I see a window with a list of all available add-ons to Sublime. Well, almost everyone.
In the search field, I enter the name of the one I want to install, at the moment - this is the color scheme called Base16 Color Schemes, or rather, it is a whole package with many color schemes. I click on the item found and wait for installation. An indicator of the installation process can be seen on the bottom panel of the program. Having received a short message there that everything is set, I proceed to change the circuit. To do this, I open the already familiar menu item Preferences - Color Scheme and I see in the opened window a large number of different options. I'm interested in the scheme Ocean, I enter the name in the search, there are two of them here: one is more contrast than the other.
My favorite color scheme is set, of course you can choose any other.
I prefer the overall view of the program to be dark, so I turn Preferences - Theme , and switch to Adaptive.sublime-theme
The combination of colors is very important for working with the code, as it affects not only the perception, but also the fatigue and health of your eyes. So pick yourself a color scheme so that nothing in it strains you. And remember about the breaks in the work!
Additional settings
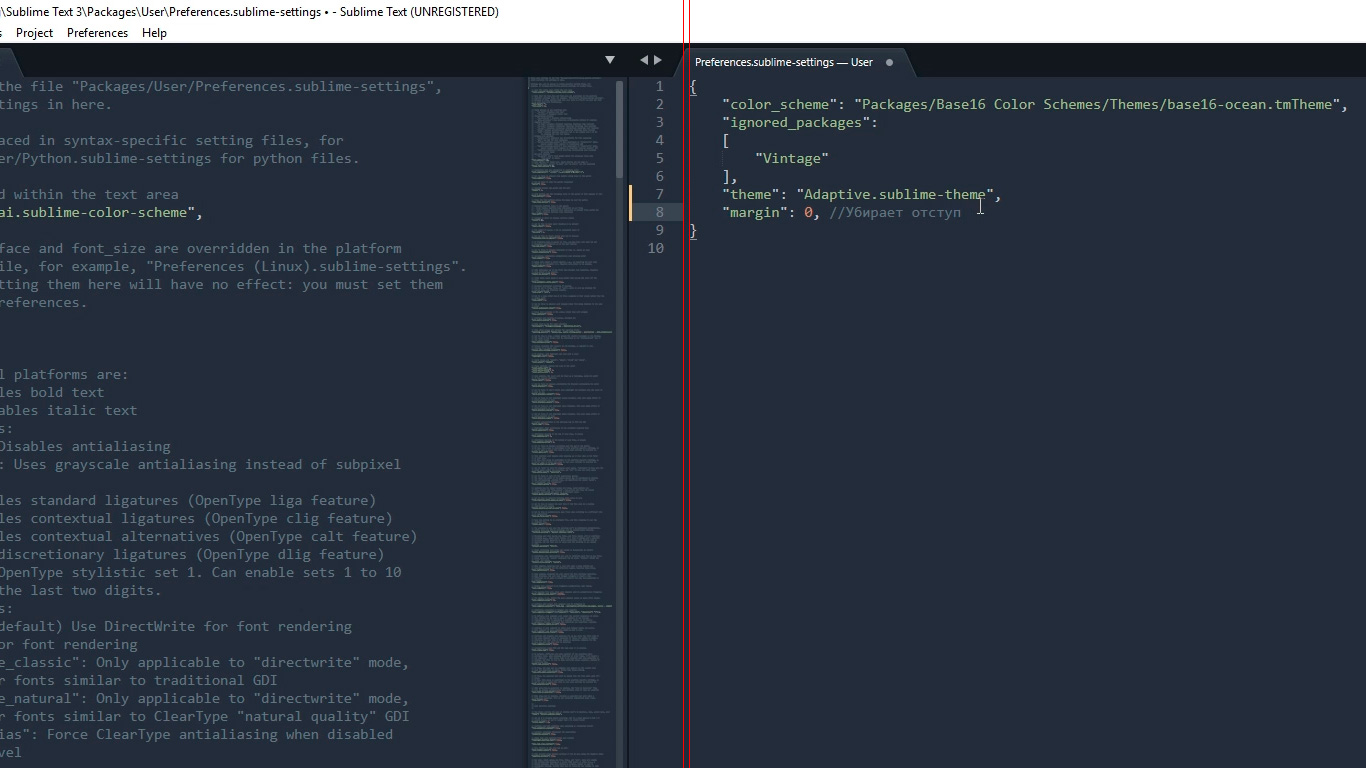
In addition, the following additional settings will help me to improve the code perception and comfort when working with it. Go to Preferences - Settings . This window opens divided into two parts. In the left part of the default settings, they can not be changed, but on the right side you can override these settings, each of the following must be separated by a comma. Here are the settings I use:
"margin": 0, // "font_size": 10, // "draw_indent_guides": true, // / "draw_white_space": "all", // "tab_size": 3, // "remeber_open_files": true, // I will explain each setting.
"margin": 0, // It removes strange indentations in the program between the code and the side panel, which makes the overall picture more compact.
"font_size": 10, // Sets the default font size. You can also quickly change the font size by working with the code, by holding the control and turning the mouse wheel.
If you suddenly change the size by accident, you can reset it by going to Preferences - Font - Reset
"draw_indent_guides": true, // / These lines are very useful for a beginner, because they visually connect the opening and closing elements, which significantly helps in orientation in the code.
Personally, I disable them (false) for two reasons. The first is that I am no longer a novice and I cope well without them, the second reason is the next setting.
"draw_white_space": "all", // Displays invisible tabs and spaces. That is, this is not a part of the code, but simply a markup for ease of operation. And so, if you include both draw_indent_guides and draw_white_space, you will get a gruel which personally strains me. What of this use and what is not - you decide.
"tab_size": 3, // The indentation line width when Tab is pressed. Personally, I like the 3rd size :)
"remember_open_files": true, // For example, we worked worked, and then suddenly closed the program :) It happens that? I have it all the time, so this setting includes the “memory” of Sublime and the next time you open the program, all the latest files will open. And yes, the memory works after rebooting the computer.
Split the working window
Even more to improve the perception of the code and speed up the layout process will help us split the working window.
Since you almost always have to work with several different files, for example, index.html style.css and some js file, dividing a window with a code into sectors will be an added convenience. There are several options. Go to View - Layout and see what we have here.
Accordingly, Single is a view without divisions as it is now, Columns: 2, 3, 4 is a vertical breakdown. For example, by clicking on Columns: 2, our screen with the code will be split in half, and we can move some of the files to an empty column, for example, CSS on the left, HTML and JS on the right, which makes the work more visual and fast.
We also have options to split the screen horizontally: Rows: 2 and Rows: 3, for example, by clicking Rows: 3, we get three horizontal windows and you can drop the JS file into the third window. And the last option is Grid: 4 which divides the screen in half both horizontally and vertically. The result is four windows. Pay attention that it is possible to switch between modes using the hot keys Alt + Shift + the corresponding number .
So you have a wide selection to taste. I most often use one vertical division.
Syntax highlighting
The final customization of the appearance will be the syntax highlighting setting. The word is terrible, but in reality everything is simple.
Syntax highlighting is a special coloring of the color of an element in the code. For example, in this color scheme in the HTML file the red tag is highlighted, the green is the name of the class, the white is the text, and so on. This makes code perception much clearer. Pay attention to the lower right corner of the program window, depending on how active the file is now active, CSS HTML JS and so on, the display of the code of this particular file is switched.
Why then do something if everything works fine? The fact is that in the initial package of Sublime syntax highlighting packages are installed not for all formats.
For example, in the future I plan to work with SCSS files, opening it I will see a solid sheet from the set of white characters. Not very comfortable, right?
So, in such cases, I additionally install the right package.
Open our usual Commodand Palette by going to Tools - Command Palette , or press Ctrl + Shift + P, type install , click Install Package Control and look for the SCSS add-on. Click on it, after installation we can switch our display to SCSS. Now everything looks prettier, isn't it?
Setting up the appearance of the editor is important, since we spend quite a long time writing code. This affects our fatigue, productivity, health, and just the mood.
The next thing we do is install a series of plug-ins and add-ons. There are a huge number of them, and I’ll tell you about the main ones that I actively use myself and which will speed up the entire layout process at times. Let's get started!
Plugins
AutoFileName
The fact is that during the layout process it is often necessary to connect various pictures. This plugin at times facilitates the connection process. Install it. Press Ctrl + Shift + P next Install Package Control looking for AutoFileName install. Let's try to connect the picture now. Immediately notice the appearance of a drop-down menu with a list of local files. Go to the desired folder with pictures and see here the file we need, as well as its size, which is also useful.
Brackethighliter
BracketHighliter can be translated as highlighting quotes. Install it. Press Ctrl + Shift + P , Install Package Control looking for BracketHighliter . Install. It even opens a separate file with a message about the successful installation. Now our code will highlight the starting and ending element, for example, the opening and closing tags, the starting and ending quotes, the opening and closing parenthesis. This helps a lot with code orientation.
Colorhighliter
Pay attention to this code - it is a color code, but which one is not clear.
Let's install the plugin. Ctrl + Shift + P , Install Package Control looking for ColorHighliter . Again, a separate file opens with a message about the successful installation. And some error messages, ignore them. We look at our code with color, and now we see what color lies behind the alphanumeric code. The plugin itself can be further configured in the Tools - ColorHighliter menu, but for now we will not stop there. Everything is so much better.
Great and mighty Emmet
Install on the established scheme. Ctrl + Shift + P , Install Package Control looking for Emmet . A separate file opens with a message asking you to restart the program to complete the installation. Close and open Sublime. Get the message that everything is set.
So what does Emmet do?
Go to the HTML file and try to write a div tag with the class .block , for this we now need to put an end , write " block " and press the Tab key. We'll get:
<div class="block"></div> To make a more complex entry, for example, in the div tag with the class .block insert the span tag use the following entry:
.block>span Hit the Tab key and get:
<div class="block"><span></span></div> Krutyak, really !?
But that's not all, we can create our own snippets, that is, templates / blanks.
To do this, go to Preferences - Package Settings - Emmet - Settings User . Here we write the following:
{ "snippets":{ "html":{ "snippets":{ "bl":"<div class=\"block\"></div>" } } } } Now to trigger the entry:
<div class="block"></div> it's enough to write bl and press Tab
From this it follows that the capabilities of Emmet are endless, and we can configure our snippets as you like and work very quickly. Detailed information about the capabilities of the plugin can be found at https://emmet.io
GotoCSSDeclaration
The plugin will help us with navigation in the code. Install exactly the same as the previous plugins. Next, assign hot keys to work with the plugin. For this, go to Preferences - Key Bindings , and write the following code
{ "keys": ["ctrl+1"], "command": "goto_css_declaration", "args": {"goto": "next"} }, Where [" ctrl + 1 "] is the right keyboard shortcut. Save Cntr + S.
And this is how it works. We should have open CSS and HTML files. CSS is usually very large and it is quickly difficult to find something, but this is in the past. For example, we need to change the CSS for the content-mainpage class, click on it with the mouse and press ctrl + 1 . Voila, we are in the right place of the CSS file.
Tag
Well, for those who read up to this point I will show another plugin that is not so easy to install, but it is definitely worth it.
His name is Tag and we have to install it manually. By this link you can download the archive with the plugin. Next, unpack into a special program folder. For Windows 10, this is C: \ Users \ [Substitute your username] \ AppData \ Roaming \ Sublime Text 3 \ Packages. Next, close Sublime and open it again and add hot keys by opening Preferences - Key Bindings and adding the following:
{ "keys": ["ctrl+`"], "command": "tag_classes" } Where ctrl + ` this is our shortcut.
So, why did we go all this hard way? As a rule, in the process of writing, the code we work with HTML first, then we transfer the class names to CSS and work there already. So do this transfer manually davolno long. And here Tag plugin comes to our rescue. Now we just need to select the desired HTML code, press our keyboard shortcut ctrl + `
and then paste the result of copying into our CSS ctrl + v .
Based on the release of “ Sublime Text 3. Setup, installation, plug-ins ”, from the series “ Programs and tools for website layout ”, on YouTube channel “ Freelancer on Life ”.
Video version of the article:
Source: https://habr.com/ru/post/458206/
All Articles