Generate tile levels and hide squares from the player.
Level generation in Unexplored 2
We are very proud of the game level generator Unexplored 2, it is a program that meets all modern requirements. In the post I will talk about how the levels of the game are created.
We did not have to reinvent the wheel. In Unexplored 1, we have already created techniques that greatly influenced the success of the first game. Unexplored 2 just continued the job. The foundation of our technology consists of two parts: we apply multi-stage generation, which almost imitates a process very similar to the work of a living level designer. On top of this, we use a technique called “ looping dungeon generation ”, which is much better at generating natural looking levels than most standard generative content creation applications. In this post I will talk about the first aspect. Adaptation of the cyclic generation of dungeons to Unexplored 2 will be the topic of a future post.
Imitation of "human" level design
The level generator breaks up the process of generating a level into a whole multitude of controlled stages. It goes from high-level planning to a low-level detailed level map. In essence, he first creates a level sketch, and then starts adding details until the level is complete and complete.
At each separate stage of this process we use generative grammars to transform the level generated in the previous stages. In particular, we use tile grammars and graph grammars, which are varieties of more general string grammars that simply search for and replace parts of strings with other strings, much like regular expressions do. If you are not familiar with the concepts of generative grammars and regular expressions, then I recommend you look for examples on the Internet (or just continue reading - you will not need in-depth knowledge to understand the meaning of this post).
')
The first stage of the level is relatively simple. We use a low resolution bitmap to locate the very basics of the level. In the example below, the level is initially very simple: it consists only of the entrance (e) on the left, the entrance on the right, and the direct path connecting them. Most other tiles are either undefined (u) or blocked (B) because they are at the edges of the level.

Figure 1: Simple level outline
At the next stage, the details are added: a group of rooms connected by gates appears, which are designed to pass in a certain direction:
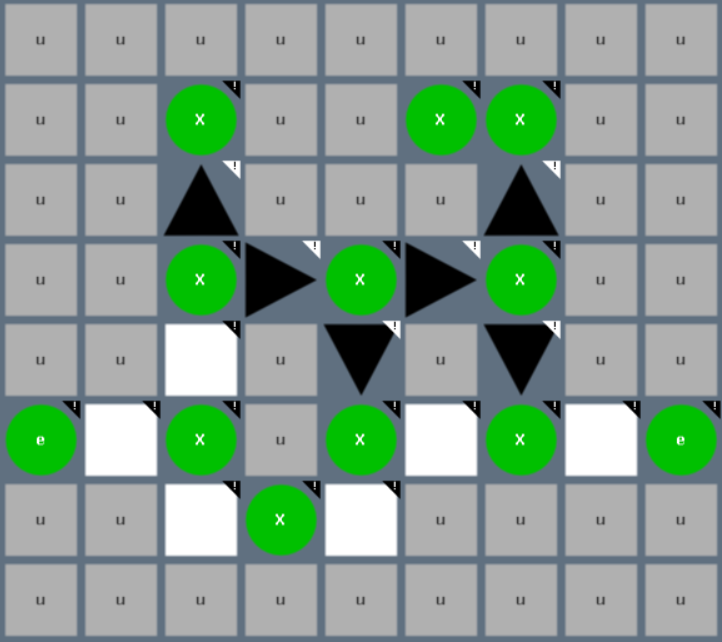
Figure 2: Added structure
Tile maps are great for creating level geometry, but it is more practical to work with graphs to generate structures and logic of gameplay. This is exactly what the generator does next:
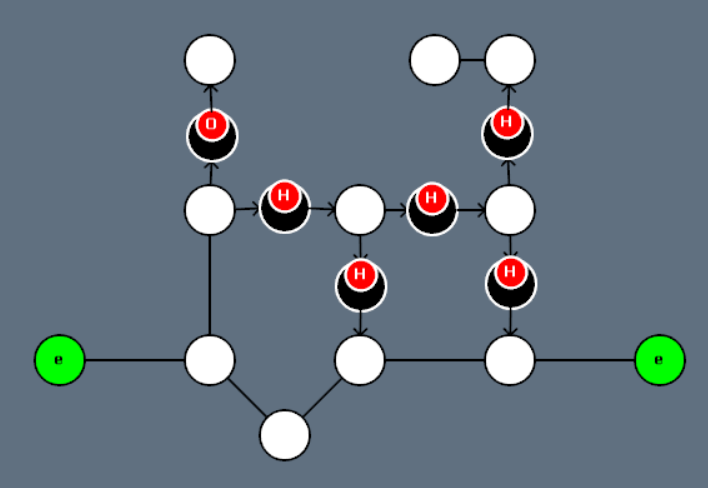
Figure 3: Basic Graph
In the column, some nodes contain sub-nodes, in our case most of the gates are marked as dangerous (H), and some are marked as open (O).
Based on a fairly simple analysis and generative rules, new elements are added to the graph. For example, end point (G) is located in a place that is quite far from the inputs. In addition, small dangers are added to the graph to make the level more threatening.
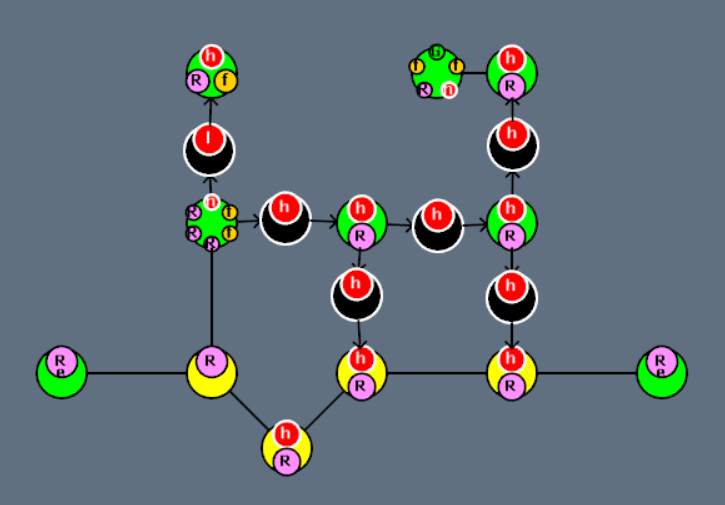
Figure 4: New items added to the graph.
In the meantime, a low-resolution tile map is converted using several noise functions to a high-resolution tile map to make it more natural:
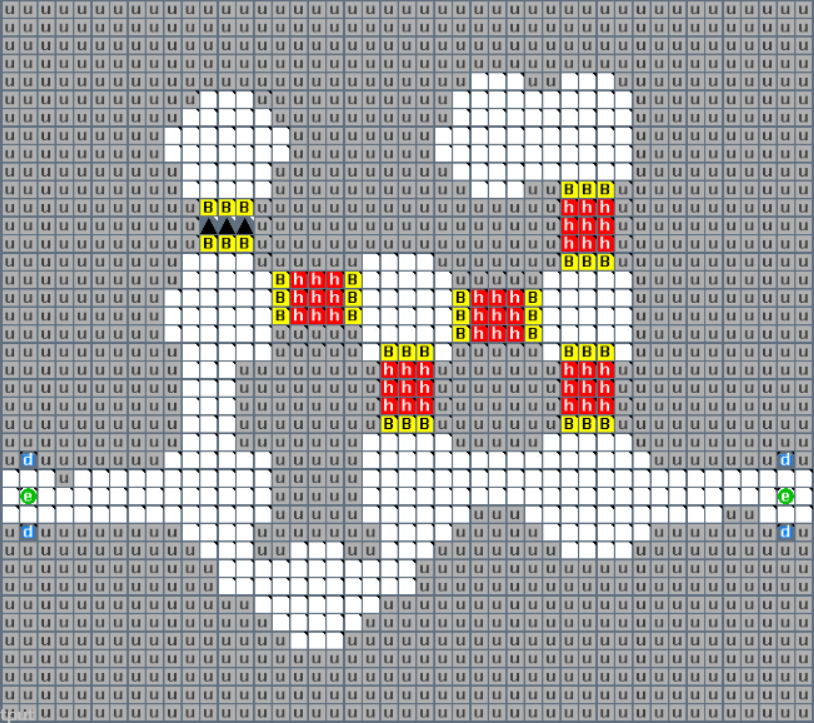
Figure 5: High Resolution Tile Map
Then the information from the graph is used to decorate the tile map and add new elements:
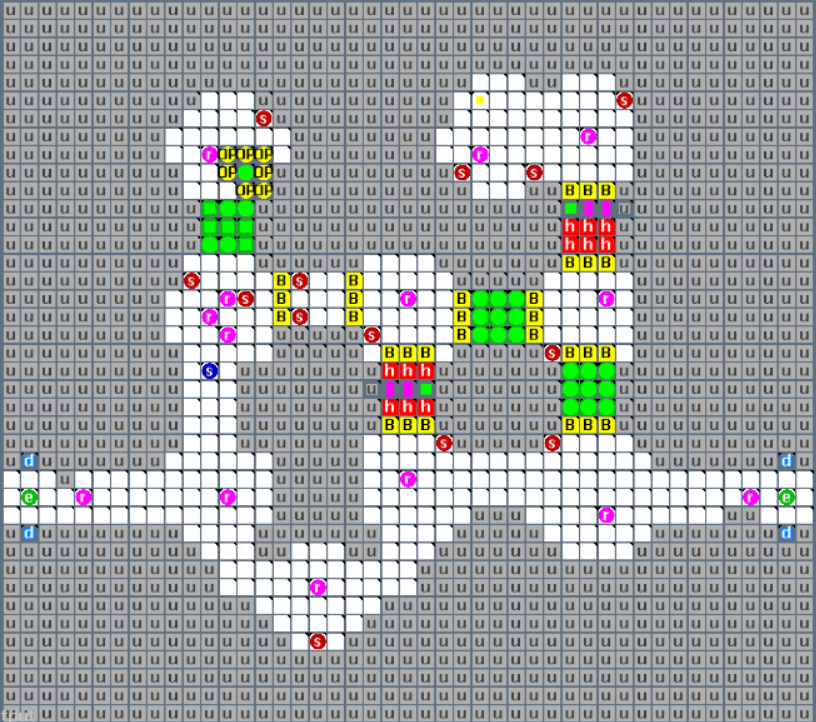
Figure 6: Decorated tile card.
The map as it is is generated solely for the gameplay view. White tiles designate open spaces, and almost all other tiles designate very specific gameplay elements, for example, a secret passage through bushes (green circles), “thickets in thickets” (green squares and lilac stripes) or spawn sites for snapping trees (red circles with the letter s). The main part of the level is still undefined, and at this stage the generator assumes that these areas must be filled so as to block the player’s movement.
It performs this task on several layers: the bottom layer indicates the level of height and type of surface, the second adds water in certain locations, and the third layer adds vegetation and other decorations.
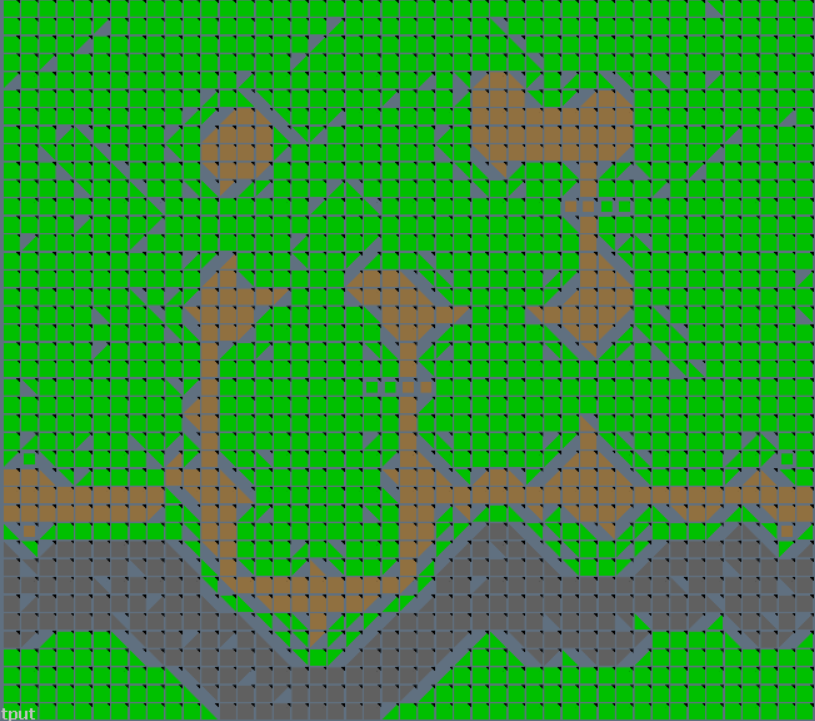
Figure 7: Types of ground surface (grass, dirt, and stones)

Figure 8: Water

Figure 9: Vegetation and other decorations
These layers are then added to the final level data file, to which some more details are added. This data is used by the game for placing assets and building a level the way you see it. At this stage there are many tricks. For example, you may have noticed that the tiles of the land in the figure above have strange shapes. These forms are used to create land “tiles” in such a way that the player does not notice that the source data was a tile map. I will tell about it in the second part of the article.
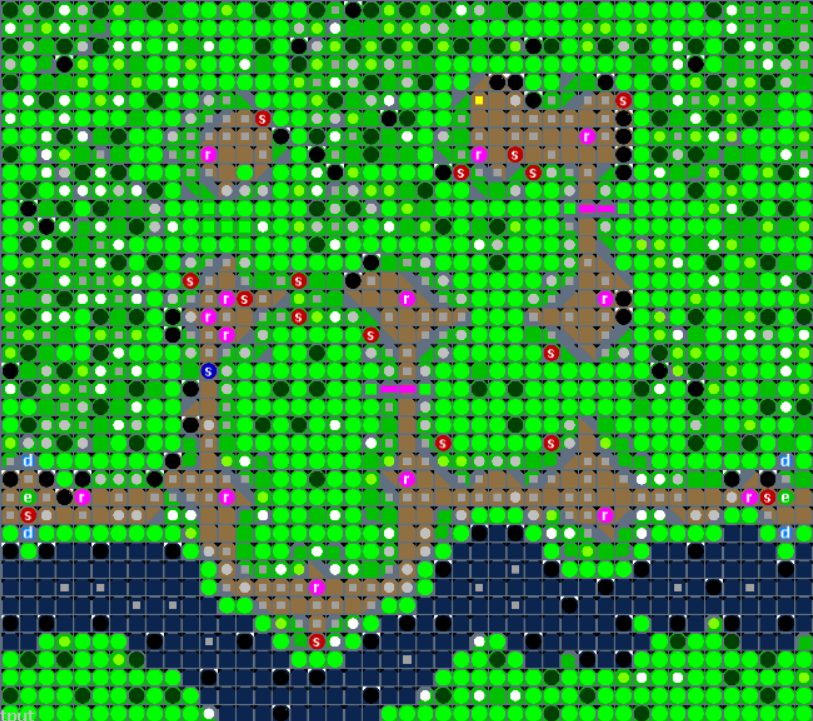
Figure 10: Ready Level
Adding Gameplay
There are many advantages to this level generation method. The stage of converting a level into a graph is especially important in order to simplify the “reasoning” of the gameplay to the generator. In the example shown above, we did not do anything with it, except to check that the level targets are created at some distance from the entrances. But for other levels, more tasks are performed at these stages.
Take for example the cave map in a more classical dungeon style (compared to the forest level from the example above). The base graph of this level has only one entrance and a couple of new types of gates. A pair of them is closed (L): one gate catches the player on one side into the trap (T), and I call the dark green one “valve”: this type of gate allows the player to pass only in one direction.

Figure 11: Base Cave Count
The structure of this level allows the generator to create a much more complex mission. For example, the only way to get to this level is through the “valve”, forcing the player to look for another way out. The key to open the way out (lower left) is located behind the danger at the upper left, and the target is located behind the gate that traps the player. An example of such a goal might be a pass that collapses after the player. In general, it creates a cave that is interesting to explore on its own, but Unexplored 2 also has the ability to add creatures and events that are mixed in during the run.
Figure 12: Locks and keys added to the cave
Using the process described above, the graph is used to generate and populate a fully detailed tile map. The use of various parameters reflecting the cave nature of this level results in highly varying results with destroyed underground structures (blue squares marked with the letter c) and wide thorns with abyss (purple circles):

Figure 13: Cave level in full detail
Summarize
I hope you got a general idea of how we approach the generation of levels in Unexplored 2. This is a complex multi-step process, which I plan to write more about in the near future. At least, I have already promised you to write about the use of cyclic dungeon generation. But you can tell a lot more, from the generative storytelling techniques, line rendering and shading methods to the lengthy design process that we used to create a good luck system, as well as other aspects.
Part 2. From tiles to curves, or fun with Voronoi graphs
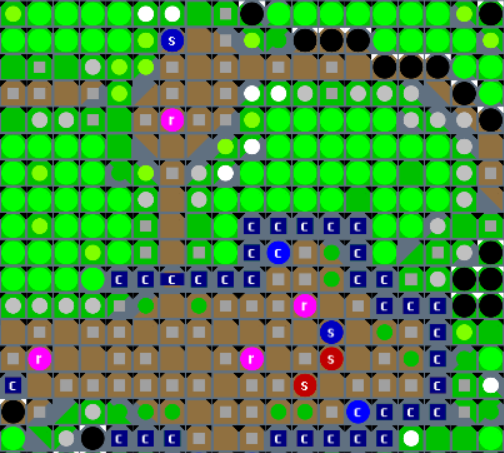
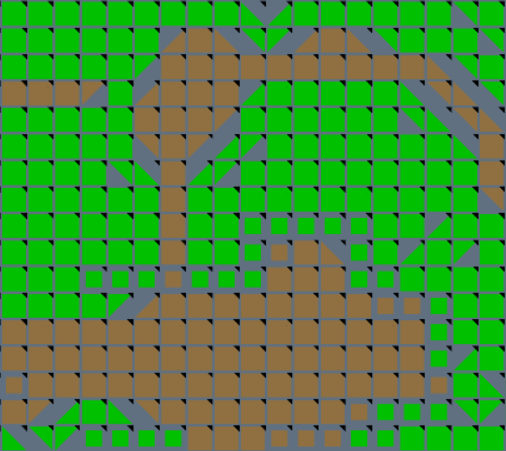
The content generator Unexplored 2 generates tile maps. A typical result looks like this:
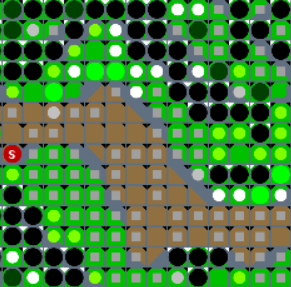
These tile maps are layered on top of each other and use different tiles to designate types of ground (in this example grass or mud), as well as various decorations. In this case, there are several bushes (large green circles), stones (black circles), plants (small green circles), flowers (white circles) and decorative textures (gray squares). There are also special tiles that indicate gameplay data, for example, spawn points marked with the letter “s”. In addition, tiles can be marked with additional information, such as height level or special subtypes.
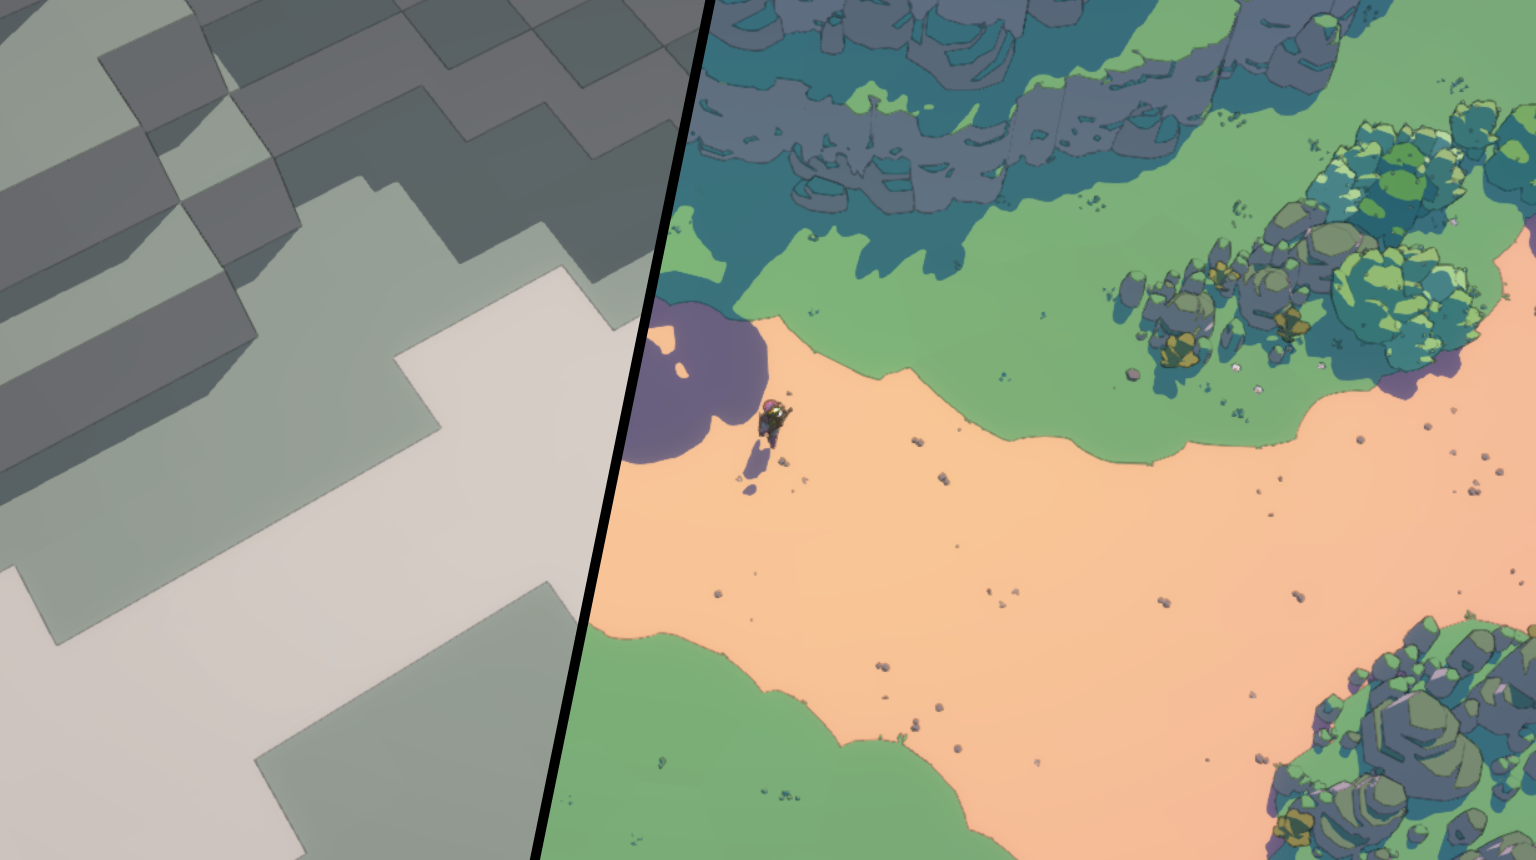
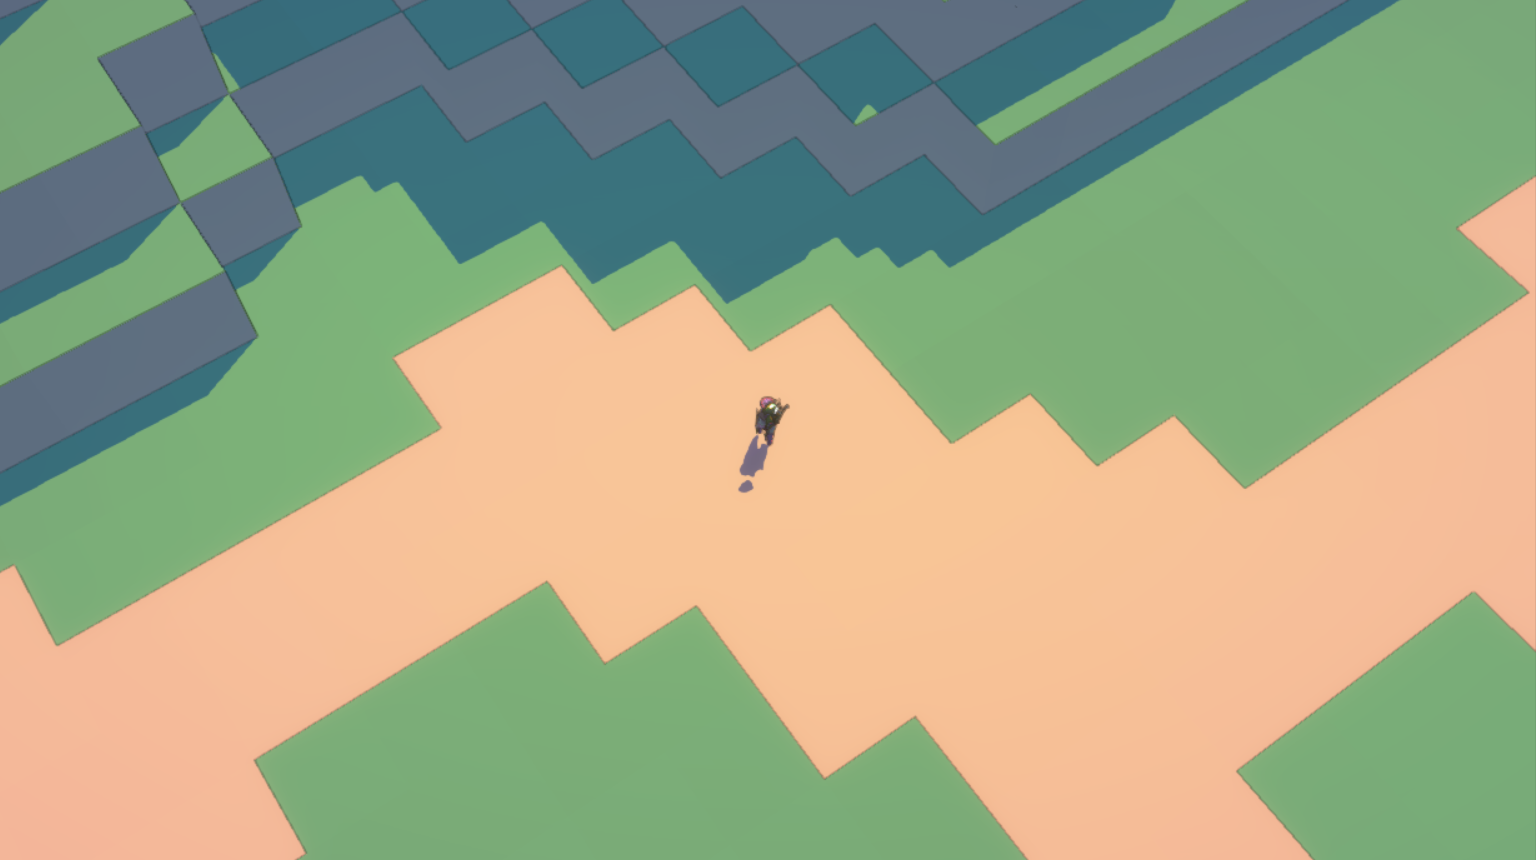
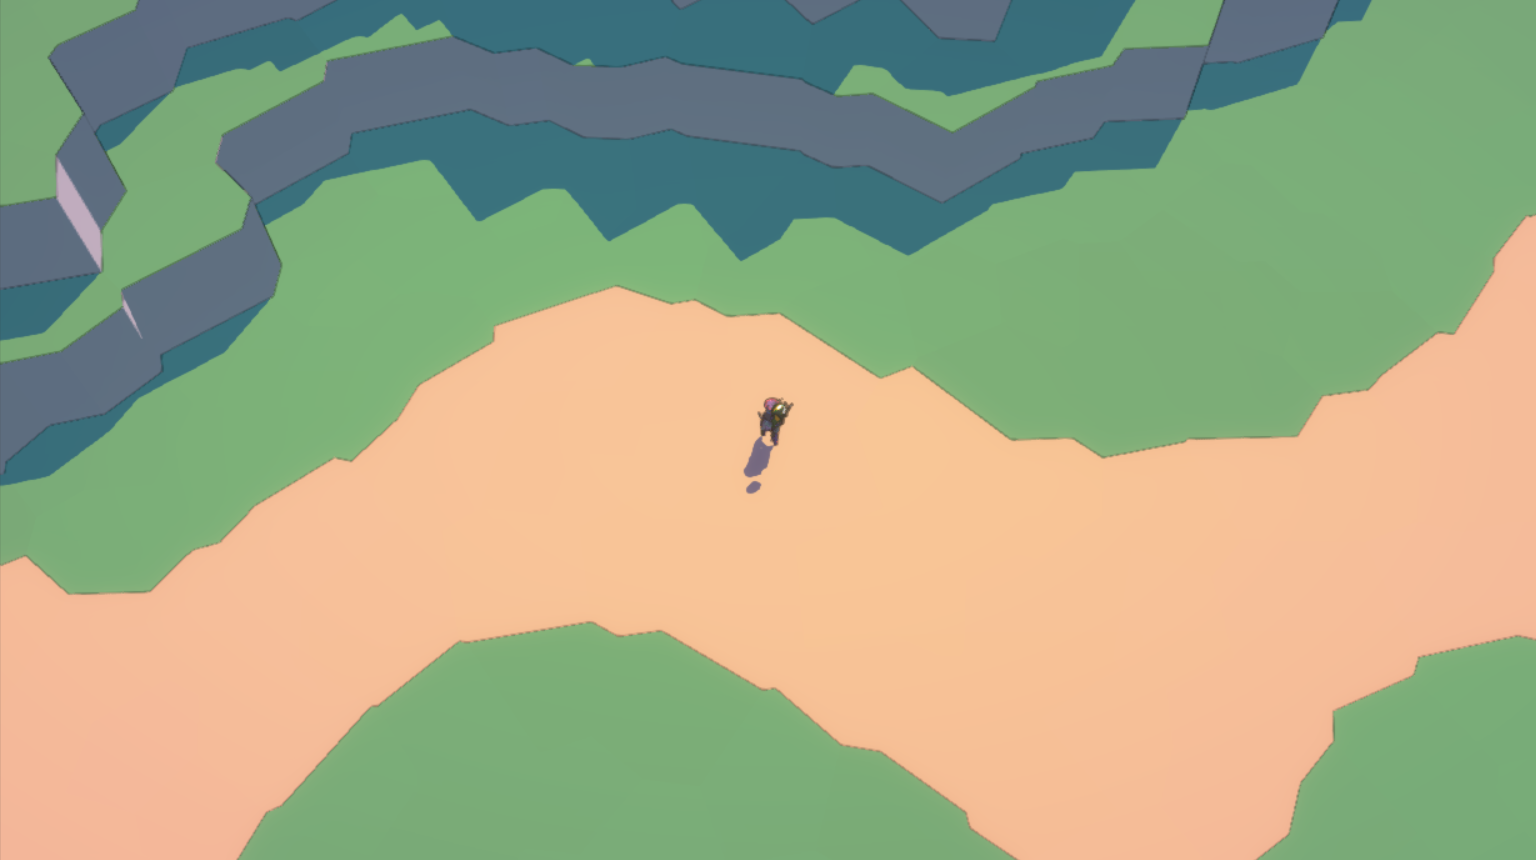
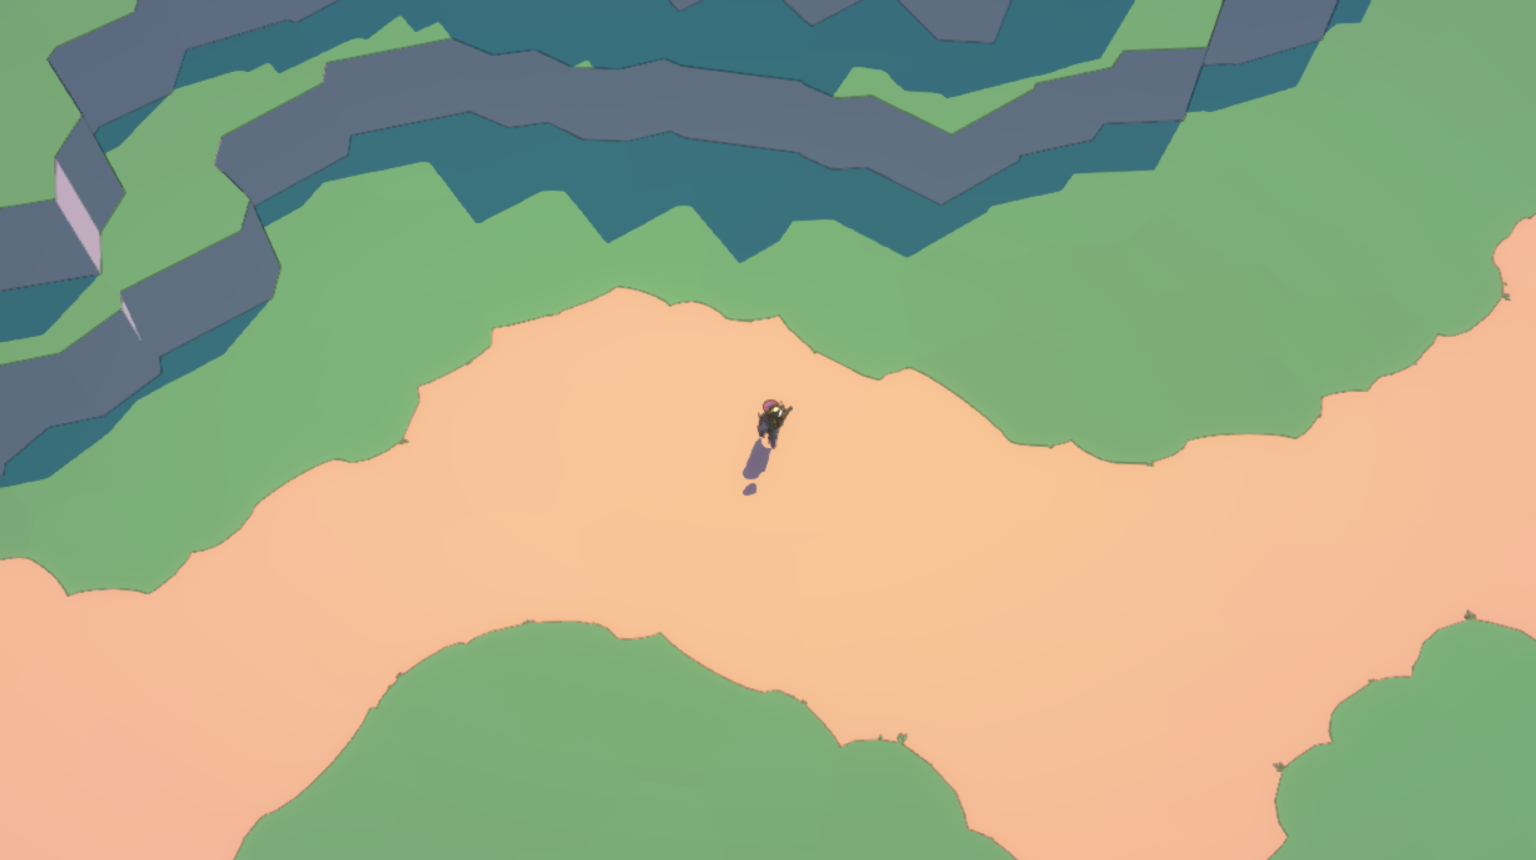
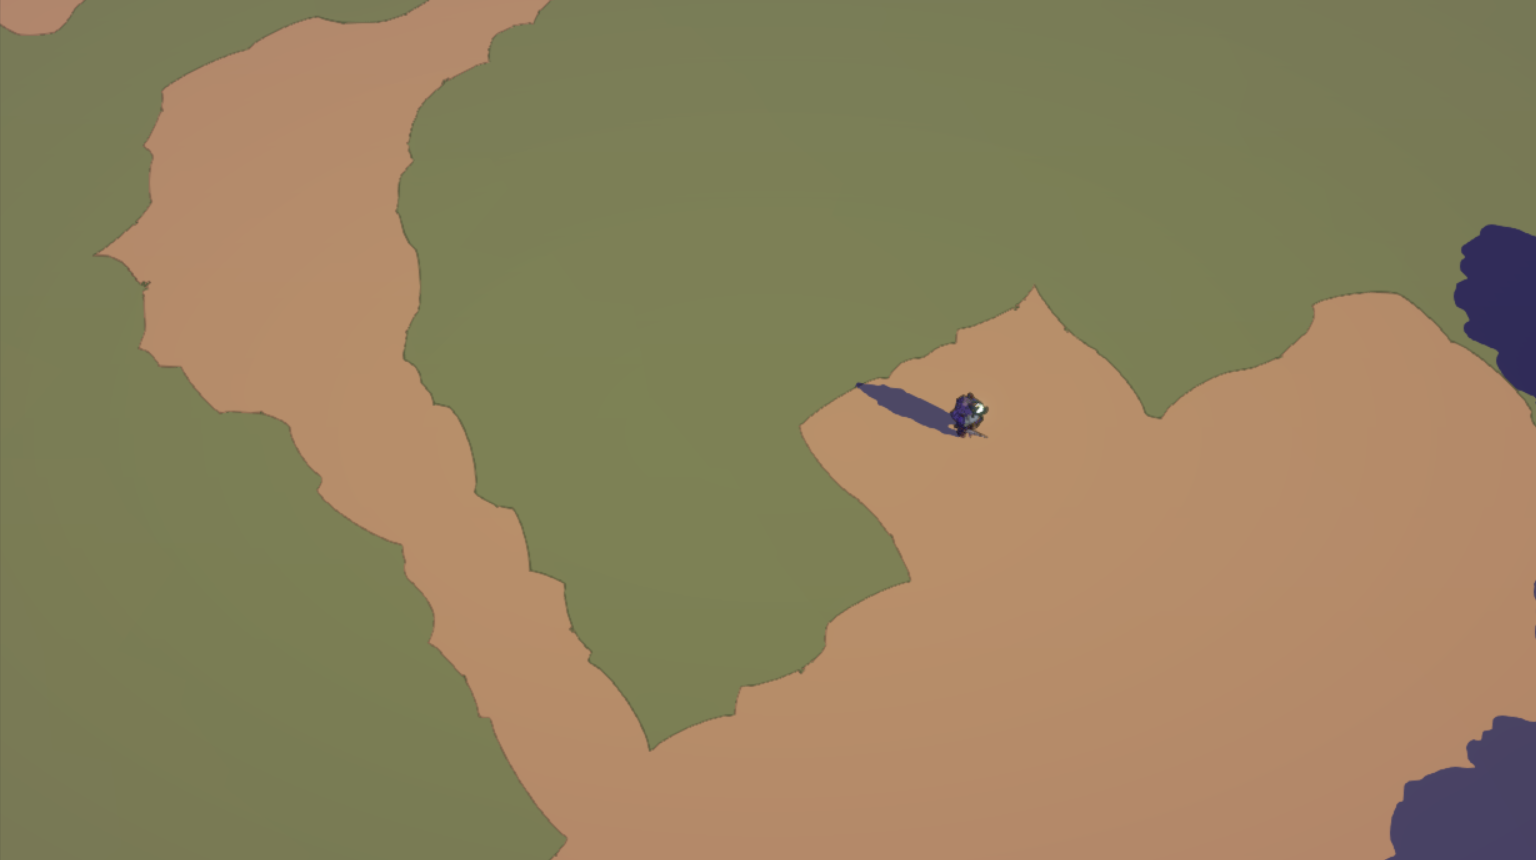
Tile maps are a convenient data structure for generators. But at the same time, it is quite straightforward, and the grid is often noticeable in the game. However, after loading data into the game and the location of assets, the result looks like this:
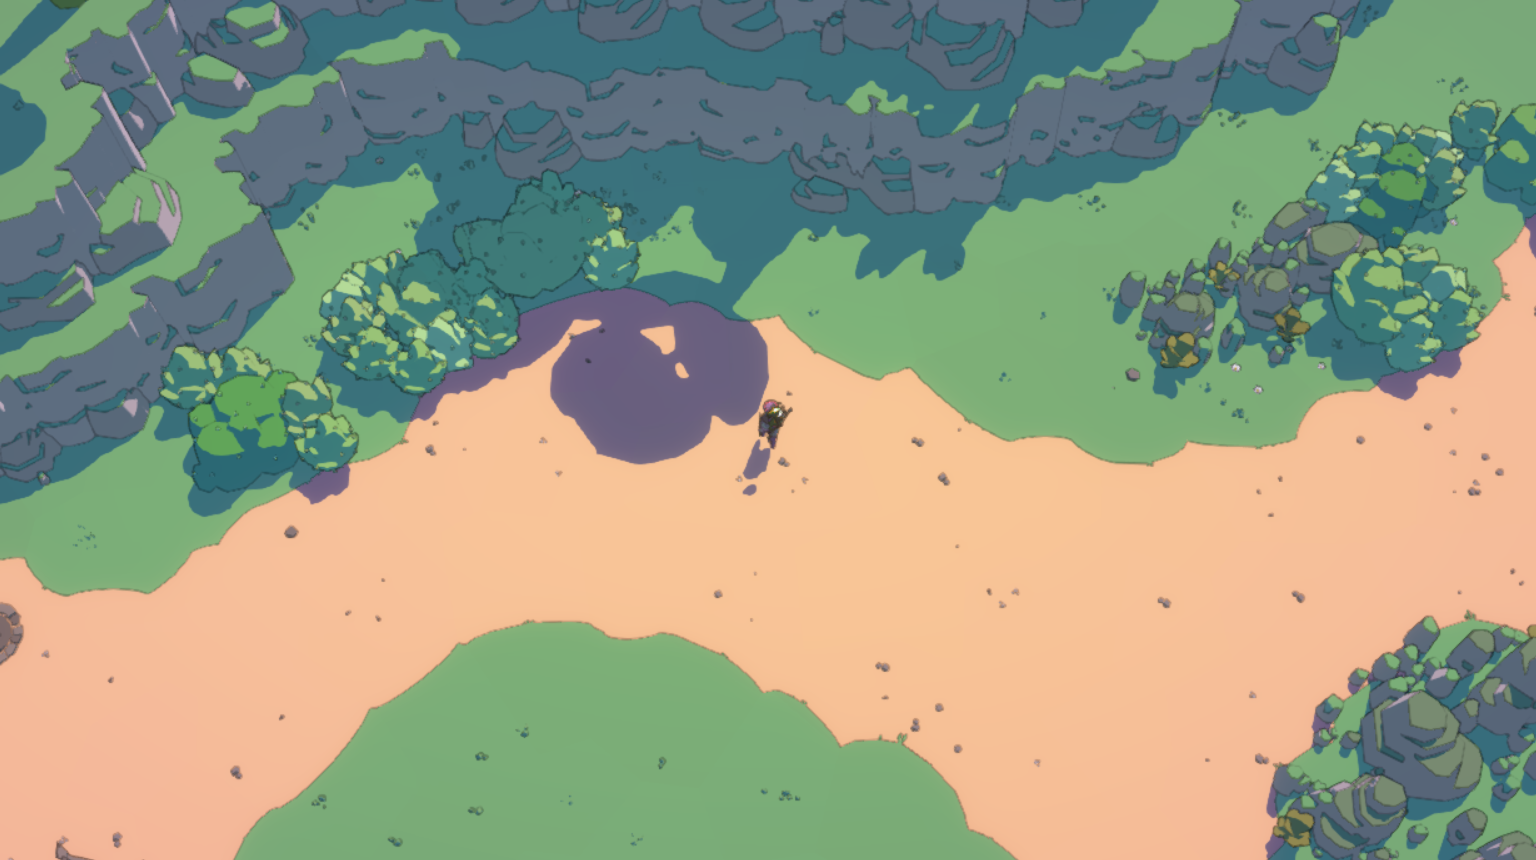
I think that we hid the tiles pretty well, and that's how we achieved it.
Voronoi magic
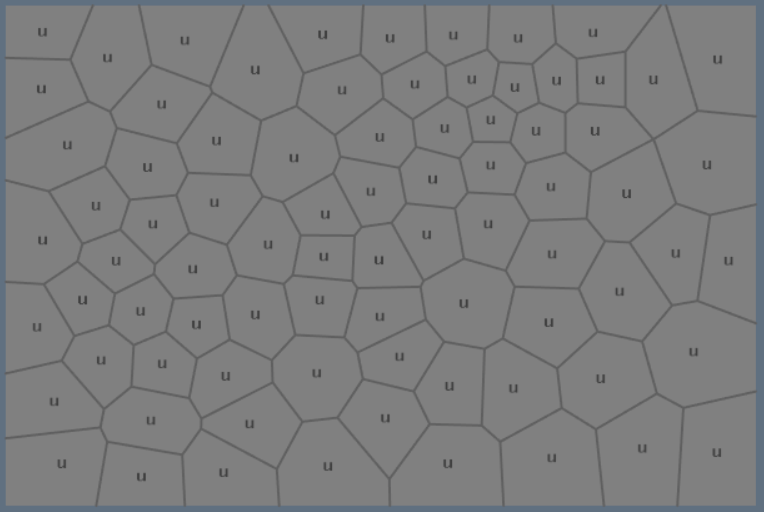
The trick is that the individual tiles correspond to the cells in the Voronoi diagram. This chart can be used to generate much more natural-looking shapes. A Voronoi diagram is created by sowing a plane with random points and dividing it into cells in such a way that each point on the plane belongs to the cell corresponding to the nearest starting point. In the procedural generation of content, the Voronoi diagrams can be used in several interesting ways.
A typical Voronoi diagram is created from a random, but fairly uniform distribution of the generating points, which looks something like this:
In Unexplored 2, we use a different kind of distribution of generating points. First, we generate at one point for each tile. So we can be sure that each tile on the tile map will correspond to one cell in the Voronoi diagram.
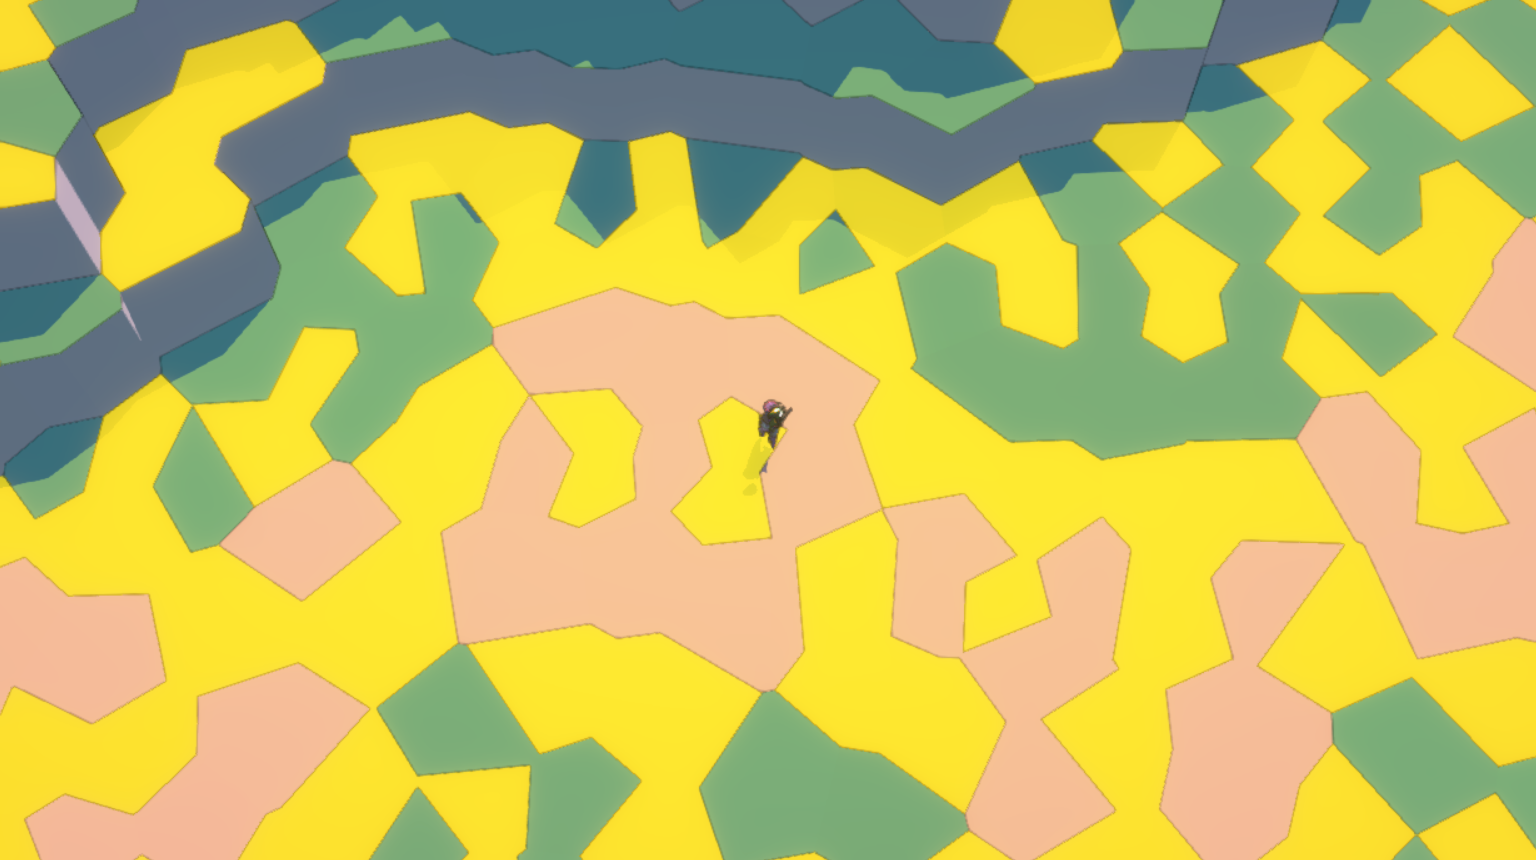
If we place generating points in the middle of each cell, we end up with a straight grid that looks exactly like a tile map (for this and other images below, I made a chess version, in which half of the tiles are rendered yellow, so that you can see patterns):

The easiest way to improve the diagram is to simply randomize the position of each generating point. When moving points, it is worth checking that the point does not go beyond the limits of the original tile.
The result looks like this:

Already better, but very noisy, and thus not get beautiful winding lines. The picture can be improved by doing “relaxation” of the Voronoi diagrams (this is a standard technique for them, which I will not discuss here). But it will always remain a bit noisy anyway, and it is difficult to effectively predict figures on a scale that exceeds the scale of individual tiles.
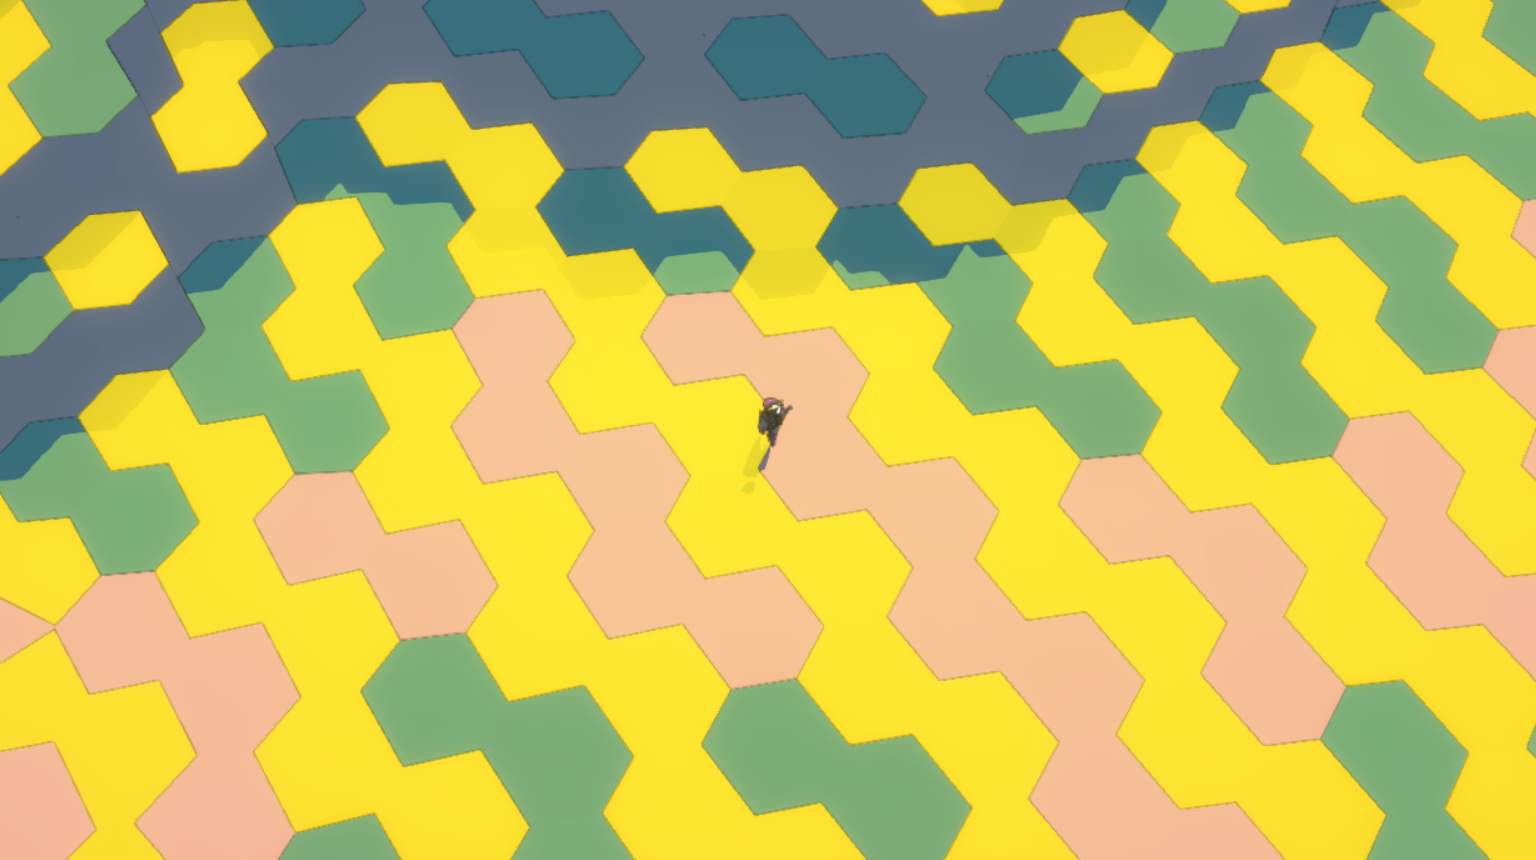
To solve this problem, we need not just to move it at random, but to approach it more intelligently. Different types of movement can have a very different effect. For example, when using Perlin noise, interesting twisting tile cards are obtained. Or you can turn the entire grid into hexagonal tiles by simply moving every other row of generating points to the left:
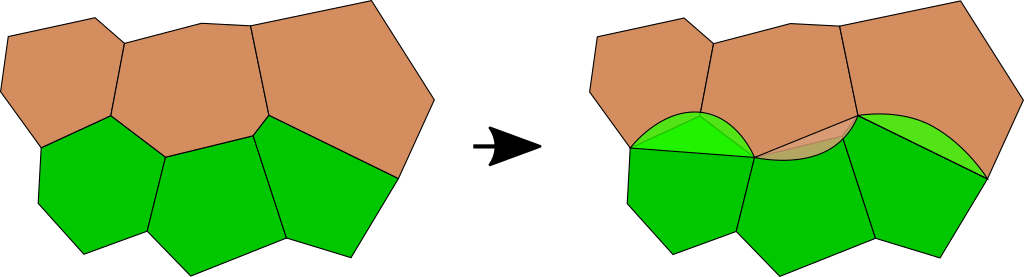
We made a real breakthrough when we started moving the generating points in certain patterns to create rounded corners. The first stage of this process is already performed inside the level generator. Angles between different types of ground are recognized, and corner tiles are marked with different shapes denoting the way they are deformed to generate a more beautiful environment:
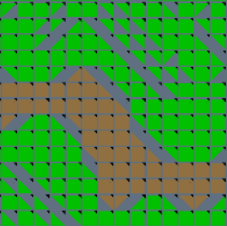
In this case, the difference in height levels also causes the corners to appear on the tile map. That is why you see additional rounded corners in the grass at the top right and bottom left where the slopes were generated.
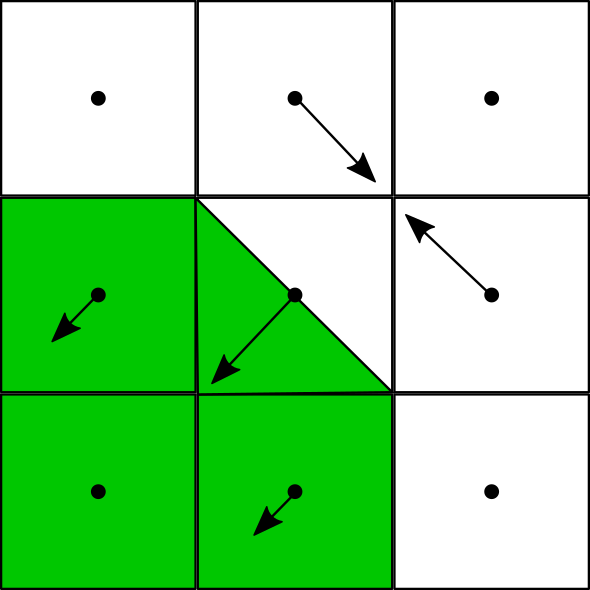
The game uses this information to offset the generating points of the Voronoi graph. Each corner angle shifts the location of the originating point (see image below). In addition, it also shifts the generating points of its four orthogonal neighbors. This process is cumulative; generating points can move several times if they are near several angles. However, after processing all offsets, the generating points are slightly randomized (approximately 10% of the tile width in each direction), and the final offset is limited to a maximum of 40% of the tile width.
The result is already pretty good quality:
But we have not finished ...
Decorate with the mind
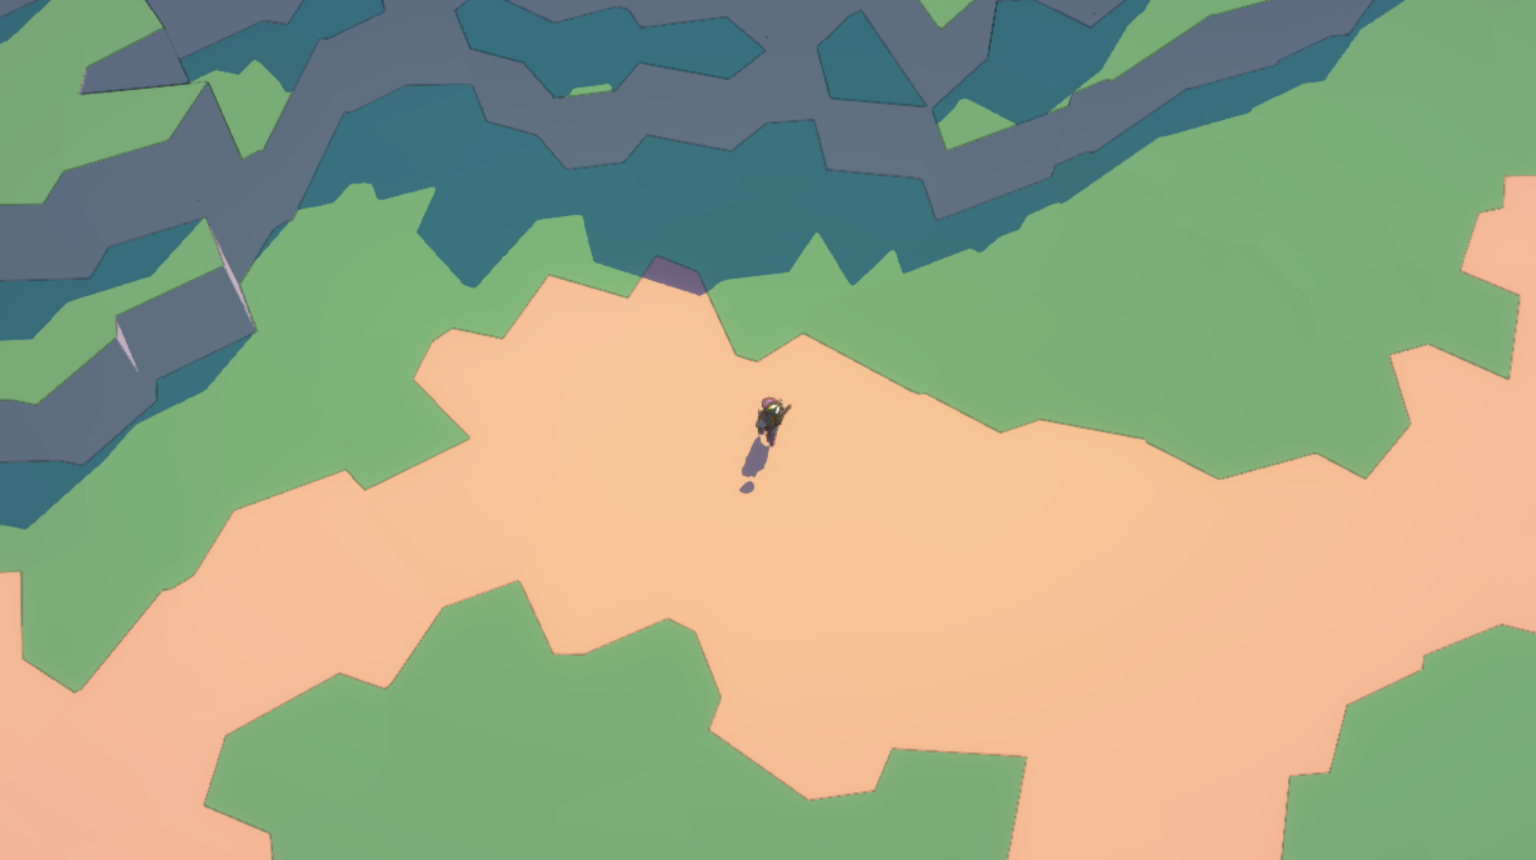
The overall shape is better, but the edges are still very straight and look jagged. We will hide this by placing curved assets on the edges where the colors are different. However, the real trick is that one curve is often placed on two edges, and to determine the direction of the curve, use their angles relative to each other.
The result looks like this:
Next, we used 3D assets to add texture breaks:

Finally, we add one more asset to fill the level. The location of these assets is determined by the previously generated level data, and generally follows simple principles. We use small assets surrounding larger ones to create natural and beautiful transitions. In particular, it is worth noting that stones are added at the foot of the cliffs, creating variability and visually softening the vertical slopes that are necessary for the gameplay:
Local variability
Angles are not the only offset type we use. In particular, we want the edges to be straighter next to artificial structures (for example, destroyed walls shown below):
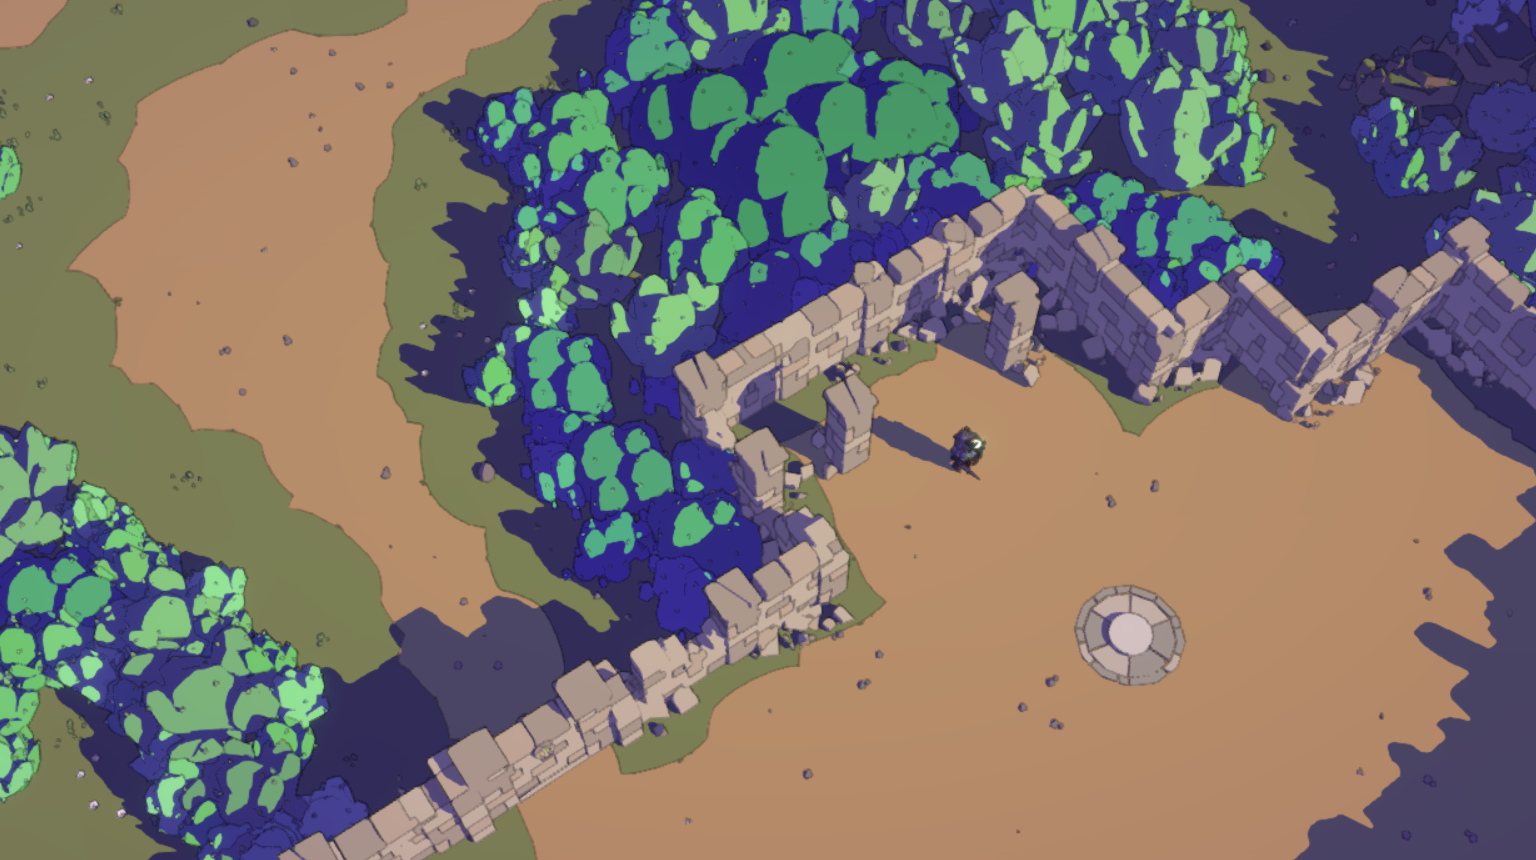
In our system, this effect is easy to achieve. We simply add another displacement rule prohibiting displacing tiles with man-made structures. The generator uses small squares to mark such tiles, and the game makes sure that all offsets are simply ignored:
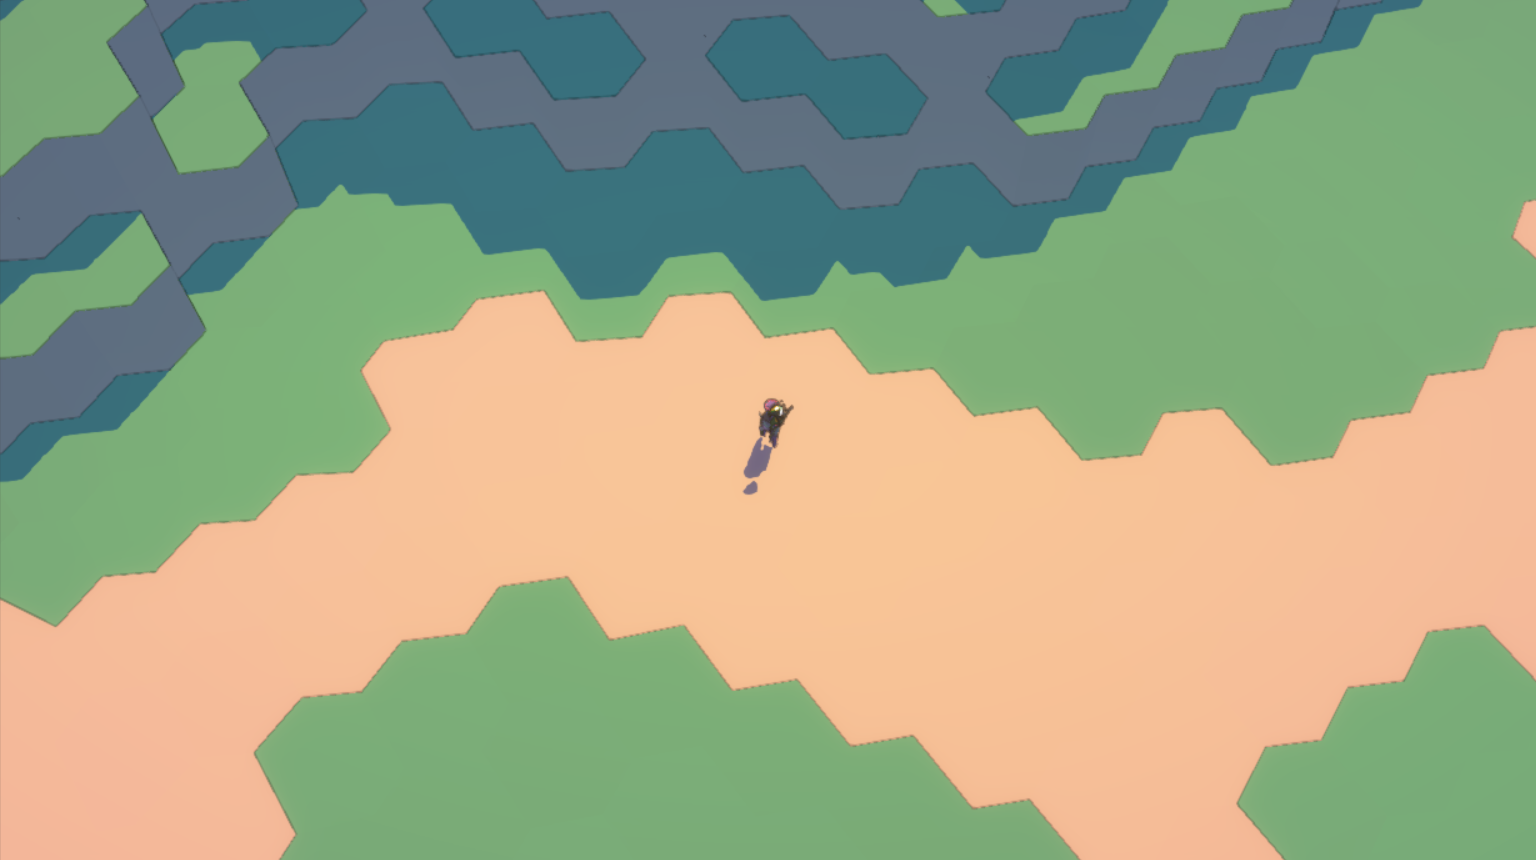
If you look at the ground, you can clearly see that the individual areas are made straight, while others bend more naturally:
Isn't it beautiful?
There are other rules that can be easily added using this technique. For example, sometimes we force tiles to create a hexagonal pattern so that narrow paths remain wide enough to move along them. I am sure that we will find other uses for other patterns.
This is one of many reasons why I like Voronoi diagrams. Another time I will write about how we use them to generate and decorate Unexplored world maps 2.
Source: https://habr.com/ru/post/457766/
All Articles