Super modern OpenGL. Part 2
All good mood and the temperature outside the window below. As promised, I publish the continuation of the article on the super-duper modern OpenGL. Who has not read the first part - Supermodern OpenGL. Part 1 .
Maybe I'll get lucky and I can shove the rest of the material into this article, this is not exactly ...
Array Texture
Texture arrays were added back in OpenGL 3.0, but for some reason very few people write about them (the information is safely hidden by masons). All of you are familiar with programming and know what an array is , although I'd rather “fit” the other side.
')
To reduce the number of switching between textures, and as a result, and reduce the switching operations of states, people use texture atlases (a texture that stores data for several objects). But the smart guys from Khronos have developed an alternative for us - Array texture. Now we can store textures as layers in this array, that is, it is an alternative to atlases. The OpenGL Wiki has a slightly different description, about mipmaps, etc., but it seems too complicated to me ( link ).
The advantages of using this approach compared to atlases are that each layer is treated as a separate texture in terms of wrapping and mipmapping.
But back to our sheep ... The textural array has three types of target:
- GL_TEXTURE_1D_ARRAY
- GL_TEXTURE_2D_ARRAY
- GL_TEXTURE_CUBE_MAP_ARRAY
Texture array creation code:
GLsizei width = 512; GLsizei height = 512; GLsizei layers = 3; glCreateTextures(GL_TEXTURE_2D_ARRAY, 1, &texture_array); glTextureStorage3D(texture_array, 0, GL_RGBA8, width, height, layers); The most attentive noticed that we create a storage for 2D textures, but for some reason we use a 3D array, there is no error or typo. We store 2D textures, but since they are arranged in “layers” we get a 3D array (in fact, pixel data is stored, not textures. The 3D array has 2D layers with pixel data).
It is easy to understand by the example of 1D texture. Each line in the 2D pixel array is a separate 1D layer. Mipmap textures can also be created automatically.
This completes all the difficulties and adding an image to a specific layer is quite simple:
glTextureSubImage3D(texarray, mipmap_level, offset.x, offset.y, layer, width, height, 1, GL_RGBA, GL_UNSIGNED_BYTE, pixels); When using arrays we need to change the shader a bit
#version 450 core layout (location = 0) out vec4 color; layout (location = 0) in vec2 texture_0; uniform sampler2DArray texture_array; uniform uint diffuse_layer; float getCoord(uint capacity, uint layer) { return max(0, min(float(capacity - 1), floor(float(layer) + 0.5))); } void main() { color = texture(texture_array, vec3(texture_0, getCoord(3, diffuse_layer))); } The best option is to calculate the desired layer outside the shader, for this we can use UBO / SSBO (it is also used to transfer matrices, and many other data, but this is some other time). If anyone can not wait tyk_1 and tyk_2 , you can read.
As for the size, that is GL_MAX_ARRAY_TEXTURE_LAYERS which is 256 in OpenGL 3.3 and 2048 in OpenGL 4.5.
It is worth telling about the Sampler Object (not to refer to the Array texture, but a useful thing) - this is the object that is used to set up the states of the texture unit, no matter which object is currently attached to the unit. It helps to isolate the state of the sampler from a specific texture object, which improves the abstraction.
GLuint sampler_state = 0; glGenSamplers(1, &sampler_state); glSamplerParameteri(sampler_state, GL_TEXTURE_WRAP_S, GL_REPEAT); glSamplerParameteri(sampler_state, GL_TEXTURE_WRAP_T, GL_REPEAT); glSamplerParameteri(sampler_state, GL_TEXTURE_MAG_FILTER, GL_LINEAR); glSamplerParameteri(sampler_state, GL_TEXTURE_MIN_FILTER, GL_LINEAR_MIPMAP_LINEAR); glSamplerParameterf(sampler_state, GL_TEXTURE_MAX_ANISOTROPY_EXT, 16.0f); I just created a sampler object, turned on linear filtering and 16x anisotropic filtering for any texture unit.
GLuint texture_unit = 0; glBindSampler(texture_unit, sampler_state); Here we simply bind the sampler to the desired texture unit, and when it ceases to be necessary, we bind the 0 to the given unit.
glBindSampler(texture_unit, 0); When we tied the sampler its settings take precedence over the texture unit settings. Result: there is no need to change the existing code base to add sampler objects. You can leave texture creation as it is (with its own sampler states) and simply add code to control and use the sampler objects.
When it is time to delete an object, simply call this function:
glDeleteSamplers(1, &sampler_state); Texture view
I will translate this as a “texture index (maybe more correct links, I xs),” because I don’t know a better translation.
What are pointers in the OpenGL perspective?
Everything is very simple, this is a pointer to the immutable (variable) texture data, as we can see in the picture below.

In fact, this is an object that shares the data of texels of a certain texture object, for analogy, you can use std :: shared_ptr from C ++ . As long as there is at least one pointer to the texture, the original texture will not be deleted by the driver.
In the wiki described in more detail, as well as it is worth reading about the types of texture and target (they do not have to be the same)
To create a pointer, we need to get a texture handle by calling glGenTexture (no initialization is needed) and then glTextureView .
glGenTextures(1, &texture_view); glTextureView(texture_view, GL_TEXTURE_2D, source_name, internal_format, min_level, level_count, 5, 1); Texture pointers can point to the N-th level of the mipmap, quite useful and convenient. Pointers can be like texture arrays, parts of arrays, a specific layer in this array, and can be a 3D texture slice as a 2D texture.
Single buffer for index and vertex
Well, everything will be quick and easy. Previously, the OpenGL specification for Vertex Buffer Object recommended that the developer split the vertex and index data into different buffers, but now this is not necessary (long story why not necessarily).
All we need is to keep the indices in front of the vertices and tell where the vertices start (more precisely, the offset), for this there is the command glVertexArrayVertexBuffer
Here's how we would do it:
GLint alignment = GL_NONE; glGetIntegerv(GL_UNIFORM_BUFFER_OFFSET_ALIGNMENT, &alignment); const GLsizei ind_len = GLsizei(ind_buffer.size() * sizeof(element_t)); const GLsizei vrt_len = GLsizei(vrt_buffer.size() * sizeof(vertex_t)); const GLuint ind_len_aligned = align(ind_len, alignment); const GLuint vrt_len_aligned = align(vrt_len, alignment); GLuint buffer = GL_NONE; glCreateBuffers(1, &buffer); glNamedBufferStorage(buffer, ind_len_aligned + vrt_len_aligned, nullptr, GL_DYNAMIC_STORAGE_BIT); glNamedBufferSubData(buffer, 0, ind_len, ind_buffer.data()); glNamedBufferSubData(buffer, ind_len_aligned, vrt_len, vrt_buffer.data()); GLuint vao = GL_NONE; glCreateVertexArrays(1, &vao); glVertexArrayVertexBuffer(vao, 0, buffer, ind_len_aligned, sizeof(vertex_t)); glVertexArrayElementBuffer(vao, buffer); Tessellation and compute shading
I will not tell you about the tessellation shader, as there is a lot of material in Google about this (in Russian), here are a couple of lessons: 1 , 2 , 3 . Let us proceed to the consideration of the shader for calculations (bliiin, also a lot of material, I will tell in brief).
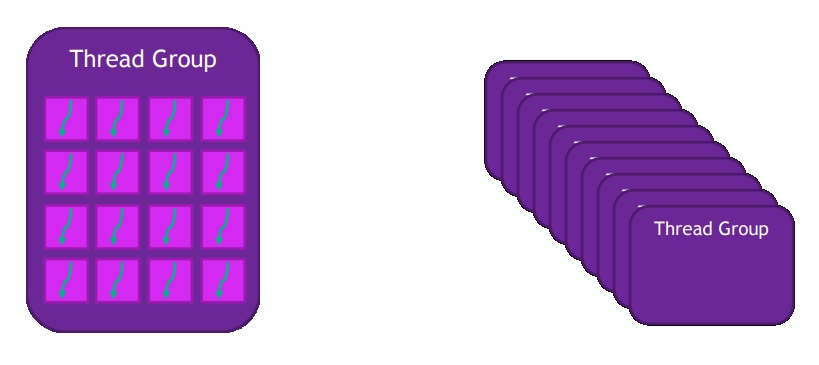
The advantage of video cards in a very large number of cores, video cards are designed for a huge number of small tasks that can be performed in parallel. The calculation shader, as the name implies, makes it possible to solve problems that are not related to graphics (optional).
The picture, I do not know what to call it (such as streams are grouped).
What can we use?
- Image processing
- Blour
- Algorithms based on tiles (delayed shading)
- Simulations
- Particles
- Water
Then I see no reason to write, there is also a lot of information in Google, here is a simple example of use:
// glUseProgramStages( pipeline, GL_COMPUTE_SHADER_BIT, cs); // , / glBindImageTexture( 0, tex, 0, GL_FALSE, 0, GL_WRITE_ONLY, GL_RGBA8); // 80x45 ( 1280720) glDispatchCompute( 80, 45, 1); Here is an example of an empty compute shader:
#version 430 layout(local_size_x = 1, local_size_y = 1) in; layout(rgba32f, binding = 0) uniform image2D img_output; void main() { // base pixel color for image vec4 pixel = vec4(0.0, 0.0, 0.0, 1.0); // get index in global work group ie x,y position ivec2 pixel_coords = ivec2(gl_GlobalInvocationID.xy); // // interesting stuff happens here later // // output to a specific pixel in the image imageStore(img_output, pixel_coords, pixel); } Here are a few links for more in depth acquaintance 1 , 2 , 3 , 4 .
Path rendering
This is a new (not new) extension from NVidia , its main goal is vector 2D rendering. We can use it for texts or UI, and since the vector graphics, it does not depend on the resolution, which is undoubtedly a big plus and our UI will look great.
The basic concept is a stencil, then a cover (cover in the original). Set the stencil path, then visualize the pixels.
For management, the standard GLuint is used, and the create and delete functions have standard naming.
glGenPathsNV // glDeletePathsNV // Here is a little about how we can get the path:
- SVG or PostScript in string
glPathStringNV - array of commands with the corresponding coordinates
and to update the dataglPathCommandsNVglPathSubCommands, glPathCoords, glPathSubCoords - fonts
glPathGlyphsNV, glPathGlyphRangeNV - linear combinations of existing paths (interpolating one, two or more paths)
glCopyPathNV, glInterpolatePathsNV, glCombinePathsNV - linear transformation of the existing path
glTransformPathNV
List of standard commands:
- move-to (x, y)
- close-path
- line-to (x, y)
- quadratic-curve (x1, y1, x2, y2)
- cubic-curve (x1, y1, x2, y2, x3, y3)
- smooth-quadratic-curve (x, y)
- smooth-cubic-curve (x1, y1, x2, y2)
- elliptical-arc (rx, ry, x-axis-rotation, large-arc-flag, sweep-flag, x, y)
Here is the path string in PostScript:
"100 180 moveto 40 10 lineto 190 120 lineto 10 120 lineto 160 10 lineto closepath” // "300 300 moveto 100 400 100 200 300 100 curveto 500 200 500 400 300 300 curveto closepath” // But in SVG:
"M100,180 L40,10 L190,120 L10,120 L160,10 z” // "M300 300 C 100 400,100 200,300 100,500 200,500 400,300 300Z” // There are still all sorts of buns with types of fillings, edges, curves:
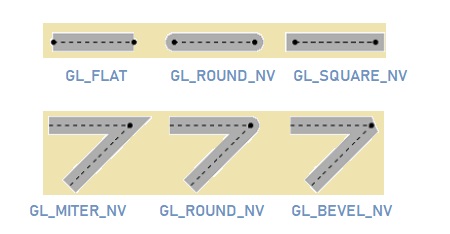
I will not describe everything here, since there is a lot of material and it will take a whole article (if it is interesting, I will write sometime).
Here is a list of drawing primitives.
- Cubic curves
- Quadratic curves
- Lines
- Font glyphs
- Arcs
- Dash & Endcap Style
Here is a bit of code, and there is a lot of text:
// SVG glPathStringNV( pathObj, GL_PATH_FORMAT_SVG_NV, strlen(svgPathString), svgPathString); // glStencilFillPathNV( pathObj, GL_COUNT_UP_NV, 0x1F); // // ( ) glCoverFillPathNV( pathObj, GL_BOUNDING_BOX_NV); That's all.
It seems to me that this article came out less interesting and informative, it was difficult to identify the main thing in the material. If anyone is interested in learning more, I can throw off some NVidia materials and links to specifications (if I remember where I saved them). Also happy for any help in editing the article.
As promised, I will write the following article about optimizing and reducing draw calls. I would like to ask to write in the comments, what else would you like to read and what you are interested in:
- Writing a game on cocos2d-x (Practice only, no water)
- Translation of a series of articles on Vulkan
- Any themes on OpenGL (quaternions, new functionality)
- Computer graphics algorithms (lighting, space screen ambient occlusion, space screen reflection)
- Your options
Thank you all for your attention.
Source: https://habr.com/ru/post/457380/
All Articles