Guide to the implementation of auto-renewable subscriptions in iOS-applications
Hello! My name is Denis, I am developing Apphud - a service for analyzing auto-renewable subscriptions in iOS applications.
In this article, I will tell you how to configure, implement and validate auto-renewable subscriptions in iOS 12 and iOS 13. I will talk about fine points and pitfalls with a bonus, which not all developers take into account.
Setting App Store Connect Subscriptions
If you already have a Bundle ID and the application you created, then you can skip these steps. If you are creating an application for the first time, do the following:
On the Apple Developer Portal, you must create an explicit Bundle ID (App ID) . After opening the page called Certificates, Identifiers & Profiles , go to the Identifiers tab. In June 2019, Apple finally updated the portal layout in accordance with ASC (short for App Store Connect).
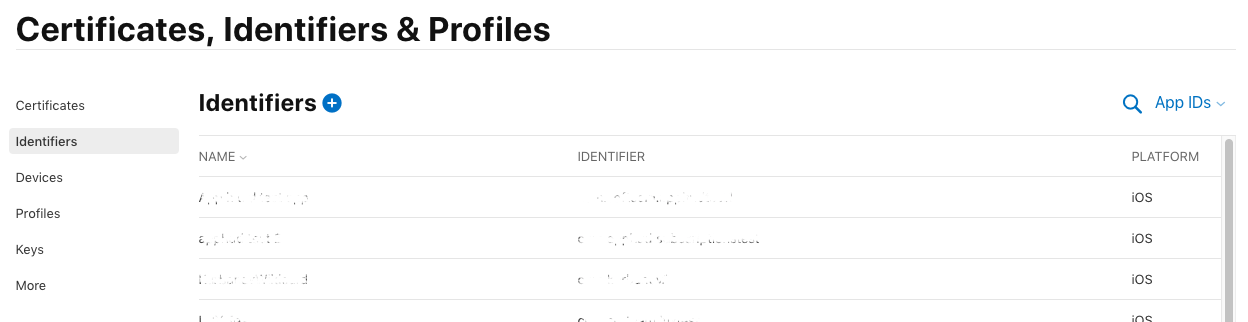
New design for the Apple Developer Portal in 2019
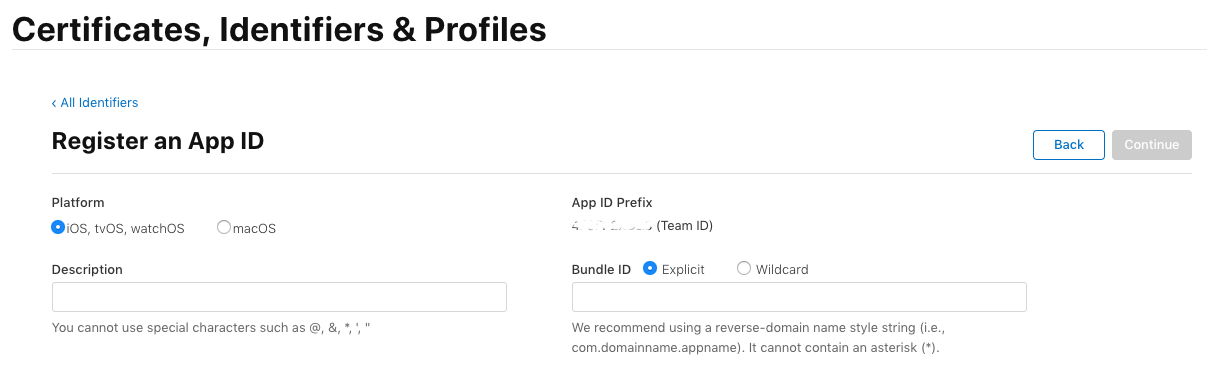
Explicit Bundle ID can be specified in the domain style ( com.apphud.subscriptionstest ). In the Capabilities section, you will notice that the check mark next to In App Purchases is already standing. After creating the Bundle ID ( App ID ), go to App Store Connect.
Test Users (Sandbox users)
To test future purchases, you will need to create a test user. To do this, go to ASC in the Users and Access tab, then in Sandbox testers.
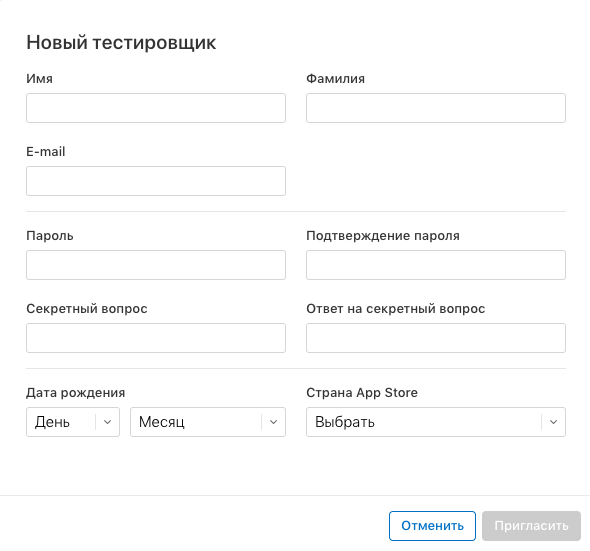
Sandbox user creation form
When creating a tester, you can specify any non-existent data, the main thing is not to forget the email and password later!
About how to test purchases with test credentials, I will tell you closer to the end of the article.
Another important step is to set up contracts and banking data in the “ Agreements, Taxes and Banking Transactions ” section. If you do not set up an agreement for paid applications, you will not be able to test auto-renewable subscriptions!
You can then create a new application in the App Store Connect. Specify a unique name and select your Bundle ID as the package ID .
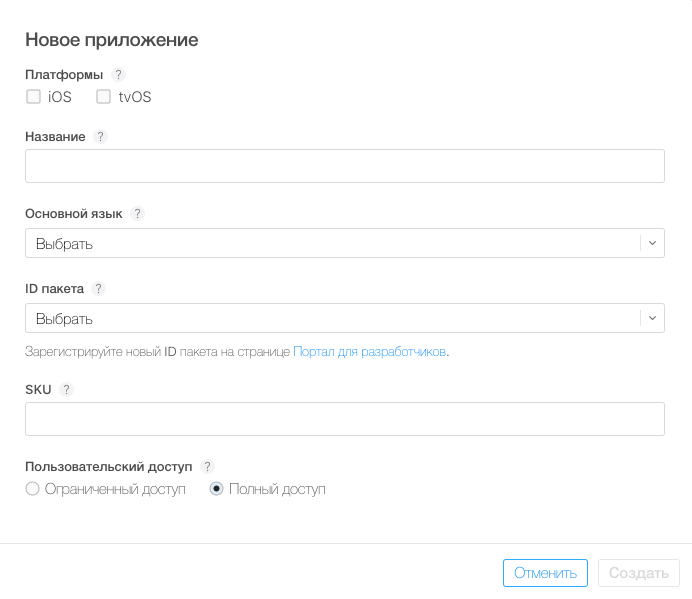
Package ID is your Bundle ID
Immediately after creating the application, go to the Features tab .
If you have already created an application, you can continue to read from here.
The process of creating an auto-renewable subscription consists of several steps:
1. Create a subscription ID and create a group of subscriptions . A group of subscriptions is a collection of subscriptions with different periods and prices, but which open the same functionality in the application. Also, in a group of subscriptions, you can activate a free trial period only once, and only one of the subscriptions can be active. If you want your application to have two different subscriptions at the same time, then you will need to create two groups of subscriptions.
2. Filling in the subscription data: duration, display name in the App Store (not to be confused with just the name) and description. If you add the first subscription to a group, you will need to specify the display name of the subscription group. Remember to save changes often, ASC may hang at any time and stop responding.
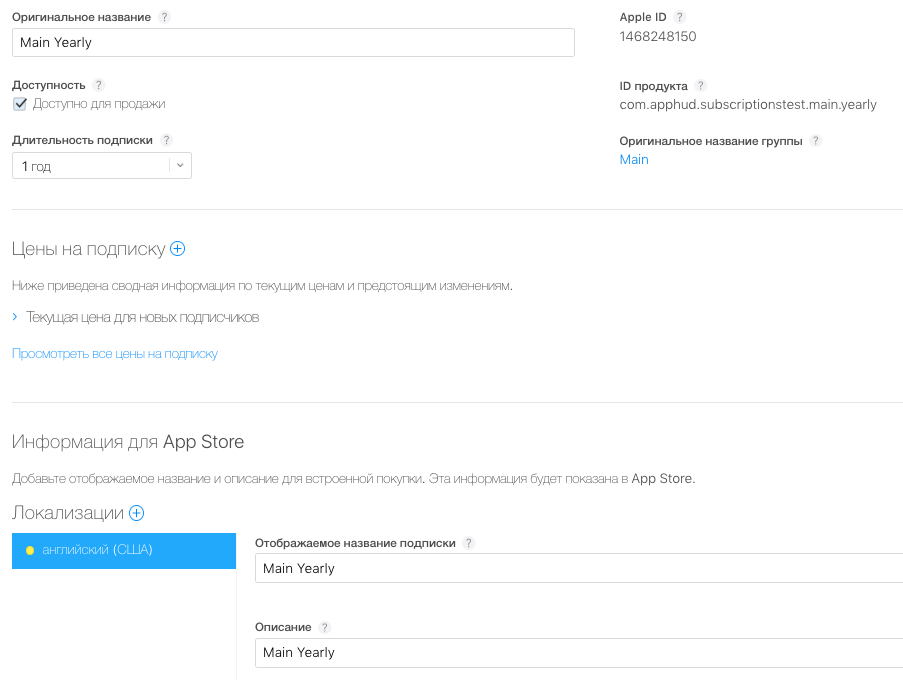
Subscription screen
3. Filling in the subscription price. There are two stages: the creation of prices and special offers. Specify the real price in any currency, it is automatically recalculated for all other countries. Introductory offers: here you can offer users a free trial period or prepayment discounts. Promotions appeared in the App Store just recently in 2019: they allow you to offer special discounts to users who have canceled a subscription and which you want to return.
Generating a secret shared key (shared secret key)
On the page with a list of all your created subscriptions, you will see the Shared Key button for the application . This is a special string that is needed to validate a check in an iOS application. We will need to validate the check to determine subscription status.
Shared key can be of two types: a unique key for your application or a single key for your account. Important: in no case do not recreate the key if you already have an application in the App Store, otherwise users will not be able to validate the check and your application will stop working as expected.
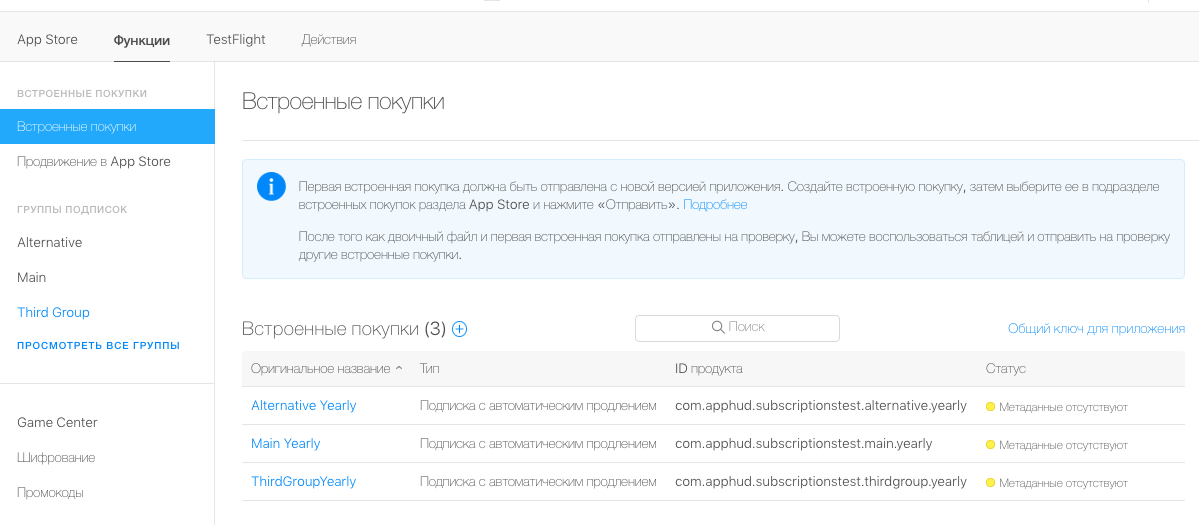
In this example, three subscription groups and 3 annual subscriptions are created.
Copy the ID of all your subscriptions and the shared key, this will come in handy later in the code.
Software part
We proceed to the practical part. What you need to make a full-fledged shopping manager? At least the following should be implemented:
Checkout
Check Subscription Status
Check Update
Transaction recovery (not to be confused with updating the check!)
Checkout
The entire checkout process can be divided into 2 stages: the receipt of products (class SKProduct ) and the initialization of the purchase process (class SKPayment ). First of all, we must specify the delegate of the SKPaymentTransactionObserver protocol.
// Starts products loading and sets transaction observer delegate @objc func startWith(arrayOfIds : Set<String>!, sharedSecret : String){ SKPaymentQueue.default().add(self) self.sharedSecret = sharedSecret self.productIds = arrayOfIds loadProducts() } private func loadProducts(){ let request = SKProductsRequest.init(productIdentifiers: productIds) request.delegate = self request.start() } public func productsRequest(_ request: SKProductsRequest, didReceive response: SKProductsResponse) { products = response.products DispatchQueue.main.async { NotificationCenter.default.post(name: IAP_PRODUCTS_DID_LOAD_NOTIFICATION, object: nil) } } func request(_ request: SKRequest, didFailWithError error: Error){ print("error: \(error.localizedDescription)") } The IAP_PRODUCTS_DID_LOAD_NOTIFICATION notification IAP_PRODUCTS_DID_LOAD_NOTIFICATION used to update the UI in the application.
Next, write a method to initialize the purchase:
func purchaseProduct(product : SKProduct, success: @escaping SuccessBlock, failure: @escaping FailureBlock){ guard SKPaymentQueue.canMakePayments() else { return } guard SKPaymentQueue.default().transactions.last?.transactionState != .purchasing else { return } self.successBlock = success self.failureBlock = failure let payment = SKPayment(product: product) SKPaymentQueue.default().add(payment) } The SKPaymentTransactionObserver delegate looks like this:
extension IAPManager: SKPaymentTransactionObserver { public func paymentQueue(_ queue: SKPaymentQueue, updatedTransactions transactions: [SKPaymentTransaction]) { for transaction in transactions { switch (transaction.transactionState) { case .purchased: SKPaymentQueue.default().finishTransaction(transaction) notifyIsPurchased(transaction: transaction) break case .failed: SKPaymentQueue.default().finishTransaction(transaction) print("purchase error : \(transaction.error?.localizedDescription ?? "")") self.failureBlock?(transaction.error) cleanUp() break case .restored: SKPaymentQueue.default().finishTransaction(transaction) notifyIsPurchased(transaction: transaction) break case .deferred, .purchasing: break default: break } } } private func notifyIsPurchased(transaction: SKPaymentTransaction) { refreshSubscriptionsStatus(callback: { self.successBlock?() self.cleanUp() }) { (error) in // couldn't verify receipt self.failureBlock?(error) self.cleanUp() } } func cleanUp(){ self.successBlock = nil self.failureBlock = nil } } When the subscription is successful, the delegate method is called, in which the transaction has a status of purchased .
But how to determine the expiration date of the subscription? To do this, make a separate request to Apple.
Check Subscription Status
The check is validated with the help of the POST-request verifyReceipt to Apple, as a parameter we send the encrypted check as a base64-encoded string, and in the answer we receive the same receipt in JSON format. The array with the key latest_receipt_info will list all transactions from each period of each subscription, including trial periods. We can only parse the answer and get the current expiration date for each product.
WWDC 2017 added the ability to receive only current checks for each subscription using theexclude-old-transactionskey in theverifyReceiptrequest.
func refreshSubscriptionsStatus(callback : @escaping SuccessBlock, failure : @escaping FailureBlock){ // save blocks for further use self.refreshSubscriptionSuccessBlock = callback self.refreshSubscriptionFailureBlock = failure guard let receiptUrl = Bundle.main.appStoreReceiptURL else { refreshReceipt() // do not call block yet return } #if DEBUG let urlString = "https://sandbox.itunes.apple.com/verifyReceipt" #else let urlString = "https://buy.itunes.apple.com/verifyReceipt" #endif let receiptData = try? Data(contentsOf: receiptUrl).base64EncodedString() let requestData = ["receipt-data" : receiptData ?? "", "password" : self.sharedSecret, "exclude-old-transactions" : true] as [String : Any] var request = URLRequest(url: URL(string: urlString)!) request.httpMethod = "POST" request.setValue("Application/json", forHTTPHeaderField: "Content-Type") let httpBody = try? JSONSerialization.data(withJSONObject: requestData, options: []) request.httpBody = httpBody URLSession.shared.dataTask(with: request) { (data, response, error) in DispatchQueue.main.async { if data != nil { if let json = try? JSONSerialization.jsonObject(with: data!, options: .allowFragments){ self.parseReceipt(json as! Dictionary<String, Any>) return } } else { print("error validating receipt: \(error?.localizedDescription ?? "")") } self.refreshSubscriptionFailureBlock?(error) self.cleanUpRefeshReceiptBlocks() } }.resume() } At the beginning of the method, you can see that there is a check for the existence of a local copy of the check. A local check may not exist, for example, if the application was installed via iTunes. In the absence of a check, we cannot execute the verifyReceipt request. We need to first get the actual local check, and then try to validate it again. Updating a check is done using the SKReceiptRefreshRequest class:
private func refreshReceipt(){ let request = SKReceiptRefreshRequest(receiptProperties: nil) request.delegate = self request.start() } func requestDidFinish(_ request: SKRequest) { // call refresh subscriptions method again with same blocks if request is SKReceiptRefreshRequest { refreshSubscriptionsStatus(callback: self.successBlock ?? {}, failure: self.failureBlock ?? {_ in}) } } func request(_ request: SKRequest, didFailWithError error: Error){ if request is SKReceiptRefreshRequest { self.refreshSubscriptionFailureBlock?(error) self.cleanUpRefeshReceiptBlocks() } print("error: \(error.localizedDescription)") } Update check implemented in the function refreshReceipt() . If the check has been successfully updated, the requestDidFinish delegate requestDidFinish(_ request : SKRequest) is called, which re-calls the refreshSubscriptionsStatus method.
How is shopping information parsing implemented? A JSON object is returned to us, in which there is a nested array of transactions (using the key latest_receipt_info ). We go through the array, get the expiration date by the key expires_date and save it if this date has not yet arrived.
private func parseReceipt(_ json : Dictionary<String, Any>) { // It's the most simple way to get latest expiration date. Consider this code as for learning purposes. Do not use current code in production apps. guard let receipts_array = json["latest_receipt_info"] as? [Dictionary<String, Any>] else { self.refreshSubscriptionFailureBlock?(nil) self.cleanUpRefeshReceiptBlocks() return } for receipt in receipts_array { let productID = receipt["product_id"] as! String let formatter = DateFormatter() formatter.dateFormat = "yyyy-MM-dd HH:mm:ss VV" if let date = formatter.date(from: receipt["expires_date"] as! String) { if date > Date() { // do not save expired date to user defaults to avoid overwriting with expired date UserDefaults.standard.set(date, forKey: productID) } } } self.refreshSubscriptionSuccessBlock?() self.cleanUpRefeshReceiptBlocks() } I gave the simplest example of how to retrieve the current expiration date of the subscription. There is no error handling and, for example, there is no check for the return of the purchase ( cancellation date is added).
To determine whether a subscription is active or not, it is enough to compare the current date with the date from User Defaults by product key. If it is missing or less than the current date, the subscription is considered inactive.
func expirationDateFor(_ identifier : String) -> Date?{ return UserDefaults.standard.object(forKey: identifier) as? Date } let subscriptionDate = IAPManager.shared.expirationDateFor("YOUR_PRODUCT_ID") ?? Date() let isActive = subscriptionDate > Date() Transaction recovery is performed in a single line, SKPaymentQueue.default().restoreCompletedTransactions() . This function restores all completed transactions by calling the delegate method of the func paymentQueue(**_** queue: SKPaymentQueue, updatedTransactions transactions: [SKPaymentTransaction]) .
What is different about updating a check from transaction recovery?
Both methods help recover purchase data. But what are their differences? There is a wonderful table with wwdc video :
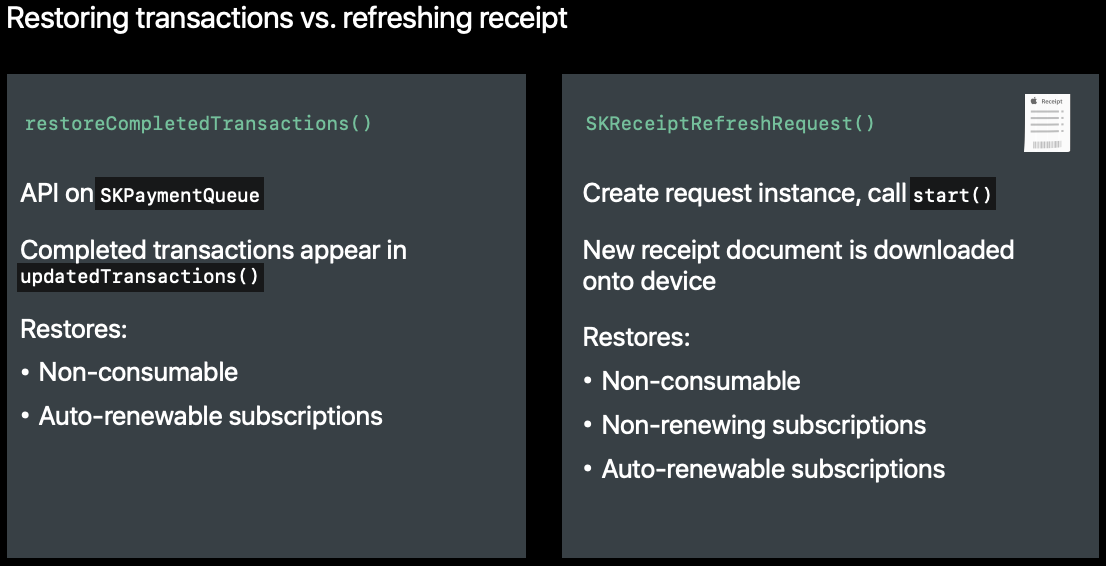
Table of differences between two ways to restore purchases from WWDC
In most cases, you only need to use SKReceiptRefreshRequest() , because we are only interested in receiving a receipt for the subsequent calculation of the expiration date.
In the case of auto-renewable subscriptions, the transactions themselves do not interest us, so it suffices to use only the update of the check. However, there are cases when you need to use the transaction recovery method: if your application downloads content with the purchase (Apple hosted content) or if you still support versions below iOS 7.
Shopping Testing (Sandbox Testing)
Previously, to test purchases it was necessary to log out from the App Store in the settings of your iPhone. This was a big inconvenience (for example, the entire Apple Music library was erased). But now it is not necessary to do this: the sandbox account now exists separately from the main account.

The purchase process occurs in a similar way compared to the actual purchases in the App Store, but there are some points:
You will always need to enter the login-password through the system window. Shopping using Touch ID / Face ID is still not supported.
If the system again and again asks for the login and password when entering the login and password correctly, click “Cancel” , minimize the application, then try again. It looks like nonsense, but for many it works. But sometimes after the second password is entered, the process still goes on.
You can’t test the cancellation process.
Duration of subscription periods is significantly lower than real ones. And they are updated no more than 6 times a day.
| Actual duration | Test duration |
|---|---|
| Week 1 | 3 minutes |
| 1 month | 5 minutes |
| 2 months | 10 minutes |
| 3 months | 15 minutes |
| 6 months | 30 minutes |
| 1 year | 1 hour |
What's new in StoreKit in iOS 13?
From the new - only the SKStorefront class, which gives information about exactly which country this user is registered in the App Store. This can be useful to those developers who use different subscriptions for different countries. Previously, everyone checked by geolocation or by device region, but this did not give an accurate result. Now it's very easy to find out the country in the App Store: SKPaymentQueue.default().storefront?.countryCode . The delegate of the method was also added if during the buying process the country was changed in the App Store. In this case, you can continue or cancel the purchase process.
Pitfalls when working with subscriptions
- Checking a check straight from the device is not recommended by Apple. They talked about this several times at WWDC (from 5:50) and this is indicated in the documentation . This is insecure because an attacker can intercept data using a man-in-the-middle attack. The correct way to check checks is local validation or using your own server.
- There is a problem with checking the expiration date. If you do not use your server, then the system time on the device can be changed to an older one and then our code will give the wrong result - the subscription will be considered active. If this does not suit you, then you can use any service that issues accurate world time.
- Not for all users a free trial period may be available. The user could reinstall the application after some time, and the application will show that the trial is available as usual. It will be correct to update the check, validate it and check the availability of trial for this user in JSON. Many do not.
- If the user has requested a refund, then
cancellation_datewill be added to the subscription JSON, butexpires_datewill remain unchanged. Therefore, it is important to always check for the presence of thecancellation_datefield, which is preferential toexpires_date. - You should not update the check every time you start the application, because, firstly, it is meaningless, and secondly, the user will most likely see the Apple ID password window. Update the check is, for example, when the user himself pressed the button to restore purchases.
- How to determine when it is worth validating a check to get the current subscription expiration date? You can validate a check every time you start it or only when the subscription expires. However, if you check the check only when the subscription expires, the user who has made a refund will be able to use your application for free until the end of the period.
Conclusion
I hope this article will be useful to you. I tried to add not only the code, but also to explain the subtle points in the development. Full class code can be downloaded here . This class will be very useful for familiarizing novice developers and those who want to learn more about how things work. For live applications, it is recommended to use more serious solutions, for example, SwiftyStoreKit .
')
Source: https://habr.com/ru/post/456602/
All Articles