Building a library of angular components in the form of web components
About Angular Elements now write many articles and regularly read reports. Like, no longer need to deploy a few full-fledged angulyars - just collect the web components and use them on your page.
But, as a rule, these materials are limited to considering a rather utopian situation: we make a separate project, create an angular component, set up a project to build Elements, and finally compile several JS files, connecting them to a regular page will give us the desired result. Hooray, the component works! ..

')
In practice, there is a need to pull out several components from the finished working angular-project, and it is also desirable not to affect its current development and use. This article turned out just because of one of these situations: I wanted to not only collect the individual elements of the project, but to make the process of compiling the whole UI library on Angular into a set of files with native web components.
To begin, let's remember how the module for compiling Angular Elements should look like.
We need:
The first item is the designation of the component itself and its dependencies, and the remaining three are the process required for the web component to appear in the browser. This separation allows you to place the logic of creating an element separately, in the abstract superclass:
The superclass can collect from the injector component and the name of a full-fledged native component and register it. The module for creating a specific item will look like this:
In this example, we collect the module of our button into the NgModule metadata and declare the component from this module as entryComponents, and also get the injector from the Angular dependency injection mechanism.
The module is ready for assembly and will give us a set of JS-files that can be folded into a separate web component. Thus, we can create several modules and collect web components from them one by one.
Now we need to adjust the bootstrap process of the resulting modules. I like the idea of putting this logic into a separate executable file, which will be responsible for compiling a specific module.
The structure of the elements goes something like this:

And a separate compilation file in the simplest version will look like this:
This approach will help you easily bypass the pre-made modules and keep the project structure with Elements clear and simple.
In the settings of the angular.json build, specify the path of the collected file to a temporary folder inside the dist:
There will be a set of output files after the assembly of the module.
For the build itself, we use the usual build command in angular-cli:
A separate element will be the final product, therefore we include the production flags with Ahead-of-Time compilation, and then we substitute the path to the executable file, which consists of the project and the name of the component.
Now we collect the result in a separate file, which will be the final bundle of our separate web component. To do this, use the usual cat'om:
It is important to note here that we are not putting the polyfills.js file in the bundle of each component, because we will get duplication if we use several components on the same page in the future. Of course, you should disable the outputHashing option in angular.json.
The resulting bundle is transferred from the temporary folder to the folder for storing the components. For example:
It remains only to put everything together - and the compilation script is ready:
Now we have a neat daddy with a set of web components:
Our assembled web components can be independently inserted into the page, connecting them to JS-bundles as needed:
In order not to drag the whole zone.js with each component, we connect it once at the beginning of the document:
The component is displayed on the page, and everything is fine.
And let's add another button:
Launch the page and ...

Oh, it all broke!
If we look at the bundle, we will find there such an inconspicuous line:

Webpack patch window, so as not to duplicate the loading of the same modules. It turns out that only the first component added to the page can add itself to the customElements.
To solve this problem, we need to use custom-webpack:
You can run the build script again - new components get along together perfectly on the same page.
Our components use global CSS variables that define the color theme and size of the components.
In angular applications that use our library, they are laid in the root component of the project. With independent web components, this is not possible, so we simply compile the styles and connect them to the page where web components are used.
We use less, so just compile our lessc variables and put the resulting file in the helpers folder.
This approach allows you to manage the styling of all web components of the page without having to recompile them.
In fact, the whole process of assembling elements described above can be reduced to a set of actions:
It remains only to call this script from the main package.json, in order to reduce the whole process of compiling the actual angular components to the launch of a single command.
All the above scripts, as well as demo pages using angular components and native components, can be found on github .
We organized a process in which adding a new web component takes literally a couple of minutes, while maintaining the structure of the main angular projects from which they are taken.
Any developer can add a component to a set of elements and assemble them into a set of separate JS bundles of web components, without delving into the specifics of working with Angular Elements.
But, as a rule, these materials are limited to considering a rather utopian situation: we make a separate project, create an angular component, set up a project to build Elements, and finally compile several JS files, connecting them to a regular page will give us the desired result. Hooray, the component works! ..
')
In practice, there is a need to pull out several components from the finished working angular-project, and it is also desirable not to affect its current development and use. This article turned out just because of one of these situations: I wanted to not only collect the individual elements of the project, but to make the process of compiling the whole UI library on Angular into a set of files with native web components.
Preparing modules
To begin, let's remember how the module for compiling Angular Elements should look like.
@NgModule({ imports: [BrowserModule], entryComponents: [SomeComponent], }) export class AppModule { constructor(readonly injector: Injector) { const ngElement = createCustomElement(SomeComponent, { injector, }); customElements.define('some-component', ngElement); } ngDoBootstrap() {} } We need:
- Add the component that we plan to make with an angular element to the entryComponents, import the modules necessary for the component.
- Create an angular element with createCustomElement and an injector.
- Declare a web component in the browser's customElements.
- Override the ngDoBootstrap method to empty.
The first item is the designation of the component itself and its dependencies, and the remaining three are the process required for the web component to appear in the browser. This separation allows you to place the logic of creating an element separately, in the abstract superclass:
export abstract class MyElementModule { constructor(injector: Injector, component: InstanceType<any>, name: string) { const ngElement = createCustomElement(component, { injector, }); customElements.define(`${MY_PREFIX}-${name}`, ngElement); } ngDoBootstrap() {} } The superclass can collect from the injector component and the name of a full-fledged native component and register it. The module for creating a specific item will look like this:
@NgModule({ imports: [BrowserModule, MyButtonModule], entryComponents: [MyButtonComponent], }) export class ButtonModule extends MyElementModule { constructor(injector: Injector) { super(injector, MyButtonComponent, 'button'); } } In this example, we collect the module of our button into the NgModule metadata and declare the component from this module as entryComponents, and also get the injector from the Angular dependency injection mechanism.
The module is ready for assembly and will give us a set of JS-files that can be folded into a separate web component. Thus, we can create several modules and collect web components from them one by one.
We collect several components
Now we need to adjust the bootstrap process of the resulting modules. I like the idea of putting this logic into a separate executable file, which will be responsible for compiling a specific module.
The structure of the elements goes something like this:
And a separate compilation file in the simplest version will look like this:
enableProdMode(); platformBrowserDynamic() .bootstrapModule(ButtonModule) .catch(err => console.error(err)); This approach will help you easily bypass the pre-made modules and keep the project structure with Elements clear and simple.
In the settings of the angular.json build, specify the path of the collected file to a temporary folder inside the dist:
"outputPath": "projects/elements/dist/tmp" There will be a set of output files after the assembly of the module.
For the build itself, we use the usual build command in angular-cli:
ng run elements:build:production --main='projects/elements/src/${project}/${component}/compile.ts' A separate element will be the final product, therefore we include the production flags with Ahead-of-Time compilation, and then we substitute the path to the executable file, which consists of the project and the name of the component.
Now we collect the result in a separate file, which will be the final bundle of our separate web component. To do this, use the usual cat'om:
cat dist/tmp/runtime.js dist/tmp/main.js > dist/tmp/my-${component}.js It is important to note here that we are not putting the polyfills.js file in the bundle of each component, because we will get duplication if we use several components on the same page in the future. Of course, you should disable the outputHashing option in angular.json.
The resulting bundle is transferred from the temporary folder to the folder for storing the components. For example:
cp dist/tmp/my-${component}.js dist/components/ It remains only to put everything together - and the compilation script is ready:
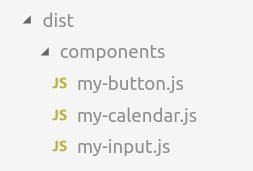
// compileComponents.js projects.forEach(project => { const components = fs.readdirSync(`src/${project}`); components.forEach(component => compileComponent(project, component)); }); function compileComponent(project, component) { const buildJsFiles = `ng run elements:build:production --aot --main='projects/elements/src/${project}/${component}/compile.ts'`; const bundleIntoSingleFile = `cat dist/tmp/runtime.js dist/tmp/main.js > dist/tmp/my-${component}.js`; const copyBundledComponent = `cp dist/tmp/my-${component}.js dist/components/`; execSync(`${buildJsFiles} && ${bundleIntoSingleFile} && ${copyBundledComponent}`); } Now we have a neat daddy with a set of web components:
We connect components to a regular page.
Our assembled web components can be independently inserted into the page, connecting them to JS-bundles as needed:
<my-elements-input id="input"> </<my-elements-input> <script src="my-input.js"></script> In order not to drag the whole zone.js with each component, we connect it once at the beginning of the document:
<script src="zone.min.js"></script> The component is displayed on the page, and everything is fine.
And let's add another button:
<my-elements-button size="l" onclick="onClick()"></my-elements-button> <script src="my-button.js"></script> Launch the page and ...
Oh, it all broke!
If we look at the bundle, we will find there such an inconspicuous line:
window.webpackJsonp=window.webpackJsonp||[] Webpack patch window, so as not to duplicate the loading of the same modules. It turns out that only the first component added to the page can add itself to the customElements.
To solve this problem, we need to use custom-webpack:
- Add custom-webpack to your project with elements:
ng add @angular-builders/custom-webpack --project=elements - Configuring angular.json:
"builder": "@angular-builders/custom-webpack:browser", "options": { "customWebpackConfig": { "path": "./projects/elements/elements-webpack.config.js" }, ... - Create a custom-webpack configuration file:
module.exports = { output: { jsonpFunction: 'myElements-' + uuidv1(), library: 'elements', }, };
In it we need to generate unique id for each assembly in any convenient way. I used uuid.
You can run the build script again - new components get along together perfectly on the same page.
Induce beauty
Our components use global CSS variables that define the color theme and size of the components.
In angular applications that use our library, they are laid in the root component of the project. With independent web components, this is not possible, so we simply compile the styles and connect them to the page where web components are used.
// compileHelpers.js compileMainTheme(); function compileMainTheme() { const pathFrom = `../../main-project/styles/themes`; const pathTo = `dist/helpers`; execSync( `lessc ${pathFrom}/theme-default-vars.less ${pathTo}/main-theme.css`,; ); } We use less, so just compile our lessc variables and put the resulting file in the helpers folder.
This approach allows you to manage the styling of all web components of the page without having to recompile them.
Final script
In fact, the whole process of assembling elements described above can be reduced to a set of actions:
#!/bin/sh rm -r -f dist/ && mkdir -p dist/components && node compileElements.js && node compileHelpers.js && rm -r -f dist/tmp It remains only to call this script from the main package.json, in order to reduce the whole process of compiling the actual angular components to the launch of a single command.
All the above scripts, as well as demo pages using angular components and native components, can be found on github .
Total
We organized a process in which adding a new web component takes literally a couple of minutes, while maintaining the structure of the main angular projects from which they are taken.
Any developer can add a component to a set of elements and assemble them into a set of separate JS bundles of web components, without delving into the specifics of working with Angular Elements.
Source: https://habr.com/ru/post/456462/
All Articles