How to implement warmth from GitHub to production server using Webhook

I have long been in the habit of creating repositories on GitHub. This is much more efficient than keeping everything on Google Drive or, worse, on your hard drive. But here the question immediately arises: how to execute the deploy on the working server?
Most search queries put me on Jenkins and other continuous deployment tools. But I wanted to find a different solution. So I went to the free service Webhook.
Skillbox recommends: Practical course "Mobile Developer PRO" .
')
We remind: for all readers of "Habr" - a discount of 10,000 rubles when writing to any Skillbox course on the promotional code "Habr".
The technical basis of Webhook is a fresh droplet of Digital Ocean with Ubuntu 16.04 as a working server. To reduce the number of steps required to implement the plan, all actions are performed by the root user.
Let's start with github
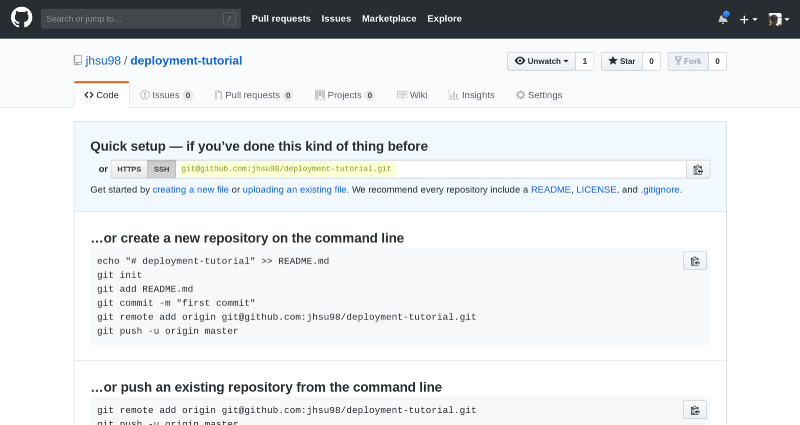
If you have a repository and you want to use it, you can skip this step - just use the SSH URI, that's all. If not, create it and use the SSH URI too.
Install Go and Webhook (droplet Digital Ocean).
Before you begin, you should perform a quick update and upgrade with the fresh installer Ubuntu 16.04.
sudo apt update -y && sudo apt upgrade -y Now to install WebHook you need to install the Go programming language. At the time of this writing, version 1.11.4 was relevant, so if you have a different version, you need to make edits.
wget https://dl.google.com/go/go1.11.4.linux-amd64.tar.gz sudo tar -C /usr/local -xzf go1.11.4.linux-amd64.tar.gz export PATH=$PATH:/usr/local/go/bin It's time to download the latest version of Webhook.
go get github.com/adnanh/webhook During the download there is no progress bar, so you just need to wait. After completing the process, execute ~ / go / bin / webhook.
Webhook is installed, but you need to create a directory and file structure so that everything works as it should.
mkdir ~/webhooks mkdir ~/webhooks/deployment-tutorial touch ~/webhooks/hooks.json touch ~/webhooks/deployment-tutorial/deploy.sh chmod +x ~/webhooks/deployment-tutorial/deploy.sh The file hooks.json is responsible for configuration and routing, and deploy.sh serves as a tool for executing the commands needed for updates from GitHub.
The first step is to configure hooks.json by opening it in a text editor. The file contains the configuration for endpoints that will be created after the Webhook launch, and is an array of objects, each of which is a unique endpoint.
[{ "id": "deployment-tutorial", "execute-command": "/root/webhooks/deployment-tutorial/deploy.sh", "command-working-directory": "/root/deployed-site/", "response-message": "Executing deploy script...", "trigger-rule": { "match": { "type": "payload-hash-sha1", "secret": "The Returners", "parameter": { "source": "header", "name": "X-Hub-Signature" } } } }] Id - a unique name that will be used for the endpoint URL;
execute-command - a script that will be executed when endpoint is activated;
command-working-directory is the directory that is used during the execution of execute-command;
trigger-rule - an option that will be used for information security purposes; this is the secret phrase for endpoints.
Let me remind you that all actions I perform as root, so the starting address / root. If you log in as a regular user, you need to register / home / username, where username, which is logical, is the name of this user. No need to use ~ /, the path must be absolute, otherwise you will get an error.
You may have noticed that we have set up a working folder that does not yet exist. Before you create it, you need to finish with deploy.sh.
The script must always begin with “shebang”. Before opening the file, you should execute which bash. Well, then the following commands are executed in the script:
#!/bin/bash git fetch --all git checkout --force "origin/master" Now both Go and Webhook are installed, so you need to configure the configuration in hooks.json and write the script responsible for the deployment. It will change the destination directory, working from the main branch of the GitHub repository.
Finally, it’s time to bring Webhook into active mode, replacing the 000.000.000.000 with the working IP address of Doplet.
/root/go/bin/webhook -hooks /root/webhooks/hooks.json -ip "000.000.000.000" -verbose During execution, you may notice the output of the URL with {id} at the end. This will be the id of the object that is already created in the hooks.json file: deployment-tutorial.
Configure Git (Digital Ocean Droplet)
Server setup is not complete yet. To complete it, you need to open a new terminal window and authenticate again on the server, while Webhook is running in the first window. At the very beginning we asked the repository URI, now it needs to be used.
To do this, go to the working directory specified in hooks.json and set the following:
git init git remote add origin git@github.com:jhsu98/deployment-tutorial.git In doing so, you need to replace the URI with your own instead of what I indicated.
The final step is to generate SSH keys in order to connect to GitHub with their help. In the terminal window, type ssh-keygen and confirm by pressing Enter while the keys are generated. Then you need to display the public keys by typing cat ~ / .ssh / id_rsa.pub. Something like this will turn out:
ssh-rsa AAAAB3NzaC1yc2EAAAADAQABAAABAQCyzJrPVOJqsTqD2R3xirTp3VNMwpmJMyLklzJg4sRQyslTUmbNNmDVO573EbXQQf2PqPQljqKDDlSaELdav4OTi1gPCoDary300yUqC/efLGHflZ6pMNuGsP2zTzerD/TMjzl1FXF1wOGTXqcC4TvGBS1bFyUY5n8wSOJ8ntZ6bBNv0zA2t7X1vH8ahIBJLKCayq9ipobKlHPYqxBt6zAoeh/ILQ0PWhGkmbGqqzqN1jcVWOefLgj4Dl8bZWORS1nkqrVg2wFC2nnibH97kZLsNrdQaeK8jUrkUWkJcUELI02mkkqh2RtBx9EwQEvsm9YuDBD9xF+HyuWoAeqcKerb root@github-webhook-tutorial Well, now all that's left is to set up a GitHub repository and test it.
Setting up the deployment key and Webhook (GitHub)
In the browser, go to the settings for the repository. First you need to add the Deployment Key.
When adding a key, you need to set its name and insert it into the key output above. GitHub allows you to work only with public keys, so if necessary, you need to set several keys. Once everything is finished, the Webhook section turns.

Three fields in this section should be given special attention. These are payload URL, content type and secret. Payload URL - endpoint, which Webhook listens on, content type - data format, secret - custom line from hooks.json file. In our case, this is “The Returners”.
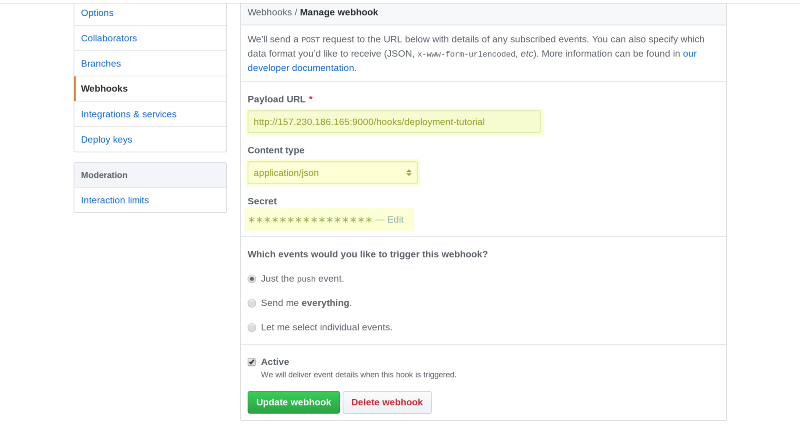
After creating Webhook, the corresponding mark should appear in the settings, which indicates that the server is available. If you check the terminal with a working Webhook, you can see that the repository is already in operation.
To check the workflow, copy the repository to the local machine, if this has not already been done, and make changes to the main branch. After that, they should be displayed on the server. Is done.
A developer who has already performed it all several times spends about 10 minutes to set up. But this is after hours and hours of trial and error. Remember these four important setting features:
- Be sure to use an absolute path for hooks.json.
- Do not deploy.sh executable file.
- Confirm SSH connections during the first “contact” of GitHub and the production server.
- Do not use the erroneous “shebang” in the bash script.
Skillbox recommends:
- Two-year practical course "I am a web developer PRO" .
- Online course "C # developer with 0" .
- Practical annual course "PHP developer from 0 to PRO" .
Source: https://habr.com/ru/post/456018/
All Articles