GPS clock on Arduino
Hello, my name is Dmitry, today I will tell you how I created the GPS watch. At the end of the article there will be a link to the firmware and CAD 3D model.
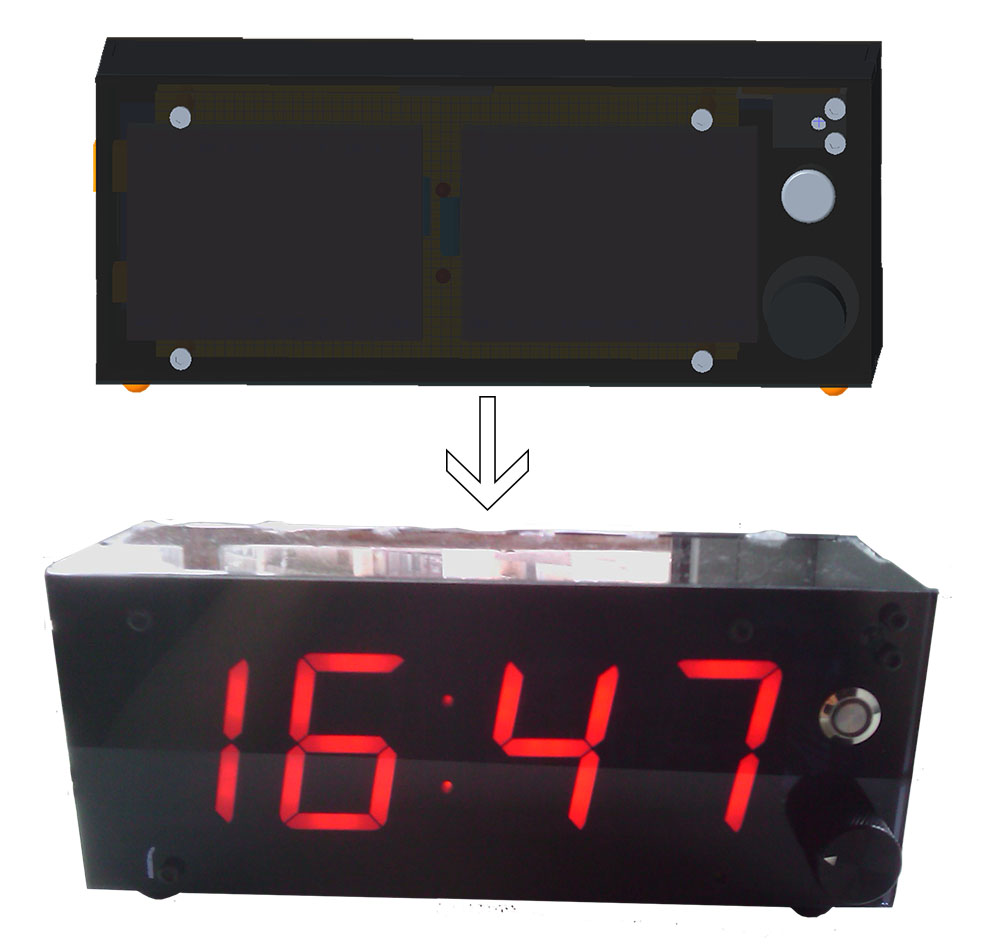
So I wanted to do something on the Arduino and at the same time something useful. And my choice fell on the clock but not just a clock but a clock with GPS time synchronization and an alarm clock at the same time.
Description of construction
Here I will also quote prices in dollars, and taking into account the delivery. All components were purchased on one well-known Chinese website, which I will not say, but they will consider it as an advertisement.
')
- Ardurino Uno center of the entire system - Price $ 3.45.
- GPS Module VK2828U7G5LF - Price $ 6.21.
- CD4026BE drivers for digital indicators 5 pcs. Price $ 2.20.
- Connectors for 16Pins drivers. I bought them so as not to damage the drivers when soldering. Price 0.51 $.
- 7-segment digital indicators 1.8 inches with a common cathode, this should be noted; indicators with a common anode cannot be controlled with the CD4026BE. 4 things. Price $ 3.63.
- Connectors for digital indicators 5Pins 10 pcs. These connectors drank a lot of blood from me because the digital indicator legs are a bit thinner than the usual pins that are inserted into them, so be sure to fold the ends of the digital indicators to the side. Price $ 1.57.
- 220 Ohm resistors. Need for limiting the current in the circuit of LEDs 40 pieces I inexperience ordered for 2 watts but of course the same fit for 0.5 watts. The price is 2.22 $.
- 12 kΩ resistors. I bought them as “pull-ups” for buttons, but then I learned that Ardurino has a built-in resistor that is activated in PullUp mode. But they came in handy when I had to adjust the brightness of 2 central LEDs to the brightness of digital indicators. Having soldered 5 pieces in parallel, I got 2.3 kΩ. So they still came in handy 20 pcs. Price $ 0.68.
- The speaker is active. Price $ 0.82.
- Red LED 10 pcs. The price is $ 1.25.
- 20 cm dupont line cable. I used it as a wiring source to connect components. Price 1.13 $.
- Encoder needed to set the alarm time and settings. I chose the encoder because with it the time setting process is simplified a hundred times. Why encoders are not applied everywhere in all watches I won’t apply my mind. Price $ 0.98.
- Pen for encoder. The standard pen is terrible. Price 1.31 $.
- Button with built-in LED. The price is $ 0.87.
- Light sensor BH1750 (I chose the one that is short). Naturally, I wanted the watch to automatically adjust its brightness. The price is $ 0.81.
- Mosfet module 2 pcs. Why 2 pieces? The first one, as you understand, I use to control the brightness of the dial, and the second I use to turn off the GPS module, of course it has a sleep mode, but in this mode it doesn’t turn off completely, so I gave it a “sleep mode” using a mosfet. Should I turn off the GPS module? Yes, when GPS is turned on, the clock consumes 120 milliamperes and when it is turned off only 80. Why the module? Because mosfets are sold only in batches of 10 pieces and I don’t need that much. The price is $ 1.06.
- Inductive sensor CJMCU-0101. Price $ 1.73.
- A set of socket connector 40Pin 5 pcs. I need to use them to connect the wires to the board. You ask why I did not use these connectors for digital indicators? Because I ordered those connectors from the beginning and then I realized that they would not be enough for me. Price $ 1.56.
- Acrylic is made of body. I took 2 pieces. The first 200x200x4 mm translucent ones I made the front and rear panels. The second 200x200x3 mm completely black from it I made the side panels. I glued the panels together with hot melt. The price is 13.03 $.
- Special hook knife for cutting acrylic. Price $ 2.01
- Two mounting double-sided boards 9x15 cm. Price $ 4.18.
- Silicone self-pecking feet 4 pcs. Price $ 0.88.
- Hexagonal brass racks for boards M3X12 20 pieces of format dad mom. And M3x20 10 pcs format mom mom. Price 3.67 $.
- Black screws with internal hexagon head 20 pcs. Price $ 2.06.
- Development board and jumpers for it. You will need it to check the work-ability of your components before installing them. Price 3.77 $.
Perhaps you will need a power supply as I said the clock during synchronization consumes 120 milliamperes when the GPS module is turned off only 80 milliamperes, but I had it.
In addition, I strongly recommend dropping all the LEDs from both the Arduino and the modules, otherwise there will be a real disco inside the clock.
So as a result, we have $ 60.72 or 4007 rubles at the rate at the time of this writing. Moreover, if you do not have a soldering iron multimeter and other soldering accessories, then you will have to pay about as much for them.
Principle of operation
When turned on, the clock shows the number of satellites that the GPS module sees. After synchronization occurs the clock starts to show the time. When you click on the encoder, you can set an alarm. The button turns on and off the alarm while it displays whether the alarm is on or off. When the alarm goes off, if you put your hand on top of the clock, you can switch them to snooze (the alarm indicator will flash while).
If you press the encoder while the alarm button is pressed, you can set the desired time zone (default is +3). Subsequent pressing of the encoder allows you to set a snooze delay at the alarm.
Well, since this is a GPS watch, they have a “secret” mode. If they are turned on by holding the alarm on button, the watch will switch to when mode, they send data from the GPS module via the USB port. Using the u-center program, you can view this data. In addition, when the alarm indicator lights up, it will mean that the clock has found coordinates. After that, rotating the encoder can be seen first latitude and then longitude.
Photo session
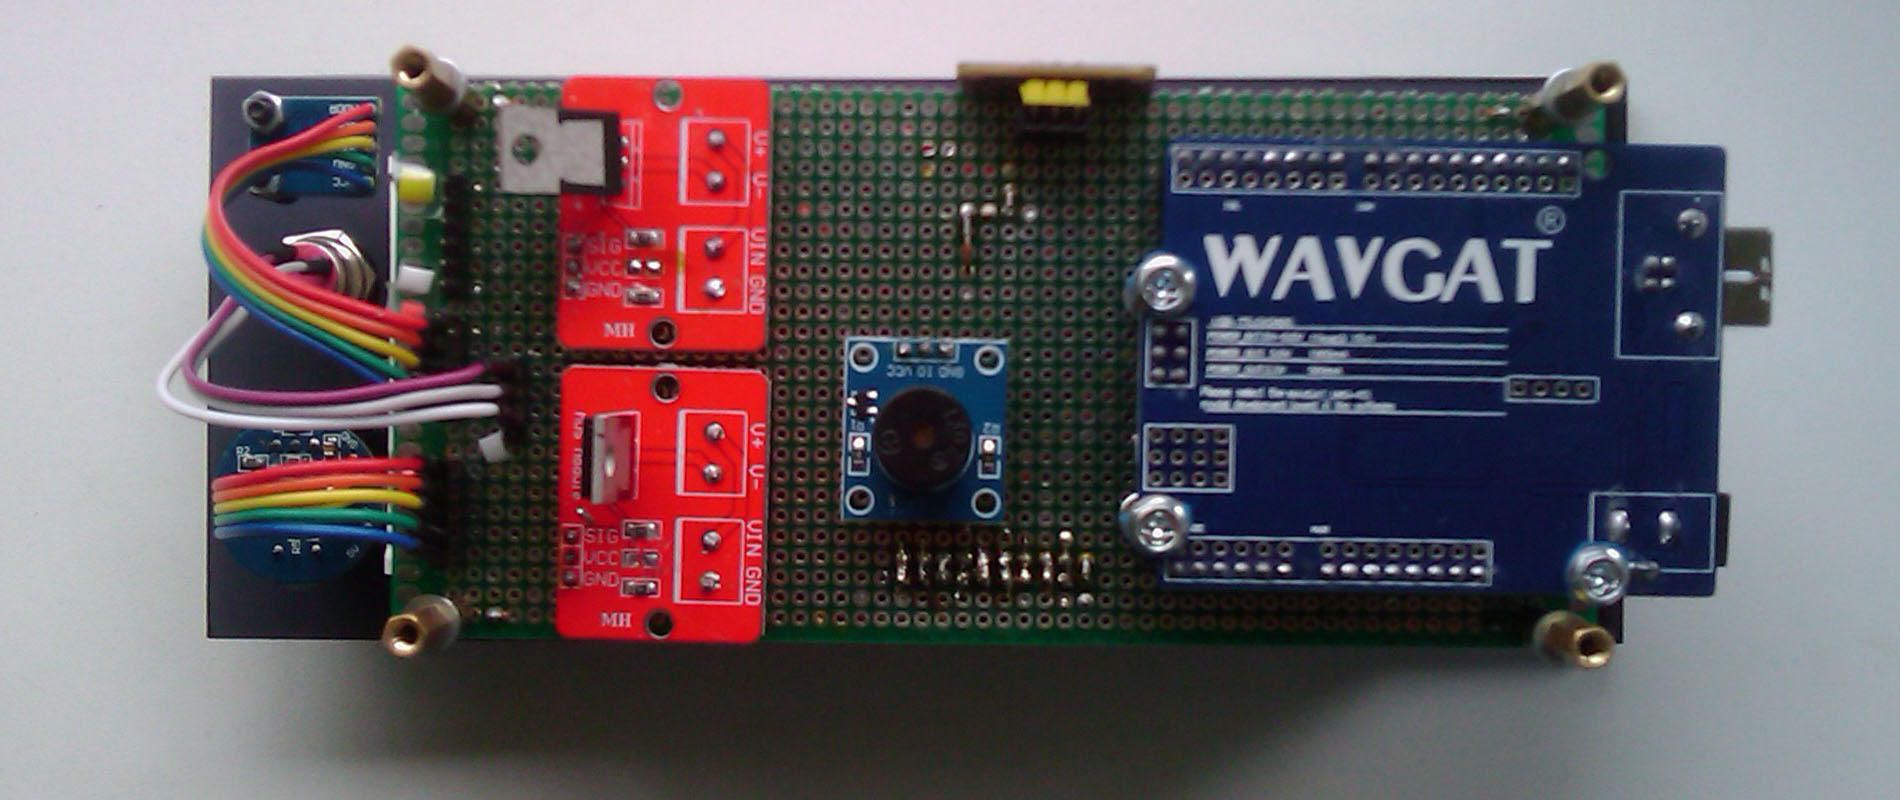
Rear view with the body removed.
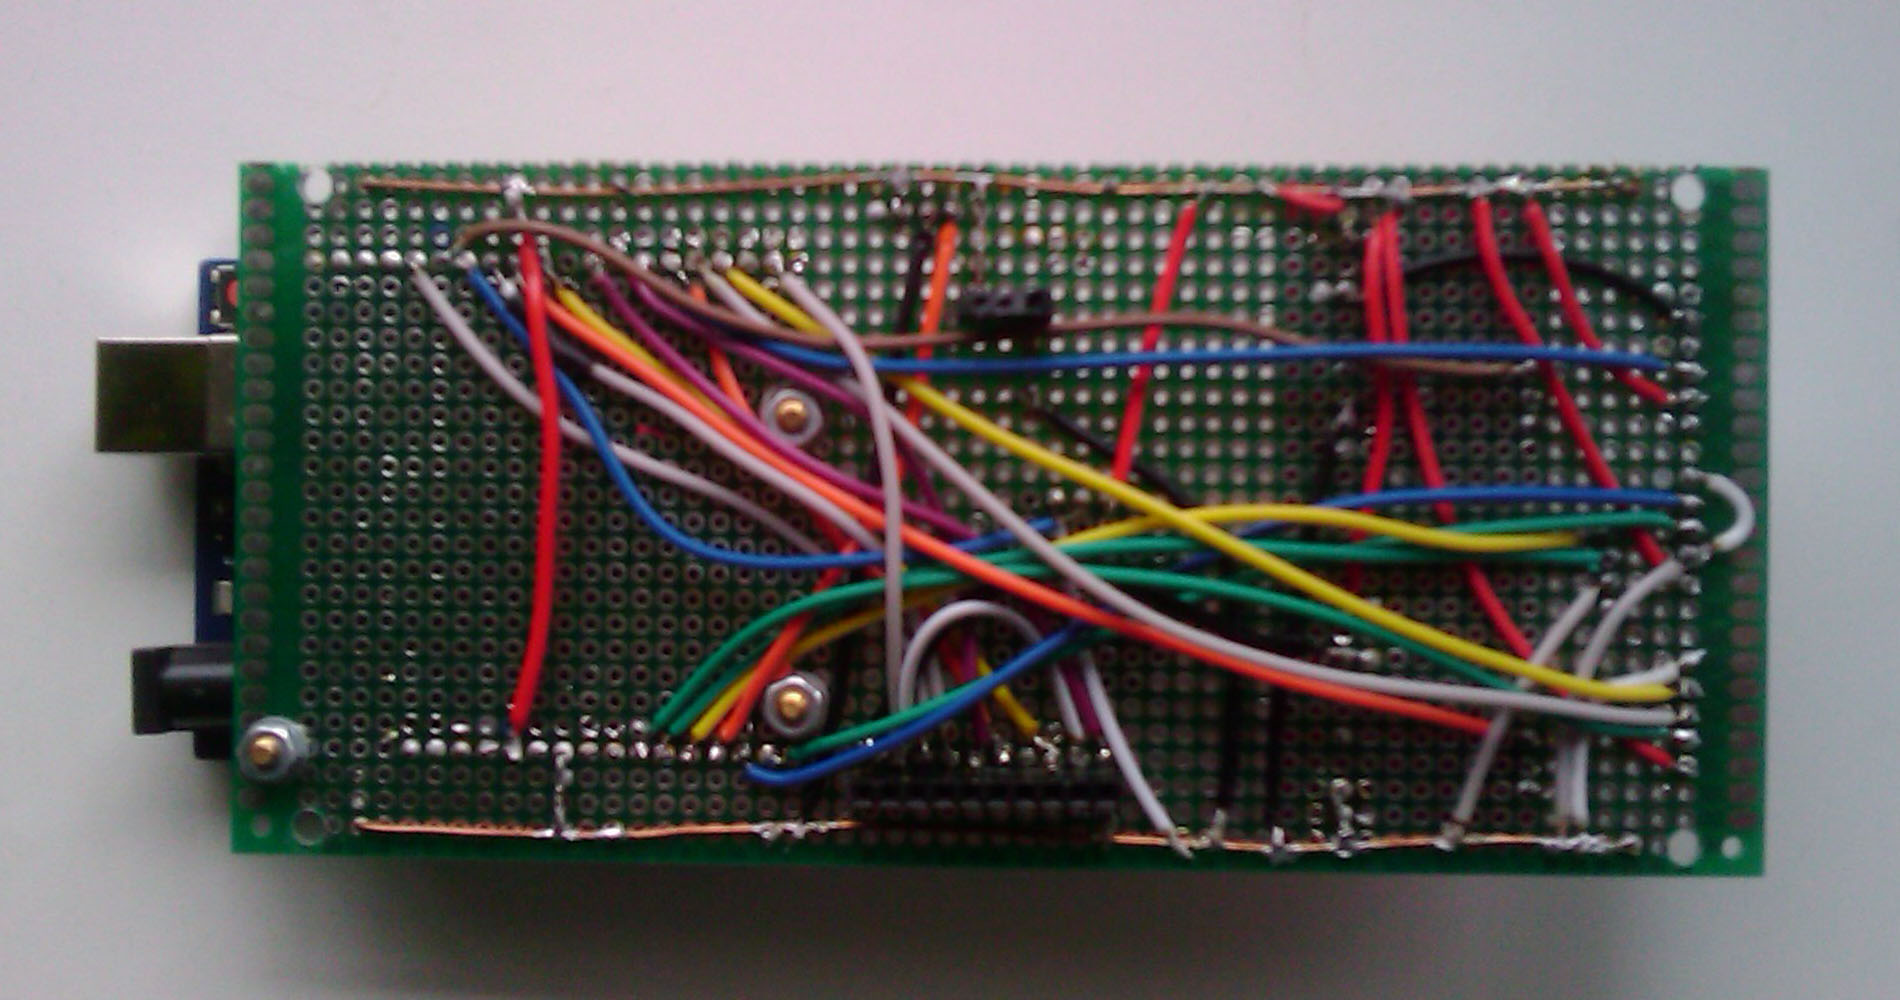
Back plate on the other hand.

Board with digital indicators in front.
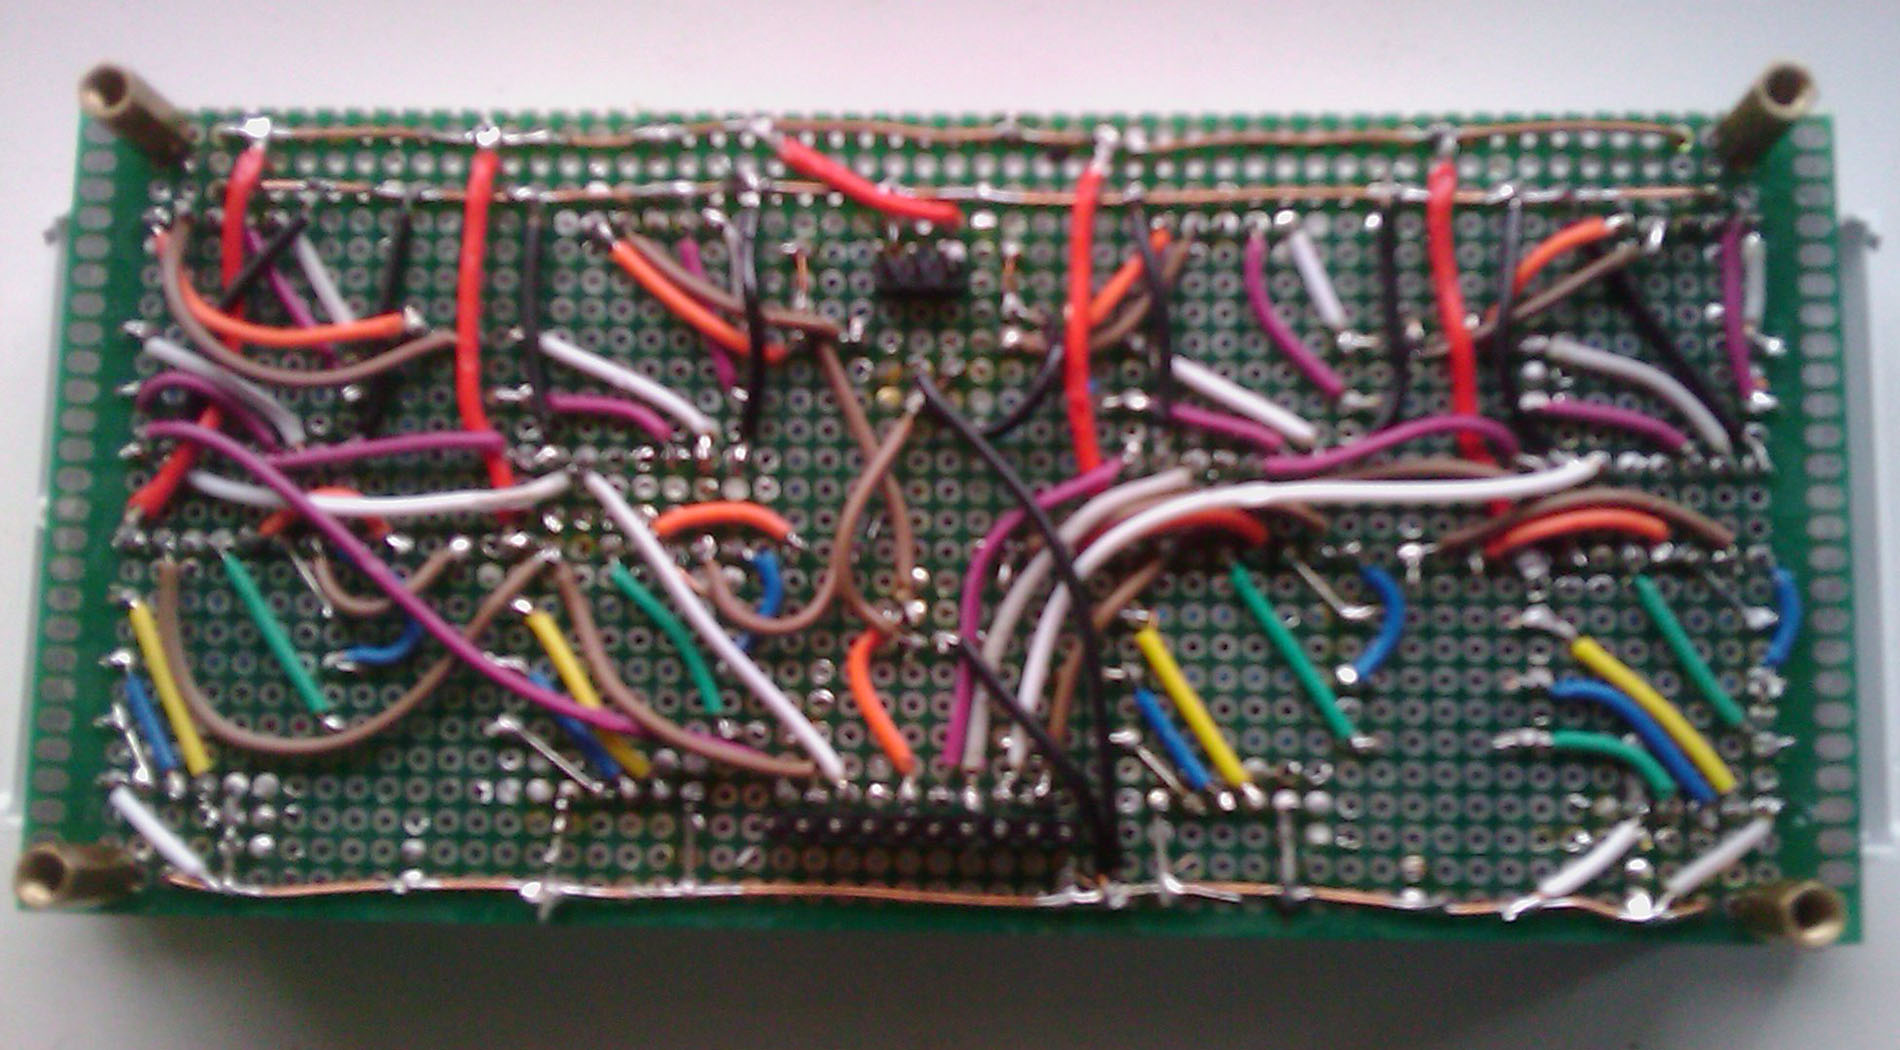
Board with digital indicators at the back.
Conclusion
Despite the high cost of this watch, I am satisfied with them all the same. As you understand the manufacturer focuses on the needs of the average consumer. And thanks to Arduino, you can create a product that will completely satisfy you.
Firmware with CAD 3D model.
This model is made using the Creo Parametric software package (formerly ProEnginer) for viewing it you will need either Creo Parametric itself or a viewer called Creo View Express you can download it from the ptc site but you will have to register with them.
Update
Converted model to PDF format. Now you can view the model through Acrobat Reader file located in the folder CAD-3D-Model / 01_clock.pdf.
Source: https://habr.com/ru/post/454676/
All Articles